Driline. Sorry about the delay and I do spend a considerable amount of time at my church. I run the sound booth as its my second love mixing and blending vocals and instruments with a bit sound effects. We have three services on Sunday, meeting on Mon an Tue with a service on Wed.
Looks like you have all kinds on applications you can do. A swing out (swings to the side) one side will have to be at a angle to close properley, you might have to install more leg bracing? as it may have a tendency to twist, do to the extended side weight as it swings. Never built one so I really dont know…
A drop in could work, but then I elected not to even consider it, as where would a visitor place it, gentley on the scenery? not the people I Know LOL
Your Road your Decision
For the main span I found that a seven ply 3/4 work great with no sag in three years. A 1/2 five ply will sag.
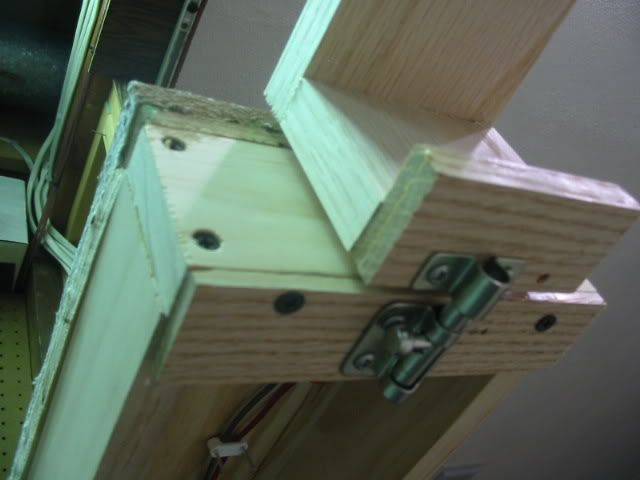
I use door hinges as one they are cheap and secont they work great due to the tight pin and are bullet proof for a light weight of a swing up.
I over cantor the swing up so that it will stay up in an over center position, I like the KISS methods, (keep it simple).I use a furniture screw nut for height adjustment on the non-hinged end. After building four of these to span my doors, I found out a simple cubboard latch works best for the free end latch, has a side to side adjustment and the furniture nut gizmo for height.
Key points…Both sides have to be absolutly level, as cars will uncouple.
No need for the added expense of rerailers.
Back cut span board, top is longer then bottom.
Back cut rails, to prevent binding when opening and closing bridge. If rail are cut straingh, Top to bottom they will bind, lets say the right side swings up and letter o is the hinge the cuts woul look like this //o__________//_________. Also dont forget to cut the board the same way so it wont bind…
You can purchase a micro sw