I have a small layout with some painted roads for cars and I don’t think I like the black paint, I noticed some people have some nice roads with different shades of gray and some even have realistic road crown and lines, what are some techniques you guys use to make roads for your layout?
First, look at some real roads. If you’re modeling the present (ie., since 2000) you can just look at the genuine article in your general area. Earlier eras might call for researching photos (Shorpy is a gold mine!)
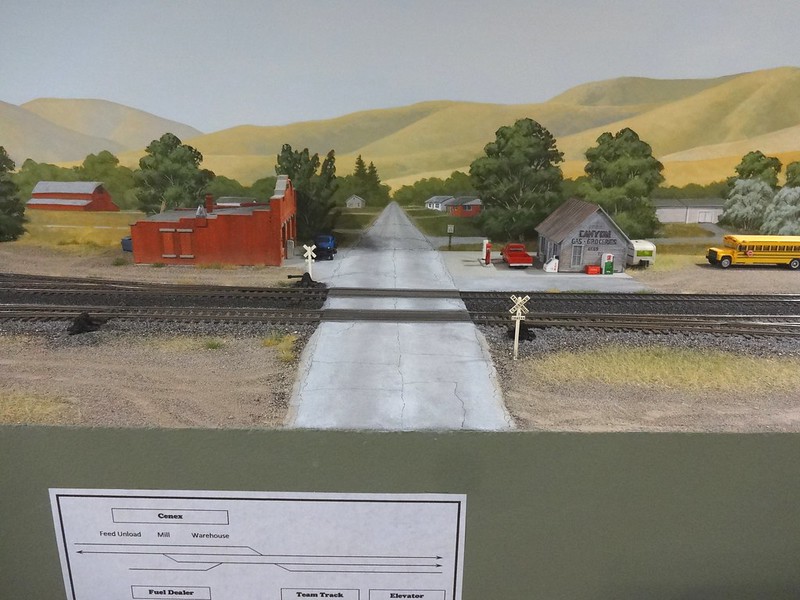
Some things you’re sure to notice. Most asphalt roads are grey, but not uniform unless the road rollers are still working. Road markings run from crisp and clean to just short of totally blacked out by passing traffic. Potholes happen - and get patched. Cracks develop, and may or may not get a coat of sealer.
As for contours, I personally have slip-formed stiff plaster to get the crown right. Others use sheet styrene or other sheet material to achieve similar results. There are probably about as many methods as there are modelers, and the vast majority achieve satisfactory results.
On my present layout I don’t have much that could be modeled with paint. The little bit of the Main Prefectural Road is concrete (which I will model with regular grey cement) and the other roads range from well-rolled gravel to, ‘Two ruts in the mud.’ [The railroads operate school trains because getting a bus over the (approximately) parallel road would be the impossible dream.]
Chuck (Modeling Central Japan in September, 1964 - as it was then, but is no more)
Metal Storm:
First, welcome to the forum!!![#welcome]
To do your roads the way you want them you will have to develop your artistic skills, and don’t say you don’t have any!
Truly black roads are very rare and were likely just paved yesterday. Pavement ages and bleaches out very quickly. The street in front of my house was paved just two years ago and it isn’t even close to black now and hasn’t been for some time. Bottom line is that your streets should be a tone of grey instead of black. I don’t think the exact tone of grey matters very much as long as it is in the mid tone range. The key, as has been suggested, is that the weathering and aging will be what makes your roads ‘pop’. Potholes are the bane of our existance and always have been, so draw a few holes on your roads and use a much darker colour to fill them in (i.e. fresh asphalt). Roads crack! Use your fine tip Sharpie to draw the crack repairs. Vehicles leak fluids. If you have an air brush then lightly (very lightly!) spray a darker streak up the center of the road, maybe slightly darker at intersections where the offending vehicles have to wait for the lights to change.
If you are a bit timid about doing this stuff right on the layout then build yourself a small test road and experiment until the cows come home. Heck, if it is rural road you could even use some brown paint with a bit of sculptamold to model errant offerings from a manure spreader![:o)][swg][(-D][(-D][(-D]
Hope I’m not too much over the top here.
Good luck, and maybe show us what you come up with!
Dave
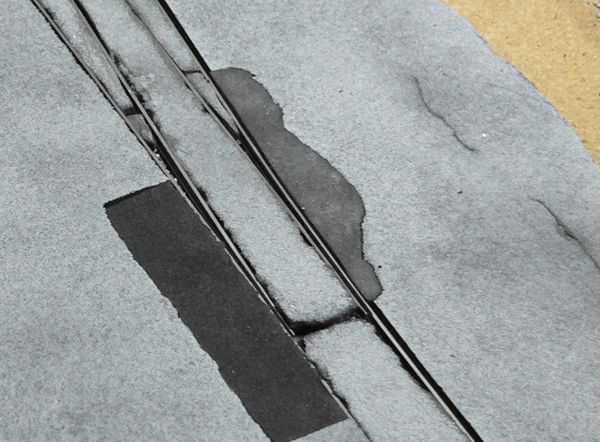
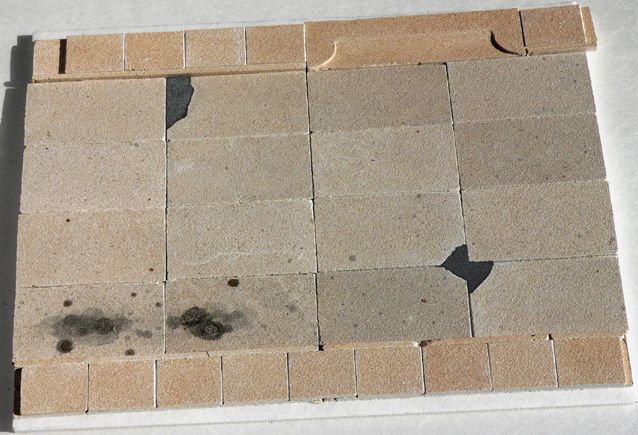
I recently completed an asphalt road using sanded tile grout. It works a lot like plaster, but has a long working time which allows shaping for realistic edges and a crown. Unlike plaster, it’s the same color all the way through without having to add anything, and is stronger so it resists damage.
The finished road dried a medium gray. I colored it with some acrylics mixed to match the backdrop and lighten the color. Tar patches were added using a drafting pen with waterproof ink.
Seamless background work! Well done!
That looks fantastic, Rob! And the transition to the backdrop is flawless!
If you have only have a relatively small section to do or you are looking for city streets with curbs and sidewalks, the Walthers street system can be pretty convincing. They offer brick, asphalt and concrete and it does have a crown to it and with a little bit of cutting and fitting looks pretty nice. Its on sale now, too! http://www.walthers.com/exec/productinfo/933-3194 This is only a link to the asphalt style. Browse Walthers to see all their street offerings.
Hope this helps! Welcome and Happy Modeling, Ed
I use a hardware-store product called Durham’s Water Putty to make my roads.
The product was recommended here by Bob Gretsch, a forum member who has posted a lot of nice work here, and whose layout appeared in MR sometime last year. It’s a powder which mixes up to a pourable or spreadable liquid, which may be shaped to a crown as it sets. It’s very hard and durable, too. It is naturally a tan color, but takes paint well. I do the job with a wash of cheap acrylic craft paint.
The paving material itself can be worked very flat, but I find that the variations caused by both the natural pouring and setting and by painting with a thinned wash add to the realism of the scene. On my Transition Era roads, I make white lines with a white gel pen.
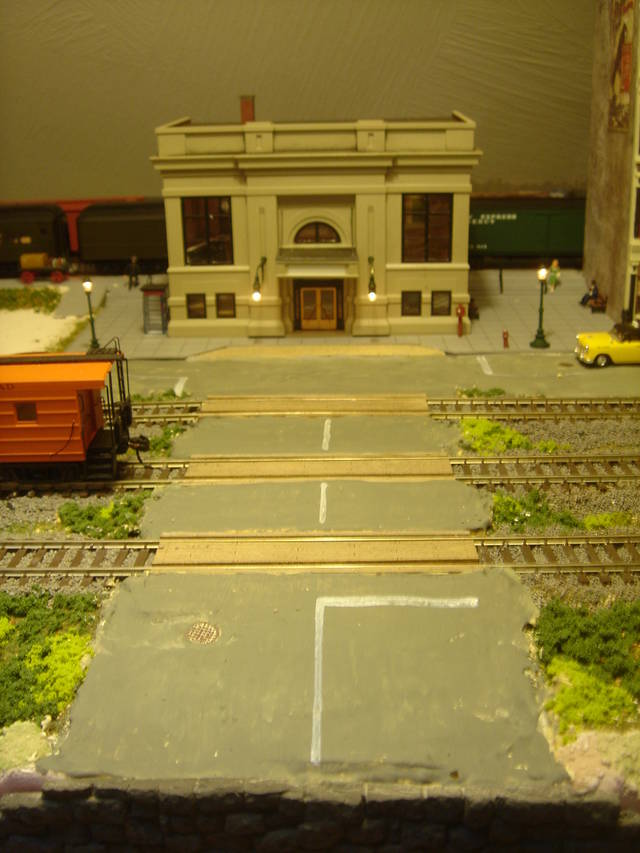
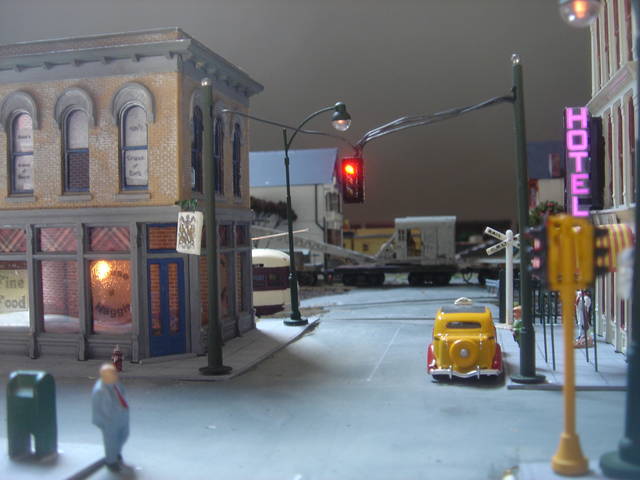
Roads are very important to visitors to your layout. Most of them will have only a fleeting knowledge of railroads, but we all know roads, so signs, guard rails and particularly cars are much more familiar, and help to set the scene and particularly the era of your layout.
Rob your trees are awesome, did you paint?
Thanks Gary. Yes, those are painted. There are no 3-D trees in that scene yet.
Rob!
Very well done. I think the use of a drafting pen allowed you to make the crack repairs a lot more subtle than a fine tip Sharpie will do. The seamless transistion into the backdrop scene is also absolutely fantastic! In fact, I am having a lot of trouble trying to figure out where the backdrop actually starts!
Dave
When I finally replaced the pieces of window screening that served as "place holders’ for the roads that needed building, I used a fine grained plaster mix called “Smooth-It”. After the plaster was dry, I sanded in the road crowns, and where necessary, repoured and sanded again. Once the shape of the crowns and gutter areas was satisfactory, the roads were sealed with my ballast glue mix, then painted with various shades of gray acrylic craft paints. Not a quick process, but this was the technique that tested right to my eyes on test panels done at the work bench.
You can find road striping in sheets of pre-printed and cut pressure sensitive labels from various sources, and applied carefully, they give a good representation of real world stripes. You can try painting road stripes by hand, if yor hand/eye coordination is good enough to give you pleasure afterwards.
Don H.
Automotive 1/16 inch pin-stripe tape for your street lines works good as well and your RR crossing lines. White, Yellow etc. It is like vinyl very thin.
Cheers, [D]
Frank
I’ll second that. [tup]
Rich
You might find the Asphault Road section of CG Textures helpful in deciding what type of road surfaces you want:
I have achieved rather good results using .040" sheet styrene to create a roadbase that I cover with Creatology Fun Foam (2 mm thick sheet foam). I use the black color for my roads. I measure and draw out my road on the layout deck then glue a strip of .040" styrene along the centerline to create a crown in my roads. I also add stacks of .040" shims where the roadbase approaches grade crossings to ensure a smooth transition (no ski jumps for me). If the road is straight or a steady radius, I just draw it on the sheet styrene and cut it out. If the road section has multiple curves and/or intersections, I will first cut out pieces of card stock to match each edge of the roadway section taping the cardstock pieces together as I go. When I have the shape of the roadsection duplicated with cardstock, I then use the cardstock as a pattern and trace the section onto the styrene and cut it out.
Next, I use the styrene roadbase sections as templates to cut out the Fun Foam. Lay out the styrene on the Fun Foam so that the joints in the two layers are staggered. With all the pieces cut, I use latex adhesive caulk to glue down the styrene roadbase to the layout. If necessary, you can use masking tape to hold the styrene edges down until the caulk dries. Allow the styrene to create its own gentle grade transitions and let the uncompressed caulk harden to hold these transitions in place.
With all of the styrene roadbase glued down, the next step is the Fun Foam. I like to use Elmers spray adhesive to glue the Fun Foam to the styrene roadbase. I find I get reasonable working time and repositioning ability by spraying only the Fun Foam with spray adhesive, then letting the adhesive dry about a minute before carefully pressing it into place on the styrene roadbase. Start at one end of a piece of Fun Foam carefully positioning it in place, then carefully letting the rest of the foam touch down in a smooth motion
Another vote for water putty.

I brush painted it with acrylic which was a mix of black, warm white and a touch of blue, and I rubbed grey and Raw Umber and Raw Sienna pastel dust over it, with more umber and sienna at the edge where it meets the verge.
Mike
Mike,
That is a great shot. If you did not notice the trip pin on the coupler on the Engine,you could swear that was a 1:1 photo. [Y]
Cheers, [D]
Frank
Can some folks share more pictures? They are great! I also use Arizona Rock concrete highway mix, made with diluted glue. Mix to the consistency of pourable plaster, or even stiffer grout. Use a wooden wall paper roller kind of like a steamroller. The technique takes awhile to learn and it’s not conducive to crowning well, but it’s great looking. Once you have the technique down entire city streets can be done in an afternoon. For crowning a roadway which I’ve tried, I resorted to carving the roadway out of foam or placing the roadbed first (choose your material) and then finishing with Arizona’s Concrete.
Wow, this forum never ceases to amaze me! Great thread, showcasing a mulitude of truly masterful modeling and artistic talents. And to top it off loaded with invaluable tips and how-tos.
regards, Peter
Here’s a guy who uses craft foam coated with plaster to model asphalt.
http://telusplanet.net/public/crowley/ashphalt_roads.htm
I tried his technique, but the plaster kept flaking off. So I tried deleting the plaster and just sponging some gray paint onto the black craft foam. It looks pretty good. Large cracks and patches are easy to make, but one thing I haven’t been able to do is make small cracks that are convincing.
The craft foam is flexible enough that it will conform to the shape of whatever is beneath it. So if you want a crown to the road, or want some ruts or a washboard effect, you could carve those into some foam and glue the craft foam on top of that.
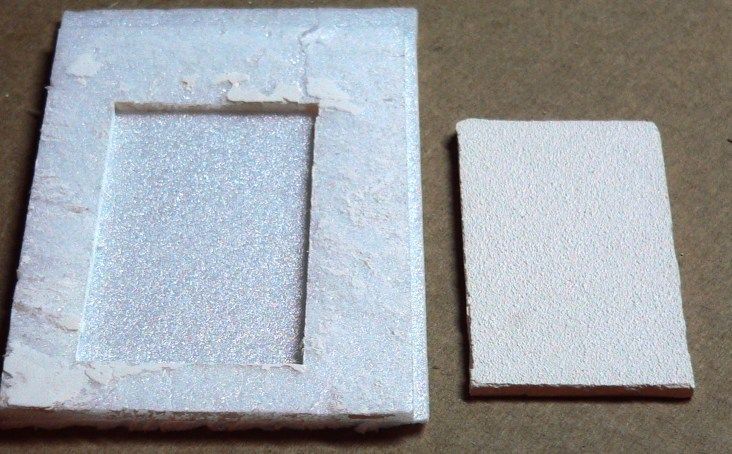
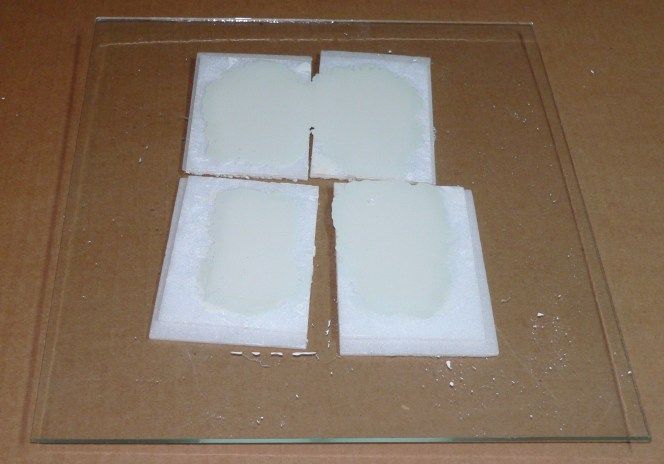
For roads made from concrete slabs, I experimented with making simple molds out of Depron foam. Pour in some thin plaster and place a pane of glass on top of it to make the bottom smooth and flat.
Don’t be afraid to experiment.
Steve S