I just wanted to get some opinions on what distance I should make between the centerline of tracks in a freight yard…and also the distance between the mainline and the first siding? Thanks!
I used 2" for everything, unless I want more scenic separation. On the other hand I didn’t run articulated engines, very few 6 axle diesels or cars longer than 70 ft.
Yesterday I asked the same questions and let me summarize the answers I got:
2" is ok on straight tracks, but to narrow in curves, if you run those 80´ passenger cars.
2 1/4" is ok in curves with a min. radius of 30" and above
2 3/8" for a radius of 24"
2 1/2" for a radius of 22"
2 5/8" for a radius of 20"
2 3/4" dor a rdius of 18"
The best is to build a test track and find out, it ´d be a pity to lay the track and ballast it only to find out that two trains cannot pass ech other in curve!
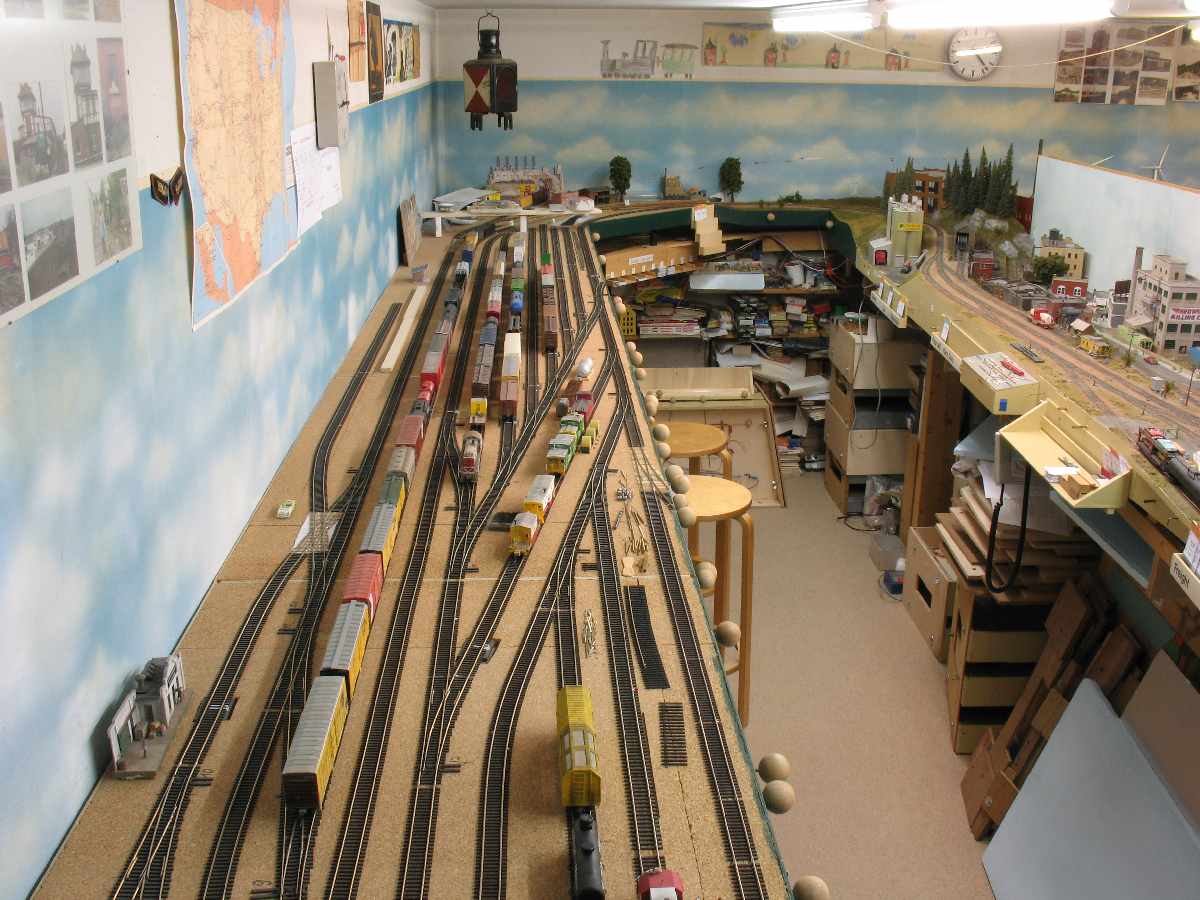
For yard trcks you can experiment w/ flex track to determine the best separation to get your fingers in there. Generally 2 1/4 to 2 1/2" inches works for my fingers. I find that 2" is just to tight. You will derail more cars on adjacent tracks than the one you’re working on.
2" works fine on double track straight, but easements into turns should allow a separation to as much as 2 1/2" for the overhang of pilot and any side overhang of long equipment. This distance will vary from differing radius. This was discussed on another thread recently.
My club uses 42 to 56" radius and we find that even w/ such a large figure a big boy pilot can get real close to auto racks or other long wheelbased stock when going with anything less than the 2 1/2" This could be more pronounced with a 10 wheeler and tighter radius. I would just experiment w/ the equipment you plan on running.
The same is true for side clearances to portals and cuts on any curve. I actually found this out the hard way w/ a double track portal that was even modified. Double stacks would hit the top of the portal.
What for N scale running modern 6 axles locos?
Go to the NMRA website and check out the standards. The NMRA standards represent the opinions of a lot of good model railroaders accumulated over many years.
It is pretty hard to get past the NMRA standards. As just stated, they didn’t publish them on the say-so of the current president at the time, but on the basis of lots of feedback and empirical testing submitted by request. Still, though, it is never a bad idea to do a mock-up test with the longest and widest, and tallest, items you know you will want to run past or through the area and obstacles in question. Then, when you have run them through towing, run them through in reverse and pushing. You’ll be surprised what model couplers, depending on their quality and method of mounting, will do to a string of cars when shoved instead of pulled.
Even so, you’ll have perfectly good reliability and then you’ll get a new “name it” and find that you have some chipping and carving to so…and repainting afterwards. It happened with a series of places around my main line, and notably at one tunnel portal on a curve. Everything else I owned, including some large steamers, were perfectly content with my layout. Then I introduced a Rivarossi H-8 Allegheny that would make contact with parts of the adjacent right of way and with the one tunnel portal.
BTW, the real railroads did some of that in their day. There are tunnel portals that show to this day where new carving was required to allow the minimum company or legal clearances when new equipment was introduced.
-Crandell
Thanks everyone! If I started to search the NMRA websites and other links, I would probably still be reading (as I finish reading one link and then proceed to the next related link…) I’ve never had the time to set up something with any amount of remarkable complexity. My plans are for a basic “dog bone” (22" radius curves) with a small yard of some type running modern 6 axle diesels and rolling stock. Maybe DCC and/or scenery later on…depending how things go…but for the yard, just wanted a few opinions to get an idea of how much track I could squeeze or not squeeze!
Prototype goes down to 12’, tis will be as narrow as 42 mm. I did so with my class tracks. They’re straight.
Wolfgang
Thanks for the picture! Are the turnouts that you are using easy to buy? To be more specific - is there a current manufacturer and part number that you can give me to set up something very similar to what you can see in the picture? Are those magnetic de-couplers under the tracks? Wow, 42mm * IS * tight! But it looks like it CAN work…what centerline distance are you using between the mainline tracks?
I agree that 42 mm looks awesome, but I went with 2" on centre for my yard (I’ve got half the track laid). I considered going tighter, but one prevailing concern I had was having enough space to get your hand in there. If there’s one thing I’ve learned from pouring over this forum, even the best model railroaders need to use the 0-5-0 switcher from time to time.
There’s no problem with my fingers. The yard should not be clogged!
The distances are, from main (red) to siding 6.7cm
Then 5cm, 6.7cm and 6.3 cm. Then come the class tracks. I must adjust - looking at the bigger plan - there’re 4.6 cm.
Wolfgang
Hello, Wolfgang, I use 13 ft. for yard track centers, 16 ft. for A/D tracks to allow for carmen and their toolboxes, oilcans, etc, and 16 to 20 ft for sidings. Question, I see the knobs for turnout operation, a nearby friend uses the m too, do you use slide switches underneath for controlled linear motion and wiring? John Colley, Port Townsend, WA

Hello, Wolfgang - What’s with the newly installed turnout (actually, there is another one further back in the photo) that will guide the train to fall on the floor?
- Gerhard
Those are dummy turnouts
Those are dummy turnuts. My layout is bigger, it goes beyond the fascia board. ![]()
Wolfgang