To add interest, I’d like to create modest ground contours on the flat plywood subroadbed on my mainline that runs directly in front of my backdrop. My benchwork is L-girder, I’ve laid the track on cork roadbed, & I have about 2" of subroadbed between the cork roadbed and the backdrop on which to work. I have no experience doing this.
I’m looking for for undulating terrain rather than big hills or rock outcroppings. I’d appreciate any suggestions–thanks.
I use rolled/bunched up old plastic shopping bags covered with plaster wrap to build hills. Styrofoam also works real good(but the plastic bags are free and I am doing my part to ‘recycle’ them). Woodland Scenics sells plaster wrap, but is is expensive. You can buy 4" or 8" rolls of it at craft stores like Hobby Lobby or Micheals much cheaper. It is very easy to work with and you will have undulating hills in an evening or two.
Rick, What I’ll do is use small wads of newspaper. Place a few balls of newspaper in your area and then lay a layer or two of WS plaster cloth, or any equivalent, on top. This should give you slight rolling landscape. Another method would be to use cardboard strips attached to backdrop from the sub-road. And then laying plaster cloth of sorts over that. Wire mesh screen also works good for forming landforms. Adds a little rigidity.
If you have a large area to 'scape and find the WS plaster cloth gets a bit spendy… (Like me) Use newspaper, paper towel, etc… soaked in water/glue mixture, or plaster o paris mix. If you know someone in med field, they may be able to get you some cast cloth. The stuff used to make casts for broken limbs… Obviously …I’ve tried that and works well… As long as there isn’t a waiting list of people trying to get casts put on.
I hope this helps… Goodluck on your scenery… If you have any pics, would be great to see…
My method is the same as the others but with a bit of a twist.
I cut card stock supports to create the intial contours, attaching them to a cardboard back plate with masking tape. Then I put strips of masking tape across the fronts, securing the initial contours together and creating the base for plaster soaked strips of paper towels (the ones that come off the roll in narrower sheets) which are then covered with a thickness of either plaster, hydrocal or sculptamold depending upon the finished look.
The base is then painted, ground foamed, brushed, bushed, and planted with trees and assorted stuff to complete the scene.
fkrall: One method that, in my opinion, gives the most professional-looking results, and is probably the LEAST talked about and/or used method, is to do what new master Pelle Soeberg did with his Feather River Canyon extension on his home layout. This was featured in the mini-series that ran in MR that started with “How to design Mountain Scenery” then continuing with “How to build mountain scenery”. I forget when exactly it ran, but he published a whole book on the construction of his layout (most of which was featured in MR anyway, but its nice to have it consolidated into one thing).
anyway, what Pelle did was use extruded foam for his mountain scenery base between his tracks and the backdrop. Pretty typical, yes, but his method and execution was wholly original: Instead of using the typical “stacking” method of layering the pieces on top of each other and then carving away at the foam, he took the pieces of foam and stacked them vertically and made a contour cut-away into each on, and then placed them next to each other. Its kind of hard to explain without having a picture. Basically, he took a square piece of foam, say a 1 ft x 1 ft, and then cut out a side-view profile, and then did that a ton of times and stacked them next to each other.
I’d never seen anybody do it this way, and for some reason the results look so much better than any other foam scenery construction that I’ve looked at. I think you also save a lot of foam by doing it that way. You DONT have to use foam though. You could do the same thing with gator board, for instance, or card-board even.
If you don’t use foam, you’ll want to space each side-profile piece anywhere from 1-2 inches apart. obviously, the closer you space them, the more control and support you have. Doing it this way, however, allows you to get much more precise and rigid contours as opposed to using just a cardboard web.&nbs
Ground Goop would be PERFECT to use w/ my application, instead of the sculptamold. I just wasn’t sure if you knew what it was, lol. It would actually be more ideal than sculptamold, and would probably save you a lot of time.
I use scraps of blue foam from other parts of the layout…
Simply scroll in the profile you want, countour it to roll smoothly out, then cover with ground goop… it’s like frosting a cake… You won’t use as much goop because you just want to create a finished surface, you won’t have to fill in all the voids left by wads of paper etc.
With just 2 inches of space to fill, this sounds like a good application for Sculptamold or other similar paper mache type product. The advantage Sculptamold has over plaster type products is you have a long working time. It doesn’t harden until completely dry, which depending on the humidity in the air, can take as long as a day. It is easy to shape and has enough body to it that you can contour a fairly steep slope.
I have the Allen Keller video of Lou’s layout and every time I watch it I get intrigued by the ground goop. Problem is, Permascene (which is one of the ingredients in the recipe) is no longer available. What can be used to replace it in Lou’s recipe?
He uses 1 Part of Vermiculite (available at garden supply stores; Dave Frary suggests getting the smallest particulate possible or rolling the larger particulates in your hand to break them up) and 1 Part Celluclay (available at craft stores like Michaels).
I’ve not done this yet, but I’m going to experiment with both ground goop and Sculptamold and see what I think.
Cool. My wife’s going to be some plant potting and she always mixes in some Vermiculite with the soil. I’ll just ask her to buy some more so’s I can use some.
I happen to have a narrow ledge on the side of the stairway leading to my garage loft HO “around the room layout”. Although I use Hydrocal plaster over heavy wire window screening for most of my layout, I used Concrete Patch in the areas where the contoured hillside is often touched rather roughly. The Hydrocal plaster applyed to heavy wiire window screening on a mountain (with five sets of rails beneath it), is attached to the formed 3/4" plywood reinforced base. For access to the rails, I constructed removeable wooden frames, with edges that blend with the rest of the mountain. Plastered paper webbing may be OK for untouched hills, but for large mountains and roughly handled areas, I prefer reinforced plywood covered with wire screening and sculpted Hydrocal plaster.
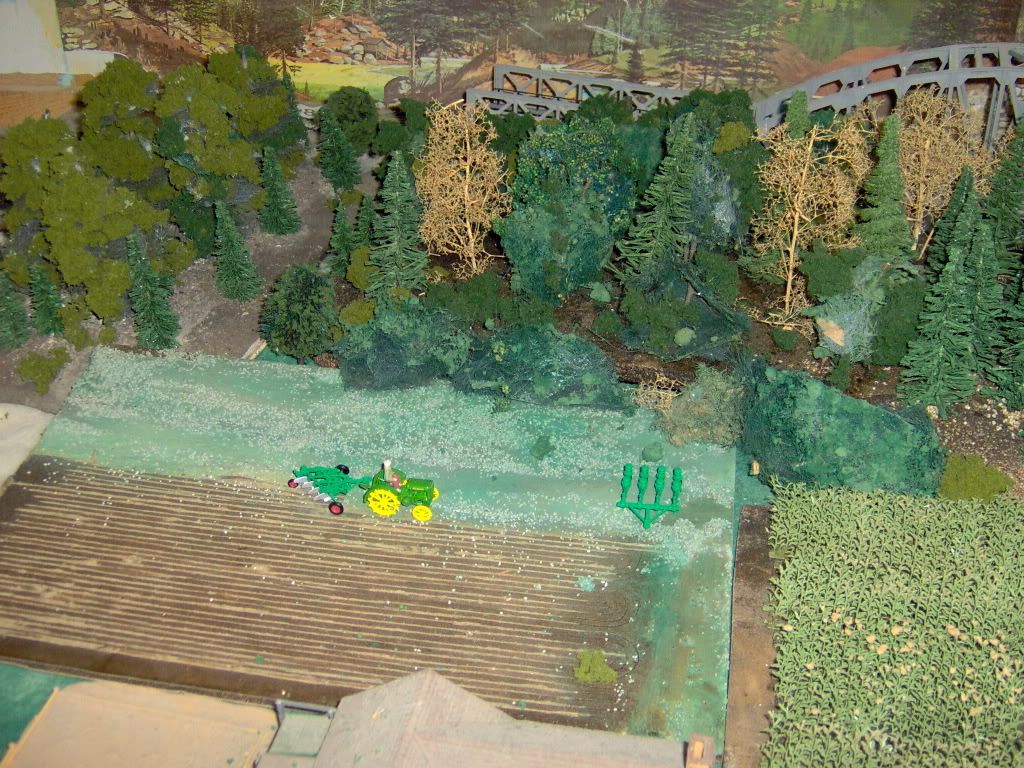
Getting back to your question: I am at present adding a farm and wooded areas to the HO model railroad on our local Historical Museum, (which is built on flat 2" insulation). To create a contoured surface, I have been using large scraps of styrofoam ceiling tiles, that are tapered on the edges and stained. The ovals are not permanently glued to the 2" insulation, since we need to be able to rearrange the pieces and change from Summer to Fall foliage colored trees. So, I suggest that you do your contour areas on either rectangular,(or oval shaped) tapered ceiling tile or scrap insulation, that can be moved for construction purposes or to rearrange the scene. Incidentally, the furrows on the plowed field (shown in the enclosed picture) is done by using a serated knife on foamboard. The portion of the cornfield that is shown is constructed from WS kits of plastic rows of corn stalks glued to foamboard. Bob