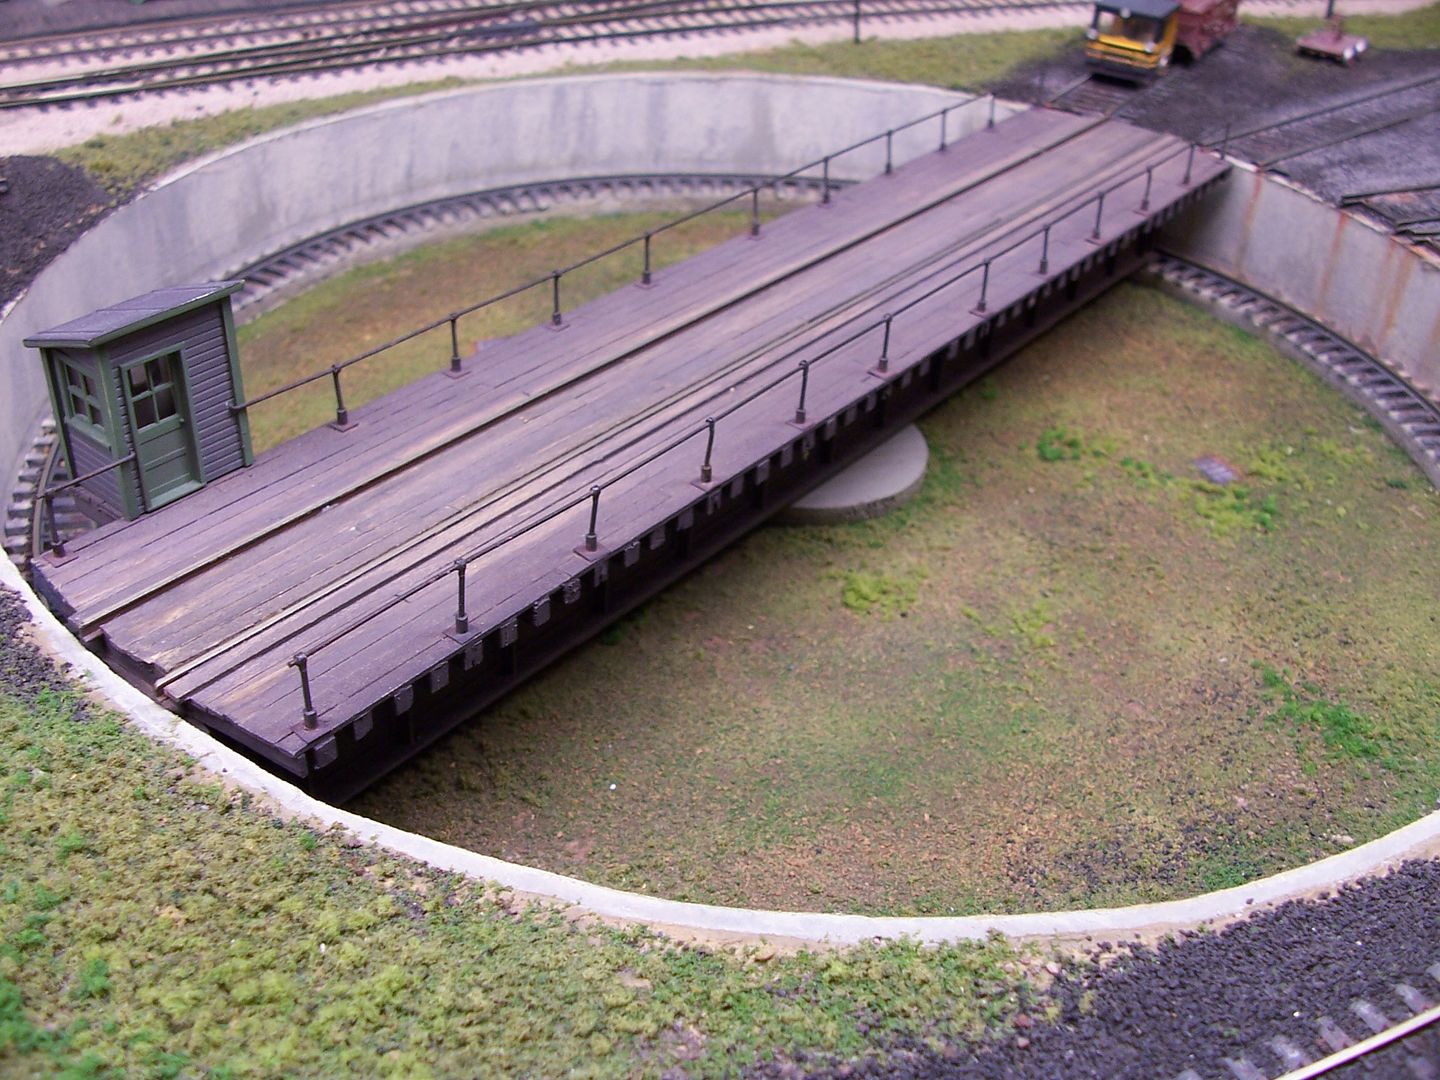
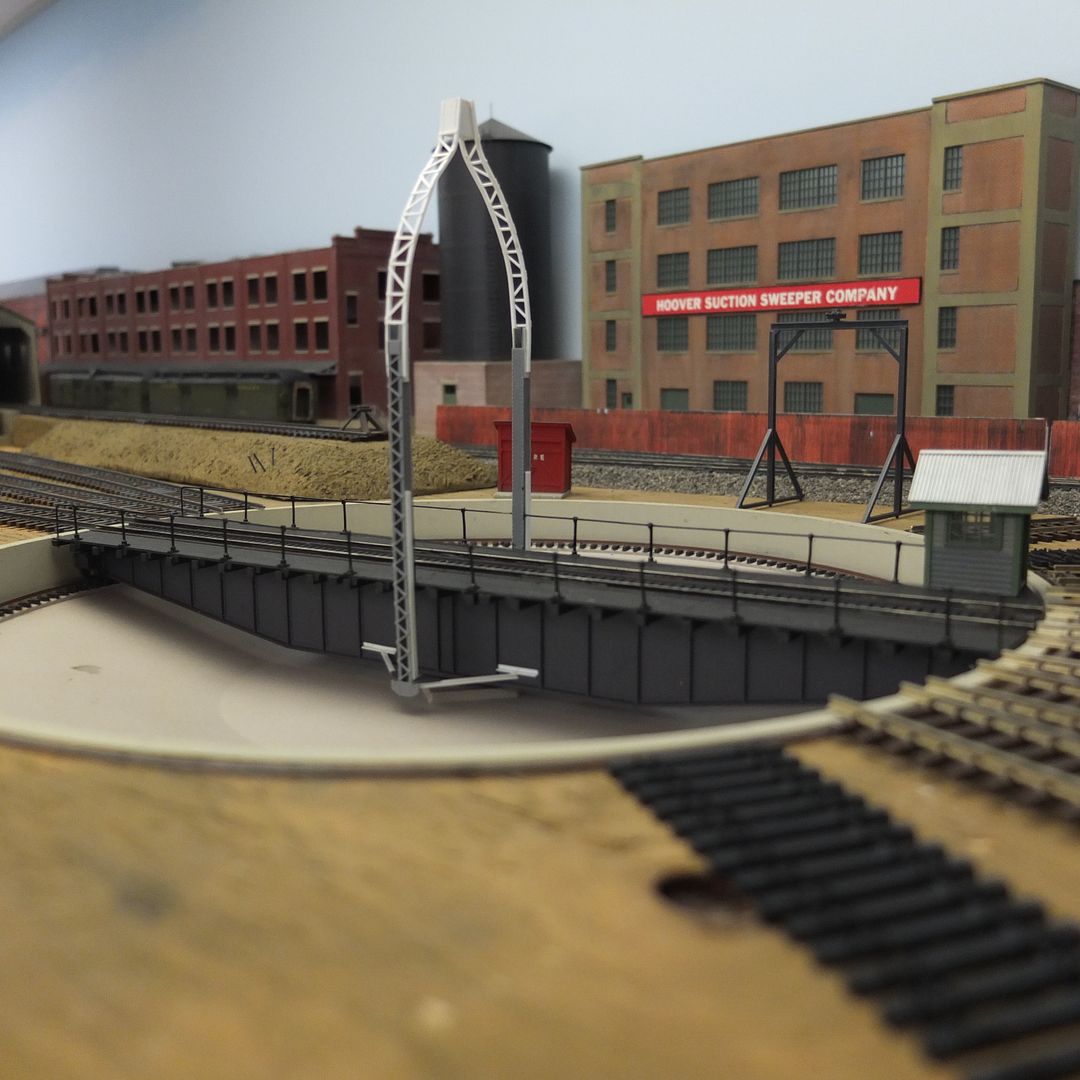
I have the original Walthers 130’ TT (non-DCC). The control box went dead and I had to figure out a way to save the TT because replacing it would have been a pain, requiring me to pull up 22 lead tracks. There were two circuit boards, one in the control box and one under the bridge. Then the thought hit me that the only reason for those circuit boards was for indexing the TT. Since I had never gotten indexing to work reliably, I really didn’t need that function. I figured why not just wire the track and the TT motor directly and get rid of the fancy electronics. That’s the way TTs were wired for years.
I decided the simplest thing would be to gut the existing wiring and insert track and motor power up through the center post of the bridge. This required me to saw the bottom off the center post that had the concentric rings for the various power sources. I knew once I did that there was no going back. After doing that I gutted all the bridge wiring including the circuit board. The leads to both the track and the motor were too short to make a reliable splice so I soldered leads to the bridge rails and drilled a hole through the floor of the bridge to run the wires down. I had to open up the motor housing so I could solder the leads to the motor. I wondered when I did that if I would be able to get it back together but it proved to be a rather simple jigsaw puzzle. The only difficulty was getting the cap back on the housing. I used slightly large gauge wire than was there originally and I had to cut a second hole in the housing because I couldn’t get both leads through the origi
If you could figure out how to fit a slip-ring in the bottom of the shaft you would get the full rotation back. The cheapo slip-rings on eBay are small enough to fit and the price is right.
If you could figure out how to fit a slip-ring in the bottom of the shaft you would get the full rotation back. The cheapo slip-rings on eBay are small enough to fit and the price is right.
Congratulations, John. Glad to learn that you were able to save a functioning turntable.
I too have the original 130’ non-DCC TT, and I long ago just stopped using the indexing feature because it was just too annoying.
You say that you “manually” reverse the polarity. Does that mean that you are using a DPDT toggle switch? Have you considered an auto-reverser?
If it were me, my only concern would be the constant twisting of the wiring. I am no mechanical engineer, but there must be some solution to this issue.
Yes, a DPDT switch is used to reverse polarity. It’s a pretty simple arrangement. I start with the motorman’s shack (if that’s the correct term) on the end where locos enter the turntable. I know from the original installation the point at which polarity changes and I’ve installed the DPDT switch so it is always flipped to the same side of the point that the shack is. If it becomes a problem, I’ll consider an auto reverser. I have one on my staging yard loops. Until then, it seems like an unnecessary expense. I also have all the roundhouse tracks wired to an on/off switch so I can shut the power down when not moving locos in and out. That way I don’t have to turn off the sound to each loco individually.
I am aware of the potential problem with the twisting of the wires. That’s why I intend to always to alternate between clockwise and counterclockwise rotations. The potential problem will come if I complete a move and leave the shack on the opposite end from where the locos enter. I would have to remember which way I had rotated to get the shack there. There is plenty of slack in these wires so unless I really get it severely twisted, I’m not too concerned about stress on the wires. My big concern would be if I broke one of the solder joints on the motor. For that reason, I used epoxy to hold those wire
It’s a good idea, but knowing me, I’ll forget to switch the lights half the time. I’m thinking of a non-electrical solution such as moving a scenic feature one way another to indicate the last direction of rotation. For example, I have an old non-operating loco that I have sitting on one of the open air tracks as a static scenic feature. I could just slide that forward or backward to remind me which way I last rotated the TT. But that has the same problem of having to remember to do that.
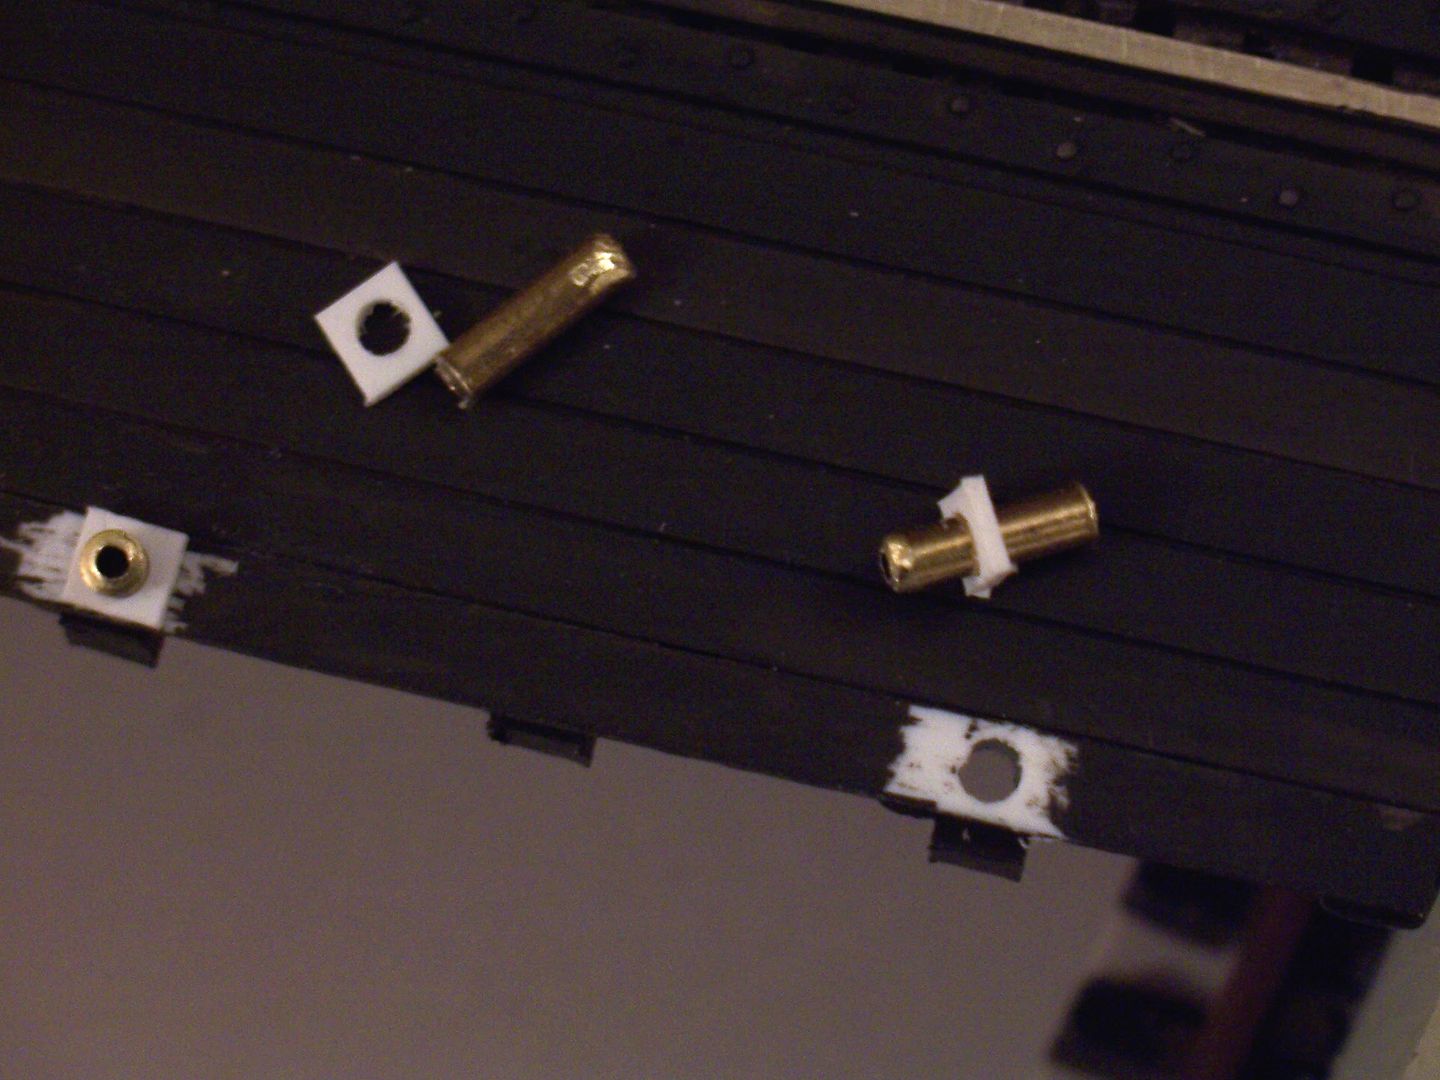
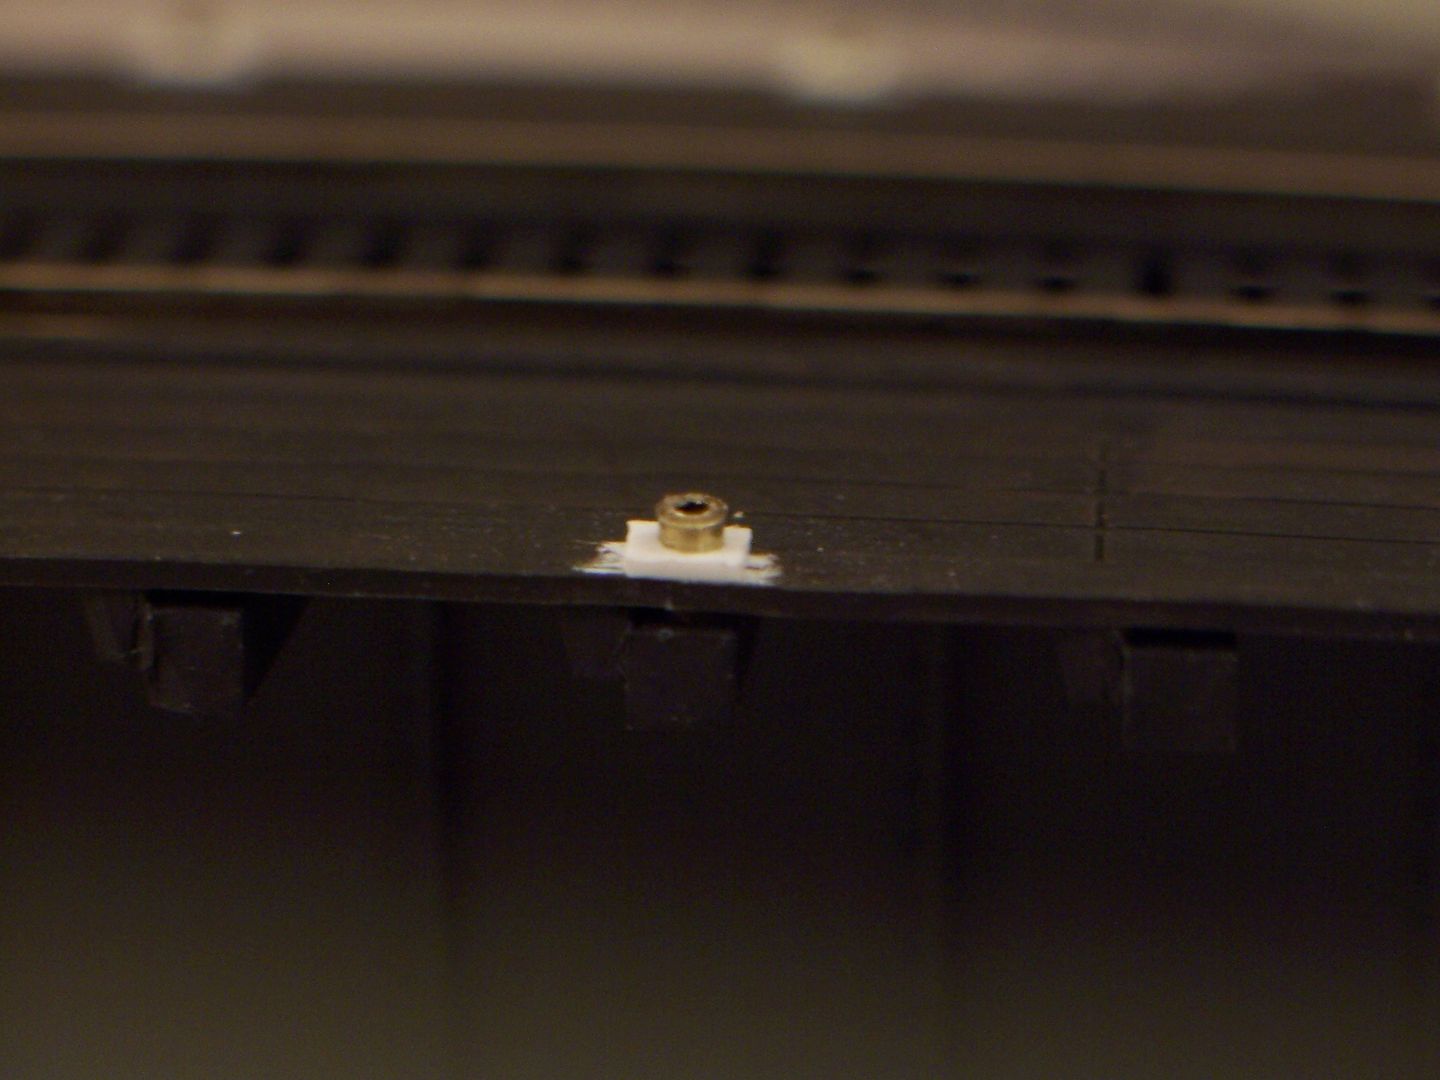
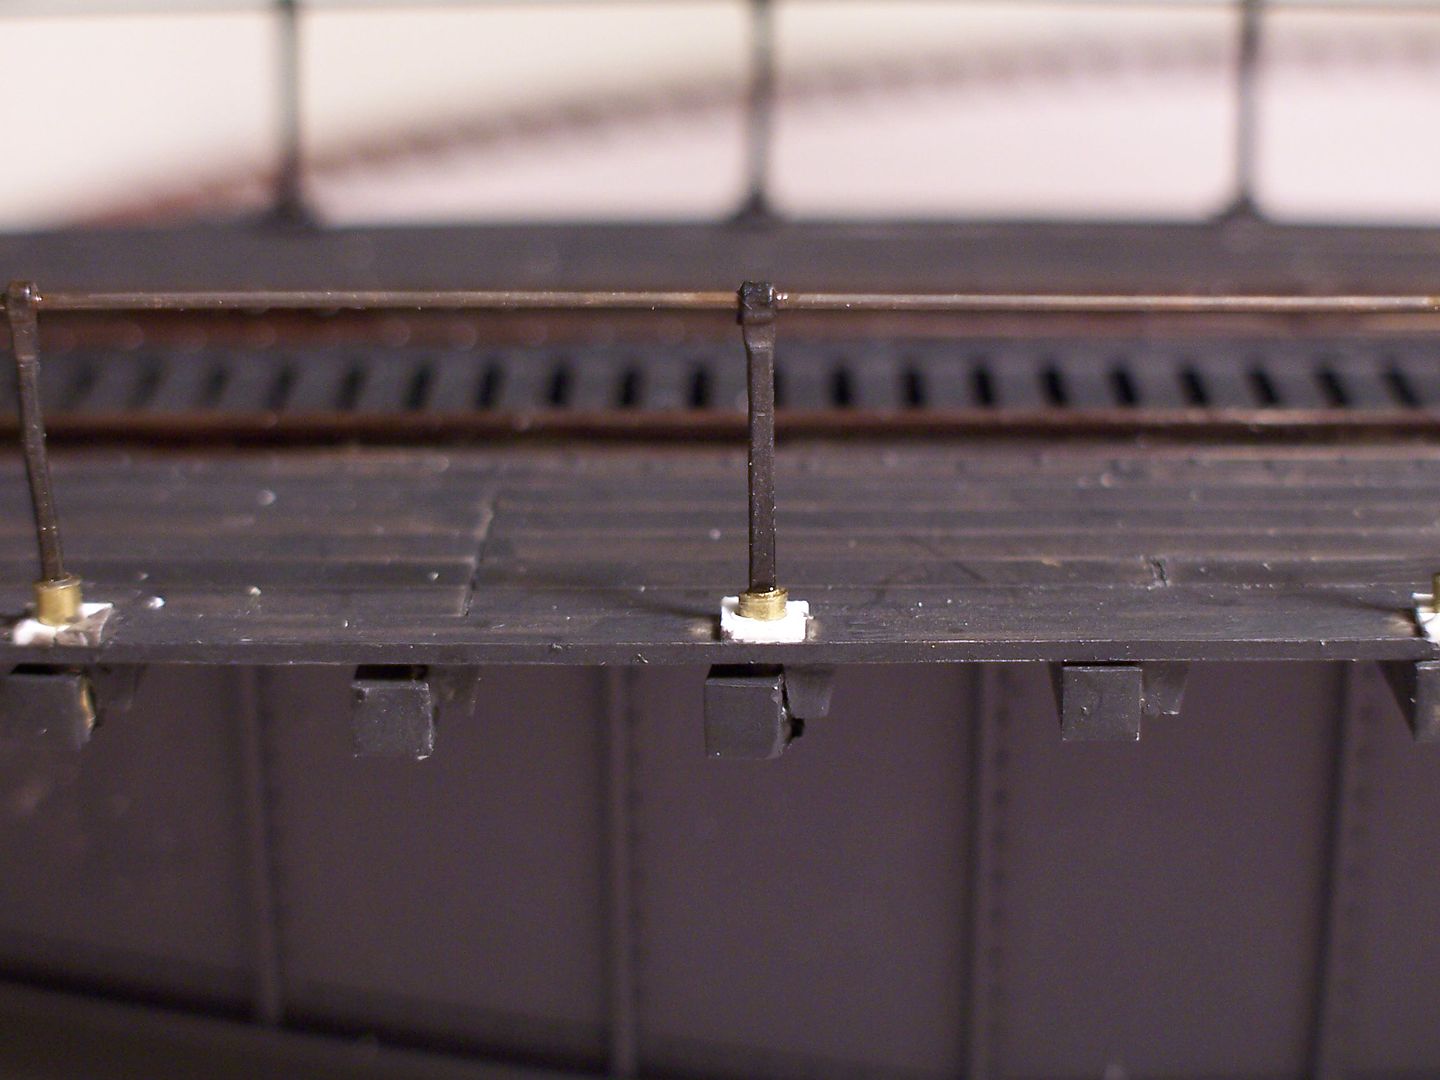
One thing I didn’t mention is that with all the handling, the guard rails took a beating. I tried to be careful when handling the bridge but inevitably I would put my hand on them and do some damage. They are very fragile. I’m hoping Plastruct has some suitable sized railings that will match to the joists on the bridge.
It began when the terminal block that received both the track power and power for the TT motor broke off the control box. I figured since this is the original TT and not the DCC version, there was little chance I could get a replacement box and I was advised in another thread that I couldn’t upgrade just by swapping in a new DCC box. Apprently the electronics are completely different. My only option was to try to solder the power feeds directly to the control box circuit board. This required some delicate soldering and apparently was beyond my skill level. After soldering the connections I powered it up and at first the power light came on the control box and I thought I had succeeded but within a minute or two it went dark. Apparently my soldering had not been precise enough and I created a short on the circuit board which fried it. My only option at that point was to go old school and wire it the way I had done TTs in the past. On my first layout, I had the Heljan 14" TT and later I switched to the Bowser 18" TT to accomodate the biggest steamers. I figured the TT motor was still functional so why not just wire it the way I did those other TTs. It worked.
I used slightly modified Athearn handrail stanchions, along with some piano wire, to create sturdy handrails for this scratchbuilt 90’ turntable (which is actually only 89’ long, due to lack of real estate)…
Mine is right at the front of the layout, so it’s manually operated by one finger of my 0-5-0 switcher, with indexing via the Mark II eyeball-method.
While I used Walthers’ 90’ turntable on the upper level of my layout, it also got scratchbuilt handrails, using the Athearn stanchions…
This one’s also near the edge of the layout, so manual operation like the other one.
Power to the stall- and garden-tracks is through a rotary switch, and uses the Walthers’ ring/wiper system to power the bridge.
John-NYBW
One thing I didn’t mention is that with all the handling, the guard rails took a beating. I tried to be careful when handling the bridge but inevitably I would put my hand on them and do some damage. They are very fragile. I’m hoping Plastruct has some suitable sized railings that will match to the joists on the bridge.
I used slightly modified Athearn handrail stanchions, along with some piano wire, to create sturdy handrails for this scratchbuilt 90’ turntable (which is actually only 89’ long, due to lack of real estate)…
This one’s also near the edge of the layout, so manual operation like the other one.
Power to the stall- and garden-tracks is through a rotary s
Using the power pack to control the turntable will make it easier to align the tracks. I did that with an O scale table. I used to run a full size turntable and it had a variable speed control. It would have been hard to align with just a reversing switch.
You could connect your turntable track to the same auto reverser that you use for your staging tracks. You would just have to be sure that you don’t run a train through the loops at the same time as you are using the turntable. The auto reverser can only correct one polarity mismatch at a time.
I have quite a supply of them on-hand, amassed over a number of years. If you want some, send me a PM to let me know how many you need, and, of course, a mailing address.
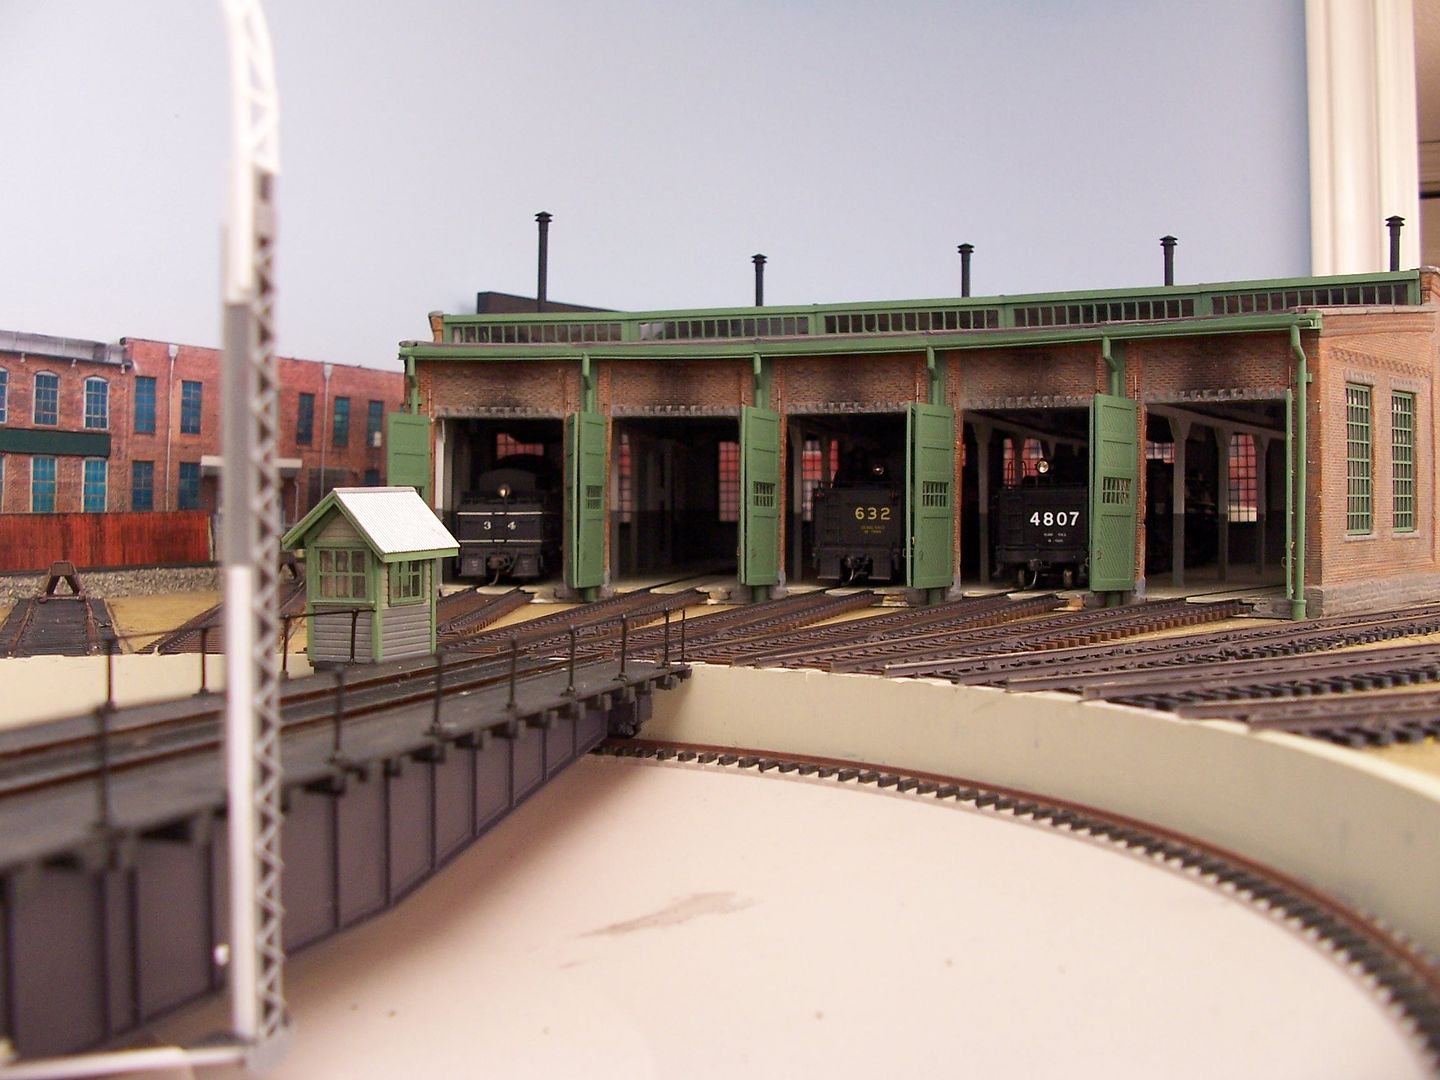
No, it’s a Korber 3 stall roundhouse with 2 extra stalls added. I bought it many years ago from Hobbies for Men, in Beacon, NY.
The walls are resin castings, and the supplied material for the roof and its supports was heavy stripwood, heavy cardstock, and a bag of ballast-like material, meant to represent a tar & gravel roof.
I made a number of modifications to it, both to “simplify” construction and to make a stronger structure. The whole build can be seen HERE if you wanna kill some time.
I’m finding that out although I’m getting a little better at timing the release of the momentary DPDT switch. The problem is if you miss by even a rail width, you can’t just tweak it back. It’s impossible to throw the switch on/off fast enough to make that little of an adjustment. You have to move it about a half inch and then try again. A couple times I just lifted up the bridge and setting it down where I wanted it.
[quote]
You could connect your turntable track to the same auto reverser that you use for your staging tracks. You would just have to be sure that you don’t run a train through the loops at the same time as you
Thanks. I’ll keep your offer in mind if I can’t find a suitable Plastruct substitute. The stanchions would allow me to adjust the spacing of the posts. I’ve also considered using styrene to make a simulated wood guard rail. That too would give me the flexibility I need.
I switched the TT power supply to a DC power pack and it is working out quite well. I had the perfect one for the task. Way back in 1977 I decided I would get back into model railroading as a young adult. Not knowing diddly about quality back then, I got a very basic Modely Power starter trainset. It had an 18" circle of track, a switcher loco, 3 freight cars and a caboose. I’m a pack rat and I never throw anything out that still works. I found the old power pack in a box of miscellaneous electronics. It doesn’t even have a reversing switch. The throttle controls direction. 12 o’clock is the off position. Direction is controlled by turning the throttle either clockwise or counterclockwise. I wired it so the direction of the dial matched the direction I wanted the turn table to rotate. I can slow the bridge way down as I get near the desired track and feather it into position. The only thing that takes a little getting used to is making sure the throttle gets returned to the 12 o’clock position once the TT is lined up. A couple times I didn’t quite get it back in position and the bridge got a little out of alignment. I don’t have to have to perfectly at 12 o’clock but pretty close.
Who would have thought that a 43 year old power pack from a starter set would prove to be useful on a DCC layout in 2020.