I needed a number of 1950’s downtown street lights for my city scene. Walthers Cornerstone offered them for a while but there were two things I didn’t like about them. First was the price - $13.99 on sale, $17.99 regular IIRC. Second was their size. The lamp heads were a bit too big IMO, although the poles were fine.
Here is my solution to the problem:
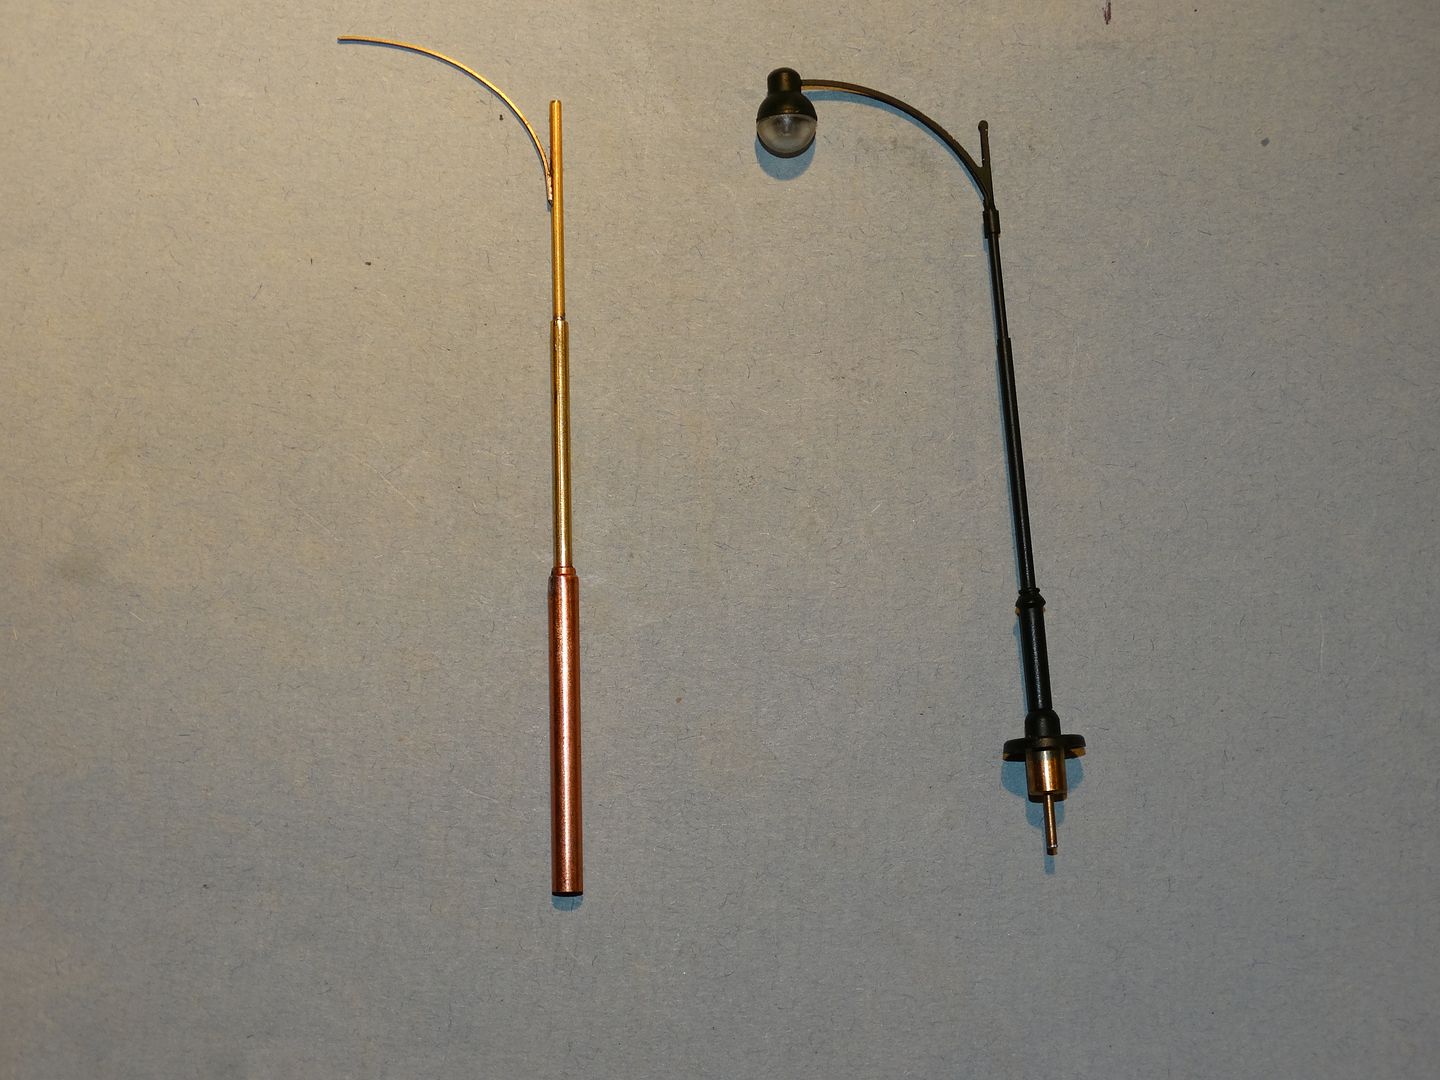
Here is the Walthers light next to a partially assembled pole:
I wanted only one wire coming out the bottom so I decided on a copper or brass pole. It doesn’t matter which. I used both because that is what was in stock. The pole acts as one conductor.
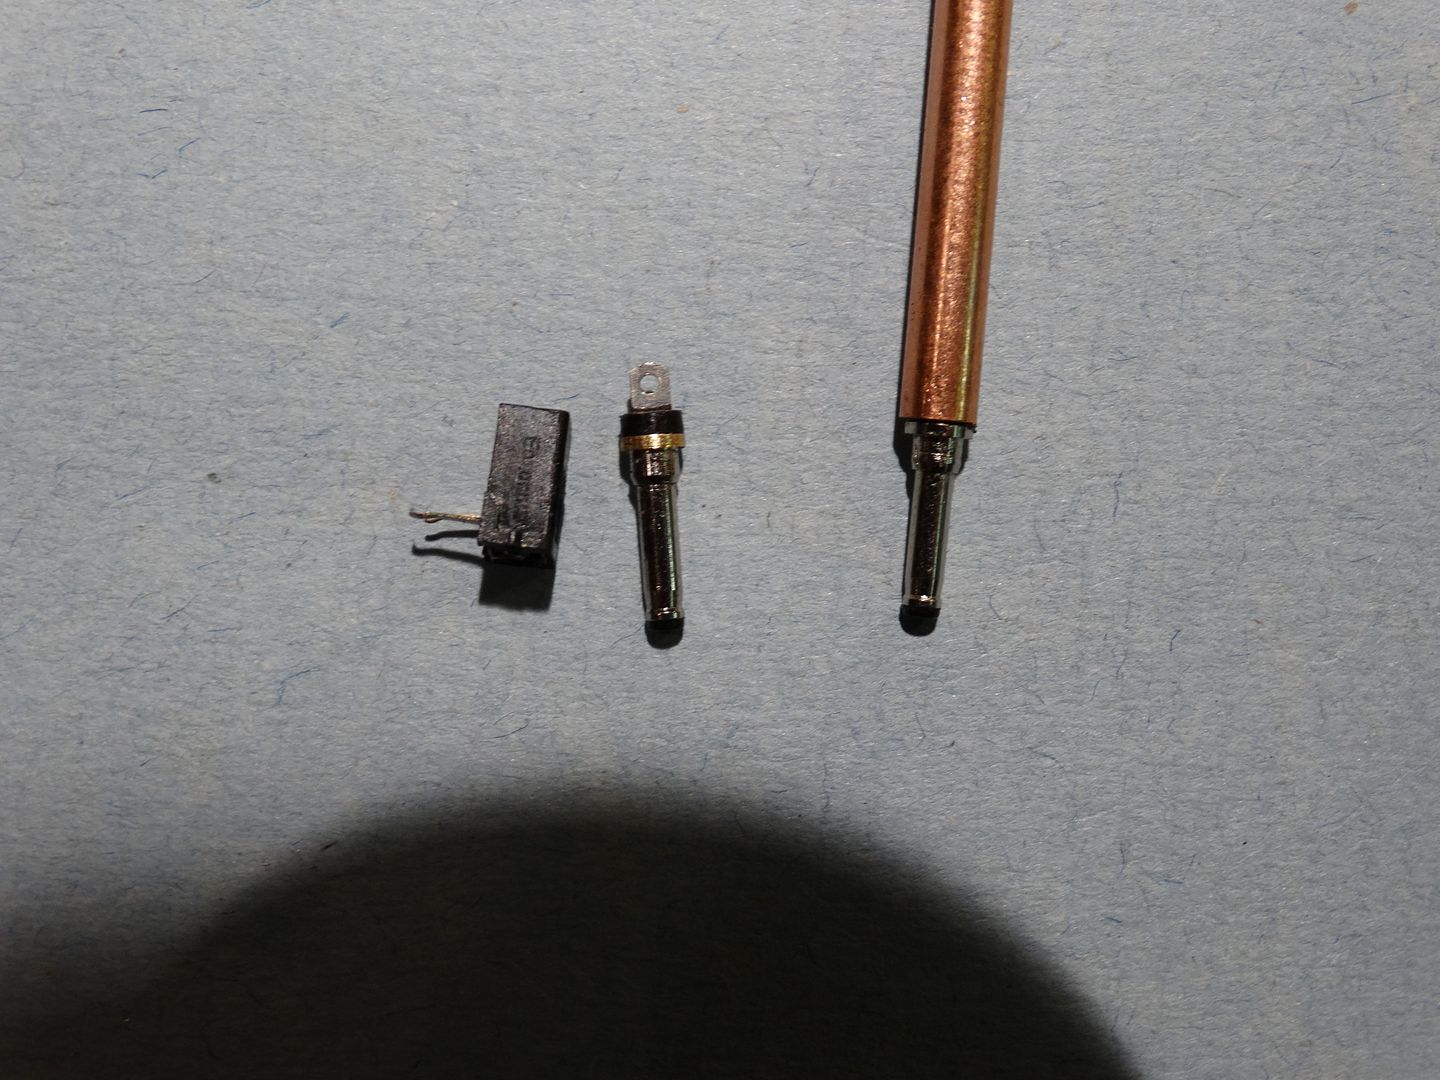
I wanted to be able to remove the lights as needed just like the Walthers ones. That required a socket and plug system. I searched eBay and came up with a power jack that was small enough to fit into the bottom of 5/32" copper tube. The jack is 2.0mm x .06mm. With a small amount of grinding the jack fits tight in the tube. To grind the plug I chucked it into a variable speed drill and then turned the drill on, and then I held my Dremel with a grinding disk up to the plug at low speed. Very little material needs to be removed. It will be soldered to ensure a good connection.
The jack is entirely optional. If you don’t care about easy removal then go without it. That will allow you to use smaller sized tube instead of the 5/32" which would be more to scale. Note that these poles are a lot fancier than most of the originals were. My style of lamp would have only been used on major downtown streets, not in the suburbs. If you want a very simple design and don’t care about the jack just use 3/32" tubing all the way up. It won’t have the slight taper that the originals had but
Very nice work and great looking lights. Glad you went into detail on how and why you made them the way you did. I may give this a try but with shades instead of the globes. Thanks for sharing and please post photos of the finishe/painted ones.
Those acorn lamps are my favorite, too. There were hundreds in my neighborhood and in the evening I always had to keep an eye on them 'cause when they turned on it was time to get my carcass home!
I started a similar project a few years ago with a gooseneck lamp and 1.5v grain of rice lamps and Campbell shades. I may have to revisit that project now that the nano and pico LEDs are available!
Those look great! Very clever using the required wire to be the nicely curving brace at the top. I was going to ask if you made a jig to bend them all the same, then I read more carefully and saw that the top piece is actually the power wire.
The plug-in thing like the Walthers ones is almost a requirement. That was a great advancement for them to start doing that - no more trying to be careful when cleaning things or adjusting scenery, just unplug them ang get them out of the way instead of bumping one and breaking it.
If only a small portion of the largest tube shows above the surface, it’s quite realistic, many lamp posts have a thicker base anyway.
Now I have another project to add to the list. I can build up a supply while I am working on a track plan once I get settled in to a new place.
I have been busy and did not get a chance to respond, but is that My pre-order, that you just have to paint and ship to me?? Just remember, they should be green.
In the first post I didn’t address how to mount the socket under the layout so the pole would slide right in. That was because I hadn’t figured that bit out yet.
After giving it some thought I think I have a solution:
The first step is to drill a hole where you want the light located the same size as the diameter of the bottom of the pole, in my case 5/32". The hole has to be vertical or the pole will be slanted. Next, slip a pole into the hole. You will then be able to go under the layout where you will be able to see how far the power jack is below the bottom of the layout. The next step is to clip the socket onto the jack. Then, cut a block of wood that the socket can be mounted to. The size of the block will depend on how far the socket is below the bottom of the layout. I would suggest that you wire the socket first because it will be a PITA to solder leads to it once it is mounted.
With the socket in place on the bottom of the pole, slide the block of wood up to the socket and screw the block to the bottom of the layout. Next step is to CA the socket to the block of wood. Be careful to not let any CA get inside the socket or the pole will be permanently mounted! To prevent that I used gel CA applied just to the edges of the socket on the opposite side from the terminals. Epoxy would likely work as well but it has more of a tendancy to flow before it sets which could jam up the socket. The bond needs to be strong enough to stand up to the removal and insertion of the pole. My test unit using gel CA seemed pretty strong but I wouldn’t use too much force inserting the pole. If it doesn’t go in easily then loosen the screws and adjust the position.
One thing I did was to bend the solder points on the socket out at 90 degrees from the socket body, just to make soldering easier.
Randy Rinker made a suggestion that if my design seems a bit too big on the botton 1/3rd of the pole then just use the 5/32" tubing as part of the base by only having it
I have soooo many projects on the go that even if I was going to charge you the $17.99 ea. that Walthers wanted for their version I couldn’t find the time to do it. Besides, I will admit that there is some fussy work to making the lights. It’s the sort of project that you say “whew - I’m glad thats over!” when it’s done.
Please don’t anyone be put off by that comment, but as I said in an earlier post, some parts of the process you may find that you can only do a few at a time. Worth it though, I think.
Dave
[#oops]Answered the same question twice[D)] Senior’s moment - seems like those moments can last for hours some days![swg][(-D]
And thanks, too, for sharing your technique. It’s these types of projects that we need to have more of on the forum and the best reason I’ve seen so far for adding an additional category to the MR forum.