[:-^]
I have a number of pieces of rolling stock that have broken stirrups.
I know that they can be replaced with wire ones from detail companies or make them yourself.
I just need a primer on how to start this process in a effective, efficient manner.
I know there are a number of you out there that are quite proficient at this skill and I would like to gain your knowledge on the subject, if you are willing to share.
Thanks for your support in advance.
Johnboy out…
Use staples. Staples from the old Swingline Tot 50 should be just about right. You can get small numbered bit to drill a pair of pilot holes, or you can just try a glob of glue.
You could make your own of wire, but LION would try the staples {if that is the lack of stirrups would be a bother to him.)
ROAR
I replace the plastic stirrup steps with metal ones from A-Line(available through Walthers). They have 3 different designs. I cut off the plastic ones and drill a #72 hole in the edge of the car body and then use 90 second epoxy to secure them. The hard part is drilling the hole. I use a brand new #11 blade to create a ‘pin prick’ so I have something to start the drill bit in. I figure about 5 minutes/step. Her is a web link to the Walthers page:
http://www.walthers.com/exec/search?category=Part&scale=H&manu=a+line&item=&keywords=stirrup&words=restrict&instock=Q&split=30&Submit=Search
Jim
If you search the Walther’s site for Stirrups you will find several companies that offer them (e.g. A-Line, BLMA, Tichy, …). I recommend metal ones. Why replace fragile plastic stirrups with plastic? The metal stirrups are much more robust.
You can drill and glue but sometimes that is not possible or desirable. Another idea from another forum is to use a soldering iron to heat the stirrups up so that you can "push’ them into place on the plastic body (assuming it is a plastic body). I test ran this idea and it does work (at least on my test pieces).
This is a good thing to do on a lot of the older cars even if no stirrups are broken…it improves the appearance significantly in my opinion.
George T. Galyon
I generally prefer the metal ones from A-Line: they’re made of phosphor bronze, with a rectangular cross-section and round mounting legs. I pick the style I wish to use (often two different types on the same car), then set a pair of dividers to match the spacing of the mounting legs. It’s an easy matter then to use the dividers to imprint starting points for drilling the bottom edges of the sidesills. The A-Line mounting legs are about .019" in diameter, so a #76 or #75 drill in a pin vise (don’t use a motor tool) will do the trick. Most plastic carbody shells are thick enough to drill into while still leaving enough material to provide a solid mounting. I usually work on multiple cars at a time, installing all the steps before cementing them in place. I’ve found it easiest to use ca - place a little on a smooth surface (I do most of such work on a sheet of glass) then use the tip of an old #11 blade to apply a minute amount of ca to each of the points where the wire step enters the plastic carbody. The cement will be drawn into the joint, providing a strong and neat bond.
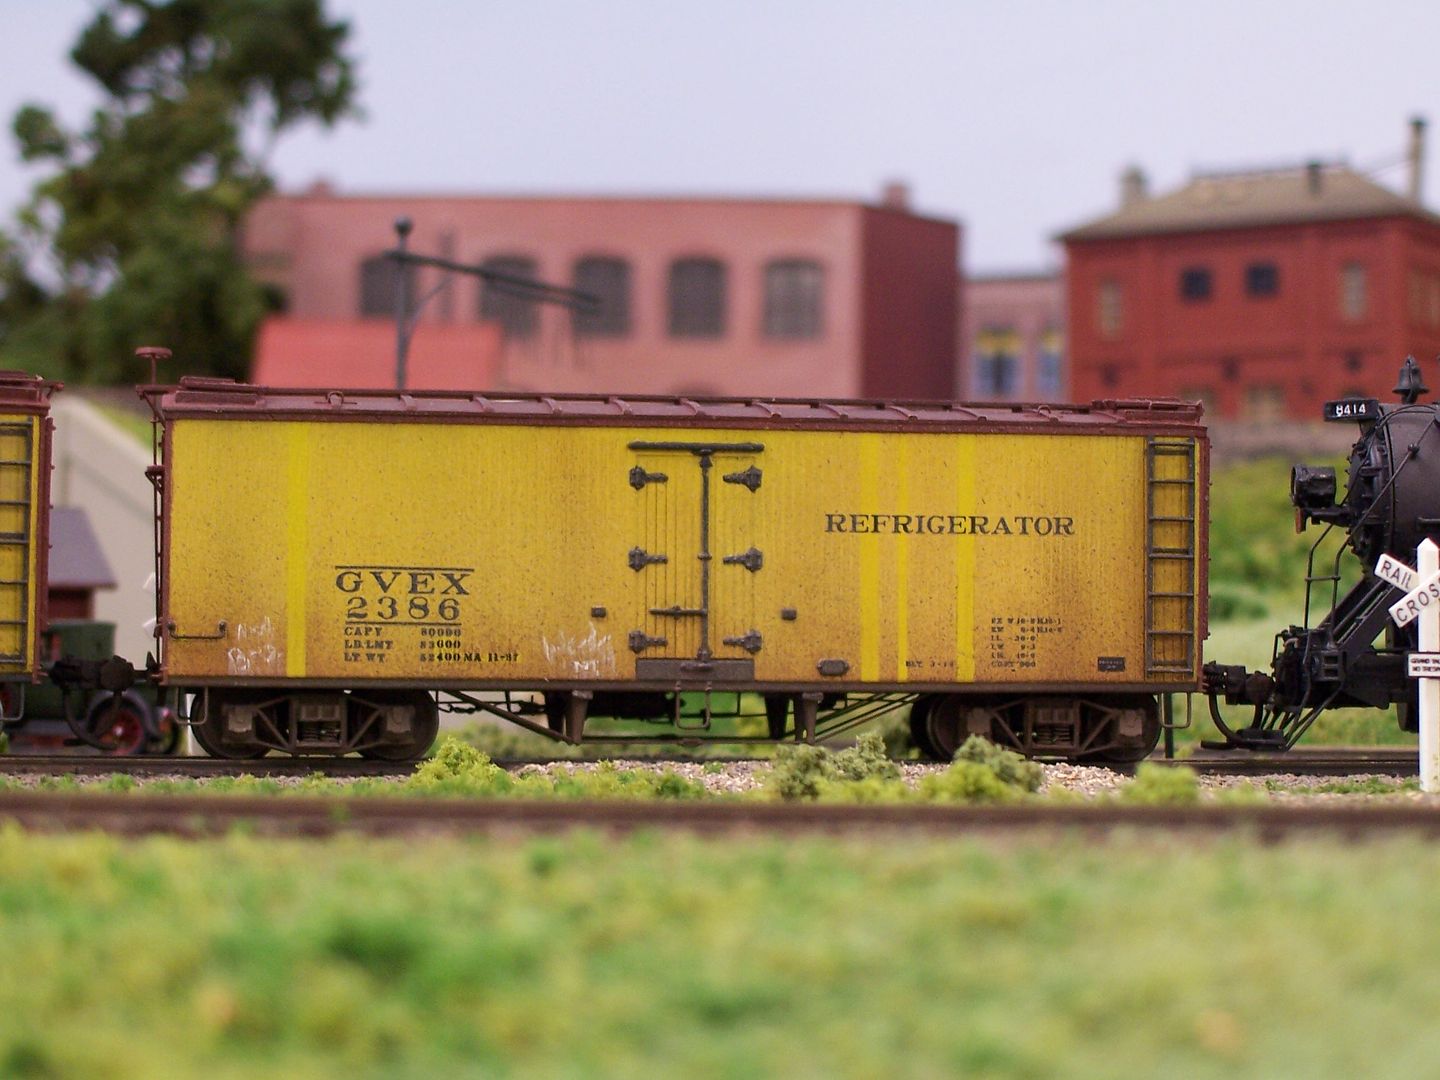
Here’s a couple of cars under construction, with the A-Line steps installed:
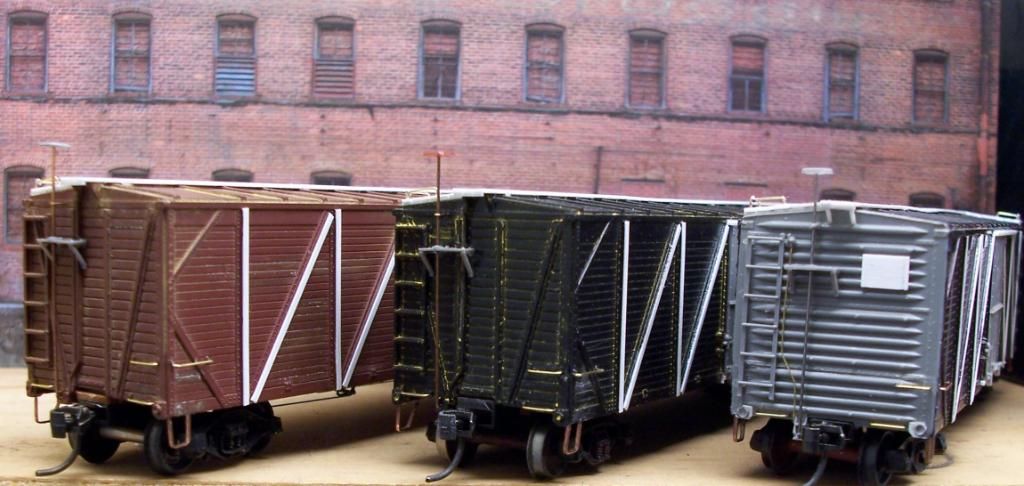
This is a modified Tyco reefer. I shortened it from 40’ to 36’, gave it new wooden ends in place of the original steel ones, along with a scratchbuilt radial-style roof. The truss rod floor and underframe replaces the original Tyco floor, which was sagging. A-Line steps, Tichy ladders, and custom-bent grab irons:
For cars with thin sides or delicate sills, like this Tichy tankcar…
[IMG]http://i23.photobucket.com/albums/b399/doctorwayne/Freight%20Cars%20-%20Part%20II/A
Occasionally, you’ll come across a car for which none of the commercially-available sill steps will work. These can often be formed using flat brass bar stock from Detail Associates.
For this Atlas car, a gift for a friend, I broke one of the plastic steps while disassembling it for painting. Using the similar remaining existing step on the opposite end of the car as an example, I was able to bend a new one using .010"x.030" brass strip. In addition to the bends apparent in the photo, the steps curve out from the carbody, with that curve occurring at roughly the same spot as the visible lateral curve in the inboard legs of the steps.
Unfortunately, the new replacement step made the existing ones (fairly-nicely rendered) look overly-thick, and I ended-up making metal ones for all four corners of the car. [banghead]
To further complicate matters, there’s a brace running at an angle from the bottom of the outboard legs of each step, terminating in the endsills of the car. To simulate these, and to attach the steps to the car’s sills, mounting posts of .015" brass wire were soldered to the formed steps.

The same strip stock is useful for making built-up sill steps for baggage cars, too. Clean the strip first by dragging it through some fairly fine-grit sandpaper (800 or 600 works well) then bend the main step to the size required (I made a jig for the three most common sizes) and then form the intermediate step from more of the same material. The pieces are then assembled in the jig, pinned in place, and then soldered together.
To mount them on the car, a #70 or #71 bit is used to drill suitable holes in the bottom of the car’s sill, then pliers are used to press-fit the legs of the step into the slightly undersize holes. A drop of ca, applied as outlined previously, will secu
[:-^]
Thanks Fellas, (Jim, George, Brother Elias and Doc Wayne.) I knew you would come through for me.
Great information and hints. I feel far more comfortable in starting these repairs / improvements.
Think I will try to get one of those tools from Micro Mark for forming the wire grabs and make an attempt with the A-line stirrups.
Much appreciated.
Johnboy out…