I figure I need 9.
Good.
- even gooder! Here’s looking at your bird.
The 220 spring will give constant pressure and ‘powering the frogs’ is (are?) excellent. Enough, you have to use your ‘smardts’ for mounting. - Now you’re ‘with it’. The right choices for the ‘right’ reasons.
As I said In my previous post I would add pictures of what i currently use on the upper part of my layout. I probably will end up using this for the majority of my layout. I am using peco turnouts above on this layout but I will be using this same idea on my 2’ by 8’ HOn30 layout (which is completely handlaid)
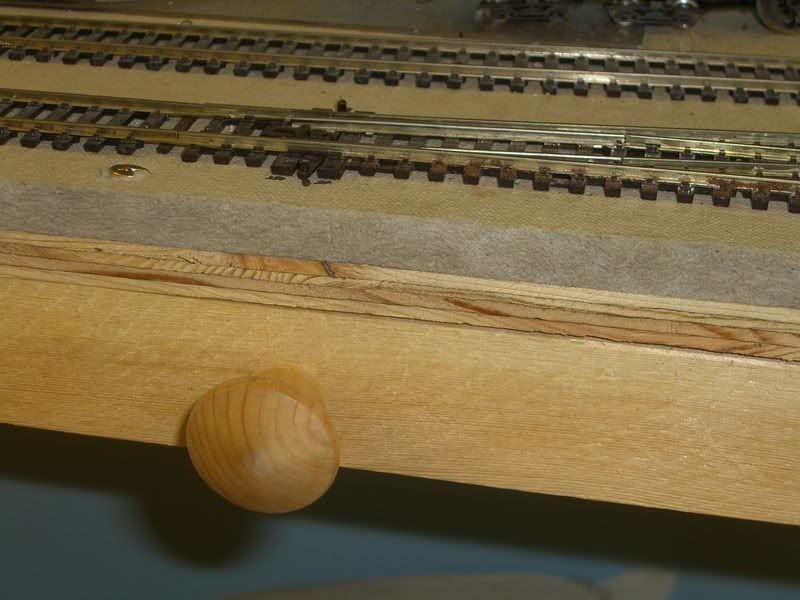


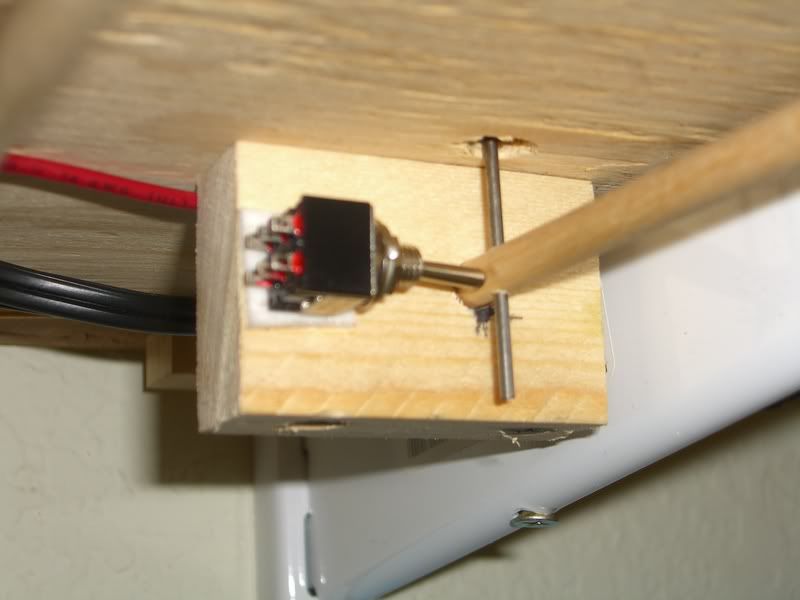
THe DPDT (with center off to prevent shorts while switch is in motion) switch has enough stick to it that it can hold the points over very nicely. The one in the photo is a demo (hense no wires ) but has been tested to both hold enough tension and power the frog.
The vertical rod is steel about 3/32in diameter and is very stiff. friction is all that is holding it in the doweling. The doweling is just 1/4 inch doweling that can be bought at most hardware stores. the support blocks are 1" x 2" (same thing as the facia at least for the upper level)
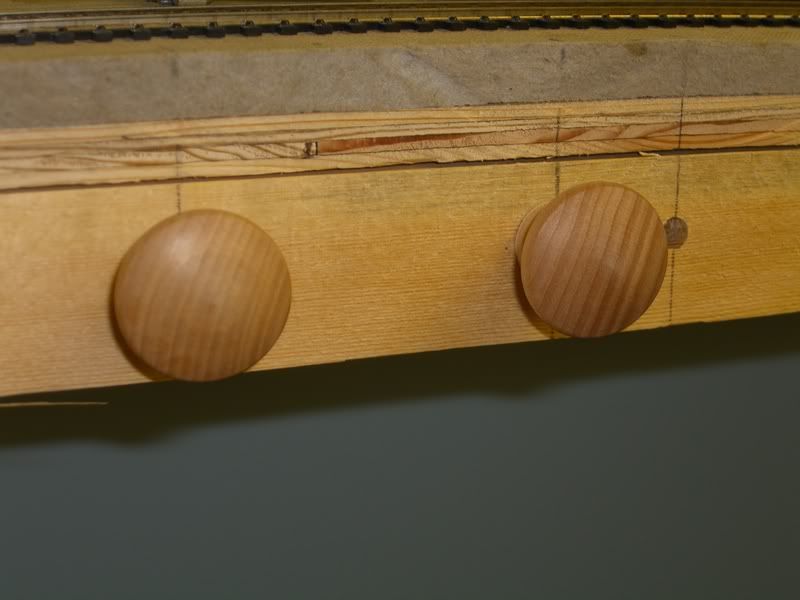
The knobs on the front are press fitted on. The are very tight and need quite a tug to come off. They are designed to come off before and operator breaks the whole mechanism.
I currently have 7 of these installed and it cost me about 15 bucks for 7. This does not include the DPDT switches but you can get those at www.allelectronics.com for a $1 a piece.
Hey Space,
Check out Dec. '03 Model Railroader article on Utah Belt Railroad. It has the best and about the cheapest method I’ve seen for TO control. With a couple of screws for the “under the roadbed arm” to hit as stops/electrical switch poles it can also function for power routing.
Just a thought ---- John in the cow pasture
Renegade,
The pictures help a lot. Very ingenious.
This is a suggestion & question all in one:
What would be the pros/cons to using a simple 12Vdc motor mounted under table, under the turn out and just have a ‘reacher bar’ attached to the motor output. Apply +/- voltage, motor attemps to spin, but can only go a 1/8th a turn, moves the ‘reacher bar’ and throws the turnout. Apply -/+ voltage to make the turnout go the other way.
… been wondering about this for a while and its a simple method as one can get ($1 for a motor, $1 for a DPTP switch)…
comments?
Bump… anyone with any pros/cons?
in other words … a home made tortoise switch machine ? the problem i see is the motor throws the turnout then continues to try to turn , drawing lots of current which burns the motor out fairly quickly unless you use the same type of motor as used in the tortoise , one that is designed to stall when it has moved as far as it can . probably a more expensive motor than you were thinking of .
no reason you couldn’t do it of course , if you eliminate the plastic casing , packaging , advertising costs etc. you could build your own copy of the tortoise and probably spend less money on it than the tortoise sells for . let us know how it turns out (pun intended!) , could be a big money saver for some folks
CONS, (CONsider):
A 12volt motor will draw too much ‘stall’ current. Most ‘Stall’ types are geared down 3V-4V MOTORS using a current dropping resistor to run on 12 volts.
PECO turnouts have a spring - holding points against stock rail tension, wheras ‘Fast Tracks’ assemblies do not.
If one is using ‘Fast Tracks’ made turnouts (for more accurate geometry), WHY would anyone buy Peco, Atlas, or ?. Hand laid (BK,Cental Valley) KITS, maybe.
From my previous post. I have also installed these on fast track switches on my HOn30 layout. The friction of the doweling is enough to hold the points over. I have added DPDT switches (with center off) as I want powered frogs. They hold tension very nicely. The reason I used center off switiches is because with the short through distance i don’t want it to short while throwing a switch. the center off gives it a little protection to prevent this.
Thanks for the feedback guys. Let me provide more details and see if that helps any:
ereimer:
I was actually thinking about using just a straight canned motor, not a geared-down one. The latter cost way too much to make it economical.
Don:
I was thinking that operation could be like the snap turnout machines where power is only applied for long enough to throw the turnout.
My real concern is without using a gearmotor, to yall think there would there be enough torque to throw the turnout? I will eventually get around testing this out, but life’s sure busy! ![]()
claymore1977:
Real cheap way to gear down a motor, positive lock and solid electricals included:
- Take a slide switch, drill it for a spring wire operating rod (parallel to mount, perpendicular to throw) and epoxy an 8-32 nut to it (axis of nut parallel to throw.)
- Mount switch sideways under the subgrade, with operating rod vertical into switch point throwbar.
- Adjust so that the switch points and the slide switch are both at half-travel at the same time, and that the points are solidly against the stock rails at full travel.
- Turn down the end of an 8-32 machine screw so that it can be coupled to the end of the motor shaft.
- Thread the screw through the nut, couple to motor and mount motor to subgrade.
- (Optional, but recommended) Connect all electrical leads to an 8-terminal strip, and label clearly.
The only reason I don’t use this system myself is that it has to be mounted directly under the switch points. Standing on my head under the layout is not my thing, so I bring all the electricals and most of the mechanicals out to the fascia (where I can work on them seated comfortably in the aisleway.)
Chuck (modeling Central Japan in September, 1964)