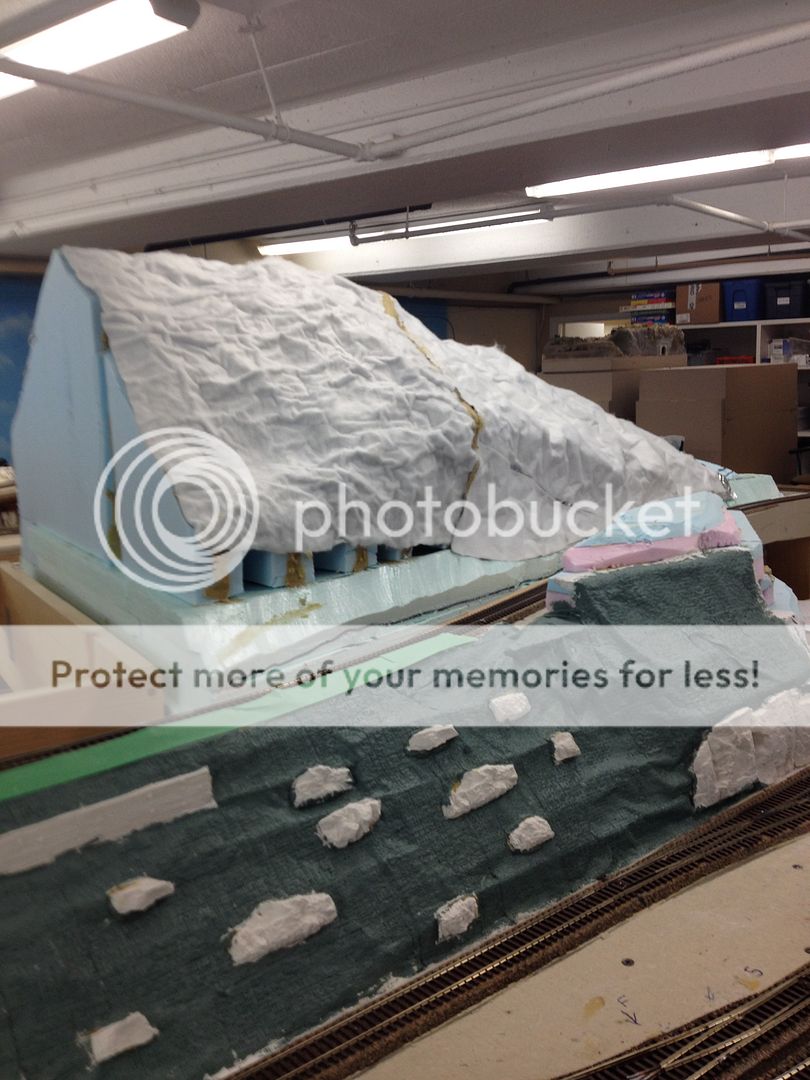
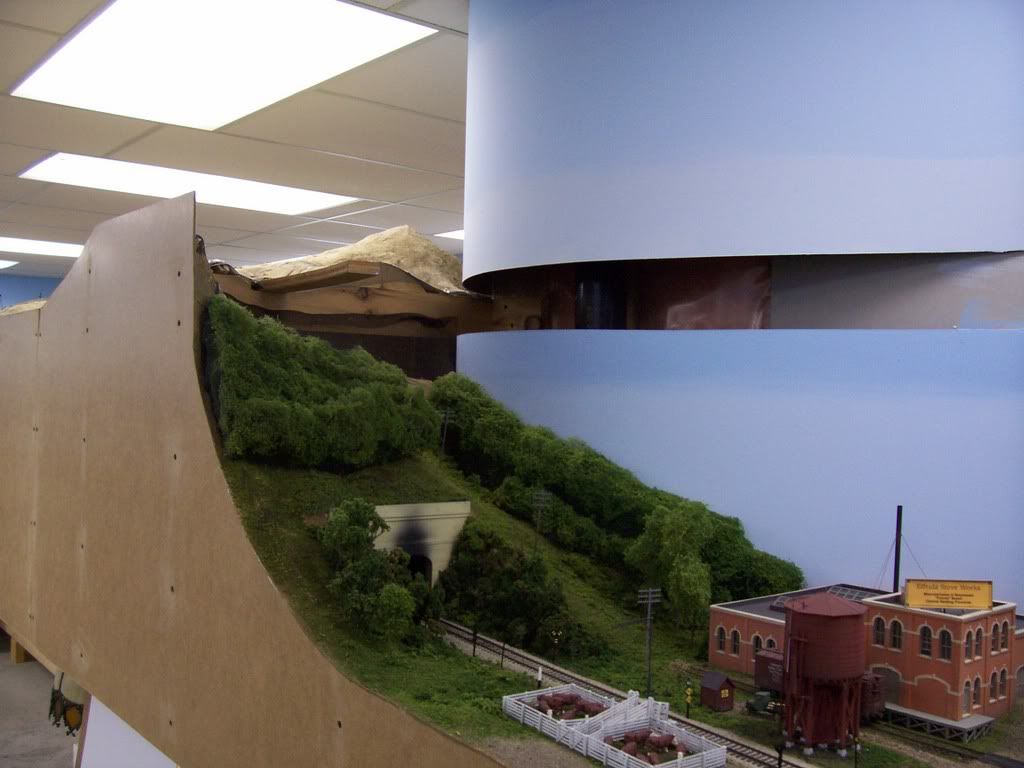
Hello everyone, i am at a point on a scene on my layout that i have found myself STUCK…As you will see in the pictures, i am trying to model a kind of cut through a mountain with the front viewing portion being realatively low as opposed to a decent rise in the rear against the backdrop. You will see the single track portal where i plan to begin the tunnel. The tunnel will run around to the other side of the penninsula pretty much just like this side. My big problem is how to go about doing the fascia where the tunnel will begin and on around to where it ends. As you can see i have began mocking up some sheet styrofoam board at the begenning of the bridge and up to where i plan to install the portal. My big problem is how to do the fascia from where the tunnel begins and on around to the end of the tunnel??? I know usually you cut your fascia to match the profile of your terrain but thats where im drawing a blank…Can you guys give me some advice/suggestions and or pictures showing how you would go about this? Many thanks to you all!
I would put the fascia up to the top of where the wood meets the foam and carve the foam so you had a cliff-like look below the track down to the top of the fascia.
If you want to have a tunnel then there has to be a reason for the tunnel, i.e. there has to be too much rock above the track to make a plain open cut through the mountainside reasonable. That suggests that your “low” front to the mountain will have to be fairly high, and that the back of the mountain at the backdrop will be very high if you want to make the mountain slope realistic.
Based on your pictures I would suggest that the front of the mountain/top of the fascia should be at least eight inches above the track. Twelve inches would be better. Sixteen inches would be impressive IMHO. That will make the actual fascia quite tall, but I don’t think there is anything wrong with that.
I would continue to mock up the foam in the foreground until you have enough height to justify the tunnel. That will show you how tall the fascia will have to be and how big the mountain will be. I think you will know pretty quickly if that works for you or not. Personally, I think that a tall fascia with the mountain sloping up fairly steeply from the fascia to the backdrop would look great! It would add a whole lot of texture to your layout, and the size of the mountain relative to the size of the trains would be very convincing. It would look like a mountain!
Maybe doctorwayne or others can post some pictures of tall fascias.
Cheers!!
Dave
Edit:
Brent’s rock cut example would work well too, and it would eliminate the need to make anything removable.
Thanks everyone for the suggestions and photos. One last thing if i may…Would it be recommended to put access holes in the fascia in order to get anything that may get derailed? How or where could i find info on how to do this while still having a tunnel liner? Thanks again guys!
A friend of mine screwed his standard masonite fascia to the layout in the usual way, but for areas where he sensed (correctly as it turns out) that he was going to need access in the future, that portion of the fascia was attached with magnets, strong but easily pulled apart - the fascia was pulled away entirely and set aside when it needed to be. But I have also seen guys who attach the fascia in such areas with hinges so it can be swung down.
While we are on the topic, and I do not know if this would work for your situation, but I have also seen very effective layouts where near a mountain/tunnel the fascia is omitted and the mountain scenery runs down to roughly where the bottom edge of the fascia would be. Not scenery all the way to the floor as in John Allen’s Gorre & Daphetid, but still very effective. On John Armstrong’s famous O scale layout he made that scenery out of flexible material because it was also a pinch point in his aisleway. There is a line of scenic foam rubber that would seem perfect for that situation. Cripplebush is the name I think. Perhaps it too could be mounted on magnets so it could be pulled away when needed.
I make my fascia follow contours. I also feel that the fascia has the same job as a backdrop; fill a hole or an irritation, improve the overall appeal and finish, and then sit still…and silent.
I agree with the suggestion that the fascia should naturally curve up to meet the height of the scenery closest to the edge of the benchwork. Means some carving with a jigsaw or something similar, some sanding, and of course a wise choice of paint, but once you mount all the panels in place, the effect, as we can all appreciate, is rather good.
In the OP’s case, he must finish his contouring, and I would continue with the scenery flocking/shrubs, trees, etc, to ensure what it ends up as is going to be satisfactory, and THEN measure, cut, and apply panels to cover up the rough edges.
Another option to making the fascia removable would be to make the whole mountain, or at least a portion of it, removable. I built two large(ish) mountains out of foam for my old club and they were easy to lift up. You will need to choose a place for the joints. Perhaps the bottom could be at track level and the left end right at the portal. The top and the right side could simply sit against the wall.
Note that making the mountain removable doesn’t preclude extending the fascia above track level. The masonite can be glued to the foam with a horizontal seam at track level. I don’t think the joint would be too unsightly.
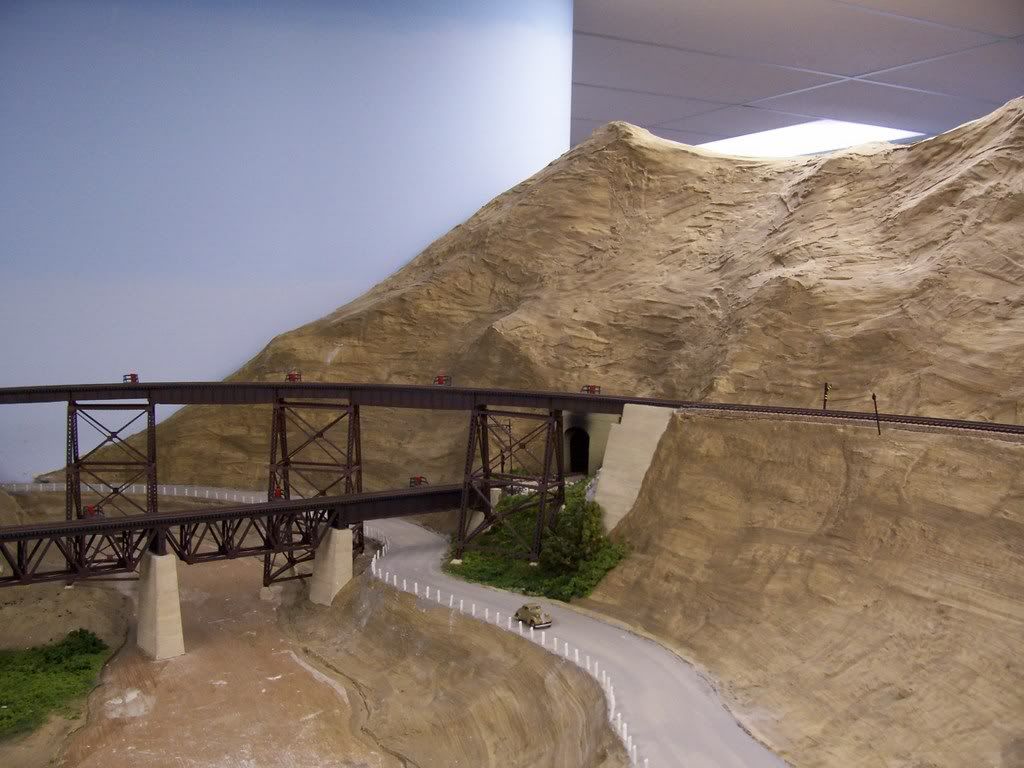
The mountains are made from 2" foam spaced roughly 2" apart with Woodland Scenics Shaper Sheets over top. I’m not sure I would recommend this method because there will be problems with trees not standing up straight if they are inserted into the gaps between the foam ribs. I would go with solid foam if I were doing it again.
Please ignore the green area of the scenery. That is not my work![^o)][+o(]
Rather than holes in the fascia, why not stack the styrofoam only where it will be visible. There’s no need for it where it will be hidden by the fascia.
Instead, leave access from below the layout to deal with in-tunnel derailments.
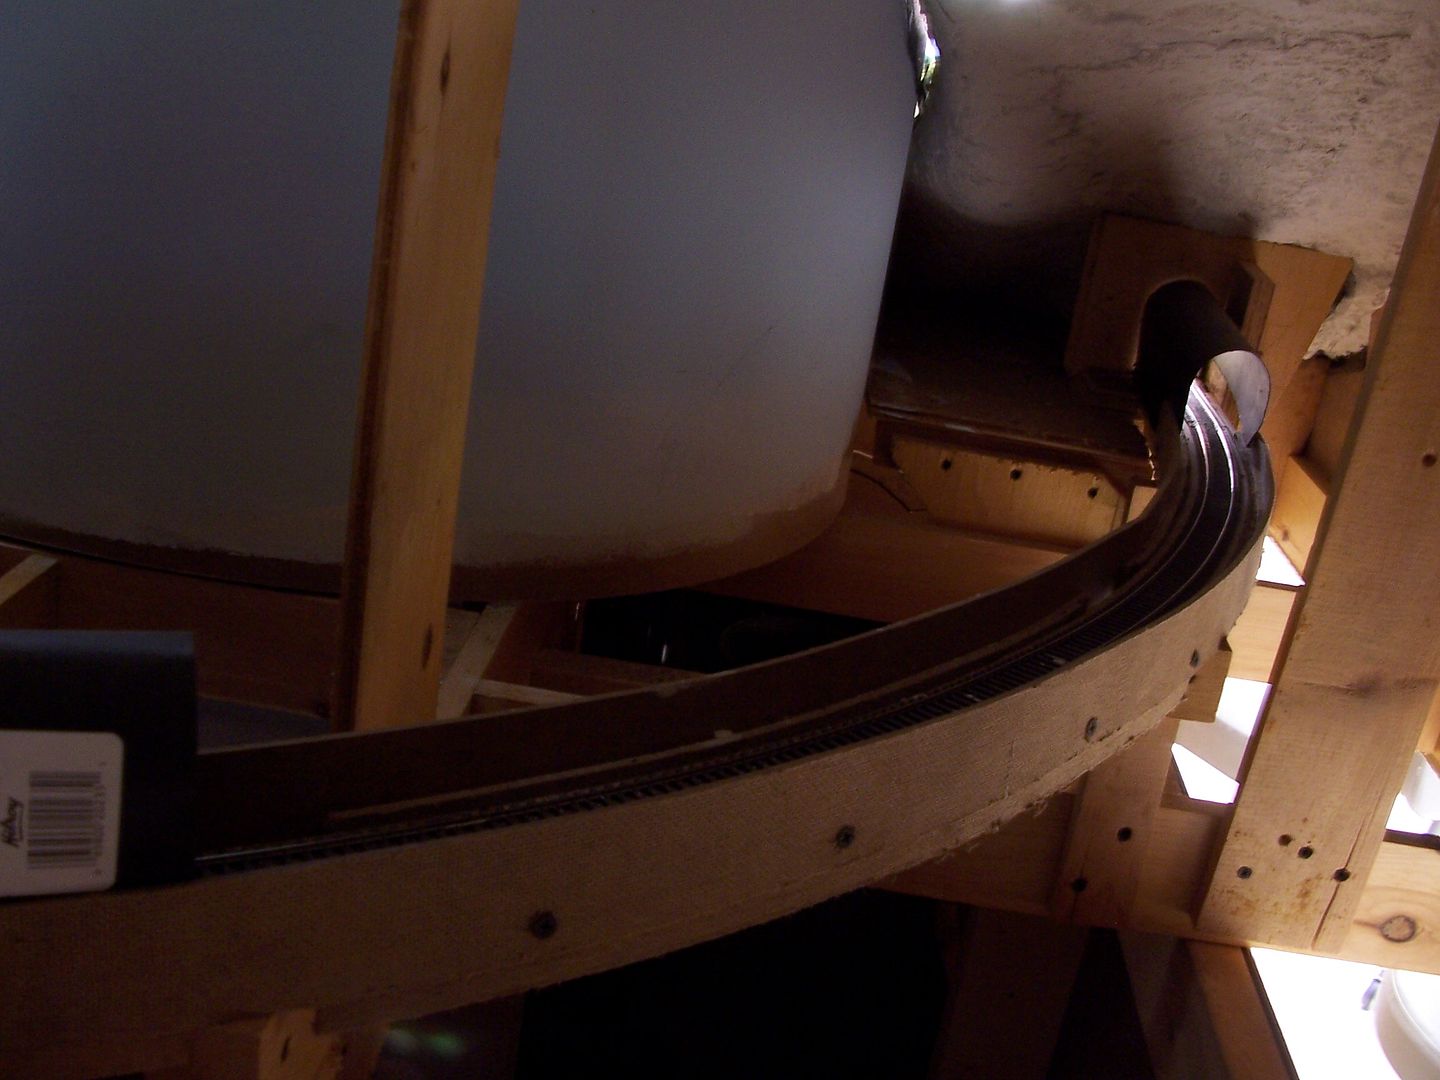
I have a tunnel on my layout, but the ground contours over it were done using plaster over aluminum window screen. Here’s the eastern portal…
Here’s a photo taken under the layout…
…and the western portal…
I used some leftover Masonite from the layout’s fascia to prevent detailed trains from heading for the concrete floor. Also note that there’s no tunnel liner, other than an arch of black construction paper at eac
Just a little update where i currently am on my mountain/tunnel section…I went ahead and filled in the areas with foam board and glued it with liquid nails projects. Then i rough shaped it with a razor knife to get an idea of what i really wanted. After that i began using several different styles of cheese graters to smooth and form everything into one scene which is where i currently am…Its amazing how much of a difference these 3 different graters make in shaping the foam, only wish i had known about them years ago lol. Anywyas, as usual your comments and suggestions are welcome…Thanks!
Can I make a suggestion? You have created a very smooth, even slope in the foreground of the first two pictures. If you were to add some high spots and low spots along that even slope, your mountain would have a lot more character and ‘depth’ imho. I’m suggesting adding one or possibly two ridges several inches high running at approximately 90 degrees to the track. The top of the ridge(s) would be sloped similar to the slope on the mountain side. You could also create a valley (or two) that would require the track to have a short bridge or a retaining wall. If you are doing more than one valley or ridge I would make them noticably different in depth/height.
There was a brief article on this in MR years ago with a nice illustration, but I haven’t a clue when it was run.
Here is a very rough illustration of what I am suggesting. Blue represents the higher ridges, gray represents the valleys and brown represents bridges or retaining walls:
A very good suggestion by Dave. Nature isn’t ‘smooth or flat’.
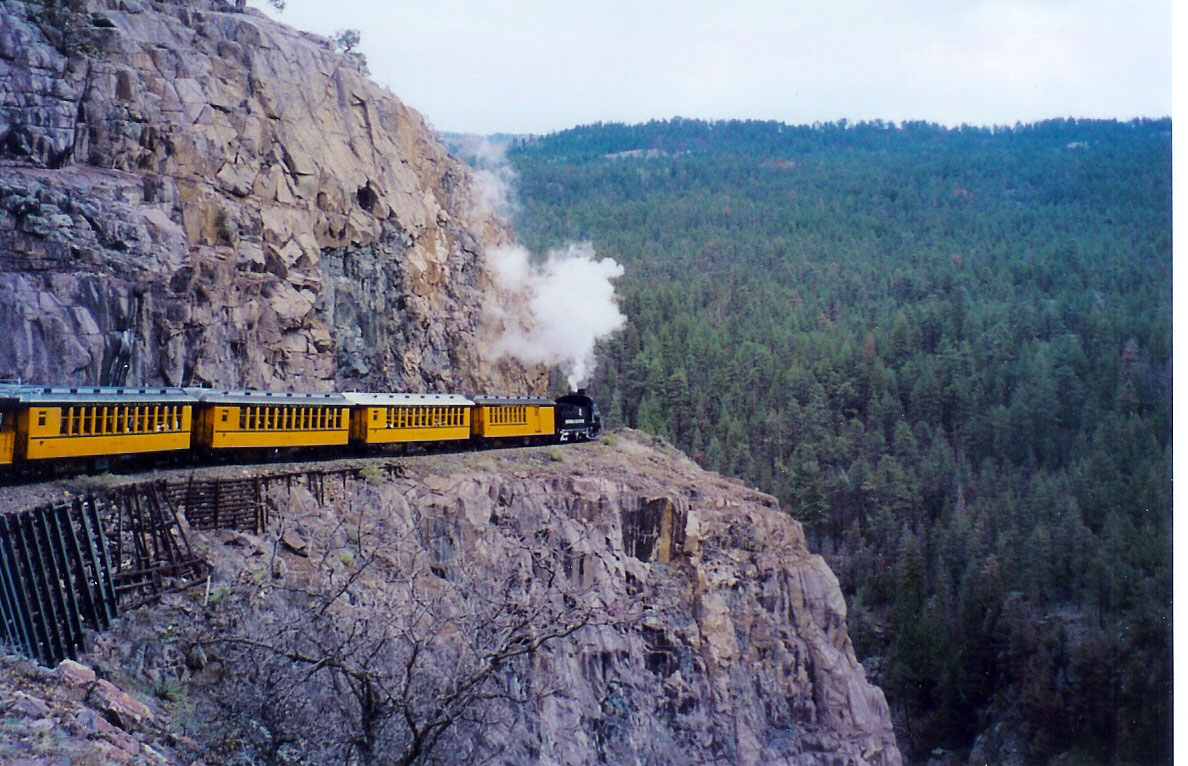
One way to see what the land looks like either side of a cutting etc. is to take a look at the real thing. If a railroad is not nearby take a good look and see how a road cuts through the landscape. It is amazing how different things actually are compared to what we think.


 Just a little update where i currently am on my mountain/tunnel section…I went ahead and filled in the areas with foam board and glued it with liquid nails projects. Then i rough shaped it with a razor knife to get an idea of what i really wanted. After that i began using several different styles of cheese graters to smooth and form everything into one scene which is where i currently am…Its amazing how much of a difference these 3 different graters make in shaping the foam, only wish i had known about them years ago lol. Anywyas, as usual your comments and suggestions are welcome…Thanks!


