Wow Wayne. That water of yours makes me wanna go fishing. Very realistic looking water. I have a quick question for you. I’m starting a sectional-type layout built for portability. Do you think your plaster water technique will hold up or is it more suited for a permanent layout?
Thanks for your kind words, Mavryk.
I think a lot would depend on how rigid the supporting riverbed will be. Mine is on 3/8" plywood, but it’s well-supported by 1"x4" open grid framework. I’d suspect that the lighter framing of a portable layout would allow too much flex, with the possibility of the thin (1/8") plaster flaking off. If your water area wasn’t going to be especially large, a small expanse of 3/4" plywood wouldn’t add too much weight and wouldn’t necessarily require framing any heavier than what you’d normally use, as it would be rigid enough more-or-less unsupported.
In fact, depending on the scene you’ve envisioned and if the water is meant to extend across the layout (front to back), the supporting 3/4" plywood could form part of the layout’s framework, acting as both riverbed and layout crossmember.
Wayne
Love your water setup
do you have any pictures of the plaster painted before you added the “water”?
matthew
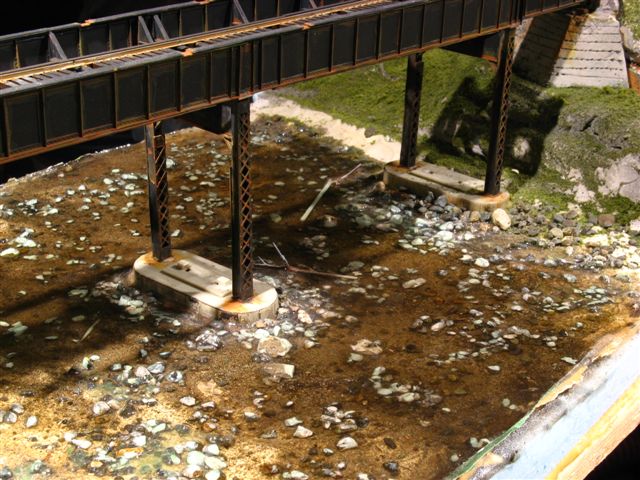
Actually, the plaster is the “water”. After painting, it gets three coats of water-based high gloss urethane to give it a “wet” look, and that’s it. I used Varathane Diamond Wood Finish, applied with a 2" brush, with the recommended drying time (four hours) between coats. If you wait too long, the surface needs to be sanded before applying a subsequent coat. Ever try sanding water? [swg][(-D]
Wayne
Thanks do you have any photos of your colored paint job?
Specifically the part where you have a transition between the sandbar and the dark water?
im working on that part of my layout and your section there is the best I’ve seen!
matthew
Sorry, Matthew, but just photos of the bare plywood and of the finished “water”.
This was my first attempt at making water in this manner, and it seemed really intuitive, so I never though to take any in-progess photos.
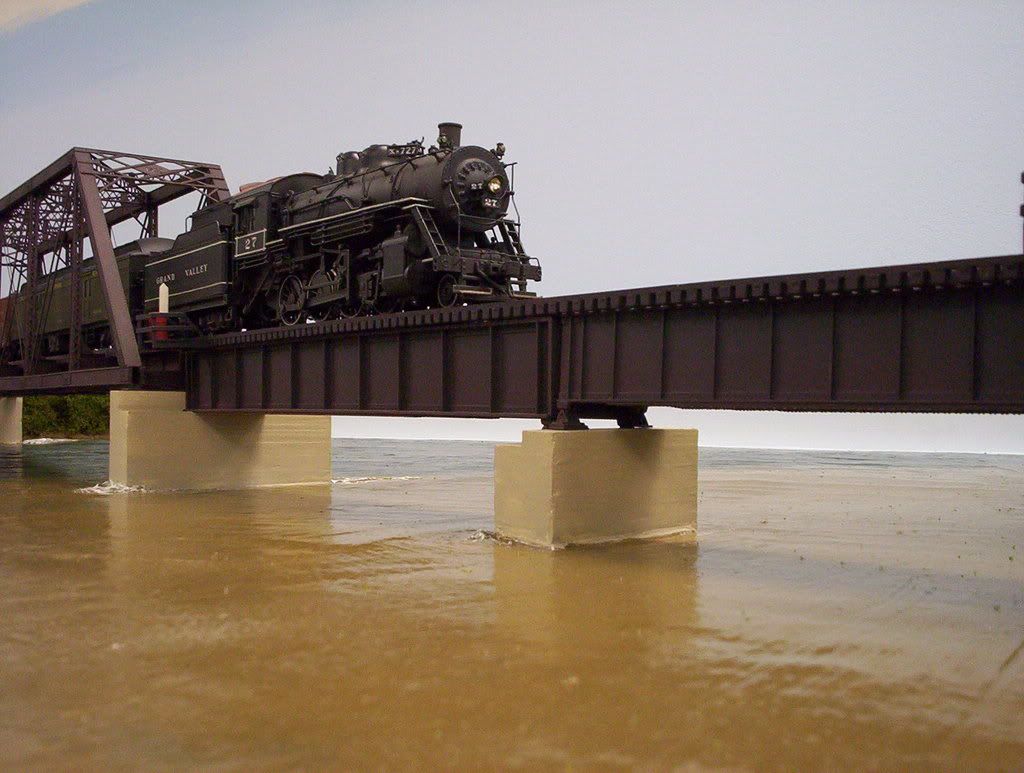
The paint I used was flat interior latex house paint, applied with a 2" or 3" brush. The muddy colour is the same dirt brown which I used over all of my plaster landforms and visible plywood, before applying ground cover, although for those purposes, it was thinned with an equal amount of water:
The plaster river was painted with unthinned paint, and likewise for the dark grey-green colour which represents deeper water. The same colour was used on some cut upholstery foam used for some background trees, as seen here in the lower part of the trees against the “sky”:
If you wish to blend the colours together, apply the first colour, then, while it’s still wet, apply the second colour, brushing right into the first colour somewhat.
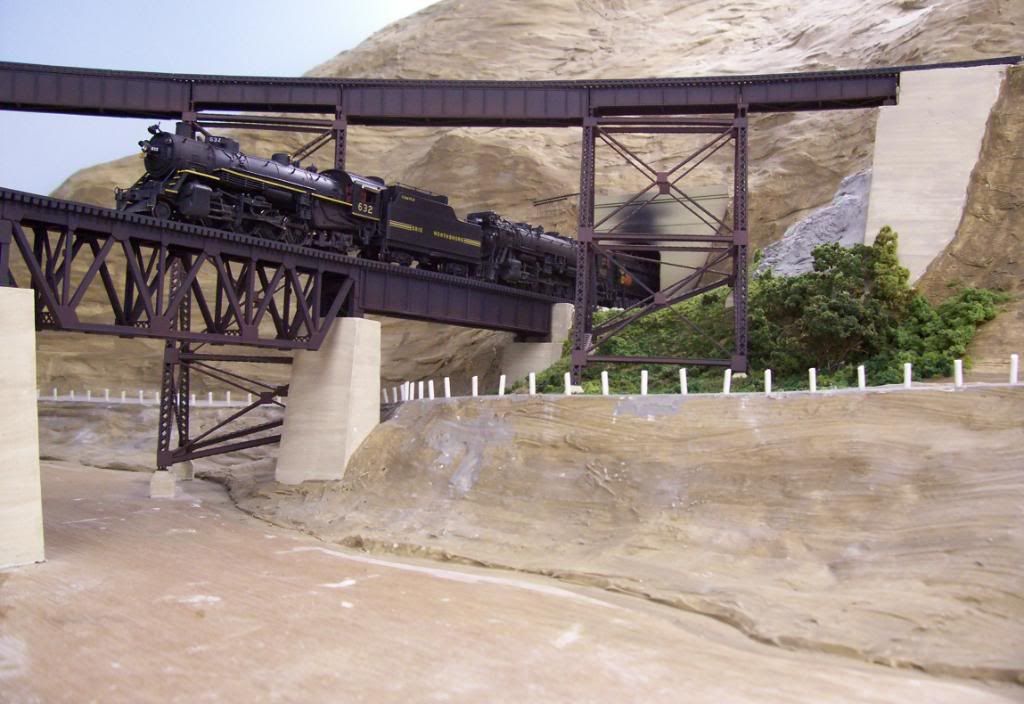
What I really wanted to show was the trail of silt which carries out into the lake, but the real one might extend for a couple of miles, so I settled for a transition between the muddy but fairly deep river water and the deeper and less cloudy water of the lake.
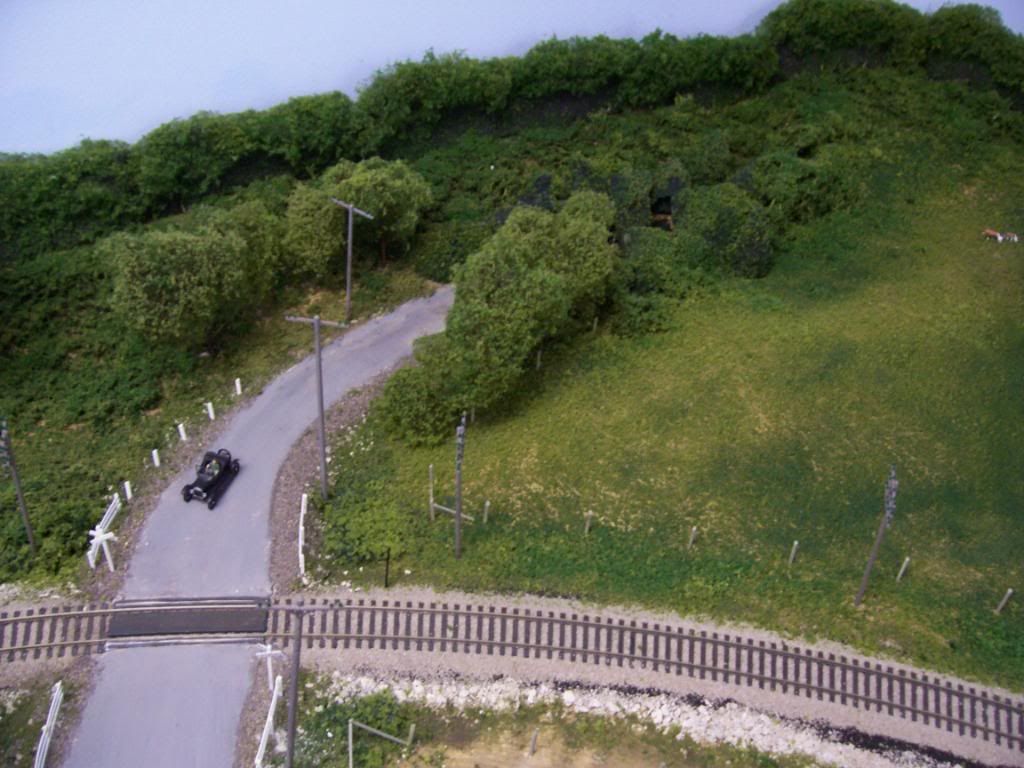
Like much of the sleight-of-hand we perform, it looks best when viewed from eye level, while an aerial view often reveals the ruse. [:$]
I had originally intended to “cove” the joint where the “water” meets the “sky”, and paint the colours of the water up onto the coved area, ending where the act
Thanks for all the details I guess I’m just getting a little too hung up on trying to make the transition in the water colors perfect or at least not fake looking…
Going from a river to ocean even on google maps actually looks fake, the harbor 15 minutes from my house is just a fairly hard transition from brown to really dark blue
im afflicted with a case of perfectionism that I need to get rid of a bit
matthew
Cowman-- Just for the record, that’s acrylic GLOSS gel, not matte. The matte stuff isn’t shiny. I use acrylic gloss medim for water, too. With the 40% off coupon, it’s about $15 a quart at AC Moore or Michaels.
Matthew, I understand where you’re coming from there. I’m going to try this plaster method on my sectional layout soon. I’ve been thinking the past couple days about how I’m going to do this. Even though I’m not going to have a transition in my river, having the water look realistic is always a concern I’m thinking about.
For applying the plaster initionally, I’ll use a putty knife to get the desired thinkness. 1/2 inch is what I think is used in the photos. Then i’ll use a very soft bristle brush to get it smooth. For currents/ripples, I’ll go to a stiffer brush to work the plaster up and create texture. For your transition I would paint both colors in the same sitting. Wouldn’t wait for one color to dry so I can blend in the colors alot. I’m no river expert here, and I’m most likely wrong, but I would imagine the darker water (deeper) will have way more current than the brown water. Will be more texture there.
This is my opinion. Might be helpful. I tend to think things through a lot before I take the plunge. Can always try a sample board with various textures and paining techniques. See which appeals to you most. This way you can look at it from different angles, different lighting.
Lorne
I would think it would be easier to make the weaves and current ripples using either the gel stuff from Michael’s or the wood side scenics gel, either way the thought being to paint on the clear gel on top of the final lalyer.
i have a test piece of blue foam that I try stuff out on and so far I have a pretty good mini river using sculptmold for the base and the magic water for the water llayer and then one of the gel products on top
matthew
I seemed to have missed this thread when it first appeared about a month ago.
I have just emerged from a 4 month ordeal using Woodland Scenics Realistic Water to model a river in an urban environment (the south branch of the Chicago River in downtown Chicago).
Admittedly, I brought this on myself by making the river bed too deep, requiring a 1/2 inch pour in stages. Woodland Scenics instructions call for pours at a depth of 1/8 inch or less and recommends no more than two pours. I poured Realistic Water in 1/8 inch or less increments, and it took 5 pours over a 4 month period, because it took as long as 50 + days each for two of the pours to clear.
Throughout this period, in addition to being tempted daily to tear it out and start all over, I often thought about just painting the Hydrocal river bed, just like the first time, followed by a varnished finish as an alternative to Realistic Water which I will never use again.
After reading this thread and viewing the photos, that is surely what I will do next time.
Rich
I’ve had much better luck with magic water I have done some deep pour tests and it cures overnight and is pretty much crystal clear So far on my layout I’ve only used it on the river section, I’m working my way down to the ocean/harbor Matthew
I’ve used magic water only in a test making a small pond. Wasn’t overly impressed. It was only one pour of roughly 1/8" deep, but was very bubbley. The water effects turned out nice, however. Was thinking of trying the water effects on the plaster water and seeing how that turns out. But for the price tag attached to magic water, I won’t be using that again.
Lorne
Sorry to hear of your troubles with Magic Water. There’s a couple of important points about using Magic Water that may be of interest and worth repeating.
(1) The 2 part MW must be mixed really well before pouring. Not fast and hard, but a gentle stir until the mix turns clear again - no streaks.
(2) When teasing MW during it’s last hours of cure, to get a texture, there’s a point where it’s cured too far, and more teasing will trap air bubbles permanently and the mix will start to cloud. Stirring/teasing 1/4 - 1/2 inch deep Magic Water at this point in the cure really made it bubbly and cloudy. For the surface texture, I kinda paint on partially cured MW (after about 12 hrs of cure) with a craft stick on top of the fully cured level pour, teasing and spreading it around about every 15 mins until it gets too cured. I have not been able to achieve a very high/coppy texture. The MW keeps settling a little. I use the gel (both medium and thick) to get more roughness and a higher chop where desired.
When I tried the MS Realistic Water, it lost too much volume and cupped a lot at the edges. I never experienced these long cure times with it, though, that others have reported. [*-)] The cured Realistic Water was soft and scratched easily.
The cured MS Water Effects discolored on a test falls within 24 hours when I covered it with Magic Water. I have had no such reactions when using the Liquitex gel and Red Devil caulk w
I prepare a vessel to contain the pour, even to the extent of using hydrocal or plaster of Paris. I paint the bottom and banks, and then make a least two pours of a two-part epoxy, a finish grade epoxy. I tint the epoxy and add a pinch of plaster of Paris to make it appear to be turbid.


The top layer is stippled gel gloss medium.
Crandell
Real nice, Crandell.[:)]
Crandell:
You have nicely captured the look of turbid water. To me it looks more real than the effect you get with just adding paint for color. I’m going to file our idea of adding a little plaster to the mix to use when I finally get around to adding water to layout.
Joe
Thanks, guys. Joe, I can’t stress enough that I’m talking about a 1/4 tsp of the plaster powder in about two cups of the epoxy mixture, and I only do this for the topmost layer of two or three. In this case, I poured two clear layers and left it for about three years. I got tired of the artificial look and added the tinted and plastered layer over it, plus a fourth layer of the stippled gel gloss medium atop that last epoxy pour.
Note the look prior to the two top layers, both clear:
Selector, I’m confused, are you saying the top two layers being transparent with the color only being under those clear layers got to be old? I’m getting torn between just an 1/8" of magic water or like an inch or so of magic water I was planning on my river being transparent and then going to tinting at the line where you crossover to the ocean/harbor Matthew
Crandell:
Thanks for sharing your method. The contrast between the two photos really illustrates the effect of adding the plaster to the finish layer. The water looks just like the creeks I used to wade in as a boy.
Joe