I have been into model railroading for some 30 years, but have been away from it for about 20 years and just now getting back into it. The question that I have is - what is the difference between a modern laser cut wood craftsman kit and say the old Campbell wood craftsman kits? I have three of the old Campbell kits, but have always been to intimidated to assemble them.
Hi,
Up until 6 months ago I was in a similar situation. I had built a couple of Campbell kits, but vastly preferred working with plastic. About 10 years ago I tried one of the earlier laser kits and it was a mess - mainly because the wood was not etched will and had a tendency to split (like the balsa planes of my youth).
With the urging of a fellow on this Forum, about 6 months ago I picked up a few of the newer laser kits that were “just what I needed” for my new HO layout. I ended up building 8 of them - most from BTS (better than scratch) and two other companies.
The results were pretty good - although I still prefer working with plastic. The laser kits take more patience (especially waiting for glue/paint to dry), and in many cases it was like putting together a structure board by board. It isn’t easy, but the results are fairly rewarding.
I would suggest you check out some of the simpler models and give a couple a try. You might be pleasantly surprised - as I was. Oh, regarding Campbell kits - they are fine too.
I use to scratch build R/C airplanes and fly them. Yet I was a little intimidated and hesitant to start the Kanamodels Grain Elevator Complex kit I had been given. I dove in and found it straight forward and quite a relaxing experience. Read the instructions thoroughly and it will be easier than you think. I just worked on it a few minutes a day as I would let the glue dry overnight on one part before moving on.
As far as the splitting wood issue goes, sharp blades go a long way towards avoiding this. I keep two knives on the bench with #11s in them. One always has a new blade for important cuts and the other is used for cuts that are less critical though it is also changed often.
In the photo below are the first two structures of the kit that I have completed. The door in the Grain Bin is a plastic insert. On many of the prototype photo’s that I looked at online, I noticed the doors were made out of the same wood as the walls, so instead of using the plastic insert on the office, I cut out a door from some of the scrap and even put a window in it like the prototype I saw. I also had to do the door frame. I also printed off an linoleum floor and glued it in.
In the Instructions it said that these buildings were poorly painted with a cheap white wash and sometimes not painted at all. On my grain bin I have left bits of bare wood that were missed by the paint crew and there is a shiny spot on the roof where some fresh tar was added to stop a leak. This is just what I saw in a big coffee table book of Canadian Grain Elevators. A little weathering still to do and hopefully I’ll be happy.
I now have the Kanamodel CP engine service facility kit and the outhouse kits to build. I don’t know why but I think wood kits look much more realistic than plastic ones. I am sold on them.
I can’t answer your question on your old kits but I’d just dive in SilvertonRR, It’s easier than you think.

I will also confess to being afraid of these kits. I bought Weimers Mill" from Branchline Trains, and it sat on a shelf in my workroom for two years until I felt “worthy” enough to start it.
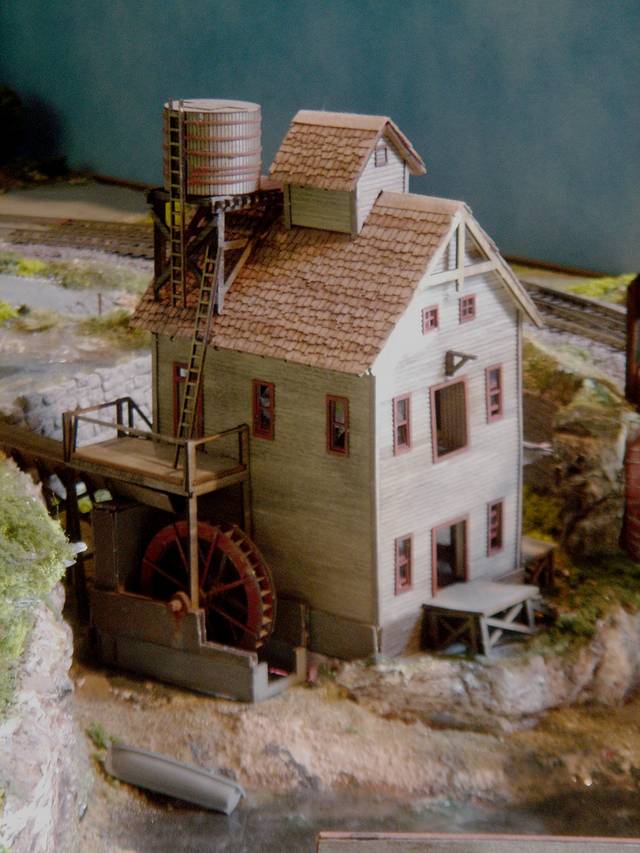
Really, the fear factor shouldn’t be there. The techniques are a little different, but no one should think that they can’t do something like this. I spent a lot of time on this kit, working carefully, but I enjoyed the effort and was very happy with the results.
Silverton,
Although I’ve never put together a Campbell kit, I have put together a couple of older Alexander Scale Model and Suncoast Model kits from the 60s and 70s. I have also put together a few American Model Builder (AMB), Branchline, and Blair Line laser kits.
One major difference between the two types is that the older kits were usually cut with dies rather than lasers. And, with the die-cut kits, you usually had some filing to do. They also had dimensional stock that had to be cut to size. A lot of work but still gratifying when completed.
The laser kits, OTOH, come with ALL the parts already cut but still attached to the sprue. There is virtually no filing needed at all. You just cut the parts from the sprue as the assembly instructions indicate.
The offerings by AMB are superb when it comes to fit. Here’s their Dill’s Market kit:

The windows and glazing are included in the kit and you can modify them so that they are either partially open, fully open, or closed. (For me, that really adds to the realism.) I also find that the assembly instructions for the laser kits are generally pretty good and come with helpful diagrams.
Silverton, I would give one of the laser kits a try. You can generally pick up an inexpensive one for $10-$15. Hope that helps…
Tom
I’ve built a couple of them and like the way they turned out. I learned a few tips along the way:
-
I assemble them with wood glue (although plain white glue would probably suffice. To apply, I put some in a plastic lid, and brush it on. I keep a cup of water nearby to keep the glue from setting up in the brush. Squeeze, or blot, out the excess water before you use the brush. Don’t put alot of glue in the lid, as it dries fairly quickly and you don’t want to waste it.
-
I glue 1/8" square wood strips along the inside walls. This helps keep them from warping. After the glue dries (I give it at least 24 hours), I prime the walls with rattle can auto primer. This seals the wood. This is important if you’re going to paint them with acrylic paints.
-
I file or sand the edges of anything that gets glued to another part.
-
After the final exterior color is dry, I weather the building (I used Bragdon powders) and apply a coat of Dullcote to seal the powders. If you want to give the building a heavily weathered appearance; peeling paint, Get a solder brush from Radio Shack. It has metal bristles that do a good job of giving it that “peeling paint” appearance.
-
Above all, take your time. Read the instructions carefully (I know, it’s hard to do if you’re a man) before you start. Before you start, put in a NEW blade in your hobby knife. I can’t stress that enough. I also have one of those “self healing” cutting pads; it’ll keep a sharp edge on your blade longer.
Have fun!!
 Rockmaulville passenger depot
 Marjenie Freight Company
[IMG]http://i20.photobucket.com/albums/b247/momarlon/Clinton-Golden
I really appreciate everyone’s comments and encouragement. The three kits that I referred to, were: Red Mountain Mine, Idaho Springs Mine and Ten Stamp Mill. I guess I just need to start slow and not worry, but all your tips were great ideas, Thanks.
Here’s a pic of my version of the National Belle, the mine that the Campbell kit models.

Modern laser kits can seem intimidating, but a Campbell kit is actually more work. Just take your time and read and follow instructions and you’ll be OK. Do some thinking about paint and how you’ll locate the mine on the layout. I built an ore sorting and loading dock similar to the one below the National Belle to add on to the kit.
The real difference between the two is in the die cut kits like older Campbell, as the dies got old, they did not cut as deep or cleanly.
Forgot to add, use gel ACC to assemble.
I like what you have done with your arrangement of the National Bell. It’s really not that far removed from the original. Unless there are other books, my favorite is “The Rainbow Route” by Sloan and Skowronski. That’s a good idea about the additional ore sorting and loading dock. Thanks
So you would prefer a gel ACC as apposed to an Elmer’s wood glue. Is speed the difference or a better bond?
You did an outstanding job with Weimer’s Mill, it looks so professional. If I do half this good I’ll be happy> Thanks
I appreciate the words of wisdom and your train station looks wonderful. Thanks alot.
As of right now, I think I prefer working in plastic also, but we’ll see how this wood kit thing goes. You ended or mentioned East Texas, once upon a time - I lived in Livingston, Texas. Any where close to you?
SilvertonRR,
Some people prefer using one type of glue and gel ACC is a good all purpose glue for working with wood kits.
I am one of those who uses the glue that I think works best to make a particular joint or allow a better method of assembly. I tend to use a lot of Titebond III wood glue. It gets tacky quickly, is easy to manage, and provides a strong bond so long as the surfaces aren’t slick. I also use ACC, Aleene’s Tacky Glue, and Seal-All. Oftentimes, a good kit’s instructions will be specific about what to use in certain places.
Here’s a pic of my Banta Silverton Depot:

It is a laser kit that is fairly simple and straightforward to build.
I am a wood structure fan. I built a few Campbell kits about 20 years ago and learned a lot. Don’t be afraid to try. Northeastern Lumbar has wood pieces of various sizes, so if you make a mistake, you can buy another piece of lumbar and try again. [:D]
About 8 years ago, I bought my first Fine Scale Miniatures kit, Skinner’s Row. The instructions are VERY detailed. I took my time and it was about 6 months later that I completed the kit. I learned even more about building wood structures from that kit. I have built several other Fine Scale Miniature kits and kit bashed several others. But, the best part is, I learned techniques that I now use to scratchbuild my own structures>[swg]
Try it. You will do fine!![tup]
SilvertonRR
There is one distinct advantage to lazer cut kits. That is the ability to paint individual components before assembly. One example would be where you want your window frames to be a different colour than the wall around them. Painting the parts while they are still on the sprues is easy (although you may have to touch up the edges after cutting them from the sprues). When you assemble the model you will have very clean separation between the colours. That is hard to do with a styrene wall with the windows moulded in.
You might have to use more than one coat of paint to get the desired finish.
If you use wood glue you should sand or file the paint off the mating surfaces to allow the glue to penetrate the wood. If you use super glue that does not need to be done.
If you are going to use acrylic paints I would like to emphasize one suggestion that has already been made in a previous post. That is to prime the flat pieces on both sides before painting. Cheap automotive rattle can spray will do fine. Without the primer the water in the acrylic paints may cause the wood to swell and warp and when dry the distortion will be hard to smooth out if not impossible.
Good luck with your projects. Let us know how they turn out.
Dave
I was very comfortable buldong the plastic structure kits. Then for Christmas I got some laser cut wood Brancline house kits. Yes they take longer to build - like building a house from scratch, but the end is well worth it. I now have quite a few laser cut wood structures on my layout. I do not know if I will go back to plastic.
In fact at one train show I picked up a couple of old campbell kits. It took longer to build the structure as all the wood had to be cut to lenght (being old the wood splintered very easily) but on the layout they look good.
Trainman