Just took possession of a lot of Micro Engineering flex track I was told it was a little stiffer than Atlas (which is almost limp in nature compared to ME’s product), and it has to be handled carefully to avoid damaging the mounts. My question is: Any tips on handling and forming the track? I need to make some nice broad curves, so handling large pieces could be difficult.
Betamax,
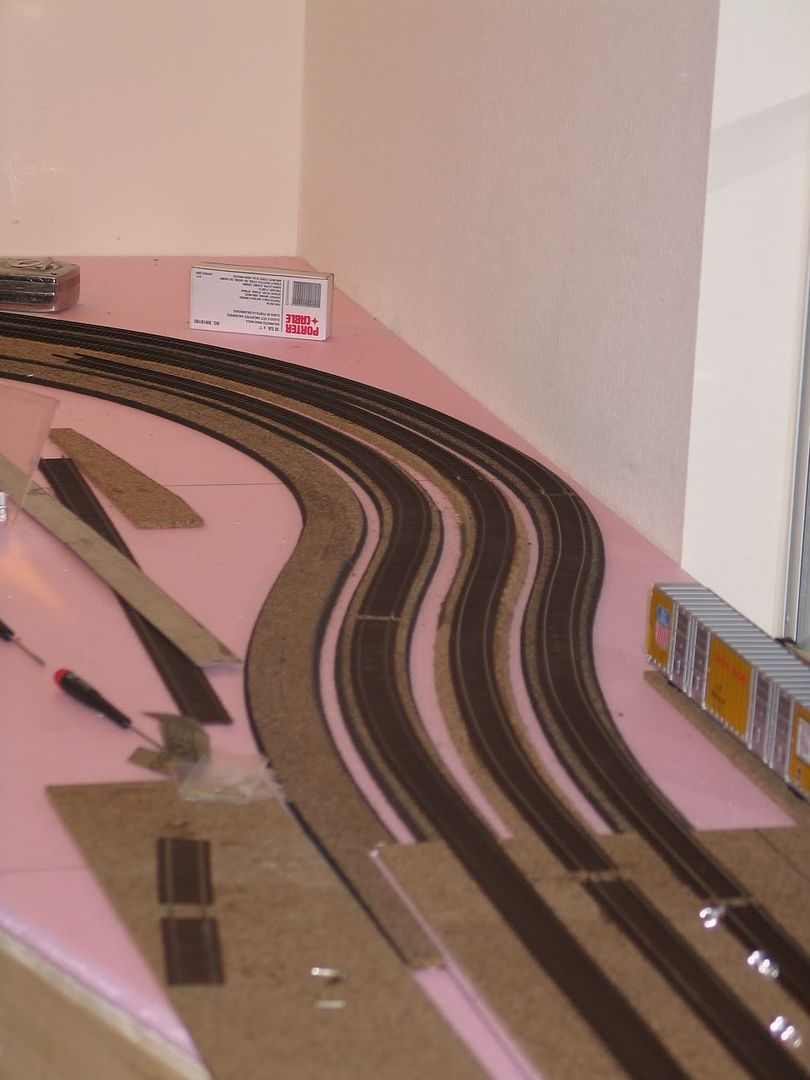
The best suggestion I can offer is to take your time! Start at the end closest to your straight track and work it slowly, curving just a little bit at a time, making several passes down the length of the track. The 3 curves in this picture are all MicroEngineering flex, code 83. The pre-weathered track is harder to bend than the non-weathered track. I did solder the beginning point of the curve to the tangent before bending.
Don Z.
I deal in N scale but it’s made the same way. Ditto what was mentioned. I actually like the stiff track because you can shape it and not really have to secure it down to maintain its shape, unlike Atlas which has a “fixed track/free track” architecture which needs nailing/pinning down to stay in shape.
The other real advantage of the stiffer flex track is that it’s more difficult to really make a bad tight radius curve, and if you do, it looks obvious enough where you can nudge it out and correct it.
Oh yeah, and as for the end ties, cut them at least 3-4 ties from the end of the shortest rail and save them in a container somewhere (Just turn the rail upside down and snip the tiny connecting piece that links them to the other ties). You will need them later on for filling your tie gaps.
Thanks for all the advice. Moving on the the other question I forgot to ask: As the track is quite stiff, can I assume that there is no “sliding” rail, or is there a secret to determine which one goes on the outside of a curve?
There is no “sliding” rail in ME track. If you turn the track upside-down the tie joint separations are evenly alternating. Either way could become the curve.
I found that laying the track on the roadbed and slowly working it from one end worked best. I braced my thumb against the roadbed and slowly flexed it using my fingers, which were spread as far apart as comfortable. This allowed a smoother flex. I’m right-handed, so I tended to hold the track in place with my left hand while flexing the track with my right hand. When you start flexing a straight piece for the first time, the opposite end will begin to flex away from you. Just keep working it.
If you need to curve the track away from you I did the opposite, bracing my fingers to the roadbed and flexing the track with my thumb.
One of the rails does slide, or maybe both of them, that’s how it allows you to make a curve. You’ll still have to trim one of the rails. But you don’t have to worry about which way the track is facing when you flex it, it will flex both ways.
After flexing it, you’ll probably have to walk some of the ties around a bit as well to get them straight and evenly spaced. There are several separate sections of ties on each piece of track. Again, it’s a good idea to work from one end when doing this.
Once it’s flexed, however, it holds its shape very well. I’ve been running my layout since I laid the mainline for almost two months now, and the track isn’t attached to the roadbed yet. I’m running on top of a masonite spline, so I’d know if it had moved around…
Oh, and it’s not so easy to take a flexed piece and straighten it. If you sight down the rails you’ll usually end up with a lot of kinks.
Randy
I use the track gauges made by RibbonRail. These are metal and fit between the rails in HO. The straight sections come in various lengths from 3 inches to 18 inches. For tangents you slowly and patiently run the gauge through the flex track a few times and the track’s stiffness should result in a perfect tangent
Ditto for curves. The RibbonRail gauges come in a huge number of radius (radii?) all odd and even numbered from 15" radius up to at least 48" radius.
You slowly and patiently force the gauge through the flex track and after several passes you will have a curve that more or less matches that curve radius (I say “more or less” because if you lay your cork roadbed to a perfect curve it is rare for the track to exactly match it – you may have to adjust a bit). I have yet to damage the M-E track using this method (knock wood). The radius options
http://www.walthers.com/exec/page/manuinfo/v170
Dave Nelson