I have a radius track in the rear in the corner of my layout and will have the town in the front of the track upto the edge of the layout, any thoughts or pictures on ideas and layout of streets and buildings would be helpful

Nope, all I get is the “404 Not Found”
Mike.
I’m unable to see what you’ve posted. It may be my browser, but did you post your picture on a site that can be accessed by this forum?
Are you trying to post the image directly? Check out “How to Post a Photo” at the top of the General Discussion
This is a small city.


The link is to a sign-in page for one’s Google Account, but since I have no Google Account, I can’t sign-in.
Wayne
Don’t feel bad, I have a google acct and I can’t see it.
This what I get:
404. That’s an error.
The requested URL was not found on this server. That’s all we know.
I don’t see any place to sign in.
The OP just needs to read the sticky on posting pictures.
Mike.
I don’t see anything too difficult about what you wish to accomplish.
Once you’ve tested your longest locomotives and rolling stock on that curve to determine the needed clearances, simply add the town in whatever form looks suitable to you.
Your streets can meet the track at any angle you wish, and can cross the tracks or dead-end at them.
Don’t be afraid to alter structure kits to accommodate the curve, as lots of real structures were either modified to allow new tracks to be laid nearby, or were built after the tracks were in place, and done in a manner which didn’t impinge on the tracks. This could include curved or angled walls, or chopped-off corners of structures.
Your streets could all be parallel, or not, as best suits what you envision. I don’t have too many houses on my layout at all, as there’s simply little room for them after the railroad-related stuff and the industries which use the railroad are in place.
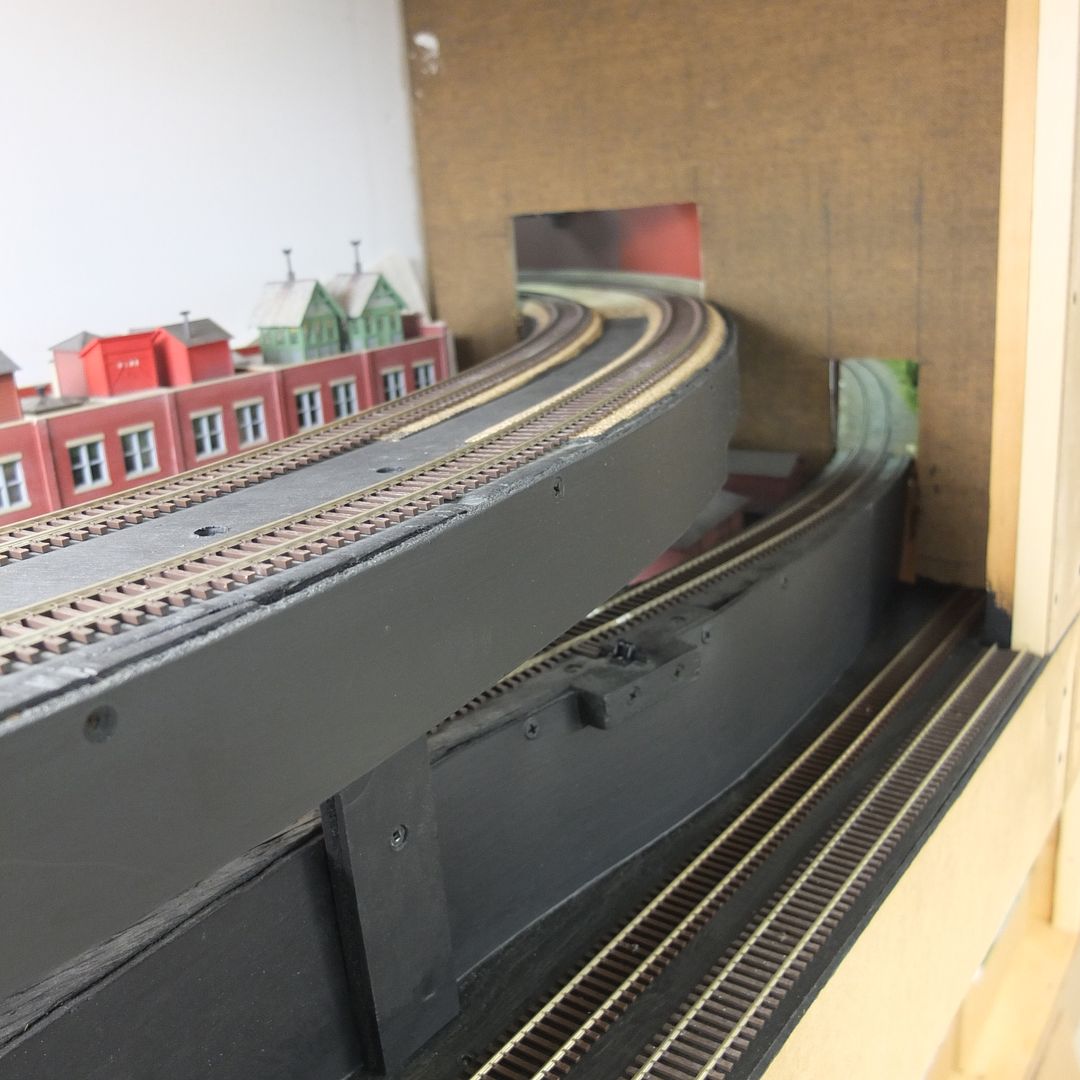
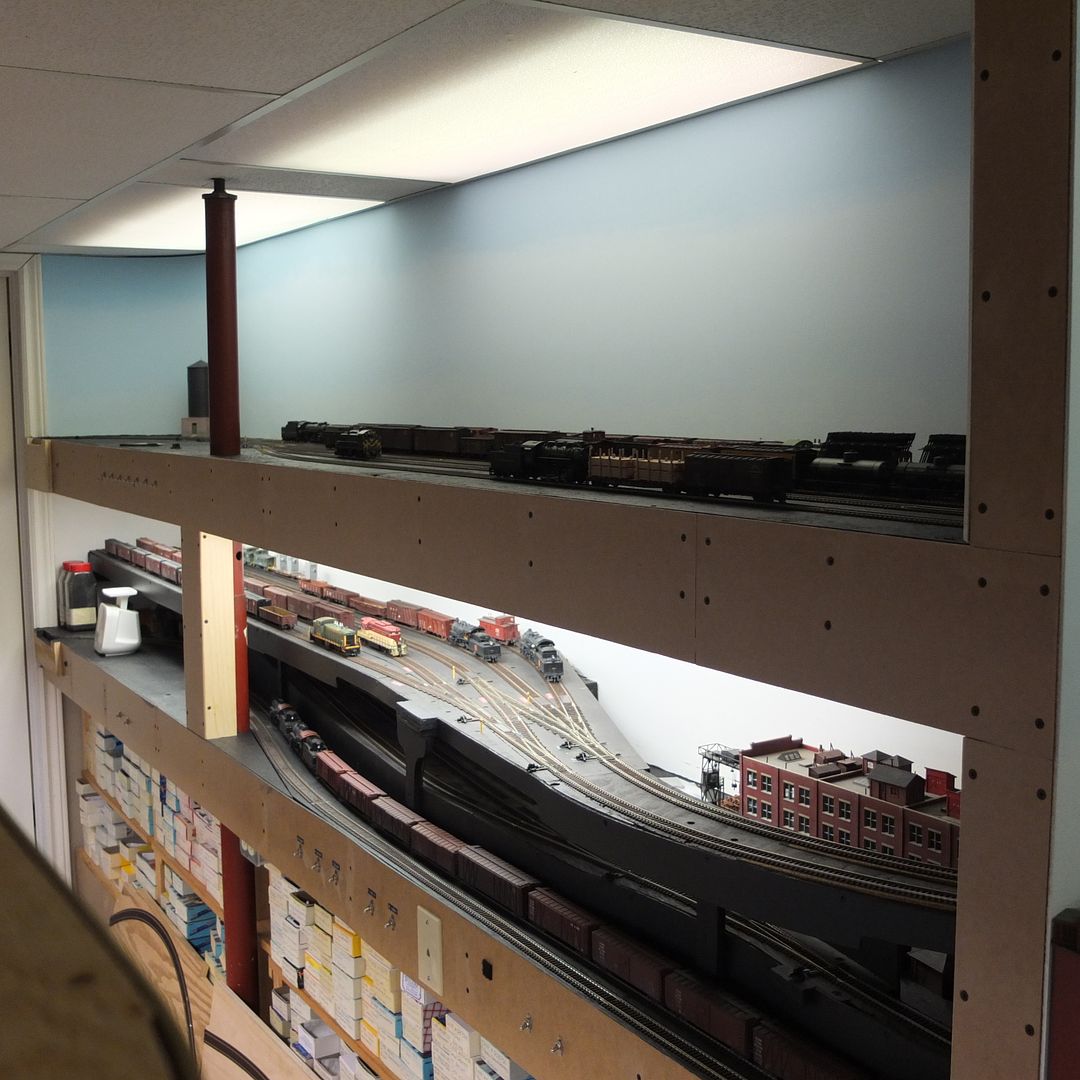
Here are a few scenes in which the tracks decided the layout of the towns through which they pass. (click on the photos for a larger view)
Curved track all over the place here, and structures built or modified to accommodate them…
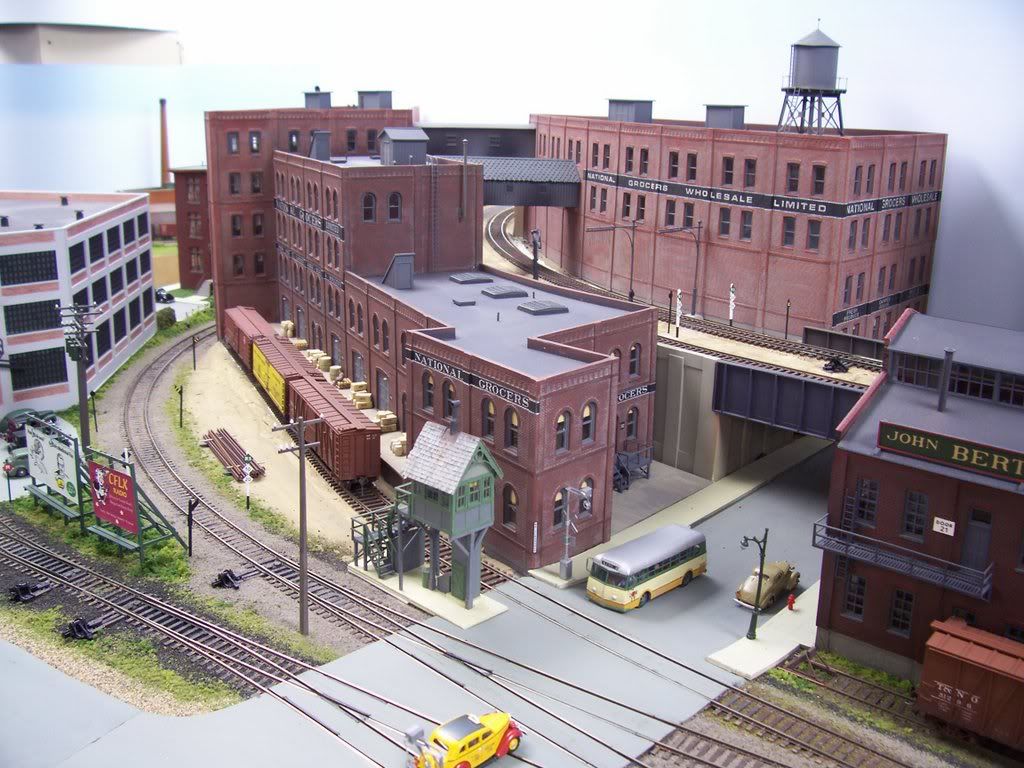


Not enough room for the whole building?..
[IMG]https://i23.photobucket.
As others have shown, I also prefer to have the trains running through the town/city, not forming a hard line between scenes. This lets the trains “hide,” however briefly, behind buildings, and makes the run seem a bit longer.
The use of backdrops or background flat buildings lets you extend the town scene into the back wall without commiting any additional real estate to it.
I also like this as well. I think it makes things more realistic if the trains “disappear” behind some structures as well. I think what attracts me to urban modeling is the opportunity to use more foreground to enhance a scene.
Ed
Wayne,
That is really well done sir. Thank you as always for sharing.
There are many things I really love about that scene. I really like how two levels of track was worked in. Mainly the elevated track and viaduct. I am looking to do something very similar to this where I use buildings on a curve to hide the trains going into hidden staging.
Ed
Thanks for your kind comment, Ed. All three of those curved tracks do indeed lead to staging yards.
Wayne
My layout has a 180 degree turn around the end of an aisle where I located a number of roads and structures to represent a portion of a town. The tracks extend almost to the backdrop opposite the center of the aisle. The entire “town” scene is about 7 feet wide and a little more than 2 feet deep on each side of the aisle. The scene uses complete kit and scratch built structures, kitbashed and scratch built low relief background buildings, plus photo building flats against the backdrop.
Here is an overall view of the right half of the town scene. You can see the tracks where they cross the street at grade. The roundhouse in the right rear and the building with the truck trailers out front were scratch built to fit the space. The three story brick building against the backdrop and facing the road was kitbashed by using two walls of a single kit.

Here is another view of the same area from a slightly different angle. Note how the intersection in the foreground is mostly in the aisle. The angle between the two streets is very close to 90 degrees.

Here is an overall view of the left side of the “town” scene. The low relief buildings on the left and the Foster Farm Equipment building are all scratch built. The remaining buildings are kits. The low relief building at center rear was kitbashed from the other two walls of the kit used to kitbash the low relief structure in the previous two photos. Note how different the two buildings appear due to different paint colors.

Here is another view of the left half of the “town” scene from a different angle. As before, you can see the track curve as it crosses the roadway.
[u
That’s a good-looking town, and a pretty decent size, too. I also like the tips you offered regarding getting more mileage out of kits, including using two walls from one kit to represent a background structure, and re-painting the other two to create another background structure that doesn’t look like it ever belonged to the other kit.
Your comment about photgraphing structures and printing them for use as backdrops is also a money- and space-saver.
Very nicely done!
Wayne
I agree with Wayne. Great job.
Ed
Looks awesome! what size ground throws do you use
I will post some of my updates
