I have started building benchwork. At least, I have the plywood ripped anyway. [*-)] More progress to come as it happens.
Details here.
I have started building benchwork. At least, I have the plywood ripped anyway. [*-)] More progress to come as it happens.
Details here.
Awesome a new layout.
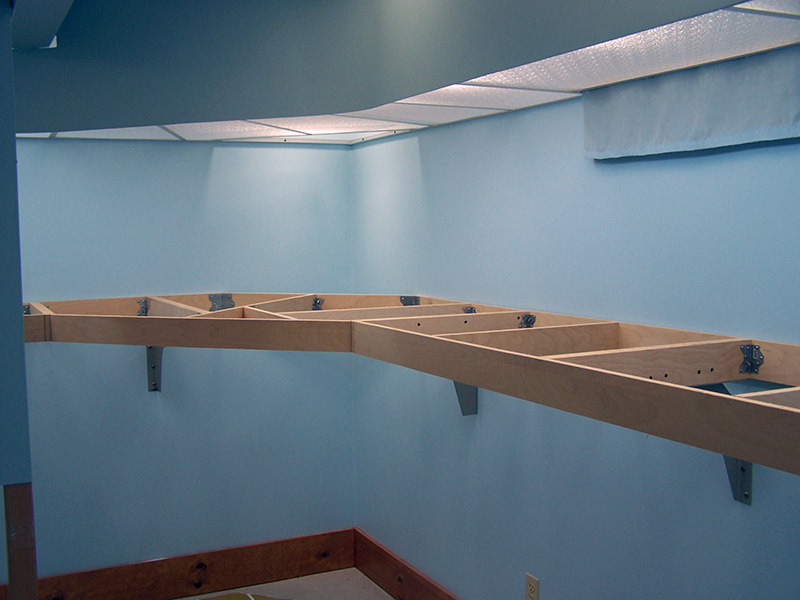
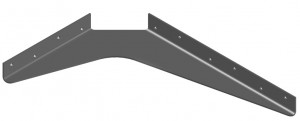
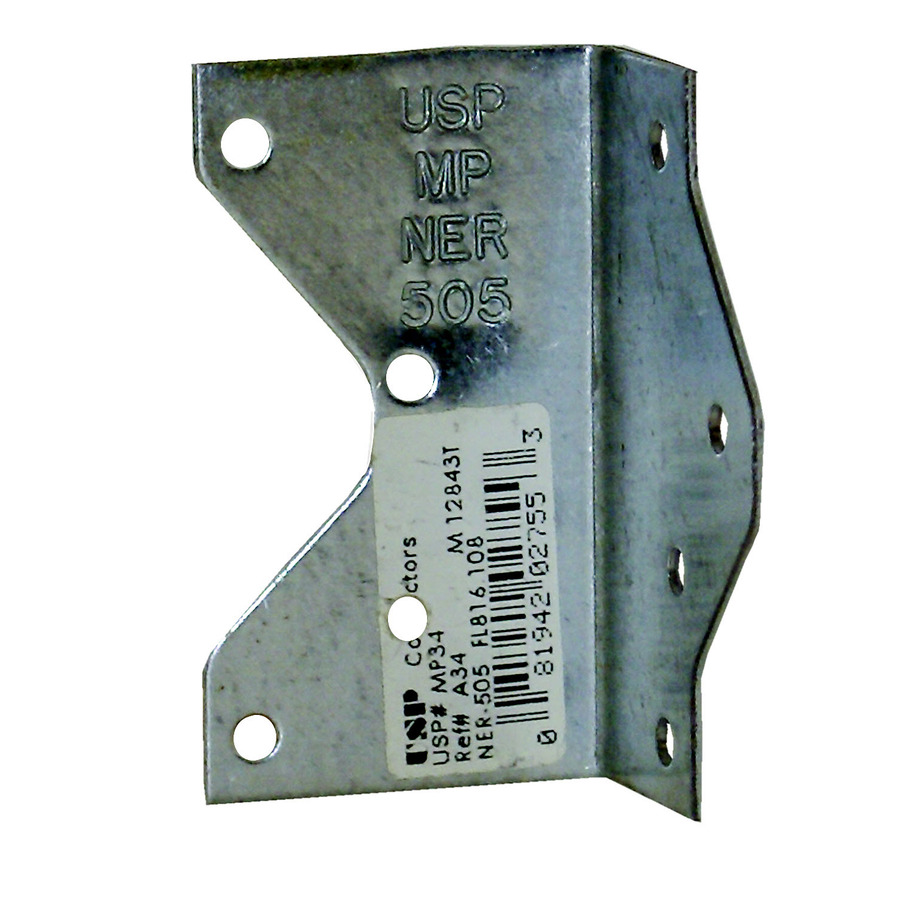
Made my selection for brackets to mount benchwork to the wall. I like this style better than regular L brackets with support strut. Should interfere less with the ‘sky space’ of the lower deck. Most are 12"X18" with a few smaller ones for where benchwork is less than 24" deep. Big box of them is on UPS truck headed my way!
Blog post about them here.
I like the idea of using those brackets. Since you’re making your benchwork from plywood instead of dimensional lumber, it will make joining the ends easier. I’d clamp them in place, with the ends overlapped flush. Screw one side in, then when you slide the other piece in, use wood glue and finishing nails to secure it. Plywood doesn’t take screws into the ends real well, unless you predrill them to prevent them from splitting. Even then, I’d predrill the holes with a drill smaller than the nails.
Can’t wait to see pics of your progress.
I will be using framing angles and #8x3/4" screws to construct the benchwork. A framing angle at every inside corner. This gives me two important advantages… screws penetrate into the face grain as they should and cross members can be removed from below if a position change is needed. I used this same style construction once before. It is time consuming (and bracket and screw consuming!) to build but rock solid when finished. If a trackwork change happens to put a Tortoise machine over a cross member then I can un-screw the crossmember and reposition from underneath the deck. No glue, no nails, no end grain fastening, no removing benchwork to modify.
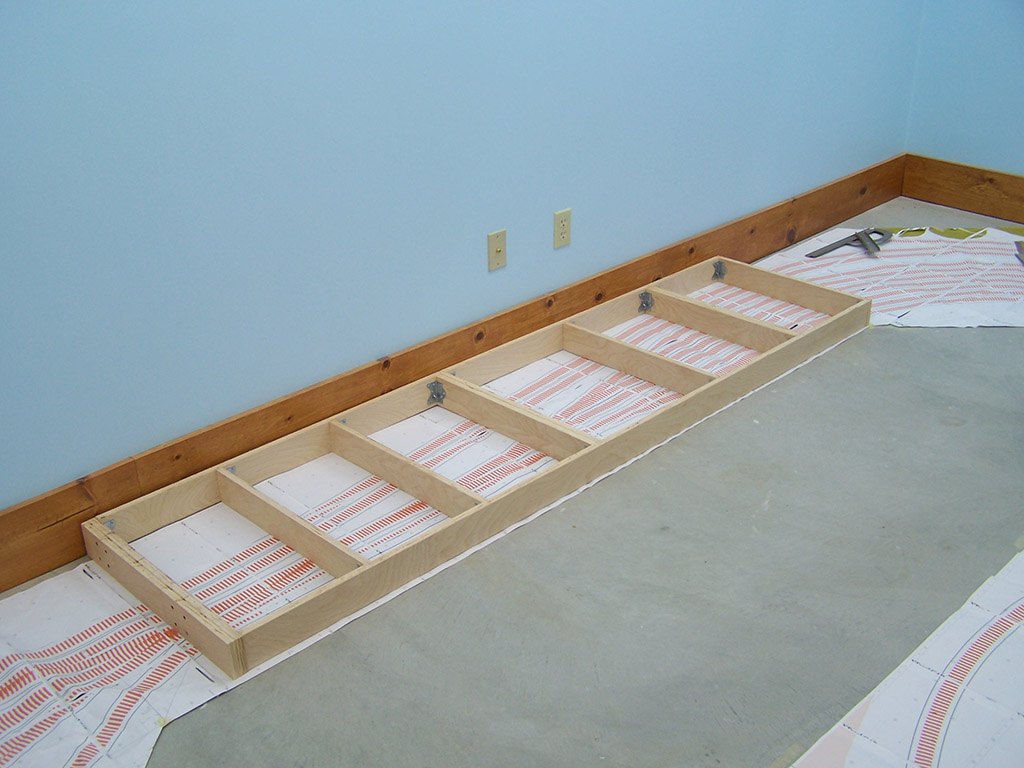
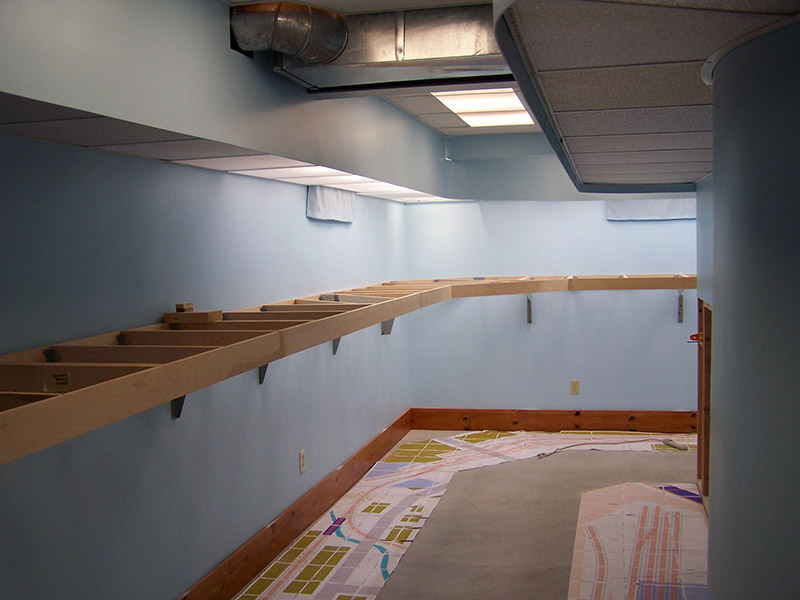
Section 1 complete. This benchwork is under the west end throat of Brittain yard. The switch concentration is the most dense in this area so if I can place the cross members correctly here then the rest should be easy. Full details here: http://www.lkorailroad.com/benchwork-construction-methodology/
Looking great Alan. Designing your benchwork with movable cross members is a great idea.
I have a question. How movable will your whole system be? (i.e. your entire layout) Could you move it to another location if need be?
Thanks for sharing
Derek
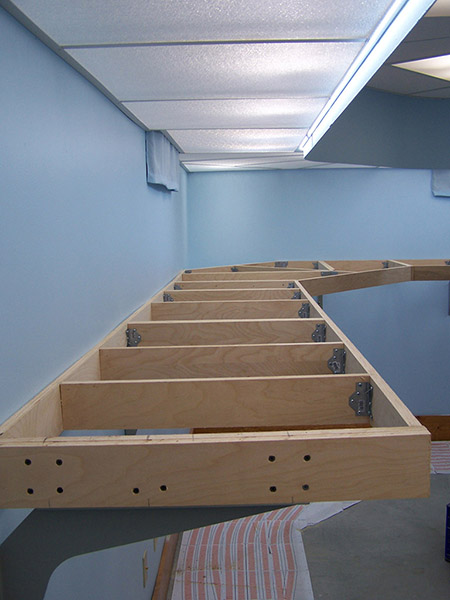
Movable, but it wouldn’t be easy. I am living by a self-imposed rule that the layout must be removable from the room leaving nothing but screw holes behind. That way a quick hole filling and wall repainting is all that is needed to return the room to its original pre-layout condition in the event we sell the house. Even the lighting valance and ceiling system comply with the rule. Armed with only a screw gun, one could drop the entire assembly to the floor in a single day.
Thanks Alan. Keep the updates on your progress coming.
Progress

Very cool!! I like the brackets where did you find them? What is the cost per bracket roughly? and what program did you use to print out a full size track plan?
Looking great Alan. I am impressed with the printed plan on the floor.
Could you share the process you went through to get the full size plan?
Keep the progress Pics coming
Derek
The track plan is made with XTrkCAD. I worked on it until I was satisfied (about a year). Then I took advantage of Byron Henderson’s Layout Vision service to review what I had drawn. His suggestions were incorporated into the design. The plan was then printed on individual sheets of paper with a common inkjet printer. The pages were cellophane taped together into one giant piece of paper. The rulers printed on the side of the pages were used to make sure each page was aligned correctly. I then cut off the sections of paper that extended beyond the benchwork marks on the drawing so that the paper size and shape represented the benchwork accurately.
Here is a blog post with all the detail: http://www.lkorailroad.com/layout-construction-begins/
Thank you Alan for the tip.
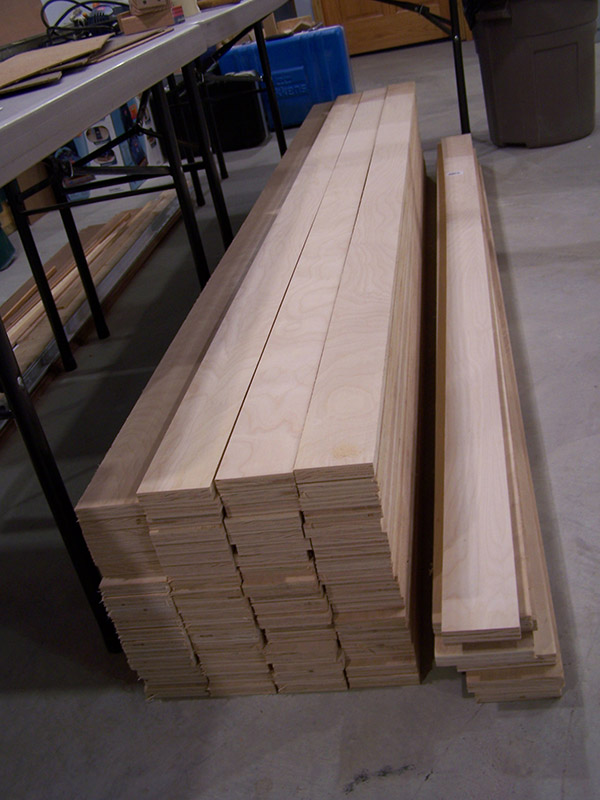
The layout is looking great. I had to comment because one thing is bothering me. That is the nicest plywood I have ever seen. It looks better than most interior lumber we have around here, and I live in the land of lumber, (Northern Michigan). Our plywood is mostly rough cut and no where near as smooth, almost like press board, but not as bad as particle board. How much is it a sheet? I payed $25 for a 4x8 sheet of 1/2"
JW
You need to look at 7 or 12 ply birch plywood for the nice stuff. Not cheap for a sheet of 3/4", BUT when you figure out how many “1x4’s” it makes and compare the price of the quality (ha) pine 1x4’s, it’s actually cheap. If they’ll rip through a couple of sheets for me, I’ll probbaly go that route when I start my new design, but I have no table saw, nor room for one, nor do I have room to set up a jig and a circular saw to do it that way.
–Randy
I believe your lumber provider will cut it for you. Maybe even no charge. Sure is cleaner that way. Sometimes even Home Depot or Lowe’s will do the same.
Thanks
Wayne
Most of the “Home centers” generally will only have a panel saw and radial arm. Even if they would rip your rather “$$$” plywood, most employees ability and condition of their “dull” blades really won’t produce the quality of the rips you want. You must know someone w/ a half decent table saw. You could buy the 3/4" baltic birch and have Home Depot/ Loew’s rip it in half (24" x96") for ease of transport and also handling to rip on a friend’s saw. If you want 3 1/2" joists, have the panels ripped to 25" and 23" this will minimize the waste (7pcs and 6pcs respectively) for 13 total per sheet.