I have a question. When i visited someone i met recently and looked at his layout, he made the moutnains using the wire and then laying plaster cloth over it. He suggests using that. I was wonderint if we could use the small looped wire like you would to form the basic shape, the get newspaper wet like you do paper mache and then cover it in a thick plaster from home depot. Could mix it think and do small areas at a time.
Rather than putting wet paper over the wire form and then and then coating it with plaster it would be better to simply dip paper strips into a soupy plaster mix and placing it on the wire form. This technique is messy but it works and is an alternative to plaster cloth. However, plaster cloth is a much neater and convenient method.
It was just an idea. The good hooby stores that carry it are 2 and a half hours away. The one close to my house is a special order for they deal mostly with the remote controlled cars/planes. A pretty decent store is about an hour away, but as soon as they get any in, they are gone and they usually have a waiting list for people looking to gewt ahold of it.
Sounds like you are just starting out. I would recommend that you get a good scenery book. Look on the MR web site and read through the descriptions of the different scenery books. This will be an investment that you can use for years. I still have and refer to the ones that I bought 20 years ago.
I was at a fabric store getting coton duck to make spacesuits for a backyard movie. They had a big batch of rags and leftover pieces cheap. I bought them and used them to make what would be a plaster mountain if it were on a layout-- six feet long and three feet high. Instead, I used it as a ground row representing the lunar horizon in the distance behind my space kids. Different use from model railroading, but same principle.
Yes, I am just starting out on making my first display model setup. I had a train when i was a kid, but that was 30 years ago. and just recently got a train. I am going with more of a scenic theme, a walton mountain inspired one. I was going to have it go thru spring into fall, with a lumber mill area, a carnival/circus area, houses, various water features, etc. This will be my first full layout i will be building.
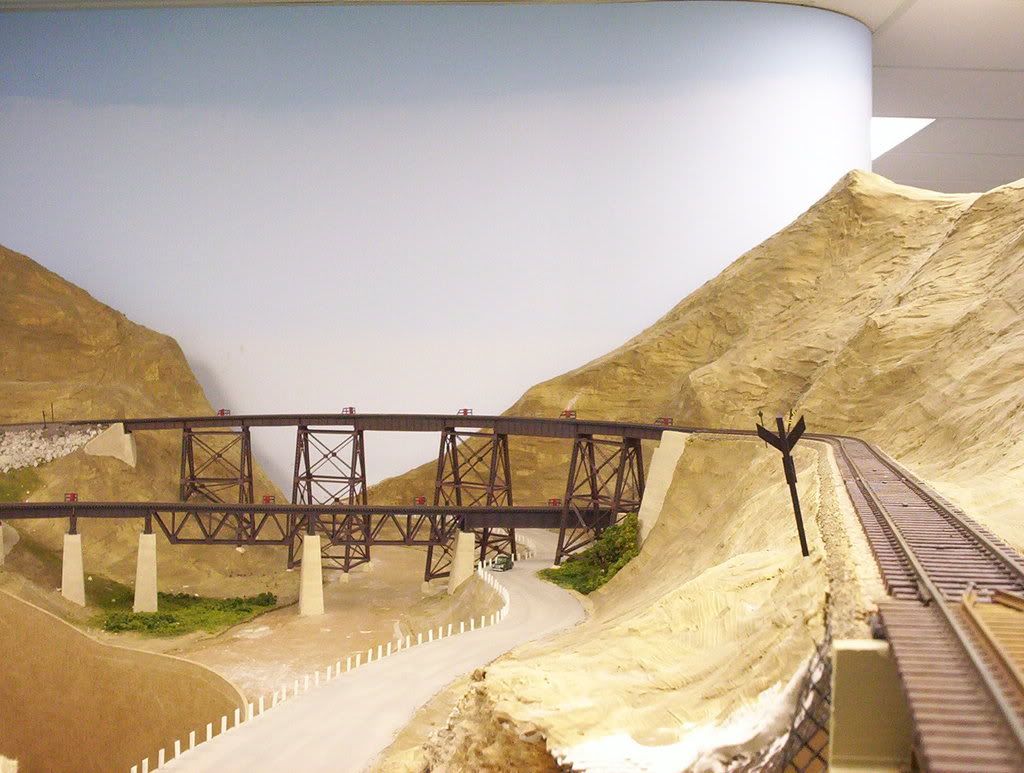
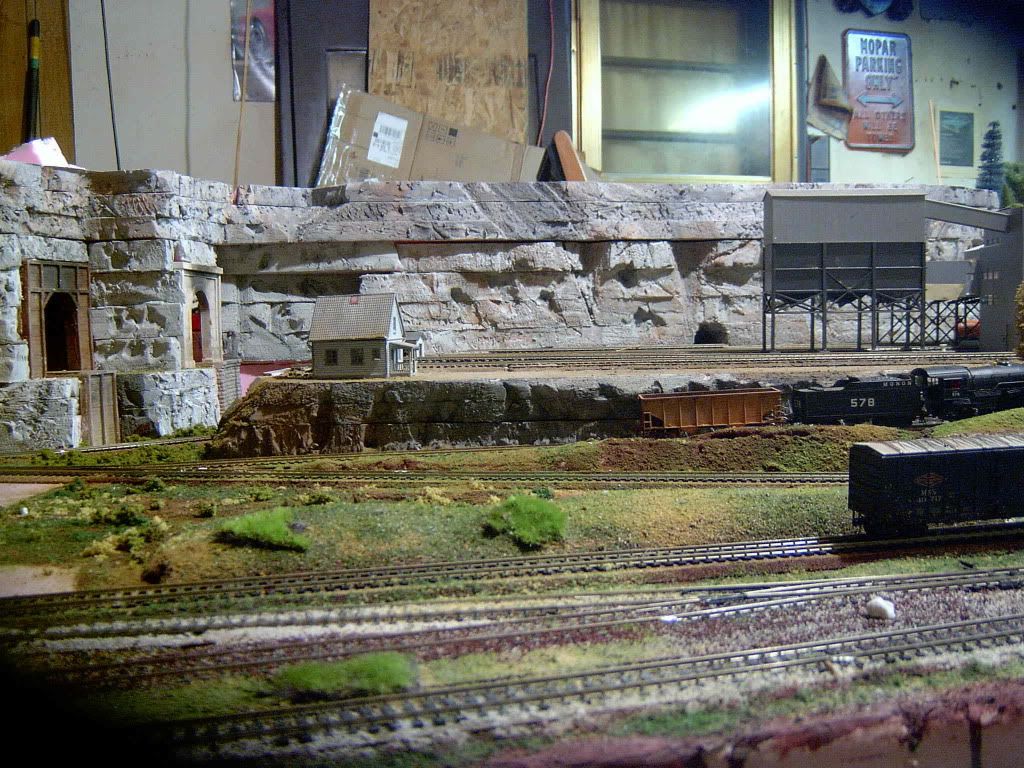
I made my landforms using aluminum window screen stapled to wood formers - either plywood cut to a suitable profile, or blocks and strips of 1"x2" temporarily clamped to the benchwork. Alongside the track, the screen was stapled to the sides of the cut-out 3/4" plywood subroadbed.
I then used a putty knife and scraper to apply a fairly stiff mixture of Durabond patching plaster over the screen. The number following the name is the setting time, in minutes - I used Durabond 90. Whichever setting time you choose, mix only what you can use in that time, as you cannot slow the setting time. After each application, and before it had set, I used a cheap 2" paintbrush, dipped in water, to smooth the knife marks. After the plaster had fully cured (I waited a day or two, but you can leave it longer if you wish - in my case, the vast expanses of raw plaster under bright lights was giving me a case of snowblindness), I used the cheap brush to apply a coat of flat interior latex paint, in a suitable “dirt” colour. I first tried the paint full-strength, but it was difficult to spread, so I thinned it about 50% with water. This gave decent coverage and was very easy to apply. Anything shown in the photos below that’s still dirt brown will eventually be covered with trees and other greenery.
This photo shows an unfinished area to the right, with the underside of some of the “mountain” visible. As you can see, the temporary supports (1"x2"s) have been removed, and the screen/plaster structure is fastened only to the roadbed - it’s entirely self-supporting.
I second the suggestion to get several scenery books, there are so many different techniques for a varity of scenic effects that just one book leaves you short. In some places one method works better than another.
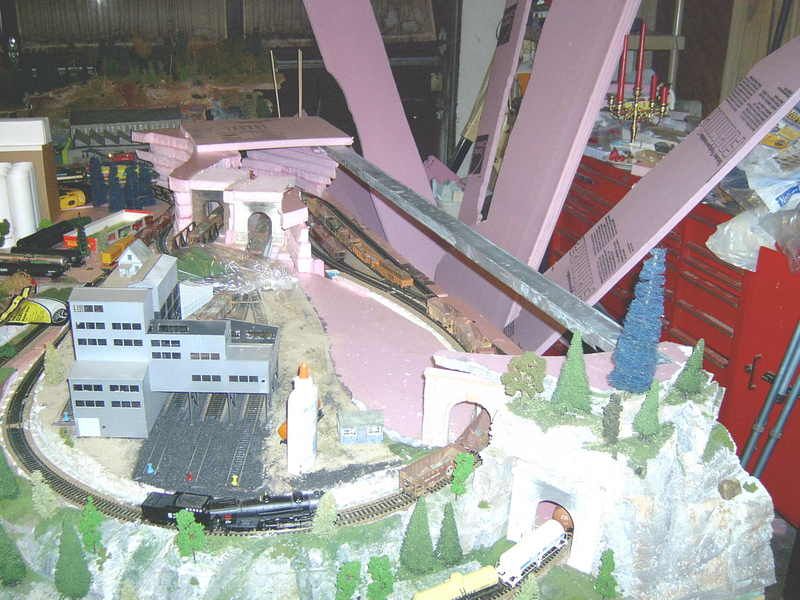
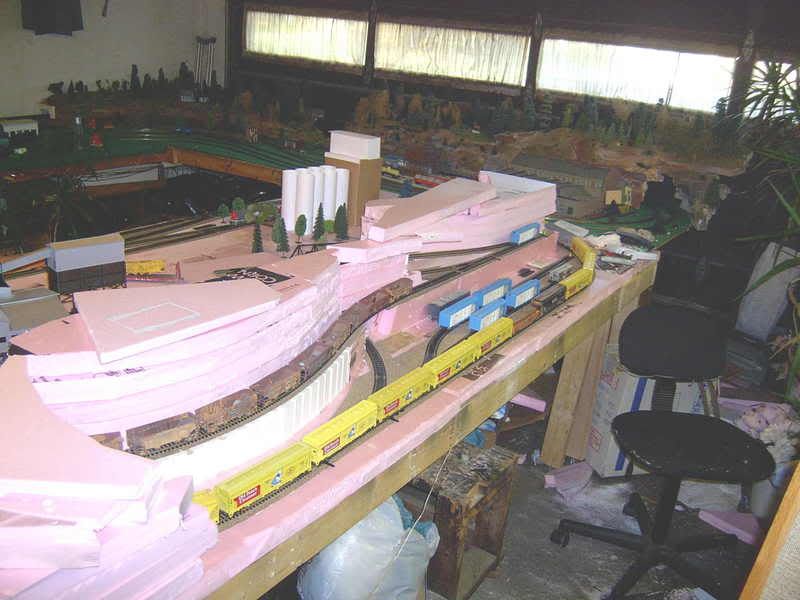
I prefer to use extruded foam insulation (pink/blue) for my close hills. Lets me plant trees, fence posts, etc in the mid-scene area. For distant mountains plaster cloth, plaster soaked rags, newspaper or paper towels will all work. I plan to use glueshell, using 50/50 white glue instead of plaster and brown paper towels, which I have a case of… Suppose to be not quite as messy. For your base you can use screening, cardboard strips or wads of newspaper to put your choice of surface over. If you have a supply of wire to make loops for your base, I would suggest making a lattice, like they do with the cardboard strips.
i’ll second cowmans idea of using foam. pink or blue will do, the white “pills” too much to use. i add a coat of brown latex over it to seal it after i’ve sculpted what i want. i’ve also used hydrocal castings of WS, sealed them on with hydrocal .
a good geology book as well as scenery books will help. also go out and take some pictures of landforms you are thinking of using as concept shots.
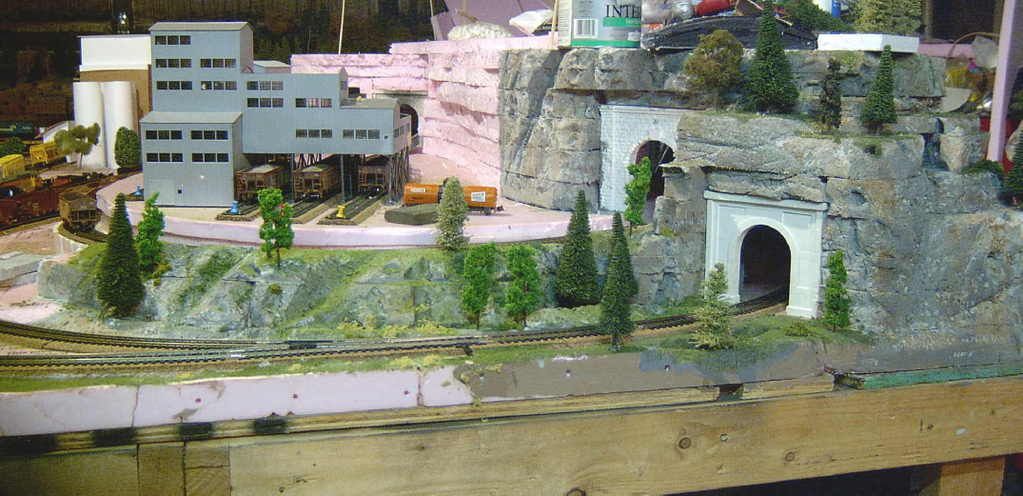
Best way in my opinion is a to get a hot wire tool and use free white foam (yah the stuff with beads but you don’t get that problem with the cutter. Then coat it with a layer of plaster cloth (ASW sells it real cheap). Just got around to planting a forest and it is real nice to poke a hole and insert tree, done!
others have made some viable suggestions but my suggestion would be if you want to build your scenery using the hard-shell method as described shelf the idea of plaster and wet cloth or paper all together. far too messy in my opinion. Built your scenery shell the conventional way by using cardboard strips to build a skeleton of your mountain or hill side. This part can be virtually free just cut up some boxes and either glue them together with a hot glue gun or staple the strips together.Next go to your local home center and get a roll of red rosin paper and a gallon of Elmer’s white glue. Cut your red rosin paper into sections and attach it to the cardboard skeleton I like using the hot glue gun method myself…Once you have the pare attached to the skeleton brush on the Elmers glue straight. Do not dilute it, it will go on white but it dries clear. at this time you can start adding your ground cover material if you want. I always go back and add a second coat but it isn’t always necessary. If you want to apply ground cover at a later time simply just spray the hard-shell with some wet water and apply ground cover. This method dries as hard as a rock and speaking of rocks it hold rock castings extremely well. The best thing about this method is it’s cheap, not knowing how large of a layout your building but for the average person a $12.00 roll of Rosin paper and a $15.00 gallon of white glue will be more then enough material to build all the landforms you want. If you want to see how well this method works just go to Howard Zane’s website and check out his Piermont division.
You don’t need to get the plaster cloth at a hobby store. Any big box craft store will work, too. Michaels, for one, and I’ve even seen it at Wal-Mart. In fact, you’ll probably pay less for it.
Another product you can use is Sculptamold, basically a mixture of dehydrated glue, plaster, and ground up newsprint. It can be used over a foam or wire screen base. Mix it to the consistency of oatmeal and trowel it on! It sets up in about 30 minutes, and takes 6-48 hours to cure completely, depending on the temp and humidity in your room, and how thickly you shovel it on.
I generally make my mountains using the old crumpled newspaper/plaster cloth method, but for one rather large mountain on my MR, I used basically the same technique as Dr. Wayne–wire screen over wood forms. I used crumpled aluminum door screen, wood and foam forms, a base coat of plaster cloth, and then finishing coats of Scultptamold. Since this particular mountain needed to represent the Sierra Buttes of Northern California, which is a large granite/basalt upthrust from the surrounding mountains, and is still ‘in progress’, I’ve been using Bragdon casting molds and Sculptamold, and also for several sections, Cripplebush Rubber Rocks, which have been glued to the plaster/screen base with contact cement.
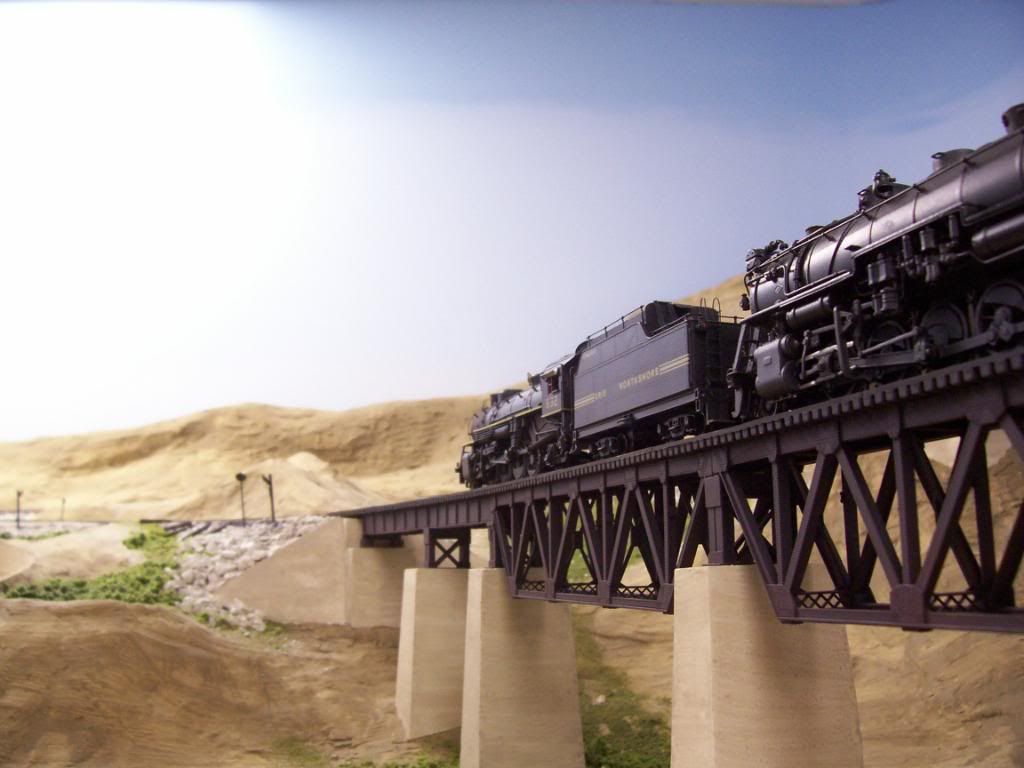
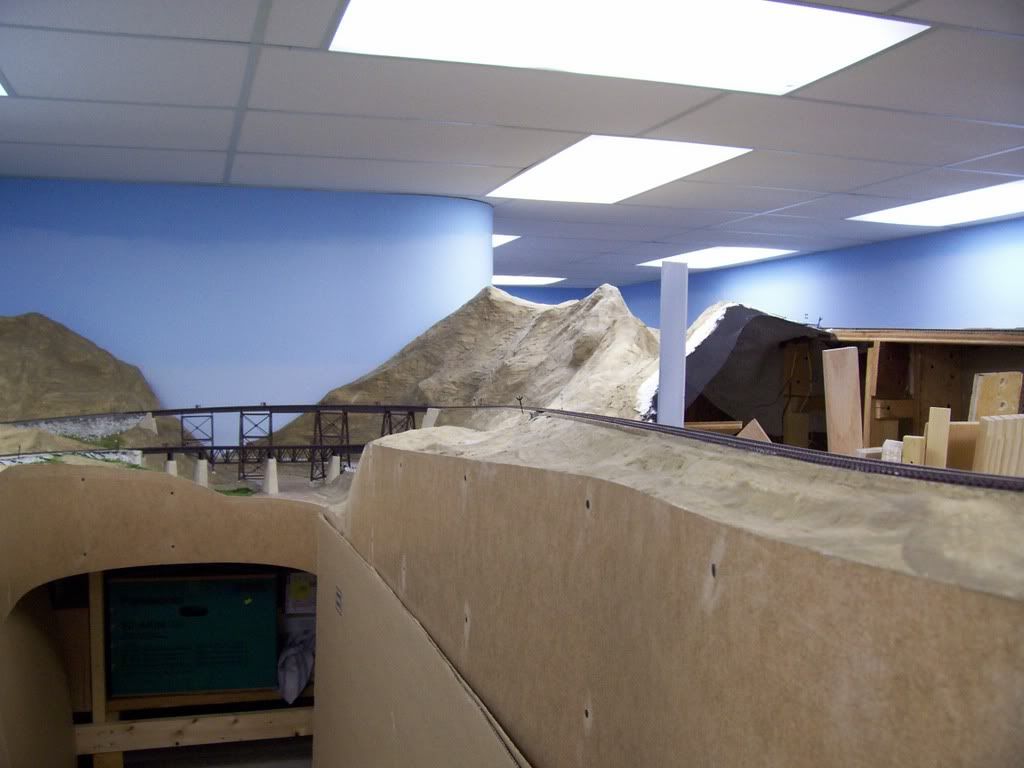
Here’s a couple of views–the first an overview in progress:
The second, some added detail with Sculptamold castings combined with Cripplebush Rocks:
I too use the torn bedsheet over wire frame method, but use a diluted 60%/40% mixture of PVA glue/water instead of plaster. This is mainly to help with weight issues. From experimenting with both methods, I can tell you that this dries just as hard as plaster-shell.
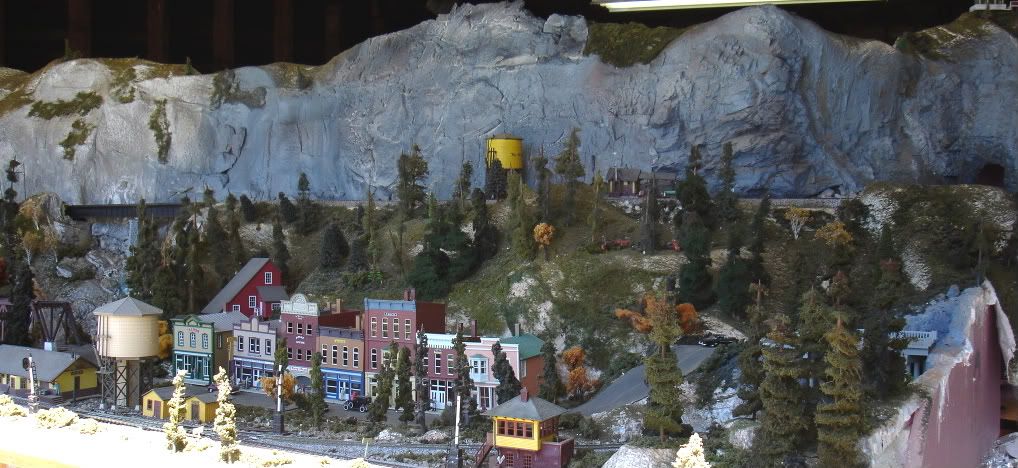
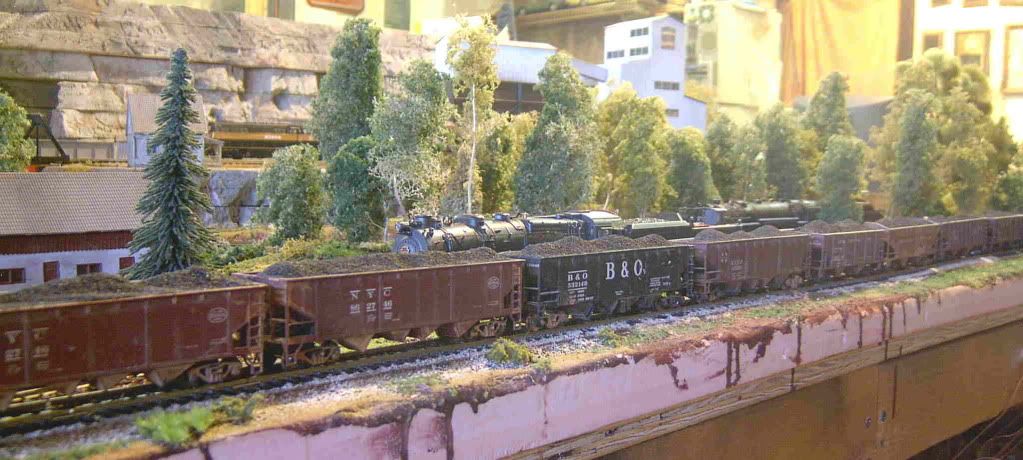
I especially like that first shot, Tom. [tup] You’ve managed to get lots of depth into that area and the upper track with the rock above really seems to loom over the town scene below. Nice work.
90 percent of the hill / mountain can be lifted off the bench, even the section that the Mine Company sits on.
I have all so found that if you find a damaged section at Home Depot you can get 75% off the prices! My last 2 inch thick 4 X 8 foot section retail was $28.00, I got mine for $7.00.
Looks like you have a great start to an absolutely fantastic layout. How big is your layout room? How long will your mainline be? I look forward to seeing more of your work. Are you a real doctor? Too neat to be an orthopedic surgeon. You must be a plastic surgeon. Keep up the good work.
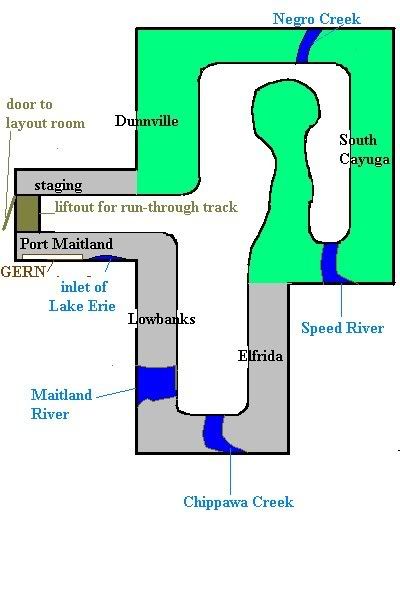
The layout room is about 560 sq. ft., with roughly 200 of that being aisleways. Counting the long grade to the as-yet-unbuilt partial second level, there’s about 190’ of mainline in service (not counting staging, sidings or double track). The second level will add another 65’ of mainline.
In the rough drawing of the layout room, below, the area in grey will be doubledecked. The track splits at South Cayuga, with one line dropping as it crosses the Speed River and heads to Elfrida. The other part begins a long climb around the peninsula, eventually gaining the second level above Elfrida.
My first picture on the previous page of this thread looks towards the end of the South Cayuga aisle, with the lower track heading to the tunnel to Elfrida. The track on the high bridge and approaching the viewer is on its climb up and around the peninsula.