I just found a brand new Mantua Mikado kit (Pennsylvania) while going through some boxes full of unbuilt purchases. (It has a brand new Onboard receiver with it which gives away it’s age. Unfortunately, I feel for the “early adopter” mistake for sound and individual control of locomotives. Is there any value at all for that system which I still have?)
I’m not sure if I feel up to trying to put it together but when I summon up the courage (or foolishness) to try, should I bother using the open core motor or immediately go to a new can design? If so, any recommendations for which can motor to use as a replacement and will I be able to put in flywheels without major frame modifications? Should I also replace the gearing?
Thanks for any suggestions and/or recommendations.
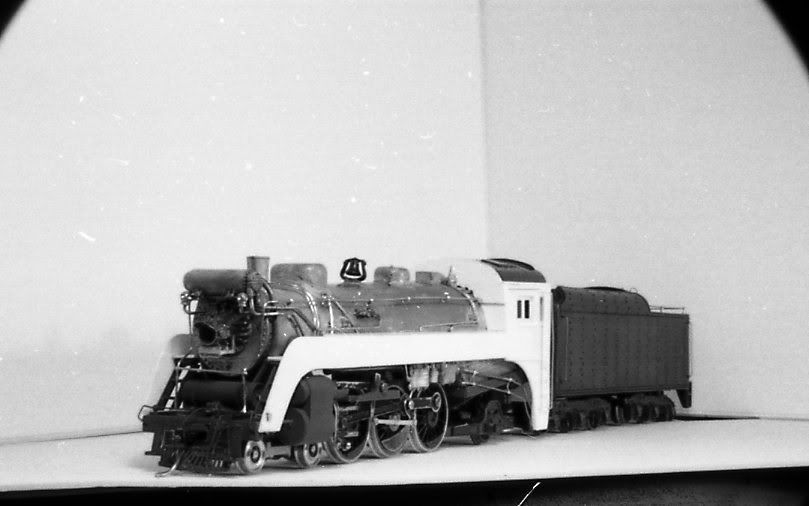
The Mantua Mike and Pacific models used the same frame and works. I kit bashed this Pacific.
The stock Mantua open frame motor gives very decent performance. That Pacific got a can motor upgrade kit from the Mantua parts department. Later, after Mantua went away, you could get the from Yardbird trains. The can motor kit yielded extraordinary low speed performance. Or, you can replace the alnico magnet with the new neonynium super magnets. This is a simple screwdriver job and gives a motor with can motor performance. The basic drive from Mantua came mostly with the simple worm on the motor shaft gearing. Some of them had real gear boxes which ought to be nice. I have a used train show Mike that I plan to kitbash into something nice, one of these days. Some cast brass detail parts, air compressor, pilot, turbine generator, bell, classification lights and suchlike look good. That Pacific is painted with rattle can dark gray auto primer.
I have a complete Onboard system, NIB, somewhere, with a couple of receivers. I moved away from the Onboard club I was in, and never built a railroad with it as DCC emerged. There used to be some online resourses and groups. I just searched eBay and found a couple of items. In the completed search, a listing just closed with a whole bunch of stuff; no bids, started at $285 with a Buy it now of $435. A great deal about 20 years ago.
I built a Mantua Big 6 (0-6-0) kit as a teenager, with little to no knowledge or hobby specific tools. I did it, it ran like a top, and for some idiotic reason I got rid of it when I didn’t think it fit into my future railroad plans. I have several Pacifics I have dis-assembled and re-assembled without issue. The new magnets are a big booster in performance. Gearing should be fine, but if you are so inclined I think NWSL makes a replacement set. Mellor also made a replacement set, but you will have to find those on eBay, and they are pricey, now.
There are so many versions of “the” Mantua steam loco kits out there that I am reluctant to comment. I can say that kit or RTR they pull like a son of a gun using the old open frame motor, and if assembled with care the mechanism creates little enough drag that the amperage needed is not excessive. Any bind in the mechanism however could challenge decoders that are not robust enough. The engineering in the tooling while old is sound enough that again if correctly assembled the locomotive sits squarely on its frame and thus there is pretty good electrical contact for both locomotive and tender. Is your tender metal or plastic - they changed that over the years. Back in “my day” the tender was metal and the trucks were not the most free rolling so some pulling power was lost just lugging its own tender around – but again the engine had pulling power to spare.
My impression is that a stock Mantua kit would need work but not impossible work to insulate the motor from the frame (perhaps a nylon screw to hold it and paper between motor and frame) for DCC.
It is unfortuante but the sort of steam locomotive detail parts that the rather plain Jane (and mostly generic) Manuta die cast steamers cry out for are less commonly seen at hobby shops these days and some sources have disappeared it seems.
The tender is plastic so I might be lucky with the trucks and drag. You mentioned “when assembled with care/correctly” so my take is that the assembly is not very straightforward. Do you have any tips or things to avoid when putting it together?
There have been other recent posts, including those discussing the correct material and technique for ‘shimming’ the stack of magnets correctly. Do not be reluctant to ask specific technical questions as you proceed.
By all means, build that Mantua Mikado. They are great machines and their looks are very easy to improve. I have 8 Mantuas (Mikados and Pacifics). I have upgraded them by rebuilding the pilot, adding several CalScale castings, adding brass rod for pipes, converting the tenders to oil bunkers, adding LED head and read lights, and improving the motors (cans and open frame with new magnets). It is not necessary to regear as the old open frame with worm on the shaft with insulated brush springs and new magnets (mine came from MicroMark) work fine - as far as I can tell new mags make it as good as some can motors. My website at
has stuff about my Mantua upgrades plus other old things. I’m converting all these locos to be controlled by Bluetooth or Wifi modules-direct wireless train control. Good Luck and Have Fun!
In the Broadway musical “Annie Get Your Gun” there is a moment when Sitting Bull the famous Chief is now part of a Wild West show, but he finds himself wanting to scalp some bad guy, and says to himself “Now, how I used to do this?” It always gets a big laugh. So now I feel like Sitting Bull: how did I used to assemble the Mantua kits?
The instructions give the advice but it is easy to get impatient. You put the drivers in the frame and the brass bearings. Does it roll smoothly? Are the bearings set correctly and fully into the frame slots. Hopefully the drivers are all squarely mounted on axles (look for wheel wobble) and there are no quartering issues with the drivers. Tinker until it rolls smoothly, really smoothly not almost good or good enough,
OK so it rolls smoothly. Now you add the side rods. If they bind even a little you can “feel” it fight you as you push the frame down the track. But it is easy to be satisfied too readily. Maybe one side rod opening needs to be smoothed or reamed just a tiny bit and you say to yourself “ah but I just went to the trouble of tightening the hex nuts so let’s move forward.” No – do the tinkering to get it right at this early stage so it rolls smooth as silk. Nothing about this is difficult, just picky.
Now it is time to assemble the valve gear using the little rivets that come with the kit. If I recall the instructions correctly they suggest putting little slips of paper in between parts that are to be riveted together so that once the rivet attaches thin
Neodynium magnets. Sorry about the typo. Walthers carries them, so does McMasters Carr. Some Googleing will find you internet sources. They are not very expensive.
Micro Mark is out of the magnets and a search of Walthers and McMasters Carr for neodynium, super magnets and rare earth magnets yields “no results found”. I did find some on a European site that has some that are 12x7x2 mm, a little smaller than the ones Micro Mark had (1/8x1/4x1/2). Will those work with respect to size?
The thread re: the Dockside showed what appeared to be 4 magnets but the one discussing replacement earlier said 5, instead of 10. Just put in what will fit?
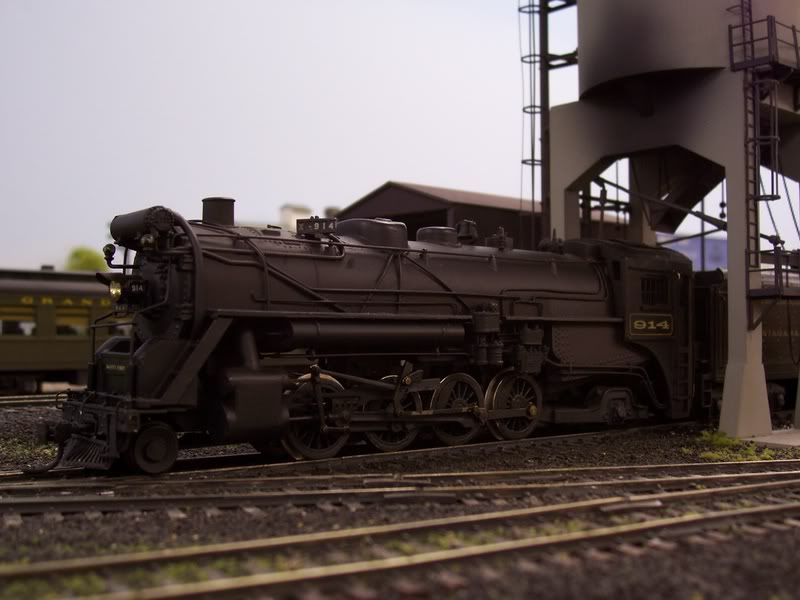
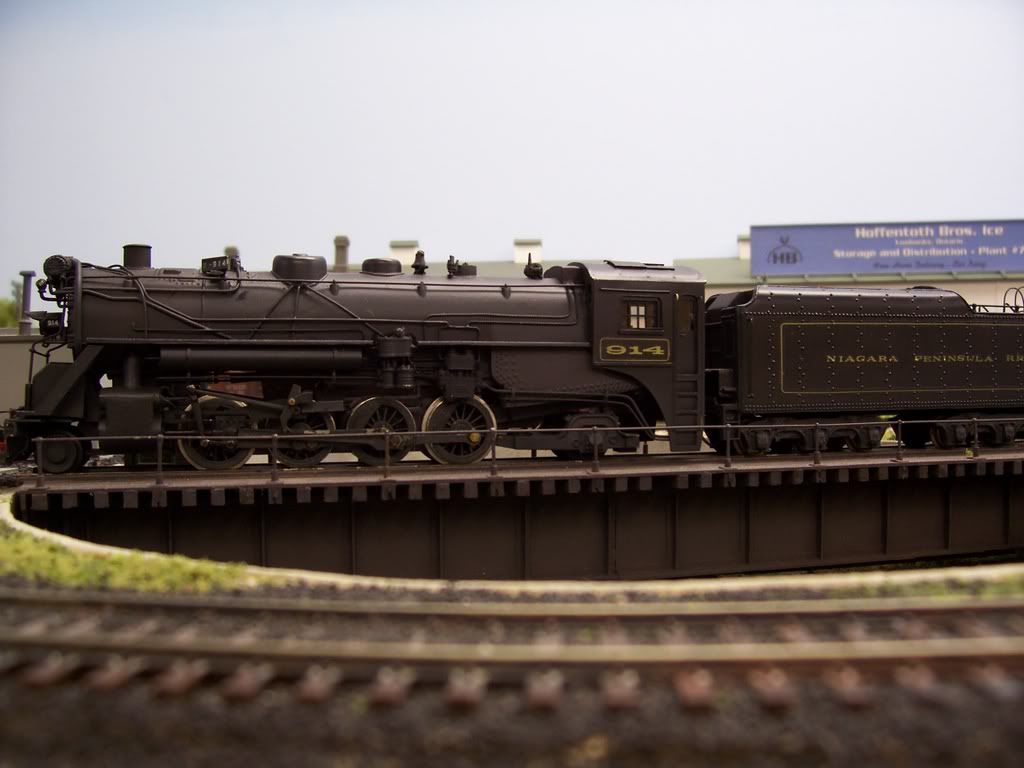
Dave’s advice is very sound… Take your time, and re-read Dave’s message a few times while building the model. Are you thinking of installing DCC? If you are, I still recommend that you follow Dave’s advice and get it to work properly in DC before installing the electronics. Below is my Mikado, modified with new piping, cab and front end.
I’m not planning to go DCC right now so I will build it as orignally designed, in DC. I’m working on trackage, etc. now so I might put it off for several weeks and read the directions several times before starting.
I do plan to (try to remember to) check and recheck at every step but we all know how hard that is to do when we want to get to a working model. Patience is an acquired virtue!
What ever will fit. More is better. If “what fits” fails to completely fill the gap between the pole pieces, make a shim or two from soft iron to fill in the air gap and avoid weakening the magnetic field. If the magnets will pull on the iron it is the right type of iron.
To get best performance out of this motor, the steel frame pieces have to be both parallel to the armature and as close to it as possible (minimizing the air gap). Unless you order the magnet to size you will need to use the ‘next smaller’ number of magnets and a magnetically-compatible shim to ‘close the magnetic circuit’, since you cannot practically reduce the thickness of a commercial NIB magnet. This is referenced and visible in at least one of the recent pictures of motor work.
I see a number of domestic suppliers offering relatively thin NIB magnets, including some at ‘surplus’ prices. Some combination of thin and thick magnets may get you very close to the right dimension. While I don’t think this should be critical, spell ‘neodymium’ correctly when searching on line. I assume you came across kjmagnetics.com – they had a ‘chat’ facility on their site which might be useful in getting you the best options for price.
Incidentally the strength of these magnets is a bulk property, so the number of magnets in a stack does not affect the strength like adding batteries in series. Commercial NIB magnets are nickel-plated to preclude intergranular corrosion so there is a very slight reduction of strength with more magnets in a stack, but this is not really important here and the ability to fine-tune the height of the stack is much more valuable.
“Ideally” the shim would be made of material like vanadium Permendur but in practice soft iron as in old transformer laminations is likely what you would use.
Something to bear in mind is that the Curie point of NIB magnets is remarkably low, so you want to be sure severe motor heating does not occur after ‘conversion’. This is anoth
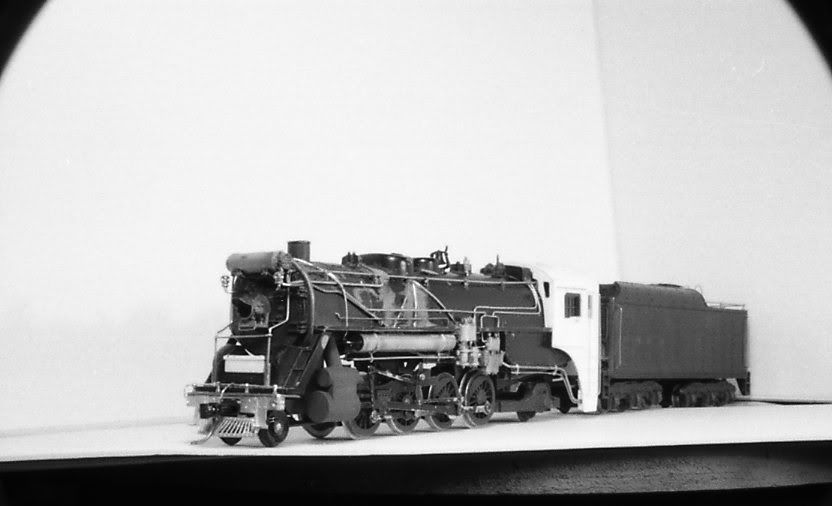
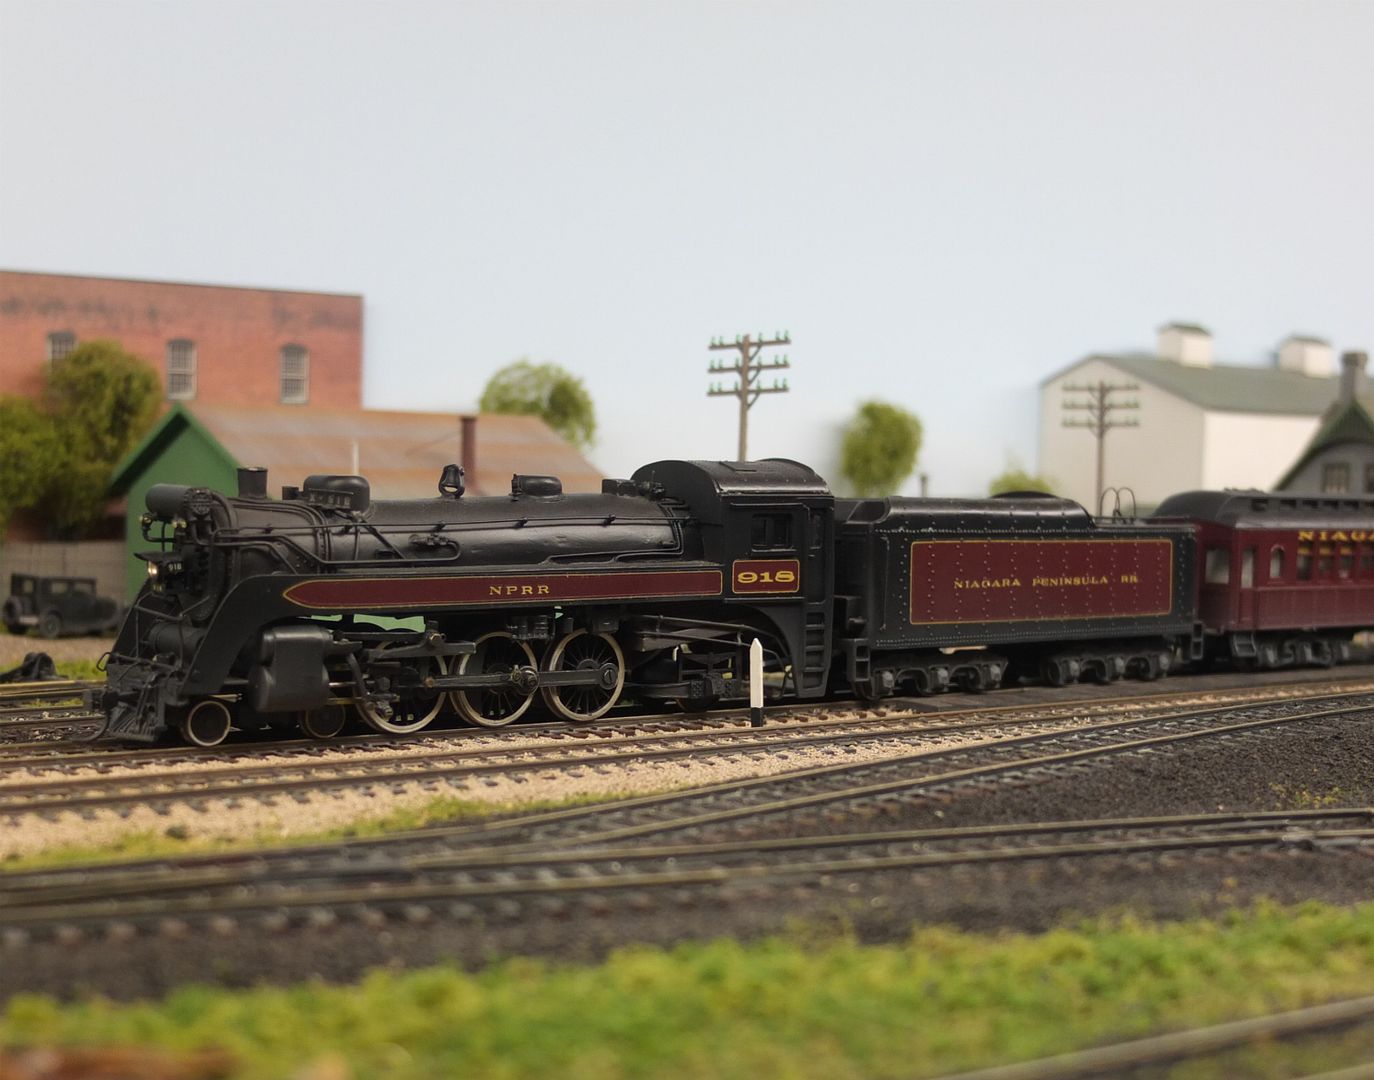
And here is a stock Mantua Mikado, just as it came from the train show. It is showing some wear and dirt, but it runs, always a good sign. It is on my list of projects for some cleanup, some detailing, new paint and decals and what ever else may occur to me. I am scouting the web for prototype photos which are not too plentiful. The B&M didn’t use Mikados, they went straight from Consolidations to Mountain types.