I am thinking of kitbashing some MDC 50 foot HO scale combine cars so they have eght windows on both left and right sides, instead of the normal 4 windows onthe two sides as they came from the factory. I want to use a miter box and razor saw to do the cutting involved with splicing parts from two combines together. What is a good miter box and razor saw for a model railroader like myself to use?
My razor sawa are all Xacto, have stayed sharp cutting styrene for yeras. There are many other brands that do the job. As to the “miter box” I hope you refer to hand (back saw) jig and not a power tool. I cut laminate/ plastics on a table saw and sliding compound, but quite large sections and use the appropriate blades. Razor saws and score/ snap then sand would be my choice. #600 grit wet/ dry paper on a smooth surface to drag pieces for sanding fit.
yes i meant hand powered saw with miter box.
Those small miter box “jigs” are usually only good to cut flatter/ thinner stock as the blade guide isn’t tall enough for the passenger shell. Also the back saw will need very fine teeth, the razor saw doesn’t have depth of cut and run in a guide to cut completely through a shell. Maybe make your own jig from 1x pine or just use a small modeler’s square as a fence for the razor saw. Are you removing just the sides or cutting off roof/ ends? Filling the shell w/ a cut piece of foam will help stabilize for side cuts and handling. Sounds like a fun project.
Maybe drwayne will “chime” or send him a msg. He has done some considerable work at kit bashing many of his pieces.
Caboose63,
I have used one of these, many times to cut various whole models, along with a 3’’ inch high Oak wood finishing miter box, with great results. Just take your time when cutting and let the saw do the work:

Take Care!
Frank
BTW: You can click on pic for info.
I’ll differ with Frank and recommend a stiffback saw. It’s less likely to wander around on you.
For large cuts like this, consider the first cut only approximate. Leave yourself a little extra material, then file or sand to final fit. Cutting exactly to finished size is for the brave – or foolish.
I agree with Frank.
I bought a jeweler’s saw from Micro Mark and a supply of fine and xtra fine blades to cut out some pieces on an old American Flyer Baldwin diesel. The steps were broken and the back platform was missing after my younger brother did a number on it many, many years ago.
I bought a duplicate shell on eBay and used the jeweler’s saw and blades to cut out replacement pieces. You can barely see the cuts. I refer to it as “like new”.
Incidentally, with a jeweler’s saw, you don’t necessarily need a miter box. Draw your cut lines with a pencil on the car and then start sawing. As Frank says, take your time, don’t apply pressure, and let the saw do the work.
The jeweler’s saw, when used correctly, will cut perfectly straight lines, if you don’t force it.
Rich
You can get all kinds of blades to fit that Jeweler’s saw, what ever kind of cut you want to make. That is a precision saw, just like the Oak miter box. You should be able to cut and line it up without any sanding. Done it many times. A stiff back saw creates too much friction, because the blade pass’s through the cut already made in order to complete the cut and some times will bind because of it. On wood or steel it won’t matter much, but on plastic it will. I’ve kit bashed and scratched many truck trailers, cut through completely and not have to sand the cut. Even have cut out roll-up doors on van trucks and trailers.
My experience!
Frank
I would only add – don’t expect your sawed “cuts” to be the final edges of your kitbash project. That is the fondest hope and it just never seems to turn out ok. You make your cut and then file or sand it down to the actual final edge.
The NWSL Sander is the kind of tool you may benefit more from than a miter box for this project.
Dave Nelson
Dave,
I didn’t go into detail, about dressing the cut, I thought may be that would be self explanatory. But by no means would I use a power tool to do that either, it’s not necessary, in My opinion. No filler is needed though.
Take Care!
Frank
The mitre box isn’t really needed when using a razor saw, as the blade doesn’t have sufficient depth to cut through the body shell in one pass.
Instead, use a machinist’s square to mark for your cuts and/or to guide the saw blade for the first couple of strokes. If you’re careful, you can cut to the “finished” line, but it’s usually best to leave a little extra material, then sand to the line. Make the cuts to both sides of the car, then cut across the roof to join them. You’ll need to alter the floors, too, but try to place those cuts so that they don’t line-up with the cuts in the body.
When you join the parts to create the new car, add splice plates of sheet styrene to the interior, keeping them away from door and window openings. Install the plates in one section of the car, then use their protruding ends to align the adjacent section. Use solvent-type cement for all plastic-to-plastic joints, applying it fairly liberally to the visible mating edges. When you bring those edges together, press them firmly into one another. Don’t worry if some of the softened plastic oozes out and definitely don’t touch it. The following day, when the joint and the oozed-out material is fully hardened, it can be cleanly removed using a sharp chisel-type blade. Joints of this nature shouldn’t require any filler, nor should they be readily apparent once the model is painted.
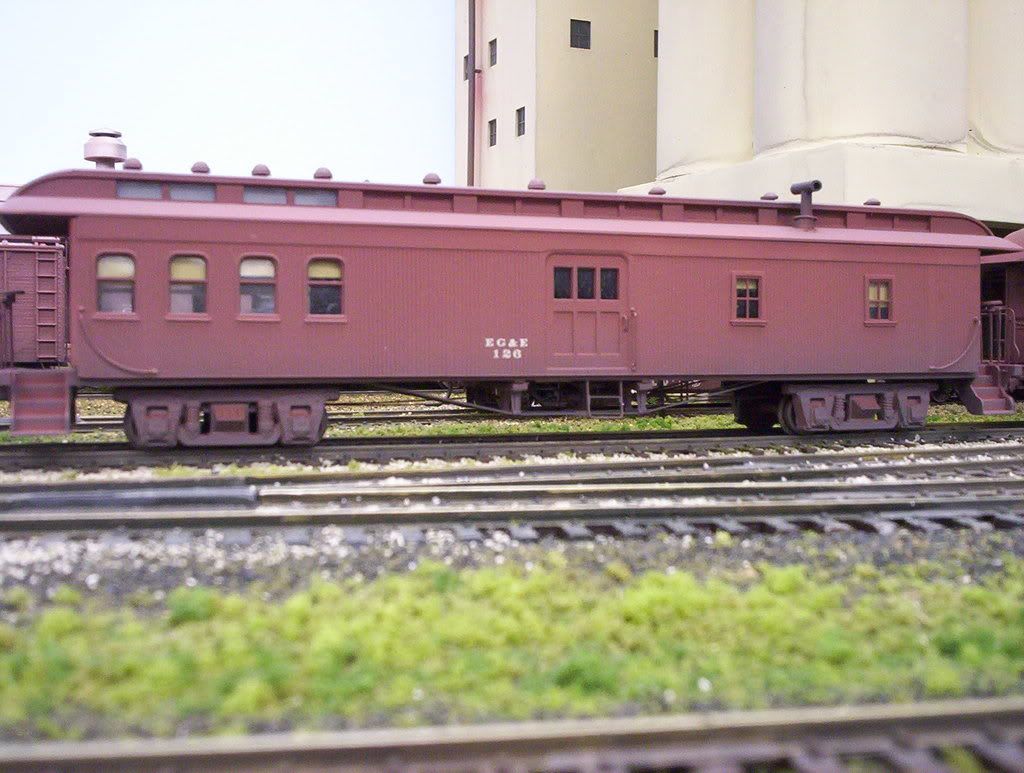
This doodlebug was made from a Rivarossi combine (and a lot of parts from other things):
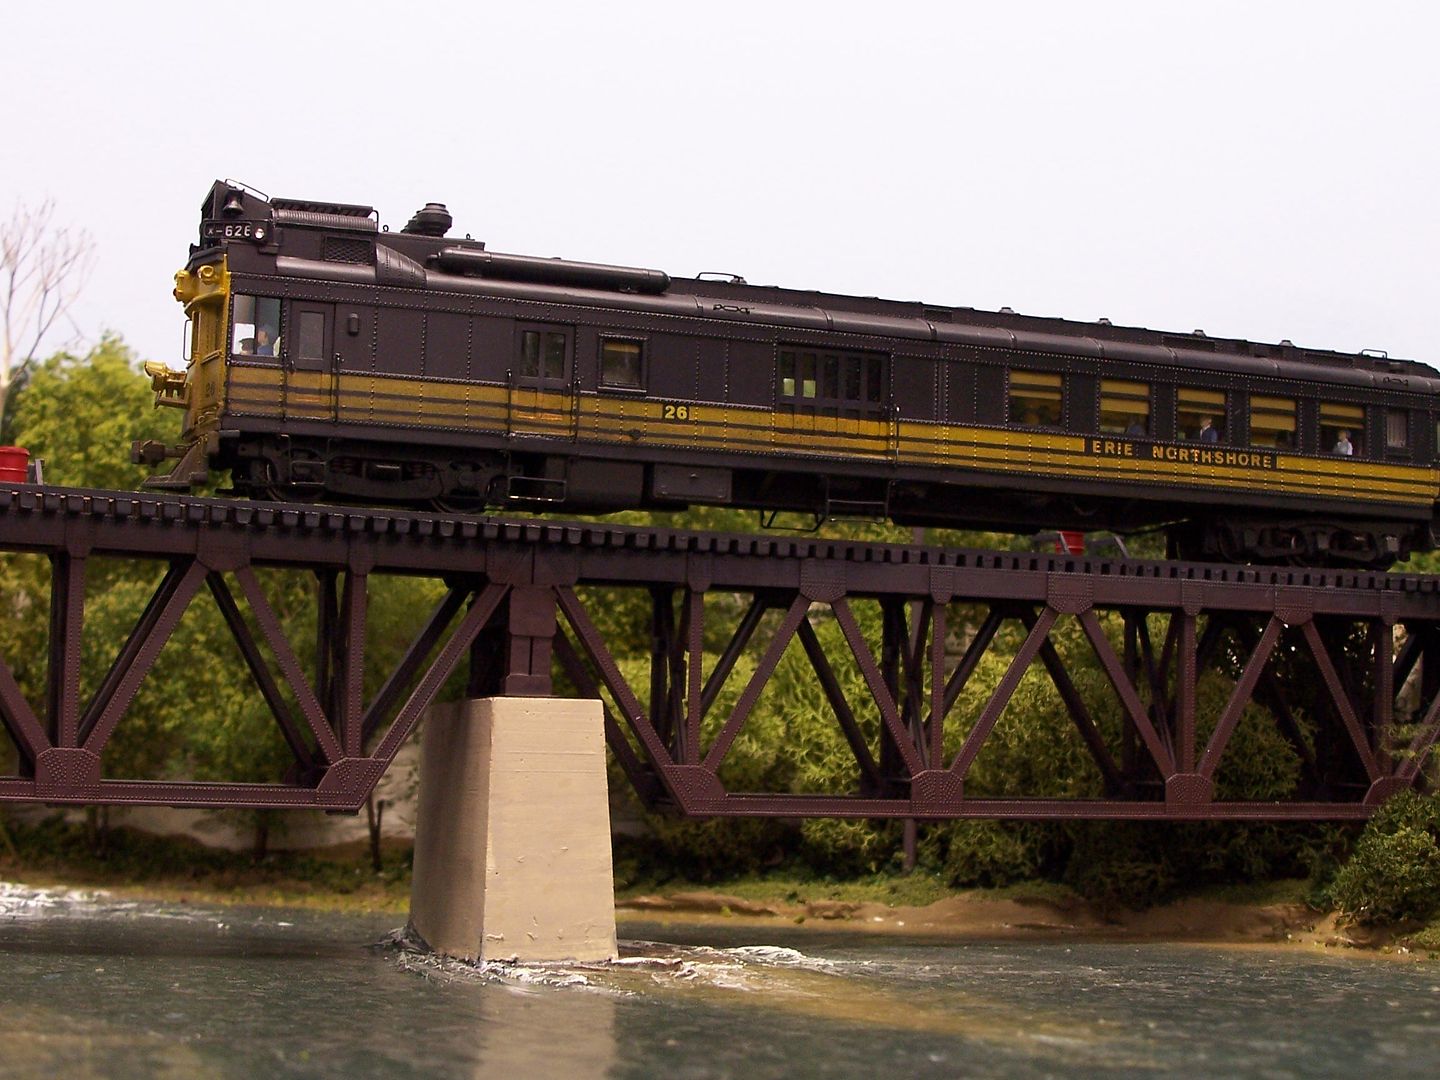
The section where the baggage door is located was cut from the body, then rotated 180° in order to place it farther from the front of
Just wodering why you would want to put 4 more windows on both sides of a combine. Not saying you shouldn’t, just curious. They usually don’t have windows in the baggage area. M
aybe you want less baggage room or turn it into a passenger car?
I think that the OP wants to create a longer car, probably with a larger passenger section.
As for windows in baggage cars, or baggage compartments of combines, most of them had them at one time.
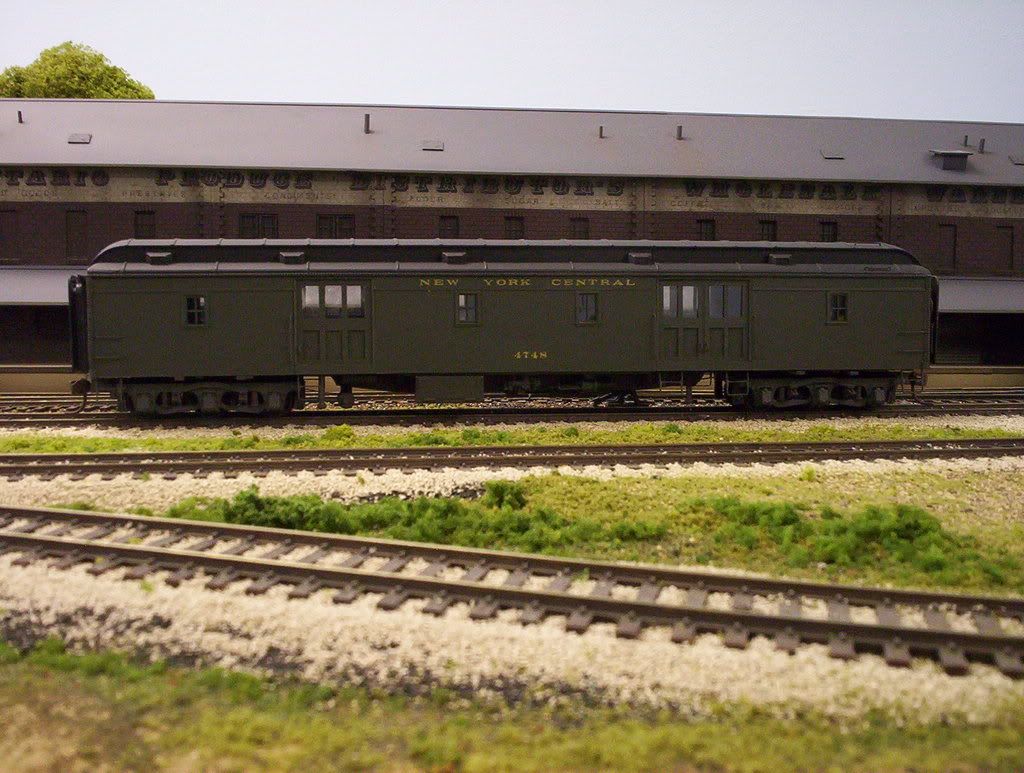
This wood car, built from an Athearn coach and using a photo of the prototype as reference, had windows when built, although many such cars had the windows sided-over in the '50s.
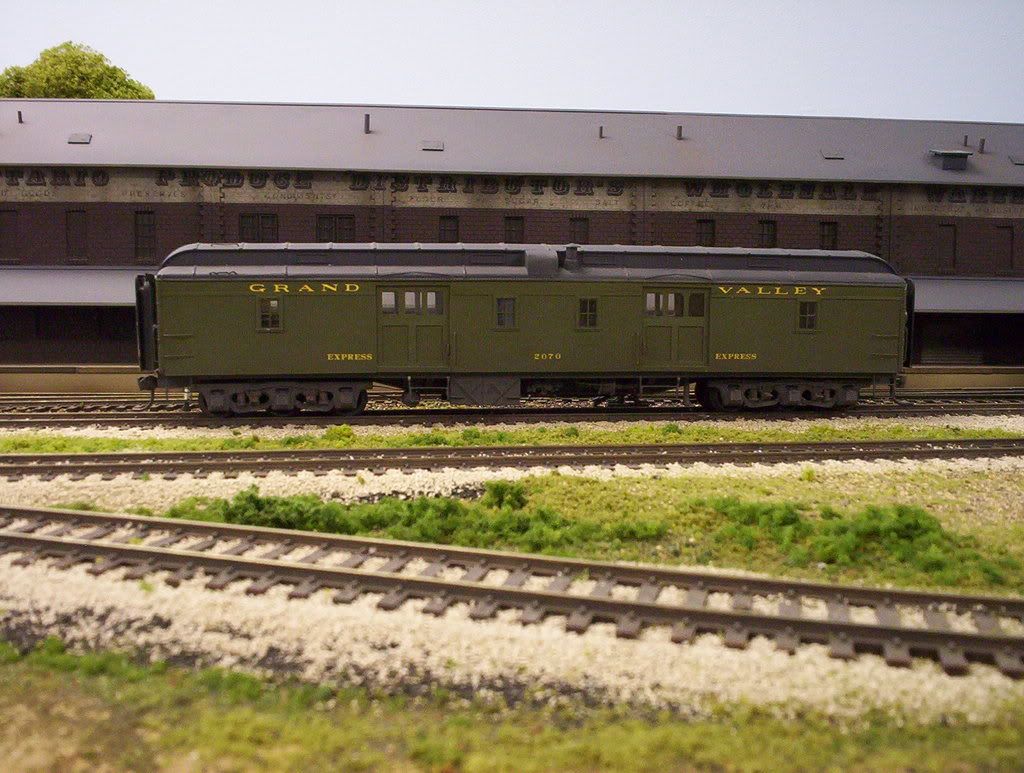
This one, formerly an Athearn Pullman, was built using a drawing for reference:
Another former coach, this one for my freelance road follows a GTR or GTP prototype:
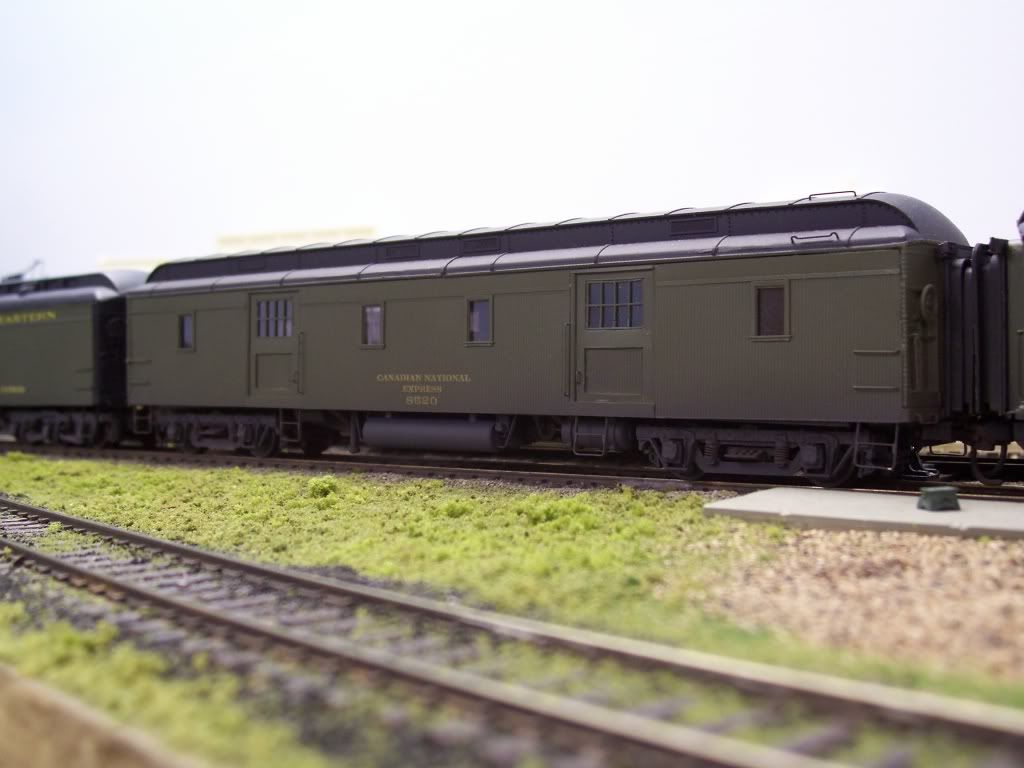
Here’s the same Rivarossi combine that I used to create the doodlebug. The baggage door is in its original position, but I added window strips from New England Rail Services to enlarge the passenger compartment. The windows in the baggage compartment were salvaged from one of the Athearn cars, as I hacked-up several to create wood-sided baggage cars for my own road. This car is similar to a CNR prototype:

Even many steel baggage cars had windows at one time. Adding windows to the baggage section of this Rivarossi RPO/baggage turned it into a decent representation of CNR’s 7776:

Wayne
wayne, i will be splicing parts of two MDC 50 foot combines so i will have one car body with passenger section of 8 windows and smaller baggage section. will do that using zona razor saw with 52 TPI razor and plastic manual miter box from the Gill-Roy’s hardware store in my town of bay city, michigan. the box only costs $6.50.
If you intend to maintain the car’s current length, I’d suggest also moving the baggage door closer to the car’s end. The procedure is the same, so it won’t be all that much more work, but will yield a better-proportioned car. For those who aren’t familiar with these cars, the roof is a separate piece, so it can simply be re-used, as long as you remember to keep the top edge of the body splice plates below the portion of the roof which fits into the body.
If you’re planning to create a longer car, the baggage door may be fine where it is, but you may want to use 6-wheel trucks. That will likely involve re-working the mounting position and the queenposts and truss rods.I’m modelling the late-'30s but my MDC short passenger cars have been downgraded to work train service:
Another option to gain more windows in the passenger section would be to combine the baggage end with one end, and as many windows as you’d like, from the MDC coach, although I’m not sure if the siding and letterboard of the coach matches that of the combine.
The coach which I have is the older-style, with panelled sides and wouldn’t be a good match:

If you do the work using two combines, you could save the leftover baggage section and extra end to create a shorty baggage car.
Wayne