Has anyone tried combining either the double track through girders or the single track trusses from these two makers end on as part of a string of bridges? If so; how did you get on and how do they look?
Are both makes of truss good for Double Stack traffic? …or Bi-level commuter cars?
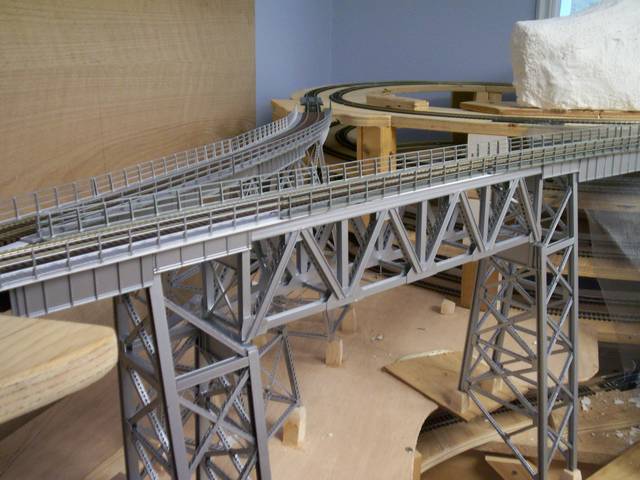
I combined the Central Valley truss bridge with some Micro Engineering deck girders and a couple of modified Atlas through girders. The piers and abutments are cast in Durabond 90 patching plaster. Sorry I haven’t got any newer photos, or one that shows the whole bridge.
The bridge is layed out on a slight “S” curve, and is about 4 1/2’ long. While I model the ‘30s, the C.V. truss should offer plenty of clearance for doublestacks, and likewise for the M.E. through girder bridges, although the latter might cause some restrictions if built on a curve. If that’s the case, substituting the deck girder bridges in their place should rectify the problem. As for bi-level commuter cars, the vertical clearance on the C.V. truss, from the head of the rail to the bottom of the lowest crossmember, is 21’9’'.
Dave …You dont have to buy one out of the box. If your inclined too, you could scrach build any combination of bridges to fit your layout and space.
I started with kits and found that it was more interesting to scrach build. Here is my rendition of Westers Pacific’s Keddie bridge, rear span is a kit, front span is scrach and rail are kit-bashed, its not compleat and have a way to go yet.
I’ve used both kits to get nice styrene pieces for kitbashing bridges. The Central Valley bridge kit and the MicroEngineering tall steel trestle kits provide great truss pieces you can kitbash into realistic looking styrene truss bridges.
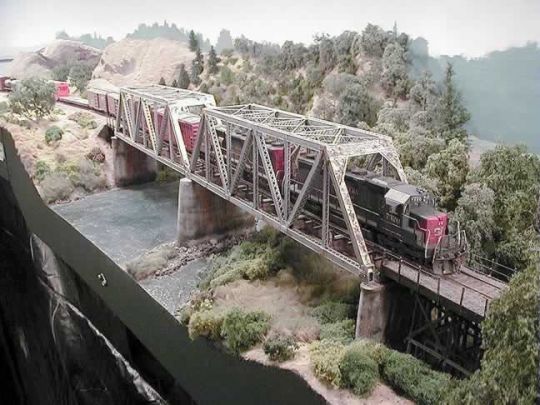
Kitbashed steel truss bridges take a lot longer to build because there’s a lot of cutting and fitting involved, plus even building the raw trusses takes a while. Here some truss bridges on my Siskiyou Line:
(click to enlarge)
(click to enlarge)
(click to enlarge)
I estimate kitbashing really small steel truss bridges out of styrene would take several weeks to build, while larger bridges can go into months of spare time to build, paint, and install. If you want the bridge to look nice, building them can take some time!
I use real railroad bridges as my guide when kitbashing bridges. I sketched up an actual sized plan for each bridge and used the plan as a guide to cut-and-fit pieces from the above bridge kits to get the final bridge.
MicroEngineering and Central Valley bridge kits provide great “raw material” for just about any bridge you care to build. You can make all kinds of steel structural members with the parts from these bridges and you can just mix and match the pieces to get a very authentic looking bridge.
It helps to use a prototype bridge as a guide. For example, here’s the prototype bridge from the North Umpqua area on the real Siskiyou Line:
Joe…Thank you too Sir for your kind info years ago on the above helix. Using yours and others on this forum I have had “Zero problems” with it…well …other then one train catching the other LOL. Thanks for sharing, love to look at your work as well as Drwaynes.
To make it easier and cut time building my bridge I built three jigs, 1 bent, 1 truss, 1 X member, along with a good cutting plan to save waste. My Grandfather use to tell me, SON…before you start a job, get the wind work done LOL.Planning is about 2/3 of the task if you never done one before…The up side to that statement, is now I can tell my grandkids…John