I’m about to try my hand at putting a decal on an HO scale ‘wooden’ structure (actually styrene) that has lap board sides. It’s my understanding that you wet the area with Microset, while the decal is soaking in water for about 30 seconds. The decal is a sign with a border around the lettering. Pick up the decal with… what, tweezers, a soft brush? and somehow coax the decal off it’s backing paper onto the model. You have a few seconds to use the brush to gently get the decal in position, I think. But, assuming all that I just said is correct, do you then use Microsol on the decal while it is wet, or wait until it’s dry? I think I remember modelers talking about using furniture polish or something similar to get a shiny surface to apply the decal to. Is that necessary?
I’m sorry that this is off topic. and by the way I love your engineer setup in front of the Y6B. But ever since I first saw your getup on your “Show me something” post, you remind me of Ben Stein, the actor?
The smoother your surface, the better and easier the decal application will be. So, if you are putting a name decal on a dining car, for example, you will want a gloss or at least a satin finish. On the other hand, if you’re putting a sign on a wooden building, you can make it look old and weathered by applying it directly to a wooden surface.
I use both Microsol and Microset. The blue one goes on first, then the decal. I usually let it dry completely before applying the red one.
“Coaxing” the decal off the paper is a good term. Tweezers are harsh, because they tend to grip a small part, and have sharp edges, so they’re likely to tear the decal. A small paintbrush is a good substitute. For large decals, I usually use my thumb, at least to get the whole thing loose. Push a small section beyond the edge of the paper, put that down on the model, and then slide the paper out from underneath. Regardless of how you get it off the paper, use a small brush to push it around and help it settle into the cracks.
Once it’s in place, treated with the red bottle stuff, settled in and dry, give it a spray of gloss, satin or flat finish. This will keep it in place and protect the edges.
And, since we know you can take a picture, don’t forget to post one for us.
I just used both for the first time when applying my Micro-Mark rivets (on Micro-Marks advise). I don’t think I will ever apply a decal again without using them. Years of building R/C aircraft, model cars and MRR stuff I have wrestled with decals. I don’t really know the why’s and how’s but both Microsol and Microset made the process a breeze.
I use a quilters pin or a ball head pin to lightly stab the decal and move it into position. A T-pin would also work. The quilters and ball head pins are similar to straight pins except a little longer with a head for grabbing. If the decal has been adequately soaked, it will easily slide off the backing without tearing. If it doesn’t slide, soak it a little longer.
I don’t let the decal float on the water surface. I hold the decal with backing with tweezers and hold it under water in a small shallow container. Then I place it on a piece of paper towel to continue soaking.
What I’ve been doing lately is placing the decal into position without any of the solvents, and then drawing the water off with a tissue. Then I gently blot the decal with a hankerchief. After all the water is drawn off, then I’ll touch along the edge of the decal with the solvent. You’ll see that the solvent will travel under the decal. I try not to touch anything at that point until the solvent has had time to dry. Larger decals may require the surface to be pre-wetted with the solvent. The problem with this is that if the solvent starts to react with the decal before you get it into position, you’ll end up with a mess on your hands. I find it much easier to just make a few pin holes in the middle of the decal so that the solvent can penetrate.
The Microset is not very aggressive. Even after the Microset has dried, I’ve resoaked with more Microset to reposition the decal a bit. It softens the decal film, but doesn’t dissolve it.
The Microsol (or Walthers Solvaset) will soften the decal film and the ink print as well. I like to apply the “sol” before the “set” has completely dried as it will help to draw the “sol” under the decal.
I also have a very soft sponge roller wheel about 1/4" wide mounted on a handle. I roll this over the decal when just about dry. Does an amazing job of forcing the decal down into the recesses and tightly over the raised details.
That’s the general idea, although a decal may need more soaking time if it’s large. Time needed varies somewhat between brands, or even different production batches within the same brand too.
Using tweezers on a big decal is asking for trouble. It’s easy for the decal to fold or tear. I almost always try to move the decal onto a piece of plain styrene before transferring it to the model. The styrene keeps the decal flat and hopefully in one piece.
It depends. If the decal film is strong enough, you may get quite a bit of time to position it. It’s best to get the decal as close to the final position as possible. I usually get one edge of the decal to hang off the styrene, place that edge on the model, then pull the styrene (and backing paper if still present) carefully out from under the decal while holding that initial edge in place.
I use Microsol only, and float the decal straight onto it so it starts dissolving in place quickly. If you’re not experienced with decaling, you may want to exercise a lot more care and start with Micro Set. Either way, prodding the decal with a brush while wet can ruin it. Once it’s where I want, I start flowing Micro Sol around the edges, letting capillary action move the solvent around as much as possible. You could also use an eyedropper or pipette to drip Micro Sol onto the surface
Try not to pick up moist decal films at all. If they don’t tear, they will twist themselves into pretzels, impossible to straighten out. I trim my decals with scissors good and close to reduce the amount of glossy decal film on the model. Moisten decal and backing paper until the decal film loosens and will slide off the backing paper. Place the backing paper, carrying the decal film on the model close to the final location, and slide the film off the backing paper onto the model. Fingers, a brush, a pin, the point of a #11 blade all help to move the decal into place. Check carefully to see that the decal is level, centered, and in the right place. You can move the decal film so long as it stays wet.
I get good results decaling onto flat paint, like Floquil or rattle can auto primer. Blot up excess water with Kleenex to prevent the decal from floating out of position. Let the decal dry enough to stay stuck in place. Then apply Solvaset to soften the decal film and make it snuggle down around rivets, scribed plank lines and such like. You want to avoid having the decal float away on the Solvaset, so go easy with it. Solvaset softens the decal film, which means moving a Solvaseted decal will tear it, just about every time. I’ve been using Solvaset for many many years, it works, I understand it. I’ve never used the Microset/sol stuff, and wasn’t really planning to do so any time soon.
I have been using, Your technique, for year’s, never had any problem’s with decal’s. The Military Figure’s and vehicle’s,that I do, are all flat paint. The Warhammer game’s figures,have tiny patch’s and stripe’s on them,sleeve’s and shoulder’s,flat paint, by brush. I just use Solvaset, that’s all,with a light coat of Dull-Coat,brushed on…
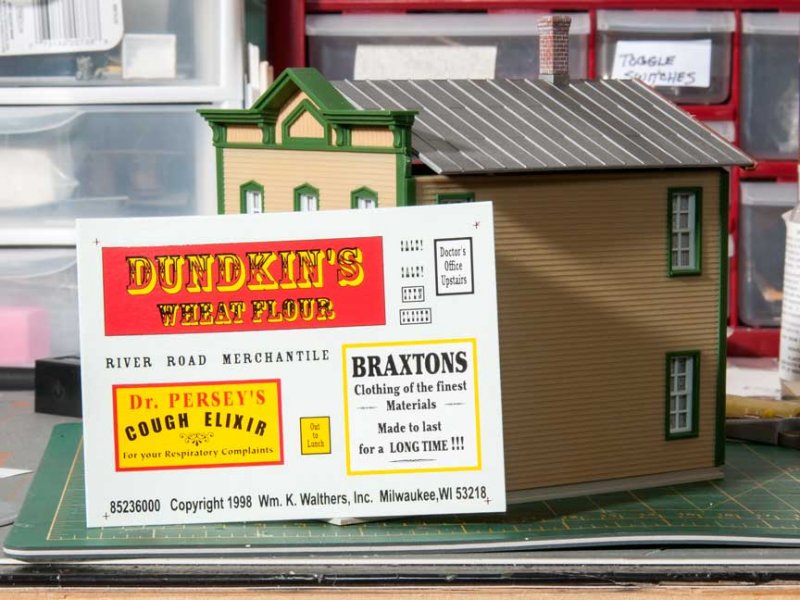
Here’s the building and the decals that came with it. It’s the Walther’s River Road Merchantile and I think I’ll try the Doc Persheys elixar sign since he’s going to have an office upstairs. The roof hasn’t been permanently installed yet.
Ok, I’ve evidently misunderstood Microset and Microsol from the beginning. From the mfg’s website…
"Description: Mirco Sol setting solution is for the most difficult irregulat surfaces to be found on models. It completely softens the Microscale Decal, allowing it to drape down onto the surface of the model, comforming perfectly to surface irregularities without distortion. The most amazing results in seemingly impossible places are possible because Micro Sol actually makes the decal part of the painted surface. For that reason you should coat Micro Sol on for only a few seconds and then leave it alone. It does the work. Do not touch until the decal has dried, as the decal is very soft at this stage and could be easily damaged. For the best results, first apply Micro Sol to prepare the surface and enhance the adhesive. Make sure the surface is free of particles that could get under the decal’s film and cause a blemish. Then, when everything is dry enough that the decal will not move easily, apply Micro Sol with a small flat brush. Apply with as few strokes as possible so a not to disturb the decal. Then allow the decal to dry without disturbing it. One application is enough in most cases, but if necessary, a second application of Micro Sol can be helpful. Following these simple instructions will result ina model with Professional looking markings."
AND…
'Description: Micro Set is a very versatile decal setting solution that does several things to Microscale Decals to improve application. Micro Set should be applied to the surface of the model where you will be sliding the decal off the paper backing. Micro Set prepares the surface with special wetting agents that cut the oils in new paint and converts the adhesive on the back ofthe decal to a stronger and longer lasting one. In addition, Micro Set slightly softens the decal film to make it more flexible so that it will conform better to the model
Well, here’s my first attempt… still wet. I did manage to get it in position without completely ruining it so that’s a start. I don’t know if I put enough MicroSol on it but it looks like it’s trying to conform to the boards. Quite a few trapped air bubbles though. I think I’ll keep my day job for now.
That’s pretty normal. A large decal like that will need repeated applications of solvent before it conforms. Use a pin or knife point to puncture any bubbles so solvent can get under them. You may need to do the same elsewhere as you go.
Oh, yes, I forget to mention the DullCote. After the decal and the paint are good and dry, overnight at least, couple of days is better, give the model a light coat of DullCote to make the glossy decal film blend into the flat paint. I use DullCote in a rattle can with good results. Shake well.
Years ago I tried some other clear flat finish in a rattle can. It made the decals crinkle up. Since then I have stuck with DullCote.
No. Once the decal is fairly well stuck additional applications of solvent shouldn’t ruin it provided you don’t use too much pressure on the brush. You do have to be careful if puncturing decal film while it’s wet to avoid pulling or tearing it.