Mississippi River and Bonne Terre Railway Side dump Ore Gondola

If you have looked at my Iron Mountain Mastodon thread, you might have concluded that I have an interest in fairly obscure prototypes. This thread should confirm that conclusion.

I won’t paste in a history of the M.R. and B.T.: you can find a few bits and pieces, including a decent summary on Wikipedia. The road’s primary purpose was to transport lead ore from the Old lead Belt in Missouri (Mines and mills in Bonne Terre, Leadwood, Flat River, Desloge, Doe Run, et al.–once the most productive source in the entire world–to the smelting facility in Herculaneum on the Mississippi River.

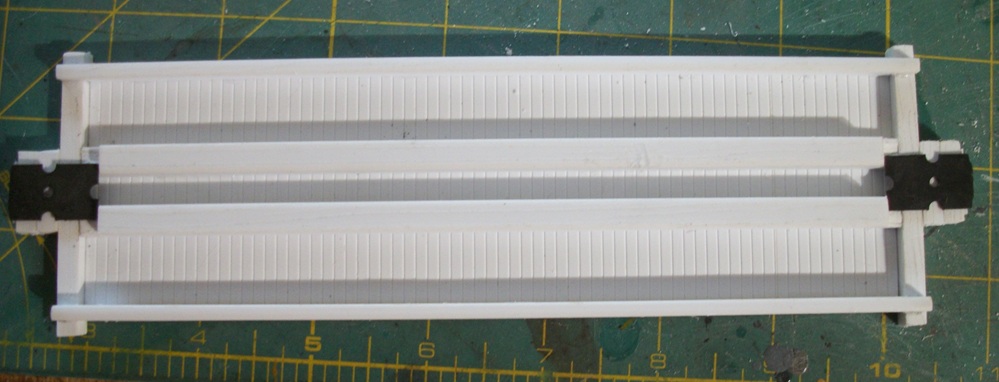
In pursuit of that task, over the years the road owned over 1100 gondolas of various types. I’d show a pic of the one I am building, but the only ones I can find are in copyrighted publications. I refer the curious to Joe Collias’ MoPac Power, Charlie Duckworth’s The Missouri-Illinois Railroad, and an old MR article by Steve Kohler and Tom Ray in the May 1990 issue. I have found no other pics, and I have found no plans, which doesn’t surprise me, as I suspect these ore haulers were built in the company shops in the late 1800s/early 1900s.

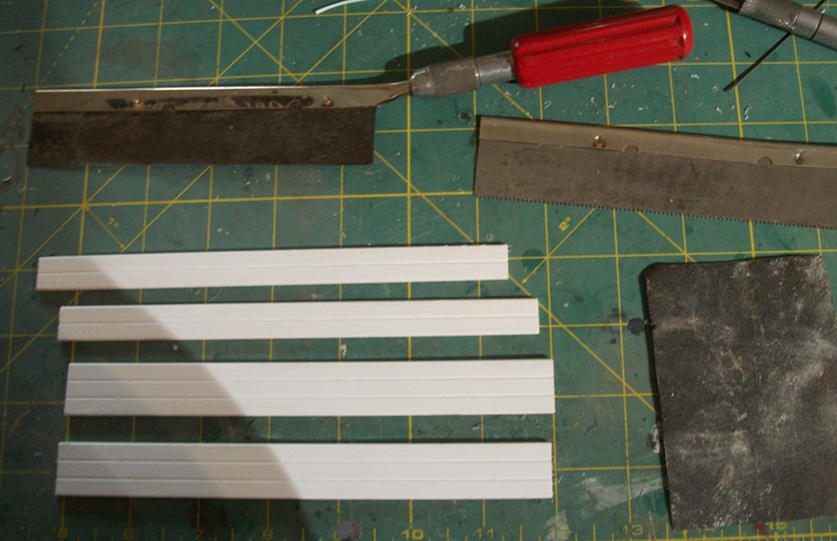
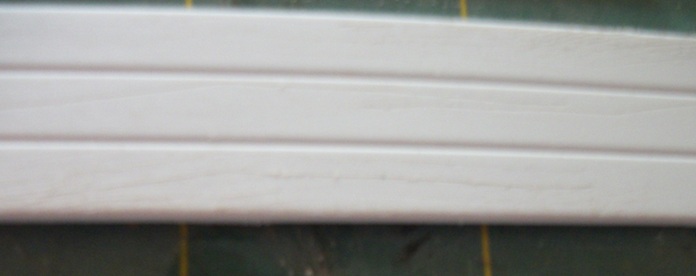
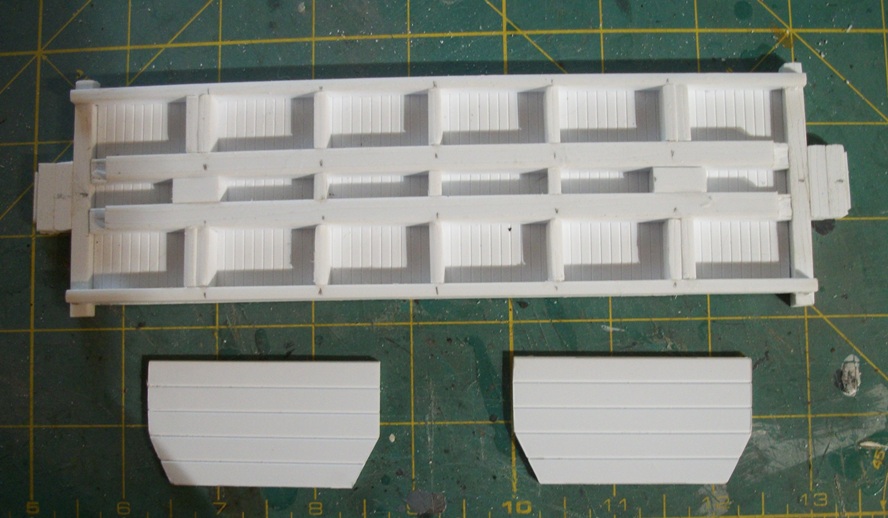
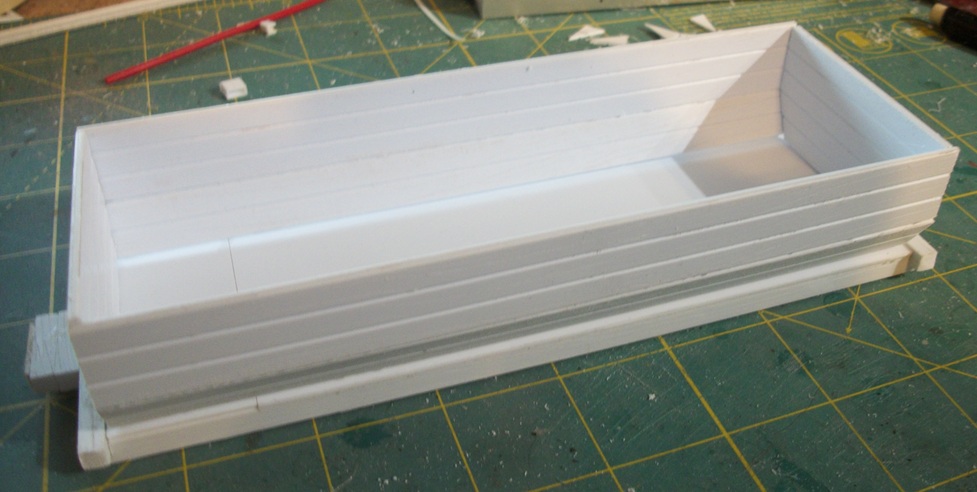
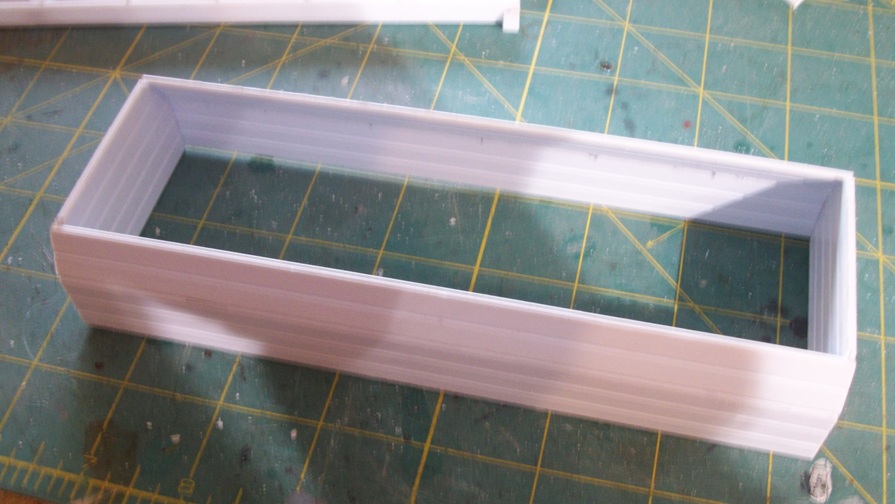
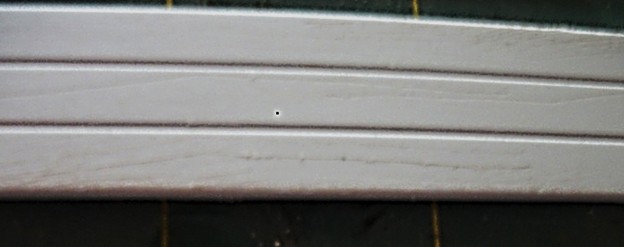
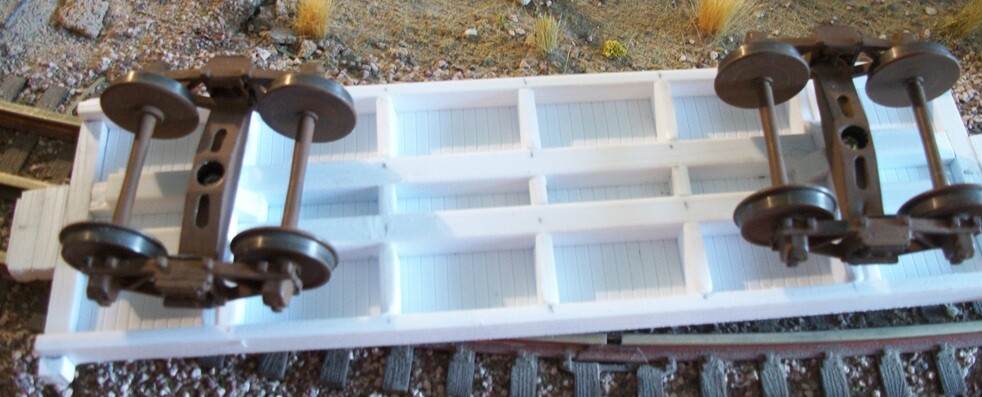
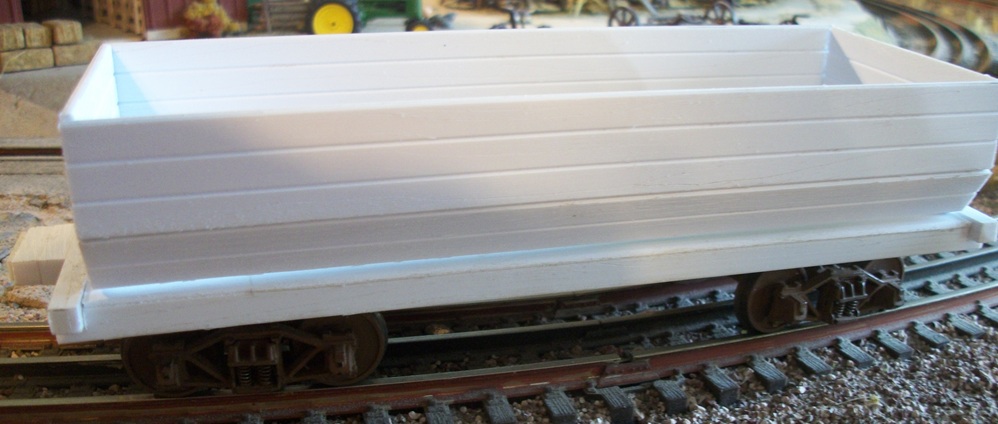
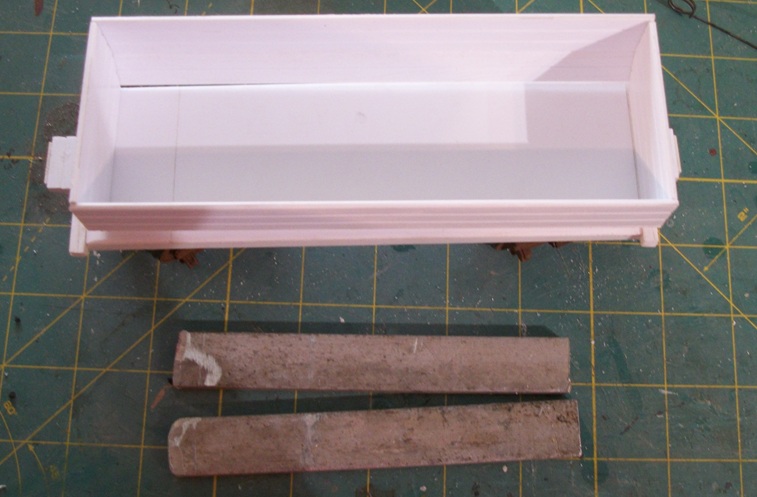
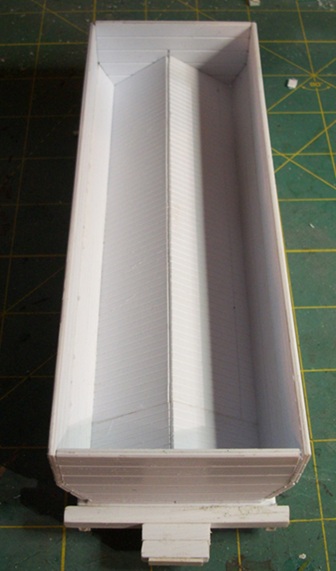
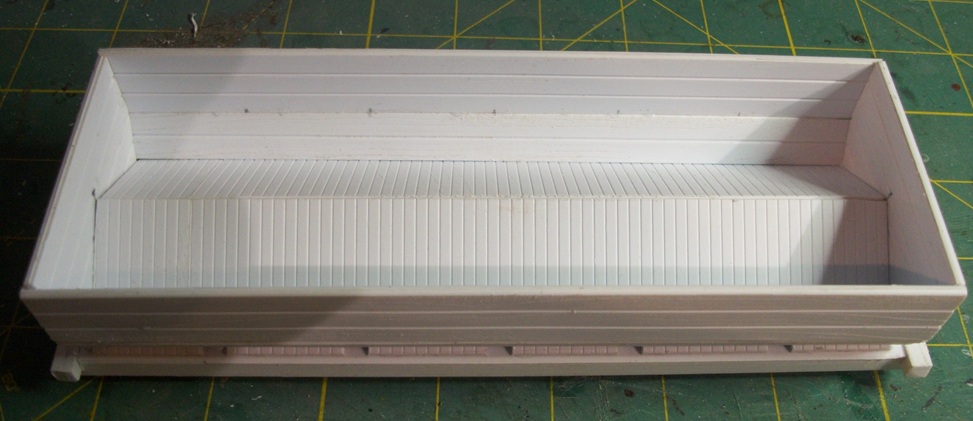
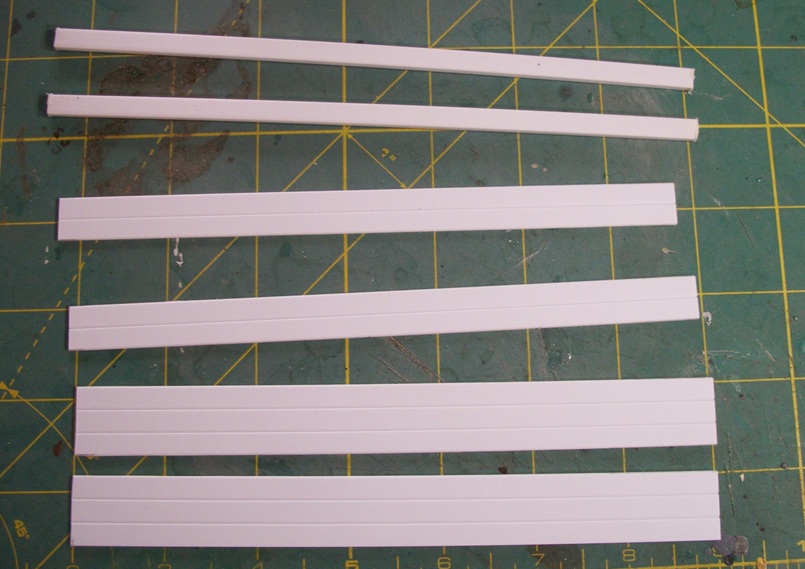
I will be working in styrene. I debated for a long time using wood, but I am less confident of my ability to do a decent job in that medium. Any way, I have a first pic: side sills and side boards (interior and exterior) cut.


Not much to see yet, but I hope you’ll follow along as I go–sometimes slowly–to see how it turns out.

4 Likes

OK, a quick update: after gluing the inside and outside of the side boards together, I applied wood grain using the time-honored technique of scraping lengthwise with saw blades, in this case a coarse tooth one first and then a fine tooth. A bit of sandpaper to remove the fuzzies and a knife to impress the joint between the individual planks at each end, and we have something that, when painted, will look like wood. I hope.


The close-up is NOT a good pic, but my camera limits me. Sorry 'bout that. :flushed_face:

3 Likes

An update:
Here’s the start of the frame: center sills, side sills, and end sills, along with the snub blocks for the mounting of the coupler pocket (you can see the top portions of Kadee pockets lying in place). The underside of the floor is in lace–there will be no tip side since the floor is entirely concealed by the lengthwise A-frame inside that both causes the dump out the sides and also controls the lading. Lead ore is heavy. PbS - Lead Sulfide- otherwise called Galena moved from the mines around the area to the mills, the chief one of which was Federal Mill #3, now a Missouri State Historic Site in Park Hills (erstwhile Flat River). After processing there, it heads to Herculaneum for final reduction to lead ingots.
Another load for these cars was “slime”: a local name for the waste rock, mostly dolomite, that ended up being piled in huge mounds dominating the landscape. When I lived in the are, decades ago, the local Jeep clubs would race up and down the mounds, not always reaching the top and sometimes returning to the bottom tumbling end over end.

Anyway, enough words; let’s have the pic:

The side sills are 6" x 12"; the center sills are 12" x 12" timbers. The end sills are 9" x 9". I can’t locate the frame bolsters for the trucks until they arrive.

5 Likes

If you can, download free photo editing software. Most have a simple “sharpen” function. My phone camera has a lot of shortcomings.

Raw image.

Sharpened, increased contrast, increased color saturation and highlights. Some even have AI enhancers that fix a lot at the touch of the radio button.

2 Likes

Do you have a recommendation? These are uncharted waters for me.

1 Like

Today’s update.

The first pic is the frame with cross members and bolsters with the box ends lying nearby:


I was able to gauge the placement of the truck bolsters from a pair of Atlas plastic trucks which are within tolerances of being the same size as the die-cast ones. Since the frame, like the rest of the car, is made of wood, I gave it 12" x 12" center sills (square tubing with the next size down solid square glued inside). I doubled the 6" x 12" body bolsters and provided a solid 12" x 12" center block for mounting the trucks. all of these pieces have had wood grain added.

Next, two pics of the basic box, one upside down, the other rightside up and sitting on the frame:


The lower two boards are the doors, which swing open to dump the contents (they will not be operable, to the disgust of my son). A wooden A-frame inside the box, running lengthwise and extending slightly past the lower edges of the doors provides the impetus for dumping. I have decent pics of the inside, so duplicating that part won’t be too difficult then there will be the iron straps and support, the million or so nbw castings, the stirrups, straight grabs, and drop grabs. I will also have to make the rod trusses underneath after I locate the truck mounting points. I have turnbuckles and queenposts in hand. In fact, i think the only thing I am still waiting for is the trucks.

Now: a plea for help. The exterior of these cars, form what i can tell, was painted with oxide red or black. That I can do. the insides were left unpainted, so I need to do a good job replicating untreated wood.

Does anyone have a favorite way to do so? Given the local supplies, I suspect they were built of oak and pine. Pine is a pretty pale blonde kinda color. Oak will be a little darker, probably black oak or red oak. Any suggestions on color mixes?

3 Likes

This is going to sound weird, but Word–yes, Microsoft Word–is actually pretty good at image editing. Microsoft paint and the picture viewer also are decent.
Of course, if you were going to buy a program, I’d be pushing PaintShop Pro. But it’s paid. I mean, so is Word, but enough people have it to the point where I can put it in alongside free programs as a recommendation.

OK< thanks for that. I had no luck with Paint, but I did make a little progress with Word (go figure!).

Let’s see if the wood grain is more clear here:

2 Likes

I can’t provide any photographic evidence that these particular cars were unpainted on the inside, but I suspect that from new they were, “standard practise.”

So, what I’d suggest that you entirely paint the car(s) red oxide or black, then either sand back the interior paint or dry brush the areas several shades of light grey where the paint would have worn away.

deck by Bear, on Flickr
They still need work!

However, if you do have proof the interiors were unpainted, I’d still use the dry brush method but extend the shades of grey, almost to black.

I’m also expecting removable loads of lead ore and “slime.” :wink:

Cheers, the Bear. :slightly_smiling_face:

3 Likes

Ore service would wear away contemporary paint fairly quickly, I’d think. And exposed pine would swell, soften, and gouge preferentially – so I’d expect oak. And it might have been treated oak…

1 Like

That’s a noticeable improvement to me!

I did all that with Google Photos which came standard on my Android. InShot is the other one I use and often in combination with Google Photos. That’s the one that can do neat stuff like removing unwanted backgrounds and letting you create “stickers” so you can insert one image into another.

Just for fun here’s an example of my process.

Start with using Google Photos to sharpen the image and make it “pop”.

Here’s a screenshot of Google Photos.

We’ll start by cropping out some of the irrelevant stuff on the sides of the locomotive.

Now to sharpen the image to it’s maximum.

We’ll use the “Pop” function to enhance the highlights and shadows.

Next, color saturation.

I used the “Skin Tone” tool to make the background colors more vibrant. I’m not photographer, I just like to play with things to see what they can or cannot do.

We’ll call that done as far as Google Photos goes and we’ll open the photo with InShot for more fun.

As you can see there’s a whole new set of options for photo editing.

Let’s look at the “Filter” tool. Notice the categories and the samples at the bottom.

Let’s try “Antique” under the “Lunar” category.

Add some “Vignette” for another level of antiquing.

At this point I saved the image which in InShot is called “Export”. Taking a screenshot of the export process created the opportunity to demonstrate another tool. One that let me blur the advertisement using the “Remove” tool which provides a smudging paintbrush.

Back in Google Photos I maxed out the “Warmth” function to change the image to sepia tone.

Under"Filters" I selected “Palma” to really antique the thing.

And I think we’ll call it a done deal.

Looks more like a Dalek than a Hudson! :laughing:

It really is just as simple as pushing buttons to see what happens. If you like it you keep, if not you “undo” it. It took trial and error for me to know how far I could go with Google Photos before I moved over to InShot for the second stage and then when to switch back to Google Photos for the finishing touches. I knew I wanted an antiqued look but otherwise I made it up based on what the software could offer me.

Unfortunately the majority of the photo editing I do on a daily basis can’t be shown hereI because it’s extremely political in nature. :wink: But not t all of it. I did this just to show how beautiful abandoned railroad bridges can be.

3 Likes

Bear, I do happen to have a couple of good photos of the insides. I am aware that interpretation of color in B&W is fraught with peril, but I’ll lay long odds that they were unpainted within.

I wish I could show the pics, but they are copyrighted in Charlie Duckworth’s outstanding The Missouri-Illinois Railroad.

Side note: The MR&BT hadn’t yet been eaten by the MoPac, but that neighbor road’s practice was to leave the interior of gondolas unpainted throughout the road’s lifetime.

1 Like

What would they have treated it with at that time?

1 Like

Thanks.

1 Like

Quite the tutorial, Becky! Thank you!

I’ll look into seeing if I can employ Google Photos.

2 Likes

You’re welcome!

I may have to try installing Google Photos on my computer. Generally, my philosophy is that the more image editing programs I can feed an image through, the better!

1 Like

A quick update.

First of all, the trucks have arrived, so I have test fitted them. Here are two pics, one of the underside.


This next pic is of the car (the bin is not attached) sitting next to the weights. I cut a bar of scarp aluminum I had lying around in two to fit under the A-frame inside the box.

In answer to a query above, I do have pics showing fairly clearly that the interiors went unpainted, and I appreciate the point about oak being more likely than pine.

Building the A-frame will be next. It might be a while as I have to go out of town for a few days for a training event of my wife’s.

3 Likes

Last update before I have to travel for a few days.

Two picks of the interior of the bin with the basic A-frame slopes in place:


The bin is attached to the frame of the car. I came out just a tiny fraction short on my width measurement but not enough to cause me to redo it. The peak of the A-frame will be “protected” by a “steel” cap made of L-angle. You can see on the outside of the car the notches in the slope as it protrudes beyond the car sides. Those notches accommodate the hinges and locking straps for the doors (which are the lower two “boards” in the sides). Structurally, there is little left to do. Almost all the rest of the work is details: wooden reinforcement timbers, steel strapping, stirrups and grabs, and lots-and-lots of nbw castings. Oh, and a LOT of nbw castings. Plus the reinforcing rods that run across the car from side to side to help resist bowing out (which, by the way, will prevent me from doing a removable load). I’ll need to affix the coupler draft gear boxes and reattach the trucks. And finally, a whole bunch of nbw castings :grin: Somewhere in there, I’ll have to paint, too.

Hmmmm. Seems I am not as close to done as I thought!

3 Likes