I am considering adding waterfalls to my layout as I have not completed the foam risers to form the mountains in the back of my layout. Any information, knowledge, experience, images, step-by-step procedures, links or whatever input you have would be greatly appreciated as I know there are many techniques. This is something I’ve never tried before and something I know very little about. Thank you in advance for your replies.
This example is certainly small as waterfalls go, but guessing the same technique and medium could be used with larger ones. Put a dollop of acrylic gloss gel onto a piece of wax paper and then spread it out into a thin layer in one direction with a semi-stiff brush using the bristles of the brush to create texture. A toothpick can also be lightly used to accentuate the look of falling water. The layer must be kept thin enough to be somewhat translucent.
Once dry it can be carefully peeled up from the wax paper, then cut to size & shape and dry brushed with white paint,
The practicing to get a suitable piece was fun. Other mediums can also be used for this technique. I took inspiration from this Woodlandscenics video: https://www.youtube.com/watch?v=_ovNbnjRUNQ
Have fun & regards, Peter
I’ve had problems with WS water products in the past turning brownish over time but I discovered the problem. Bakersfield is at the far end of the San Joaquin Valley and we get tons of Bay Area SMOG that settles as brown gunk 24/7 and it’s the brown gunk that turns the WS water products brown.
Having said that I used Woodland Scenics Water Effects to make a 4” drop water fall with very good results, but I do keep it covered unless I’m running my layout to prevent the brown problem.
I used the same procedure with Water Effects as Peter did with Acrylic Gel. Water Effects sometimes can take over 24 hours to totally dry, it depends on the ambient conditions and the thickness it’s applied. It goes on white and turns clear when dry. My current waterfall is three years old and still looking good.
Mel
Modeling the early to mid 1950s SP in HO scale since 1951
My Model Railroad
I modeled water running from a drain pipe. I started by cutting some clear Scotch tape from the pipe and attaching it to the scenery below. I then brushed from glossy ModPodge to the tape. When that layer dried, I pulling some strands from pillow stuffing (the kind that looks like a huge cotton ball). When that dried, I built it up in layers, allowing the previous layer to completely dry. I also modeled some rapids using the same technique. It looks pretty good if I do say so.
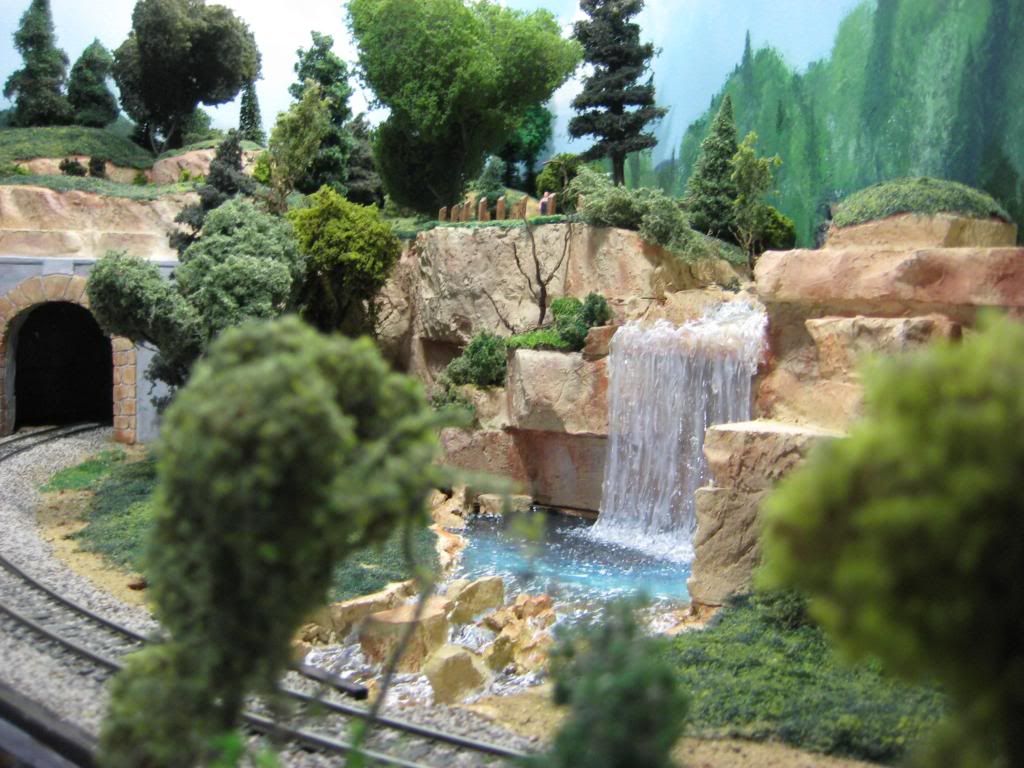
I used a super clear caulk, it’s not silicone, it’s called Lexel.
http://www.sashco.com/products/lexel/
It’s a bit more cost than silicone, but I think it’s look better, clearer, and doesn’t turn colors.
I spread a few small beads onto a mirror, used a knive or tooth pick to work it into streams of falling water, then let it set for a few days.
I then carfully pealed it off the mirror, cut it to fit the shape I needed, and then used the same Lexel caulk on the top, and the bottom, to hold it in place.
After that set for a day or two, I used the Lexel to add the waves, ripples and features to the pool that the falls lands in, and to simulate the rushing water, between the rocks, in the river that it comes from.
The pool itself is casting resin, the river that runs out of the pool, rushing among the rocks, is the Lexel.
After all had dried, I used just a bit of white gloss paint, lightly dabbing it on the waves and ripples, to simulate the white water effect, of water rushing between the rocks, and at the base of the falls.
The next time around, I’ll be a little more carefull in the placement of the falls, and work with the caulk a little more for the falling water effect.
Mike.
Mike your waterfall looks great, I’m going to give your way a shot and redo mine.
Mel
Modeling the early to mid 1950s SP in HO scale since 1951
My Model Railroad
http://melvineperry.blogspot.com/
Bakersfield, California
I’m beginning to realize that aging is not for wimps.
HI-Velo - That’s one of the best drainage ditch scenes I have seen. And you guys with the water falls aren’t slouches either. Nice work everybody.
Thanks Mel, and Tom. I found the caulk at my local hardware store, thought I’d give it a try. Where a typical tube of silicone is around $5, the lexel was almost $10.
A tube does a lot of water effects!
Lunch over, back to a tractor project.
Mike.
Short day at work today. Just got home a while ago and took some time to look over the thread I posted this morning. Thanks for all the replies everybody’s work looks really great. I was very pleased to learn that you can model waterfalls at the workbench on a flat piece of wax paper or glass. That’s really good news for me as it relates to the other post obstacles in scratch building. I’ve been working on kitbashed and scratch built Bridges this last winter and I only have three of the eight I need complete with exception of paint. And I would really like a break from Building Bridges. That’s why I’m excited about getting started crafting waterfalls that I can add to my layout later. I am going to apply all the techniques that everyone shared with me.
On a different note. I had a brainstorm today. I was working with a view of a lake. I saw the water sparkling in the Sun. And I got this idea. Maybe someones thought of it already but I’ll share it with you anyway. Do you remember the old Hamm’s beer lights that came out in 1958. You would see them usually in a bar and grill when you went to ask your parents for more quarters to play Pinball. That was a pretty good design for back then because the sparkling water almost looked real. They didn’t have the technology back then that we have today. Now we have fiber optics LEDs digital relays etc. It seems to me it wouldn’t be too hard to come up with some kind of concoction to utilize these new Technologies and put them behind the waterfalls to create that moving simulated water illusion like the old Hamm’s beer lights. Any thoughts or ideas. Maybe somebody has already done this. Please feel free to share on this new addition to the thread as well as more of your work and techniques as it’s always appreciated. Thanks again
Nice work, all. Looks as though Lexel trumps shaped and slit cellophane as a main fall medium.
I considered using balls of white glass fiber for the foam churning at the base of the falls, but it’s hard to find and dangerous to work with. Cotton really isn’t a suitable substitute, so the jury is still out. That’s more necessary on a free-fall of 100 feet or more, but I have two places where such would be appropriate.
There’s also the possibility of arranging to pipe bright-white LED ‘sun reflections’ into the falling water to impart a false sense of motion. Much more experimentation is in order for that one.
Chuck (Modeling Central Japan in September, 1964 - with waterfalls and white water)
Here is an awesome waterfall animated using a stencil drum and LEDs under the waterfall. This was posted on Facebook (sorry) and I cannot find it on YouTube …
https://www.facebook.com/bill.pontin/videos/1153838581321581/
Mark.
The best waterfalls I have seen are small. If you want a big vertical drop I would suggest going from pond to pond in falls no taller than a couple of inches each.
.
When I made a waterfall for the Scale Rails of Southwest Florida portable N scale layout I put clear silicone onto 0.010" clear plastix sheet and let it dry. Then I cut out the waterfall from this sheet and glued it into place. It looked very good. Not perfect, but with a little more care it would have been.
.
There will definitely bwe a waterfall on my new layout.
.
-Kevin
.
Woodland Scenics has a new group of water products, including waterfalls and water waves. Each item on this page has a video on how to use. I have just started experimenting with that stuff. I am still using Magic Water for the water base; the WS water has to be heated to use it, MW does not.
http://woodlandscenics.woodlandscenics.com/show/category/Water
Unreal Details Magic Water. I have been using Magic Water for a few years with no problems.
Mark!
Wow!! The flowing water looks fantastic! Thanks for the link.
I couldn’t find where he posted his ‘how to’ video. Any idea where it is?
Thanks
Dave
Hey
This is not criticism, just food for thought. Most modeled water falls I see, the water flow is smooth all the way across. On a rock face this is unlikely and would probbly only happen on a concrete face.
Any thoughts?
Good day all.
Lee
Mark that falls is exactly what I was trying to imagine. My media player on my computer was glitching last night but I got to see it this morning. It would be good to know how to do that. Thanks for the link.
Edit. I’m definitely going to do some research with All Electronics
Here is a picture of my water falls. It is made using Woodland Scenics products.The falls have tapered strips of wax paper which I put in place before pouring WS “water” over it.
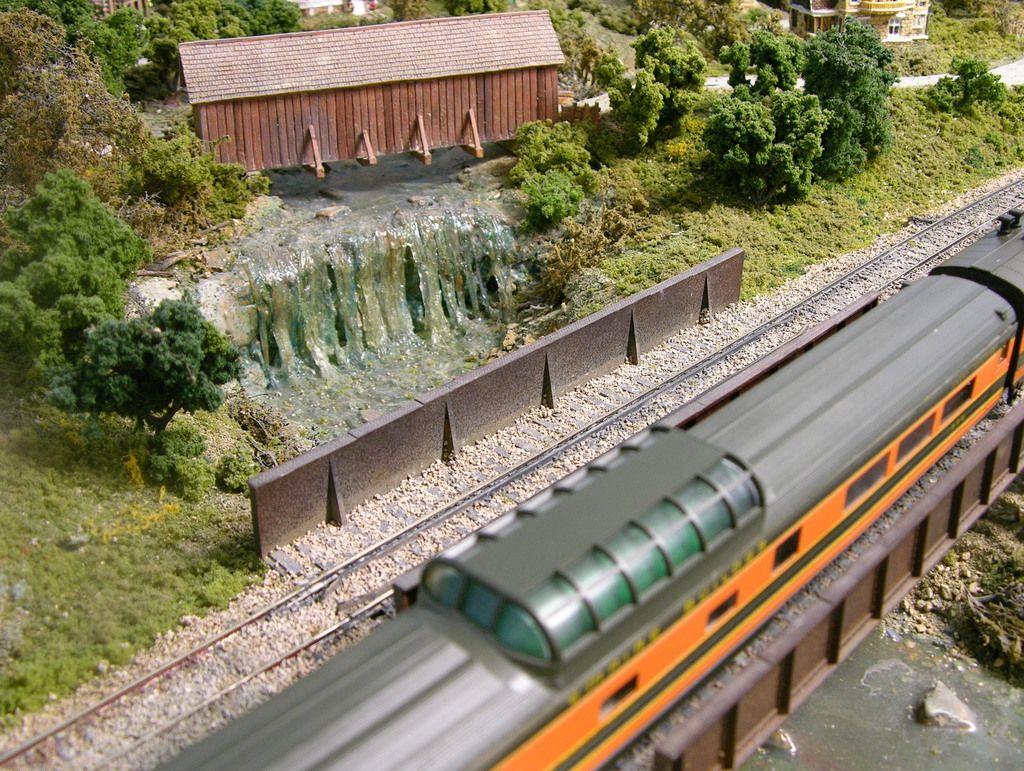
Peter. Nice job.
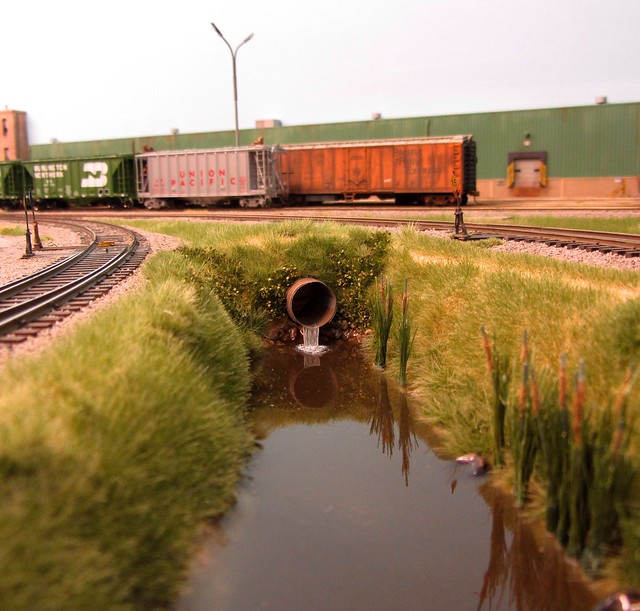
Your run off culvert looks so real it’s like I can almost smell it.
Garry. I like it. What kind of techniques did you use to get the green color effects in the water to look like algae or dirty water.
Track Fiddler … Thanks… I blended in a small quantity of acrylic paint (browns, greens, and blues) to the WS “water” before applying it.