Is there an easy way to remove the reflective backing from an MV Lense?
I’ve used two methods. You can use a knife blade to scrape it off. Now I tend to place the back face on a sheet of fine sandpaper and rub it gently with my finger tip. A needle file could also be used.
The lenses are “soft” so it doesn’t take much rubbing to take of the reflective film. You should be careful not to distort the lens as you do it, so “gentle” is the operative word.
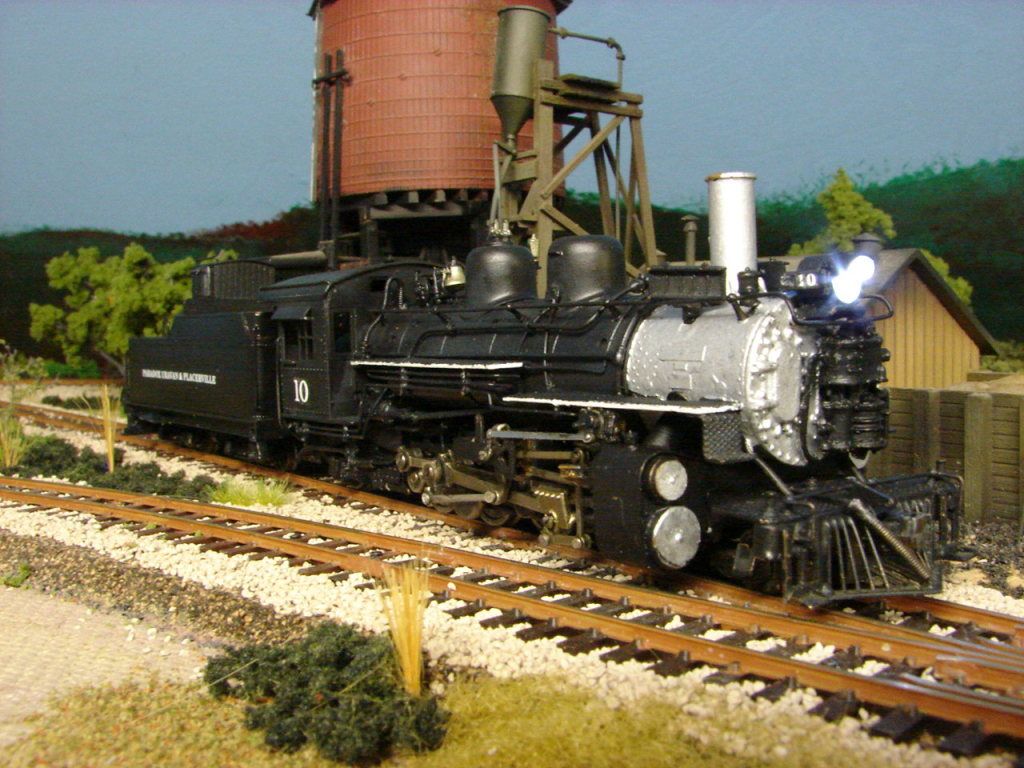
Are you going to place the light source behind it then? This works great as a technique. Here is a pic of my Rio Grande #375 with the MV lens done this way and a tiny SMD LED behind it for a light source. As can be seen, the small spot you scrape off in the middle of the coating on its back is not at all obvious, but makes the lens really come alive.

Mike’s method work great for larger headlight lenses, tried the same to use for class lights, was just too small to do for LED. I figure that class lights may work if doing fiber optics. Never got to that point yet.
Have even tried to drill into the backing, however the bit seemed to obscure the clear and couldn’t polish the “hole”. Tend to tear the reflective backing also. I guess Mike’s way would work best.
I don’t use working lighting (the unionised LPBs threatened strike action if management insisted on night operations), but MV Products suggests drilling a shallow hole in the back of the lense, then inserting a bulb or fibre optic strand. When unlit, it will appear as a bulb in a reflector, and when lit, the light will be amplified and directed as it would on the prototype. If you’re going to remove all of the foil, you could simply use clear epoxy as a lense, or punch one out of clear styrene.
Wayne
I actually tried the drilling method on the first one I did. Found it was harder to control than sanding or scraping, although it will certainly work.
I don’t remove all the foil, just a spot about a third of the diameter of the lens.
All mine have been headlight lens, so yeah, the smaller ones used for class lights and some modern headlight housing are going to be tricky.
I install into the Pyle/National headlights with the LED canopy-glued at the back of the housing, rather than up against the lens. With LEDs, the placement that’s crucial is keeping it aligned with the window you’ve made in the foil on the back of the lens.
I was planning using them in O scale caboose markers. In which case the fiber optic in each lense would be too crowded.
Now that you mention fiber optics, isn’t there a way to get the light emiting end into a bulb shape?
Yeah, to create a lense, make a square cut on the end of the fibre, then hold it close to a heat source - I prefer a soldering iron, especially if I’m making a number of lenses. The amount of heat, the distance the fibre is held from the heat source, and the duration it’s held there all play a part in the size and shape of the lense thus formed.
If you require multiple lenses of the same size, you’ll likely end up with a few extras which are larger. Ones which aren’t quite large enough can usually be re-heated and “grown”.
Wayne
The soft lens has been around a long time and its best iteration is as the manufacture intended. Bore a tiny hole and then insert a tiny grain of rice incandescent and under-power it to get that soft yellow glow and, thus, not over heat or blister the lens. When done well, it is worth the effort if you demand ultra high scale results.
I tend to use the ultra microminature surface mount, 1.5mm warm white leds. I drill a hole through the rear of the headlight and either paint the reflector silver or indium “tin” the reflector bowl. Next, I attach #38 twisted magnet wires and insert the wires and LED through a hole drilled in the rear of my Pyle National, alignining the tiny LED facing forward and securing with a drop of CCA. Finally, after testing, I mount the engine in a holder facing vertically and mix up some clear epoxy. I heat it slightly to make it less viscid and place a full drop of it into the light’s reflector bowl. Upon curing, the lens may have a slightly convex surface. If need be, I add another small drop of epoxy until the light is full and the convex lens forms nicely on curing.
Yes the light is usually brighter and whiter than you might like at true scale, but it is a good looking finished piece whether on or off. The brightness can be controlled with a larger value resistor and a hyper thin wash of yellow high lighter marker over the lens surface can yellow things a bit. In the darkness, it really functions nicely casting a rich illumination beam down the rails.
Richard
Thank you Wayne.
I thought there was an article in MR years ago about how to do this and other things with F/O’s.
How do you hold the lens ?
My luck they will fly across the room never to be found again.
Dennis,
I prefer my fingers for the actual installation, given the lens is somewhat soft and could be distorted by tweezers unless one was very careful. I use canopy glue to hold the lens in, but Aleene’s Tacky Glue would also work in a pinch.
Okay…but how do you hold it for the sanding ?
To hold it for drilling or sanding, tape a piece of masking tape sticky-side-up onto your work surface, then place the lense on it, face down.
Wayne
On this AUSSIE Beastie, circa KY2, yes, year 2000…
(Also, this is a LARGE 1/24 model!, not anything smaller, a superior Large Scale!)…
I center-drilled the MV lens’ & then used a small pilot drill to penetrate about 1/3rd’s the way into the lens.
Then I dropped a small needle with blue or a grimy black paint to make like an H4 Bulb look…
Then I drilled it again with the next size larger drill, stopping short, to just leave that painted cap that is on those H4 bulbs.
Believe it or not, that effect works, & it does not even have to be very deep.
They are a challenge to find center, really! But if you have a Dremel, & a ball burr, try dipping it into a basswood piece, & seeing if you can get one Lens to nest in that ‘divit’ once you do that, add a dab of paint mask & stick it… Now you can work on it, in a delicate way…
So, In HO only a pinhole & a little cleaning would result in the greatest light transmission.
I would use a center drill, then sharpen the LED or Fiber Optic to mate that hole & put it in with a very clear adheasive that has some flexibility.
It will Work!
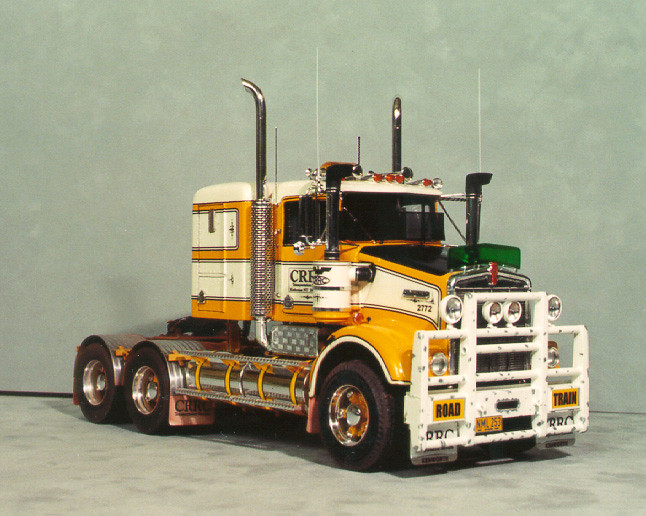
Chad,
Nice truck! I can almost see the 'roos bouncing off that crazy bumper[X-)]
Dennis,
I lay the snadpaper or file on the desktop, then lay the lens backside down and apply pressure with my fingertip. I rub it carefully, as it goes quickly. As Chad noted, you don’t need much, just past where the film comes off and you’ve just begun to drill into the back of the lens, if you’re using a drill. If it’s a file or sandpaper you basically flatten the back.
Thanks Mike,
I can’t help BLASTING “Beds are Burning” (Midnight Oil) for that girl, it became her theme, it has 3 trailers & 62 tires on the ground…& a 6 foot assembled length when completed… My SAD Issue is, that the models were moved to a storage location that my have destroyed them with heat & cold, I am… well… completely… without words about that…
I should have protected her better, I guess… how was I to know…
She was, what she was, I guess…
Amen…
Quite impressive Chad, Your method of holding the lense is somewhat similar to what I tried. The smaller lenses are harder to contol and hold for the drilling. I found that drilling the apropriate sized hole/ dimple in a block of 1x pine to work (very much the same as "ball rasp for Dremel). The advantage of the drilled hole for much smaller ones is you can enlarge the divit to hold the si