**Fred…**I’ll name my layout and my next dog after you if you send me enough to do a layout. It looks stellar.
Jack
**Fred…**I’ll name my layout and my next dog after you if you send me enough to do a layout. It looks stellar.
Jack
I sell them (yes legally!) so you could build a layout using them.
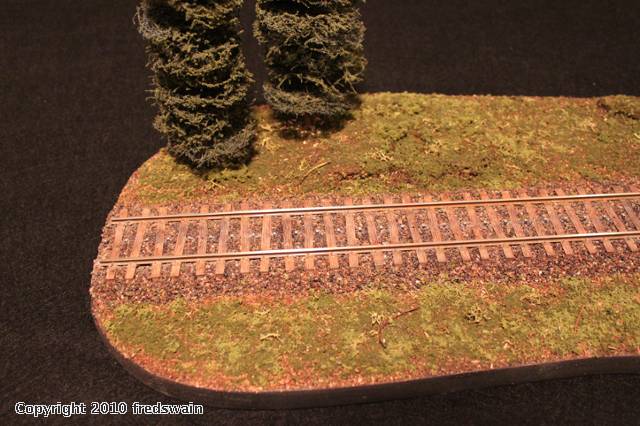
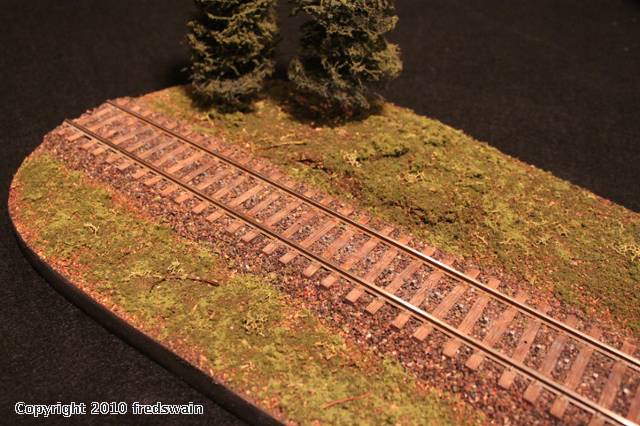
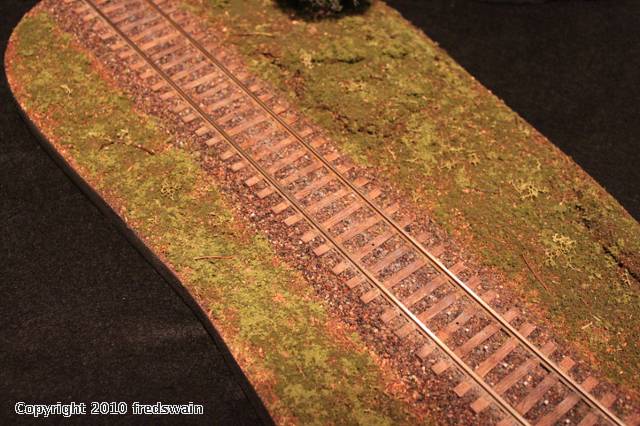
I thought I’d update this with some new pics of the displays that I’m working on. The first few pics are of a wooded scene. It is still in progress as there are only 2 mostly complete trees in it. This display uses a prototypical 24" tie spacign which pulls them apart a bit and makes them a bit uneven. It looks really good. All track is painted and weathered. This display just had a wooden crossing added to it and is going to get a small water tank but those aren’t shown here.
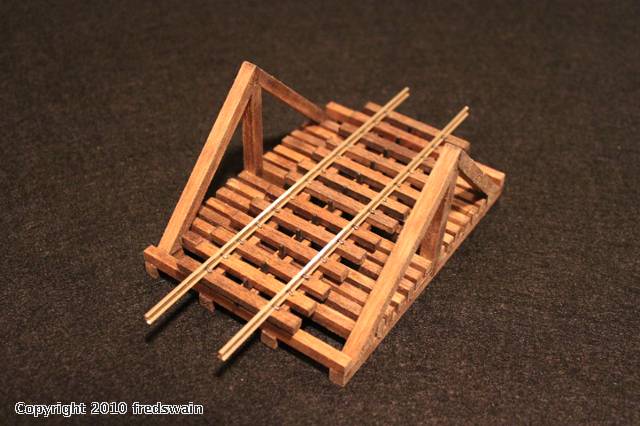
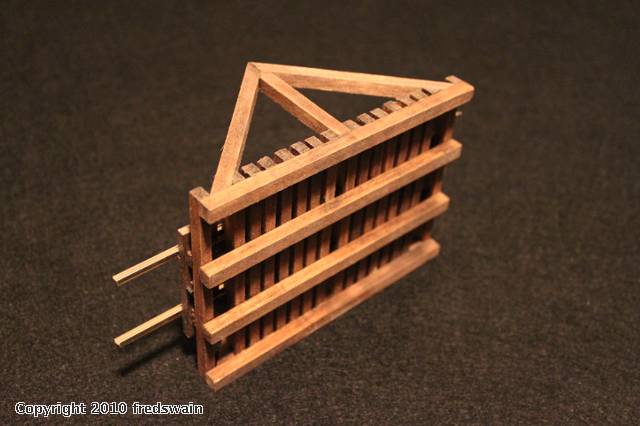
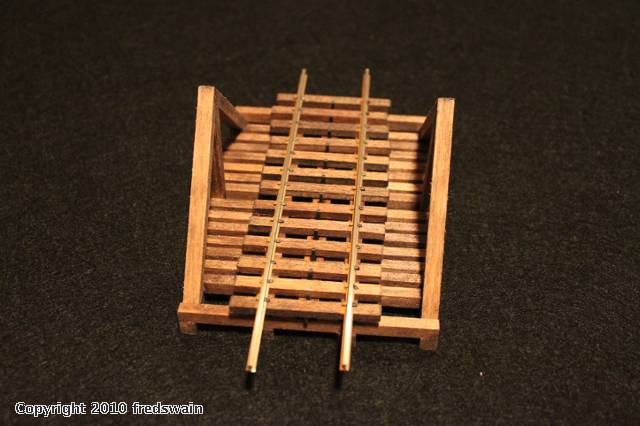
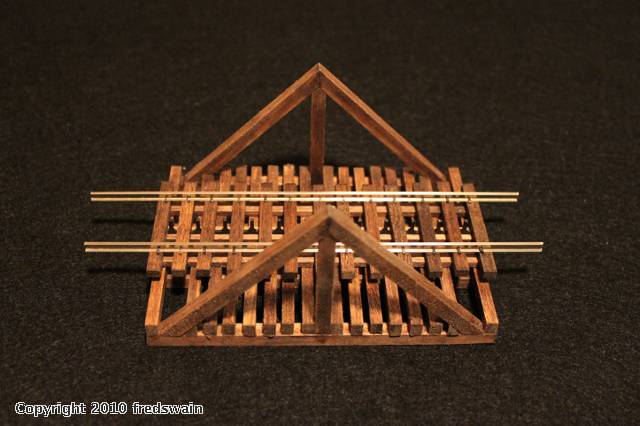
The other pics are of a small King Post bridge that I made to connect my 2 display pieces together. This way I can have 2 separate displays or join them to show something running over them. This bridge is a bit short on the ends but it’s length was determined by the length of a leftover stud stick piece that I had. The studs are painted black on it and don’t really stick out all that much. All 2 rail wheels roll on these and all Lionel and MTH 3 rail wheels that I’ve tried do too. Atlas 3R wheels don’t. Anyways, here are the pics…
I like how it looks a lot. I can see the work and attention to detail. Do you think it would be possible to use atlas o two rail and add studs?
Your track looks amazing. I think you’re on to something big.
Joe
It is Atlas 2 rail track with stud rails added.
FWIW, the last addition John Armstrong made to his outside third rail O scale Canandaigua Southern layout used stud contact.
Many years ago I read that some modelers were making stud rail by driving wire nails through or between their ties and soldering a wire to them under the roadbed. The systems shown here are both much more elegant and much less labor intensive. Well done!
Chuck
Are you using the Maerklin trick of raising the studs slightly above the running rails, to lift the pickup shoe over the running rails in turnouts and crossings?
Beautiful track work.
Looking forward to seeing the video of the locomotives running down the track in the near future.
The section of John Armstrong’s Canandaigua Southern that used the stud system is the branchline to the mine and it is currently up for sale. There are a few sections of his layout that are for sale for $400. I model in both outside and stud rail and use code 172 rail so that layout was right up my alley. I was given first shot at buying that layout but I have no room for it and can’t get it down here anyways. It is for pickup only and is in New York. I am in Houston. The layout also doesn’t include any structures but is just scenery and track. The way I am doing the studs is VERY quick and easy to lay down. If you can glue down cork roadbed, you can do this too.
As far as Marklin’s system is concerned, mine is done the same way and my studs do rise up at switches as well. This vertical rise is built into the stud stick. I have drawn up the switches in CAD to be used as a template. You print out the template and glue it down. You just glue the cork down to the template and the stud sticks get aligned accordingly. The stud height is designed so that the bottom of the stud stick sits on the table and sticks up between the cork up through the ties. The studs get taller at the switches and equal rail height at their tallest. The end user does not need to try to adjust anything in terms of stud height. It’s built in.
Marklin’s studs do not rise above rail level and the sliding shoes do run across the rail tops, as do mine. This is the exact same way that standard 3 rail pickup rollers cross these rails. Nothing has changed. The slider does not need to rise above the rails. The rails just can’t be powered. With 3 rail, the other outer rail is still powered so there is no issue. If I wanted to power that rail I would have to use a polarity reverser but it’s not necessary. Marklin uses hi rail like wheels on their cars with tall flanges. They have a metal contact strip that the wheel flanges ride on next to these rails so when rolling across them, the wheels do get power. This isn’t feasible in O scale
I don’t have any experience with Maerklin pukos, but I have read descriptions that have them rising level, as you say, with the turnout rails and ones that say they get above the rails. In any case, it seems to me that the very slight additional rise that you would need to clear the rails could obviate a bunch of rail gapping and insulating.
The studs on mine mimic theirs in that the studs do rise. They have to as they are normally well below rail height just above tie level. When you get to a switch you need to raise the studs so that the slider can pass across the running rail. This doesn’t mean that it has to rise above rail level. Just equal to it. That’s how theirs and mine both work. The slider slides right across the running rail. Just like normal 3 rail switches, those rails are unpowered. There is no wiring complexity as it is still 3 rail and still works exactly like a 3 rail switch does. I have seen all 3 types of Marklin switches and I have yet to see one that has the studs rising above rail level. They all rise up to it.
While most of my layout is done, I would be interested in a smaller area using such a system. Of course, I 'd like to figure on motive power that fits into my style (something like a NYC hudson). That would be great. I will check on your site from time to time.
Dennis