Per the attached TCS tutorial for a similar (H16-44) loco, one removes the couplers and then “gently pull apart the shell at the two ends and along the sides and lift the shell off of the frame. Take care with the handrails as you lift off the shell so they don’t break.”
It’s not obvious to me how to do this without damaging something. Prying the shell slightly from the frame side does not appear to allow simple lifting the shell off. The diagram shows separate pieces for the short hood, cab, long hood, walking platform (sill) and fuel tank skirts. The sill has delicate handrails and pilot steps, etc.
If anyone can advise on how to approach this one, I would be most appreciative.
IIRC, after removing the coupler boxes from my Atlas H16-44, I turned the locomotive over on its back and wedged four tapered toothpicks - 2 on each side - in the gap between the shell and the chassis. I then turned the locomotive back over, bounced the locomotive slightly above my workbench or lap, and let the weight of the chassis pull itself out of the shell.
You may still need to pry the shell outward slightly more to completely remove the shell. The tapered toothpicks, however, should give you a good startpoint. I’ve found them to be indispensible in removing tight-fitting shells on all sorts of models.
I had one H16-44 that was very stuck. Turns out, Atlas had used a little too much glue and I guess it was still wet when they put the shell on the chassis. It took a lot of wiggling back and forth then and up and down to get it to break free.
There’s no latches, there’s no screws, it’s just a friction fit. But man, did mine have a lot of friction.
I again went around the shell/frame separation and slightly pried the parts apart and tried again. Indeed, it became possible to wiggle the shell upward with repeated motion, but very stuck at the extreme end of the cab end, even though separated on the sides with straight pins. With a close look I saw that I could gently pry through the stair gap to cause a bit of separation between the very end of the frame and the platform of the sill. Once doing that, it came apart with some more careful, repeated wiggling.
I’m glad I gave the attempts a rest for a few days as I wanted to address the issue patiently. The rails on the ends are rather fragile and I wanted to separate the parts w/o damage. It was still a considerable challenge and surely would have caused some damage if the brute force approach was used. IMO the provided info was vital to the success, so thanks!
I must add, this is quite a nice loco for 2002 vintage.
Mike, I had found that Atlas info earlier. It states:
“The Atlas HO scale H15/16-44 shell and sill unit (combined) are held to the chassis by friction only. After removing the handrails from their holes in the cab (to avoid breaking the handrails should the cab separate from the sill unit), the best way to remove the shell/sill combination is to simply grab the fuel tank area (either the tank or side skirts) with one hand and the shell with the other. Some careful tugging and rocking should separate the two parts.”
The issue is that I had near infinite friction at one end; i.e., the fit or glue meant that simply pulling would inevitably break something. I also inquired directly of Atlas and they sent me the stock response. (Admitedly, many manufacturers do not post such useful info.) In this case, the Forum members real experience was the key to approaching the apparently common problem, at least for owners named Paul.
Yes. I realize that. I posted the link because I wasn’t sure if it had been included. For others looking for similar information.
As it happens I was also in process of swapping out a new shell from Atlas for my older Gold Series FM Trainmaster which is removed and installed in the same way.
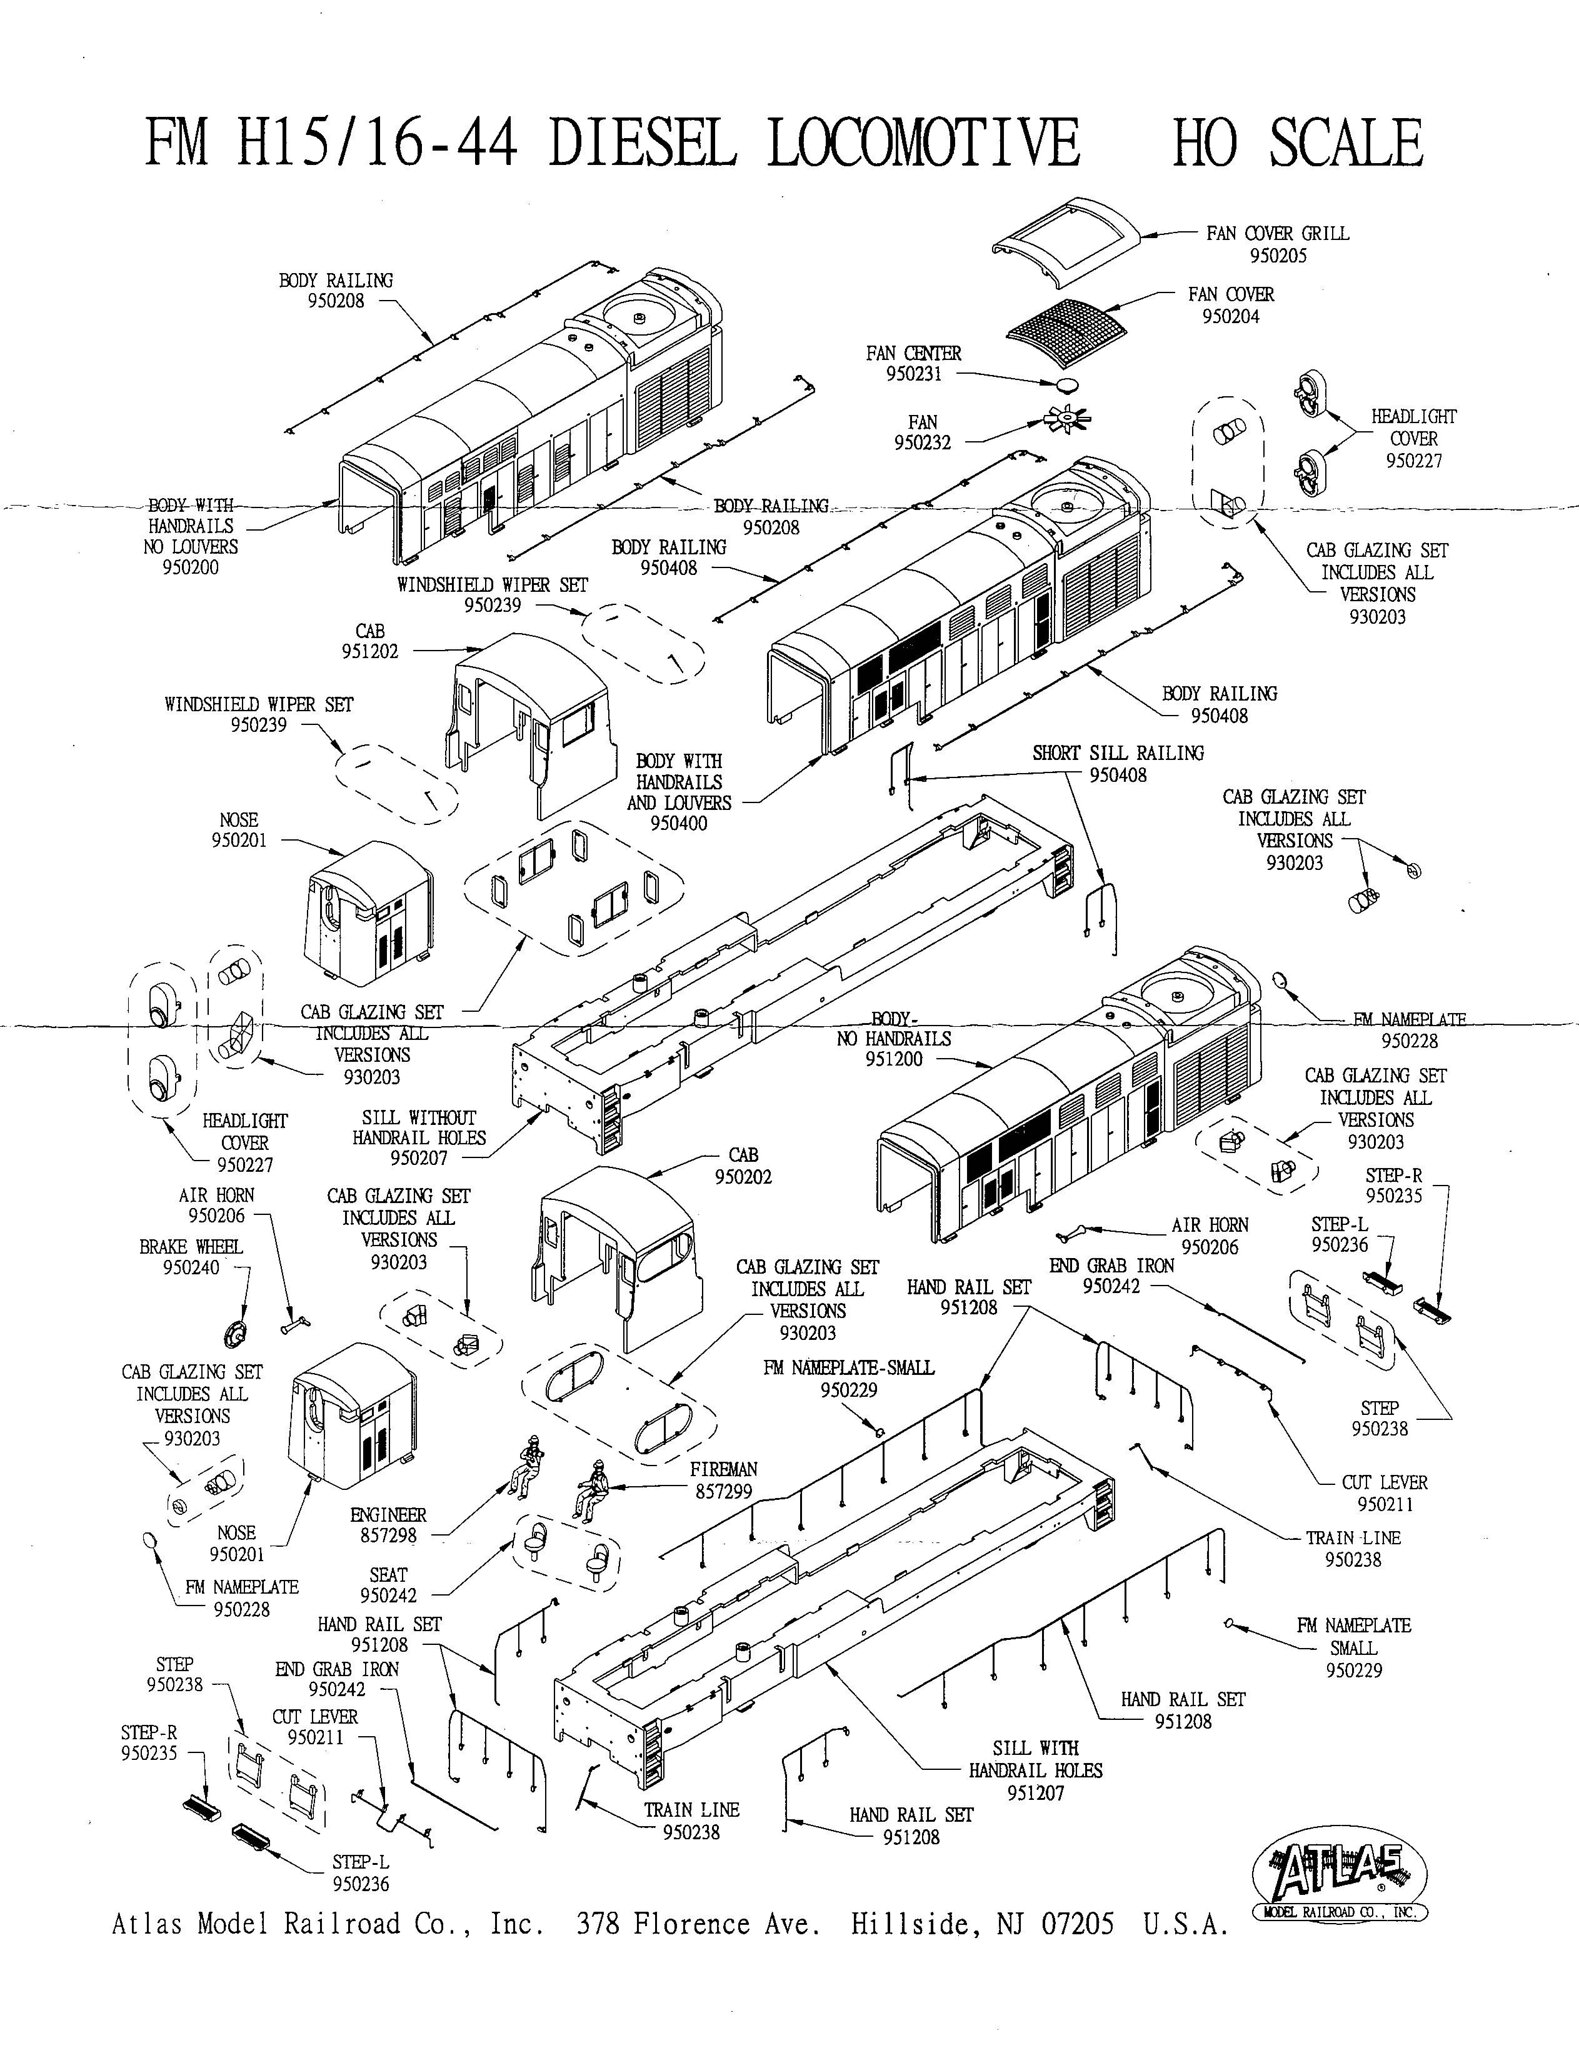 H15-44 Diagram by Paul Ahrens, on Flickr
 H15-44 (2) by Paul Ahrens, on Flickr