I replaced the original magnet in an open frame motor with some small, round neodymium magnets, and the motor no longer worked. I replaced them with the original magnet and the motor still won’t work. What’s the issue and is it reversible? Did I kill th motor?
You need to do careful troubleshooting, understanding how these motors work.
Presumably you used a permeable shim to match the thickness of the new magnet stack to the dimension of the old magnet. This involves a certain loss of magnetic power… but is small compared to the absolute gain of the NIB stack. Be aware of the direction of the magnetic field, and that the magnets you bought were end-polarized (the north and south poles have to stack in the direction between the open-frame pole pieces).
If this is right, you will have a solid ‘magnetic circuit’ through the frame, with the poles close to the armature (“minimizing the air gap”) but never touching it. The bearings should also be in line and free, and any end-play of the armature in the bearings should be carefully shimmed, although this can be a bit less important than getting the field correct.
If the armature rotates properly but the motor does not turn under power you have an electrical problem. To diagnose this most easily, you should have a multimeter, but even the cheapest ones available will do the job nicely.
First make sure you haven’t damaged the armature windings or the connections to the commutator.
Then make sure your brush connections are good – and that a brush isn’t quietly shorting to its holder.
Then ensure that the commutator is smooth and its segments aren’t damaged, and that the brushes are dressed and properly sprung to provide running tension. Even a small gap can keep the motor from running.
There is nothing mysterious or ornery about one of these motors, and you seldom need resort to incantations or sacrifice to get them turning.
Well written Overmod, well written. The problem these days is most active modelers did not live in the “open frame motor” heyday. When tuning and maintaining these was a common part of the hobby. They have faded away to the maintaince free sealed Can type motor and Coreless motor. And while those are nice, can be in short supply at times or expensinve. A fresh magnet stack and some easy maintance can make those old open frame motors run nearly as good and draw low enough amperage for DCC conversion, add in a Keep Alive circuit and your all set. Most just need one of the two motor brushes isolated to be converted to DCC as the other brush was already insolated. I have never isolated the whole motor, just both brushes. Open frames are hard to kill unless run super hot with a weak field magnet. Mike the Aspie
I’ve had good results adding neodymium magnets to Suydam interurbans with open frame motors, but in some cases the magnets are hard to reach without Dremeling out a rivet and I haven’t worked up the nerve to try that approach with some of my brass. The bigger limitation with a lot of old brass interurbans is power pick-up off the track, typically each truck picks up power from one side only, and I haven’t had the nerve to try to wire them for all-wheel pickup, but the new magnets do help and are a lot simpler/cheaper than a full remotoring. Although in the case of repowering some brass GE steeplecabs, I found using a newer Bachmann 44 tonner chassis (with circuit board removed to allow it to fit into the steeplecab chassis) produced better low-speed results, and had all-wheel pickup (plus you can get the appropriate sideframes via Shapeways.)
I have used the super magnets too with good results.
I also experimented with 2, 1/2" cubes and old Alnico magnets that had gotten weak.
Using a compass to properly orient the magnets, place a super magnet on each end of the old weak one.

I am no expert but this process seems to help out the old motors a great deal.
And you can cut or grind the Alnico magnet to precise shim length, too…
I wonder if anyone has experimented with Cunife magnets as shims: they are soft enough to cut and so a little tapping on the stack would conform the contact without having to file a magnetic material.
The sheet metal weights from freight cars come in varying thicknesses, depending on the brand, and are easy to add as shims once cut-to-size with a hacksaw or cut-off disc.
To easily determine which end-is-up for the stack of new magnets, simply bring it close, from above, to the old ones still in the motor - if the new stack is attracted, its orientation is correct, if it’s repelled, it’s upside-down.
I’ve re-done several locos with older open frame motors, and every one of them now pulls better, starts at a lower voltage, and offers much better low-speed perfomance, too.
Wayne
Wayne,
Should the magnet’s poles be oriented top and bottom or on each side of the frame? Does it matter?
YES, the LIOIN uses them powerful magnets to operat the siignals.
Problem was, I have put some of these magnets on the motor car and now they do not work as well.
When I get back up there again I will remove the magnets from the power car and put them on a car further away from the power.
Sorry, but I’m not sure what you mean by “each side of the frame”. The magnets are stacked atop one another, and will only go together by the attraction of their opposite poles. If the stack of neodymium magnets, when held slightly above the original motor, and is drawn towards the original magnets in the motor, then the new magnets should be inserted into the motor the same way.
If you put the new magnets in upside down, the motor will still run, but in the opposite direction of what it normally did.
If you need to add to the height of the stack of magnets, in order to fill a gap between the magnets and the motor’s frame, you can likely put it anywhere…atop the stack, beneath it, or within it, using a piece of steel of suitable thickness.
On the motor shown below, the steel “filler” is atop the magnets…
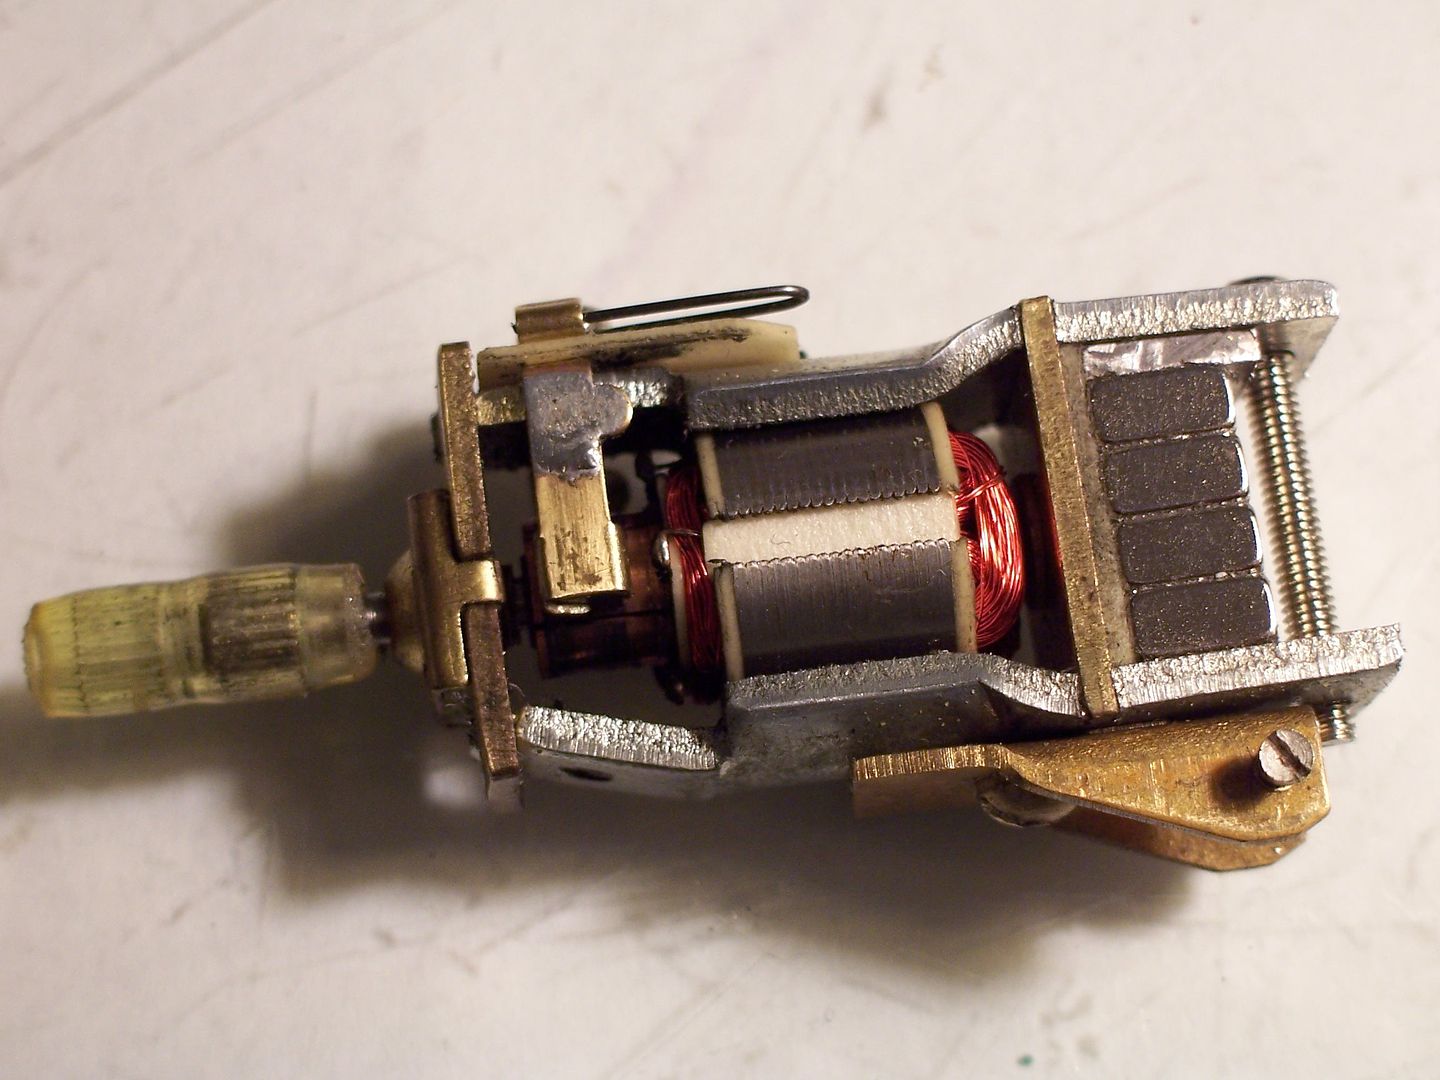
While the magnets shown above are only half the size of the original one-piece magnet (which had a cut-out relief in its rear, in order to accommodate that screw), they make a surprising difference in the loco’s performance.
Wayne
im asking if it matters whether the poles are oriented north and south (top and bottom) or east and west (side to side).
The poles are oriented to create a magnetic circuit through the metal open frame. That means north and south point up and down, and butt against the metal.
Whether north or south is up determines which way the armature will turn when DC of a given polarity is applied (I.e. which way your reverse switch is positioned). If it turns the ‘wrong way’ to be consisted with another locomotive, put the magnetic stack in the other way.
Jetrock, once you make the jump to powered overhead wire for the interurbans and trolleys, you make both rails the ground side of the circuit and the pole the hot side. I found that really helps with power pickup on the old Suydam cars, even the early runs with brass(non plated) wheels. A good quality trolley pole is also esential. I found some with a fabricated shoe touched the wire with the soldered joint and the impurities in the solder tended to gum up the shoe after running awhile. I replaced the shoe with a solid brass cast shoe or a whole new pole and problem was solved. Mike
I ordered some 1/2x1/8x1/8" neodymium magnets and they arrived today. I stacked 5 of them in the frame and used an exacto blade as a spacer. The motor runs fine, thanks to the information provided.
If you have a Harbor Freight store where you live, they care little button size Neo magnets. I bought several packages and used them in my ailing motors in my old brass interurbans. Motors that once ran hot enough to fry and egg, now barely get warm after over an hour of non stop running. You get enough to do one motor per package at $2.34 per package. I had 3 left over from each package so eventually(depending how many each motor takes, you get another motors worth. They fit perfectly between the screw at the rear and the rear armature bearing. Just close enough to keep the oil felt wick material for the rear bearing in place. Mike

I didn’t have any luck with the Harbor Freight circular magnets. At 5/16" wide, they were too big to fit in the MDC loco I tried them in.
Some motors are just to small, the ones from Micro Mark are even larger than the ones from Harbor Freight. That motor is quite small in my pic, But I do have even smaller open frames in my parts box from models that got can motors. I save all of them for spare parts.
Started reading this thread to find out what the heck a neodymium magnet is. Still don’t really know exactly WHAT they are but some of the replies clicked and I remembered an unfinished Penn Line PRR M1 that’s been sitting on a shelf for about 20 years.
I’ve wanted to convert this engine to DCC but hesitated because of the problems with replacing the original motor with a can motor and the expense of doing that. Upgrading the open frame motor with neodymium magnets sounds like the best solution.
Any advice or recommendations for this upgrade?
Hi Chuck,
Penn Line used Pittman open frame motors so the conversion should be easy and fairly effective. As others have shown, you need to measure the size of your existing cast magnet and figure out what size stack of neodymium magnets will fit in the space. If you can’t get an exact fit, use steel shims to fill the gap. If you can’t reinstall the original rivet or screw that held the old magnet in place, don’t worry about it. The magnets will actually hold themselves in place (if shimmed properly). You can use a little CA to fix them in place if you wish.
I’m not sure how much you know about Penn Line products, but this might be of interest to you:
http://www.tcawestern.org/penn.htm
Good luck,
Dave
Thanks for the info and the link, Dave.
The M1 wasn’t mentioned in that history of Penn Line so I’m thinking now that it may have been in some pre-release stage of development when Bowser acquired Penn Line. I’m traveling right now so I can’t check but I’m pretty sure the Builder’s Plates on the smoke box have P-L on them (or I’m confusing the M1 with an older H9 that I have).