I am wanting to attempt my first small scratch built trestle and am wondering what to use to simulate the nuts and bolts that go through the beams? I found a package of plastic ones at my LHS but it was $3.00 for about 20 little simulated nut and bolt heads. At that rate I would have to spends hundreds on little specks of plastic and that is not going to happen. All help greatly appreciated.[C):-)]
Grandt line carries a large selection. Order direct or search for them at larger hobby sites/shops. Here’s a link to their HO scale page of NBWs (Nut/Bolt/Washer castings):
I typically paint the NBWS on the sprue and then cut them off with part of the shaft attached. Drill holes in the beams where you want them to go. Use a Pin vise if we are talking small numbers, dremel for larger amounts. Be sure to buy several drill bits as it is normal to break some of these tiny little devils. I have also cut the heads of the bolts off flush and used CA to glue them in place without drilling holes…Very difficult with the smaller sizes. I have glued them in using CA or Elmer’s with about the same degree of success when gluing NBWs into holes.
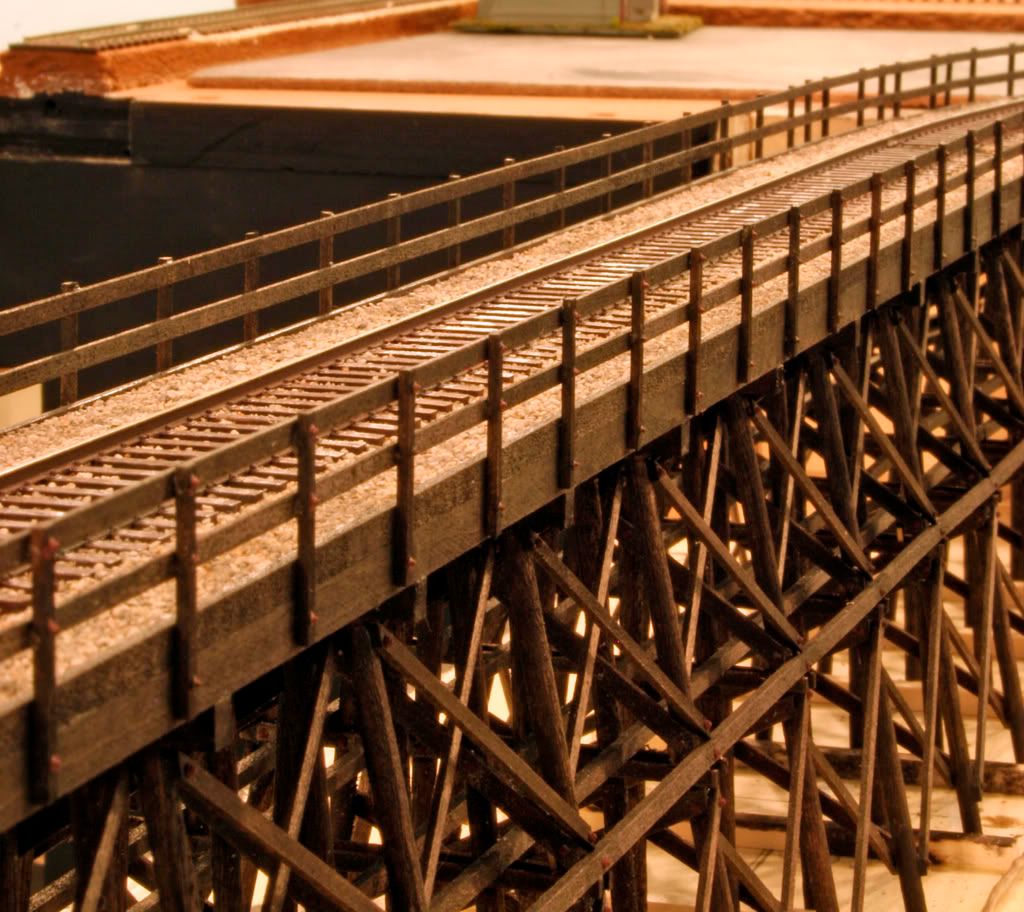
Some structures can take many hundreds or even thousands of these if you are being 100% prototypical. Fortunately, well placed NBWs can give the impression that there are lots of them on the model when in fact there are not. I built a trestle last year that I estimated would need around 1200 NBWs, I cheated and put them on the aisle side of the bridge and certain other noticeable areas and got away with around 600! Here is the result:
I think that NBWs add a lot to a model and are worth the time for foreground models. Once you get used to seeing them on your models there’s no turning back… [:-^]
I wonder if WS “cinders” in would do the job. Each ‘cinder’ is black and very tiny. A meticulous person should be able to apply them and have them look a lot like a tiny black bolt head. They could be weathered after the fact by spray or a wee drop of a wash of the appropriate colour.
Another suggestion. Get a pack of modeling clay. Press a stick out to a sheet between 3/8" to 1/2" thick. Press a sprue of NBW castings into it to get the inpressions. Remove the sprue. Fill the casting impressions with baking powder. (Or was it baking soda?) Dribble some CA glue into the impressions. After the glue sets, a matter of seconds, you should have a number of new useable NBW castings. A bit of sandpaper on the backs an a touch of paint, and they can be glued into place. The clay can be reused. Damage to the mold impressions are irrelevant, just smooth out the clay and make a new impression with the original parts.
Carl Goldberg models mentioned this in their adds in the mid 70s when they were first introducing their Jet line of CAs. I have seen it mentioned in many Model Airplane and Boat magazines, but not too often in th Model Railroad press.
Very brief related question…when painting bolts on wooden trestles and cast in rivets on city viaducts and other bridges in styrene, does anyone have tips for highlighting them so they stand out a bit? (Paint? “Rust” specks, etc.)? Never seen this mentioned in mags or books so far. Thanks.
If you are building a showpiece model I would explore the nut bolt washer (generally called NBW) castings. They come in a nice variety of sizes and types. Detail Associates has a package of 48 castings for about $3 which I think is pretty reasonable.
If all you seek is the general idea, then very fine wire that fits snugly into a small drilled hole, then clipped flush with the wood, would give something of the same general idea. Both NBW castings in small holes and fine wire clipped off in the same holes amount to rather painstaking work. Again for a showpiece or centerpiece model this might be worth it. If you aren’t worried about how it would look when photographed close up for an MR or RMC article, then a small dimple made with an awl and a quick dab with a very fine point brown Sharpie gets the idea across, particularly for the recessed sort of NBW – practice on scrap wood before you try this on a finished model – but again that is just an approximation of the effect. You can see from the above picture on the other fellow’s posting how nice the effect can look when you use real NBW castings.
Archer transfers has rivet decals in HO scale. They are little rivet heads on decal paper at differing spacing. Maybe what you may not need for a trestle but if you have any steel beams on the bridge than these would work great.
Thanks for all your help guys. The craftsmanship in the photo’s sure shows me that I have my work cut out for me.
Crandell the cinders idea may work as this first attempt will be at the back of the layout. I once made some very convincing rivets by applying epoxy with a very fine needle and sanding them smooth so I may try that as well.