Steffan, from your photos your layout looks great. What are the footprint dimensions?
Regards, Chris
Steffan, from your photos your layout looks great. What are the footprint dimensions?
Regards, Chris
wow @steffd that layout looks awesome. thnx for showing the pictures!
Hi Chris,
Thanks Overall size is11’ x7’
Thanks ![]()
That’s a lot of railroading in a relatively small space!
Mike H
Great photos and beautiful layout.
Rich
howdi all
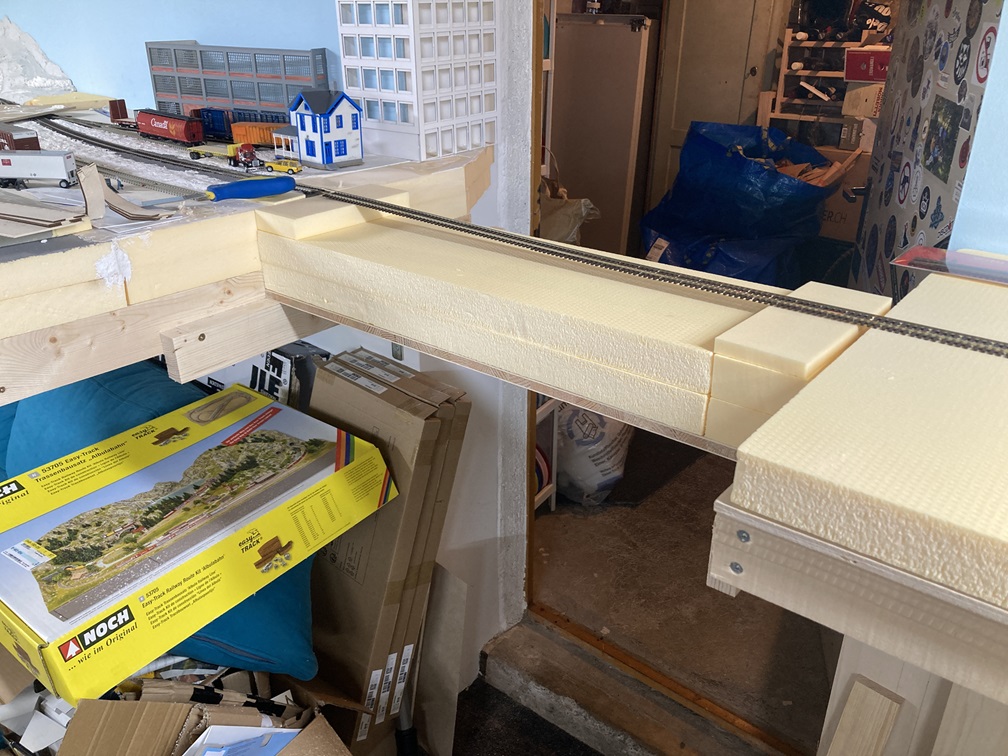
i had some time over the weekend to work on my layout. so here are some pictures and updates.
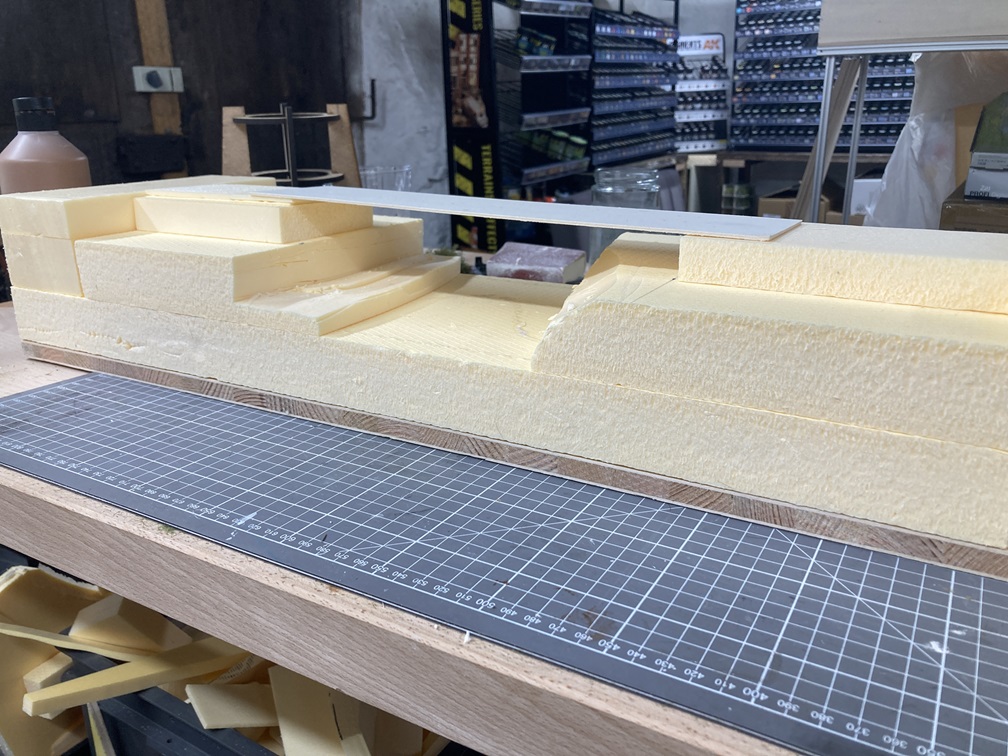
First i had to find the right height for the bridge section. after that i made some testruns with some engines and also with my biggest boxcar. went all good so i now have the correct height i need.
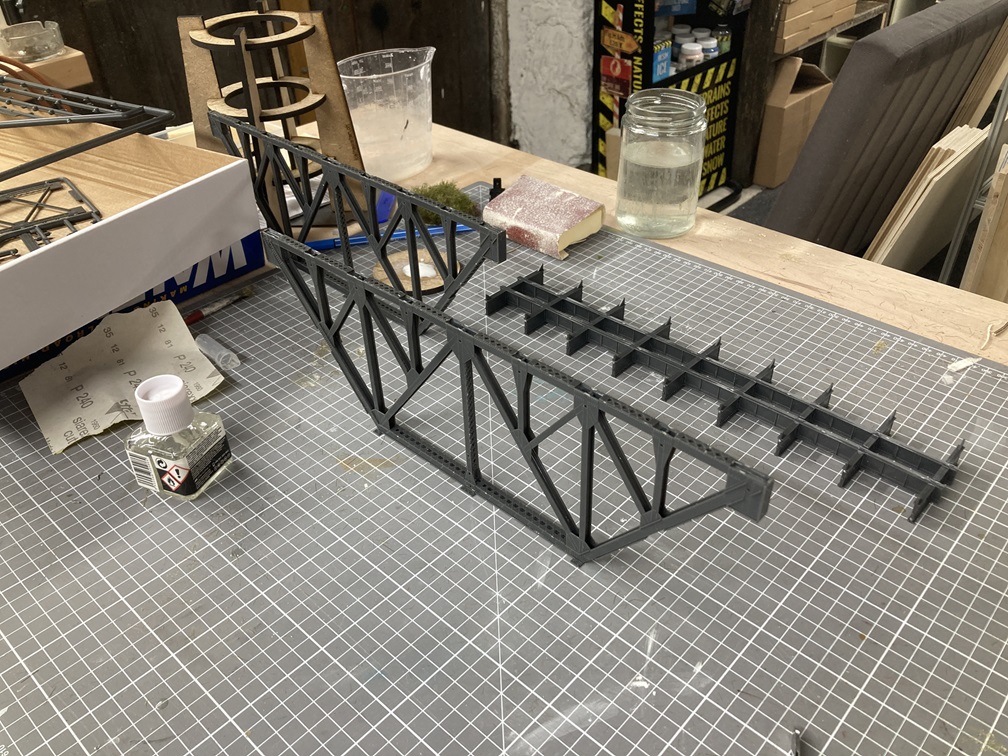
iam also building the bridge, and yes i did glue some things the wrong way, but i was able to fix my mistake haha. the bridge is now ready for priming.
the great thing about the lift out section? i can lift it out and work on it at the workbench. there will be a river and also a walk way with a concrete wall. and of course on the wall there will be loads of graffiti’s. ![]()
thats it for now.
cheers
Marco
I’m building an N-scale layout, mostly to n-trak standards, that will eventually require a similar dropout or swinging section for three tracks. Have you thought about how to keep your tracks aligned as they go over the dropout section? This is what worries me the most about this area. I don’t want to have to fiddle with it every time I run my trains.
yes and no.
at the moment i plane like i will lay over a flex track, and glue it in place. when this is done, i will cut it with a dremel. there will always be a section that is not glued down, so i hope this will work in the end but i will find out.
i know the ntrak group switzerland has also a swing bridge. but i never took a picture of it, so i cant really tell how they did it. but i know in the end it will work (i hope haha)
howdi forum folks
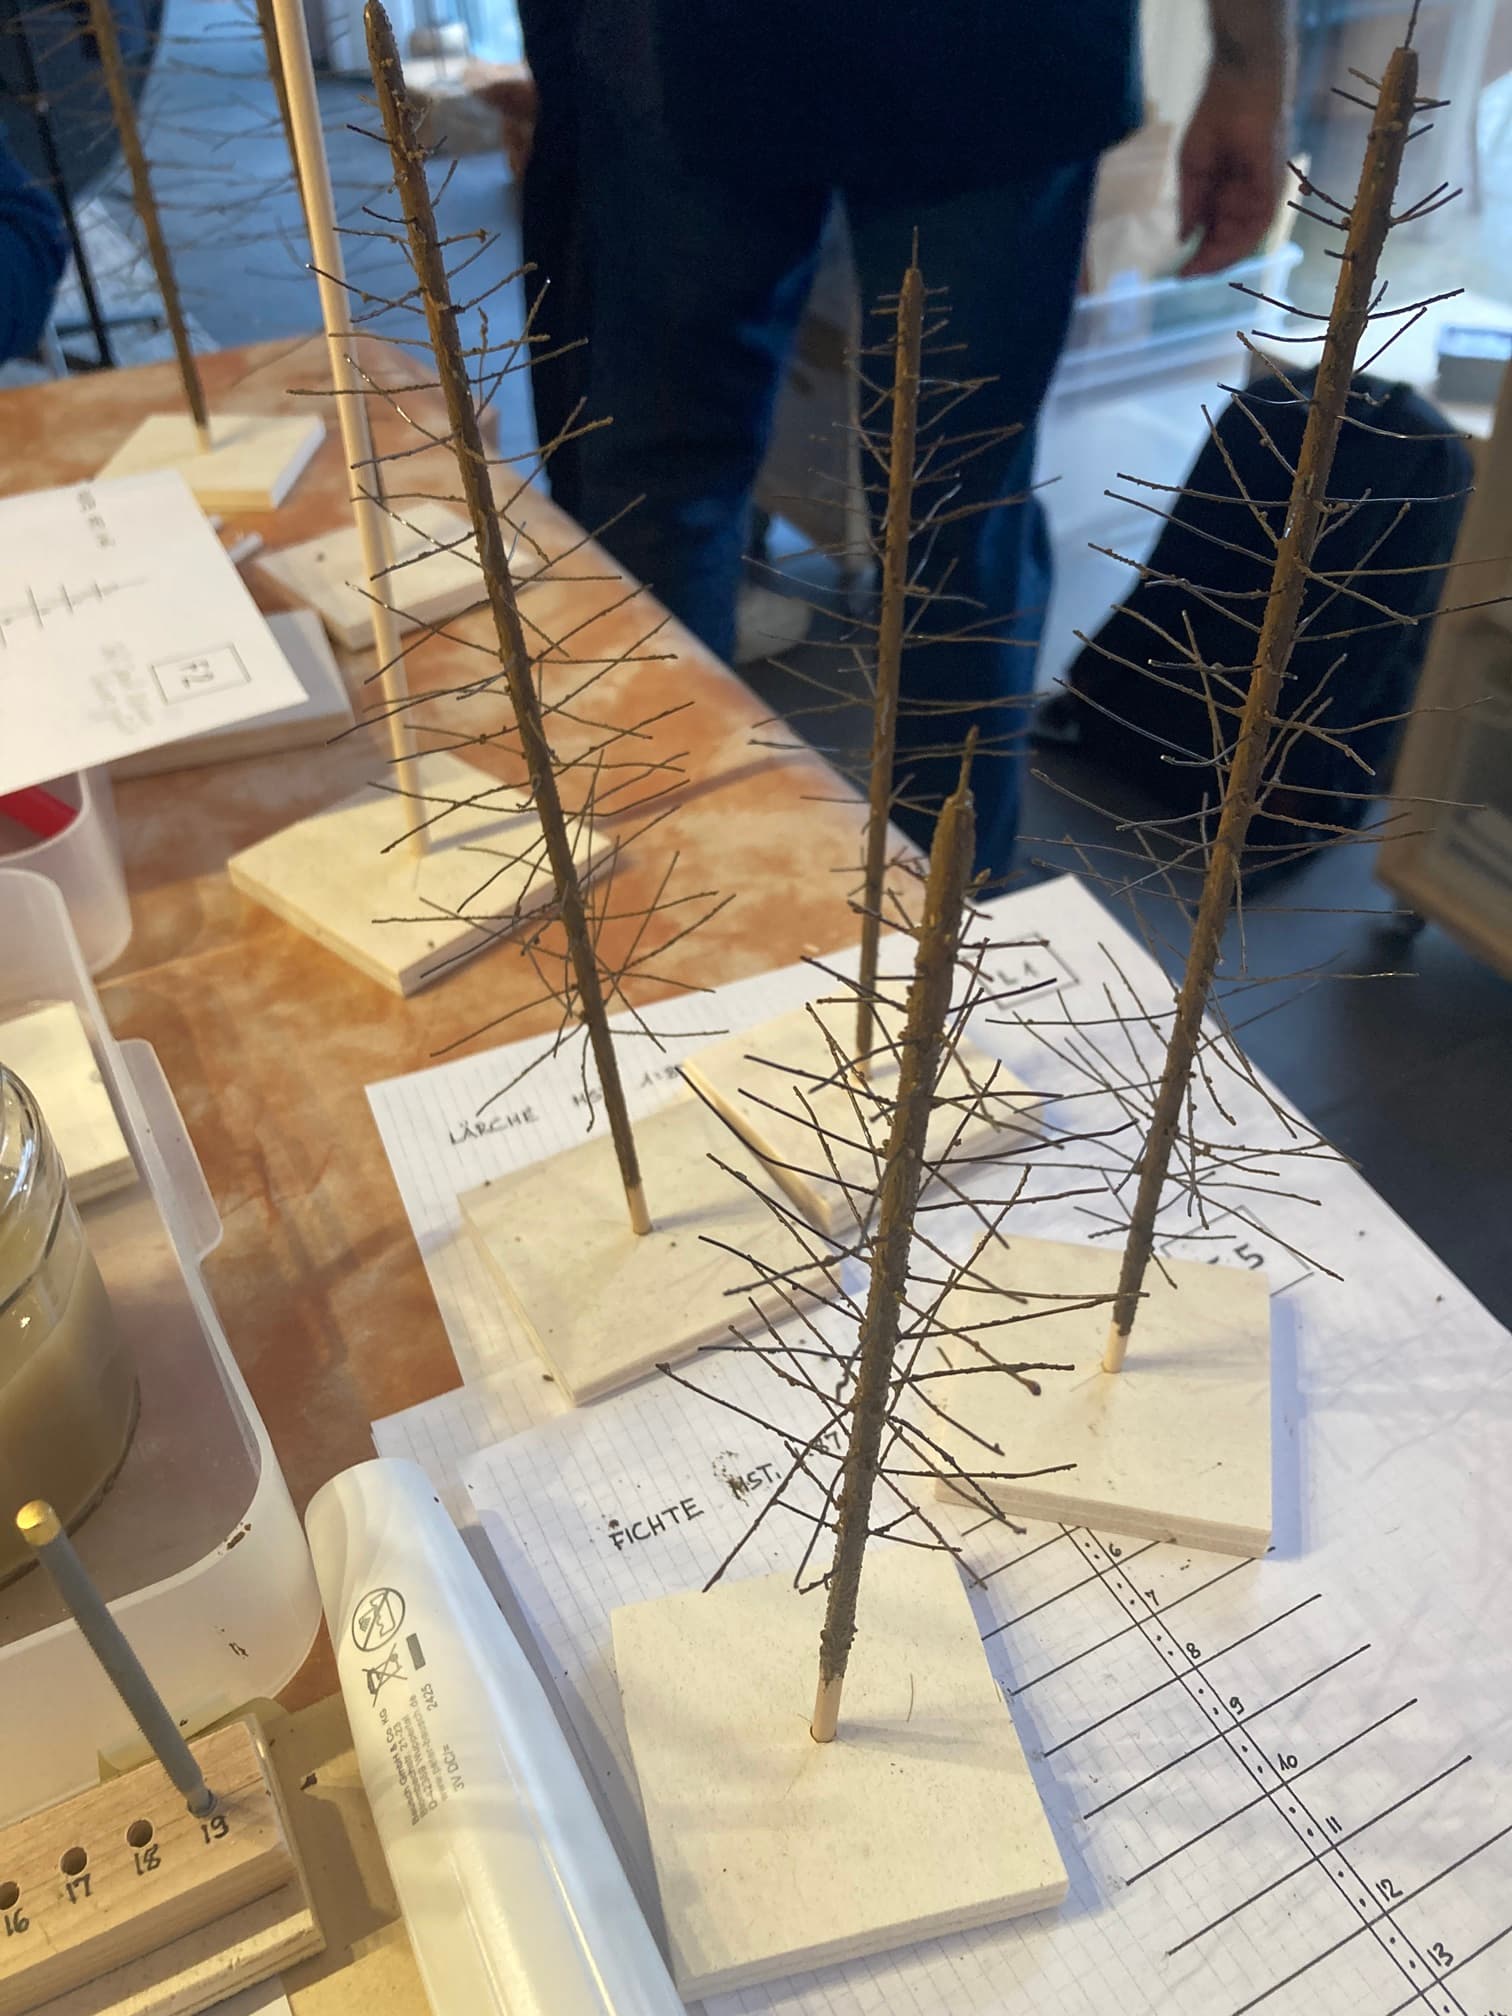
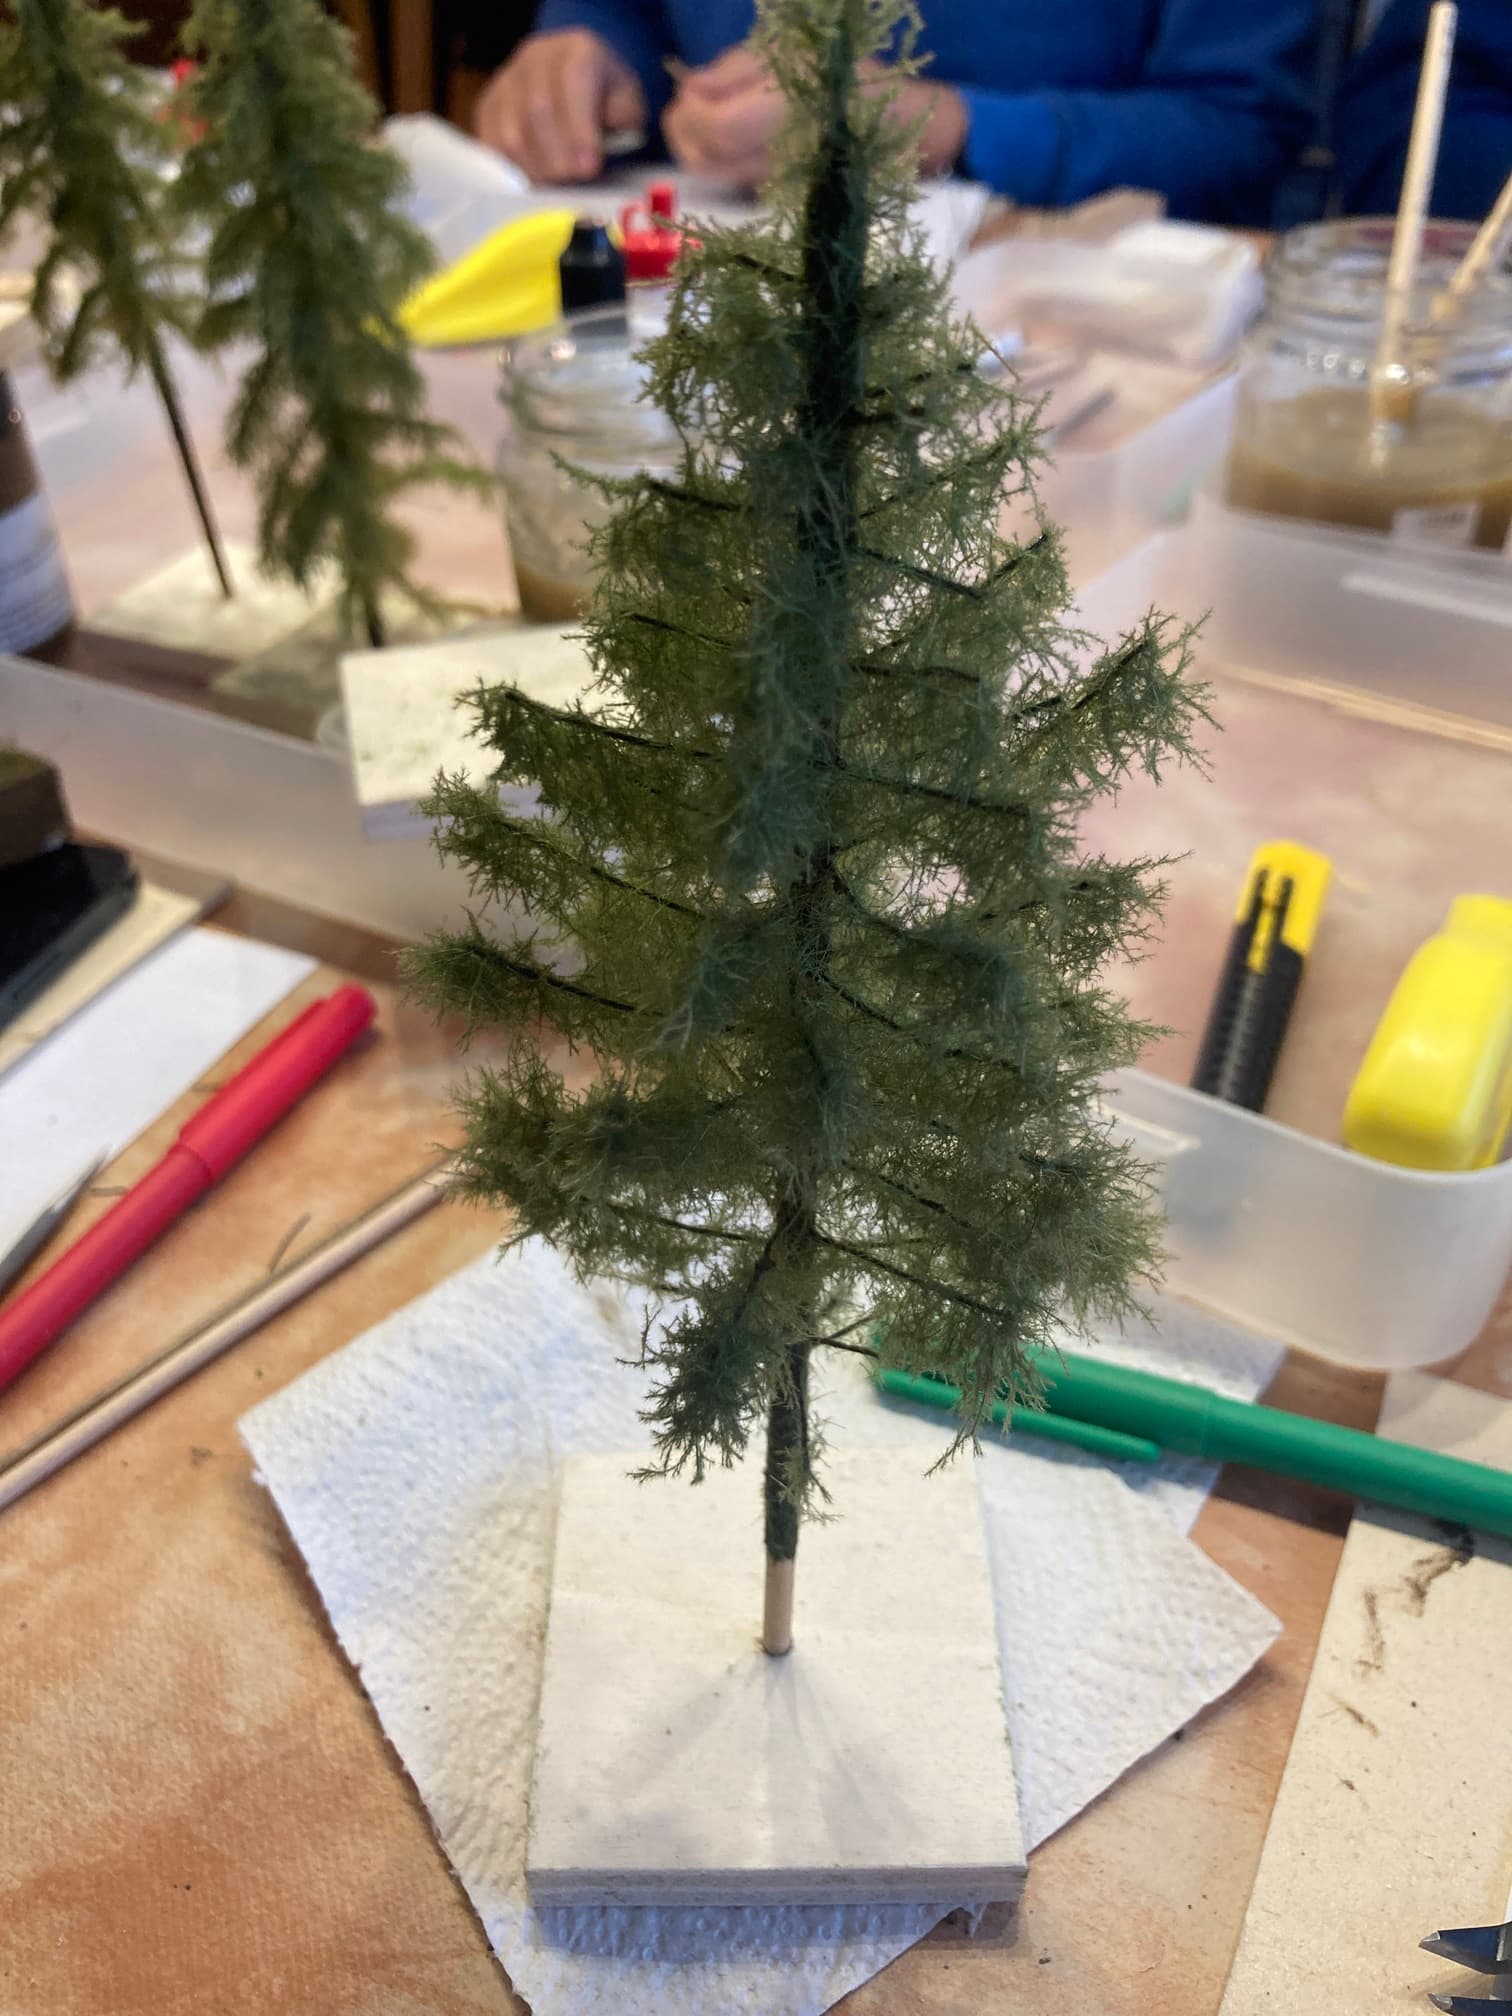
last week i attended a workshop hosted by the Legend Marcel Ackle. He teached us how he does trees that almost look real. So i was really looking forward to my second workshop by Marcel.
After some hours of work, i had my first trees ready to be flocked.
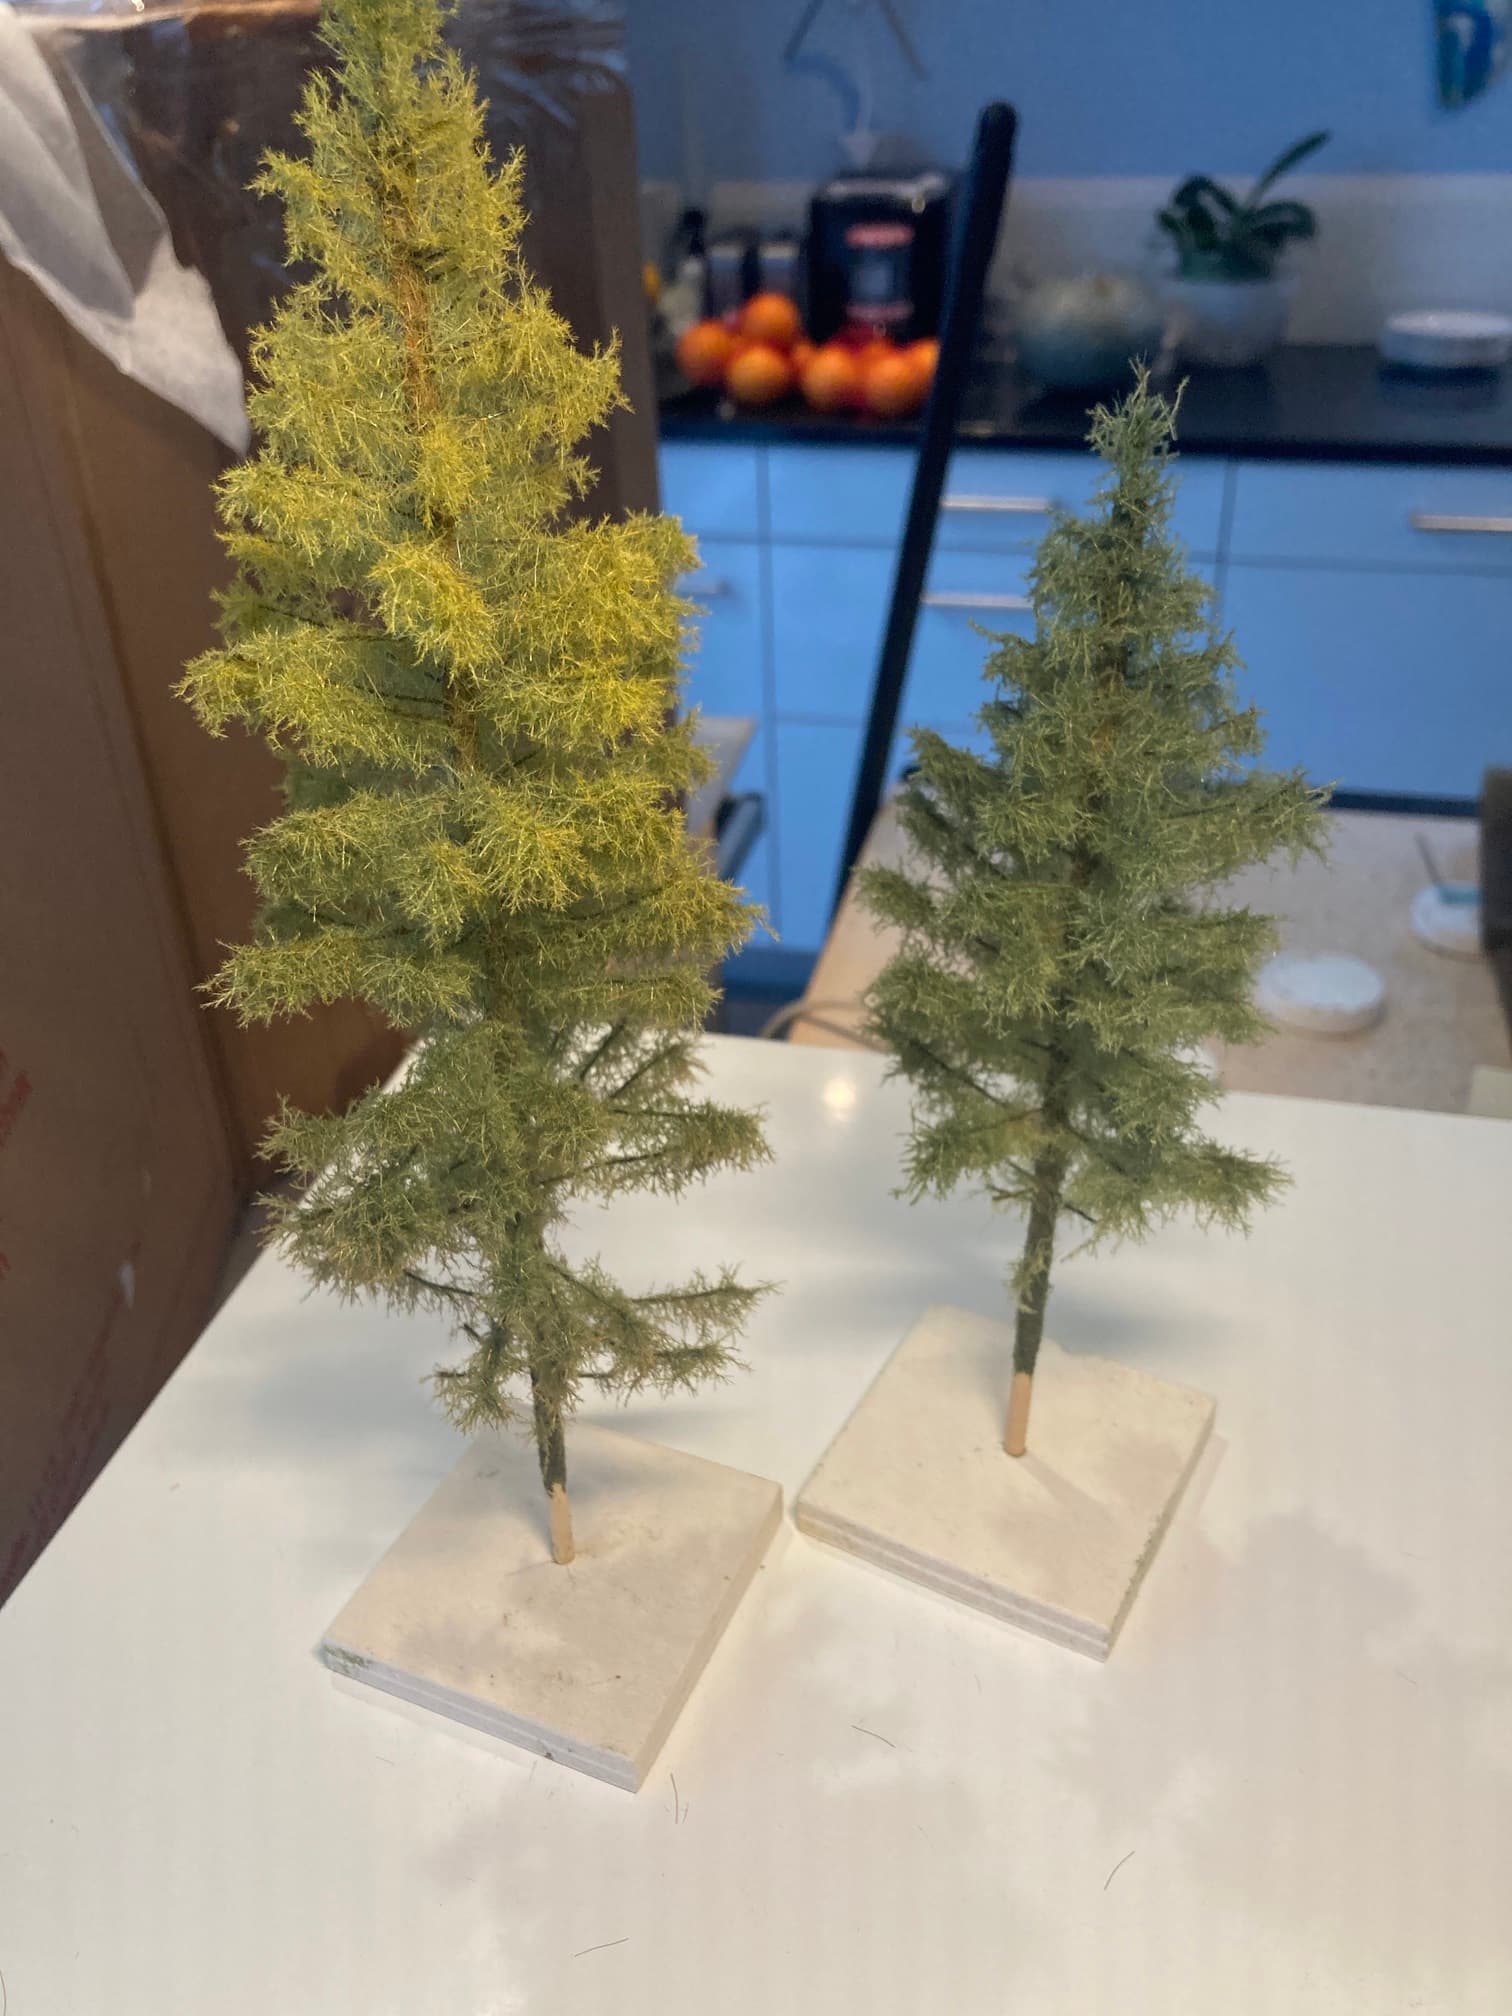
in the end, i did leave the workshop with a happy face, new gained knowledge and a box full with 5 new trees.
i can also tell you, i already ordered wood sticks, to start working on more trees at home ![]()
Cheers
jay
Nice work!
well howdi!
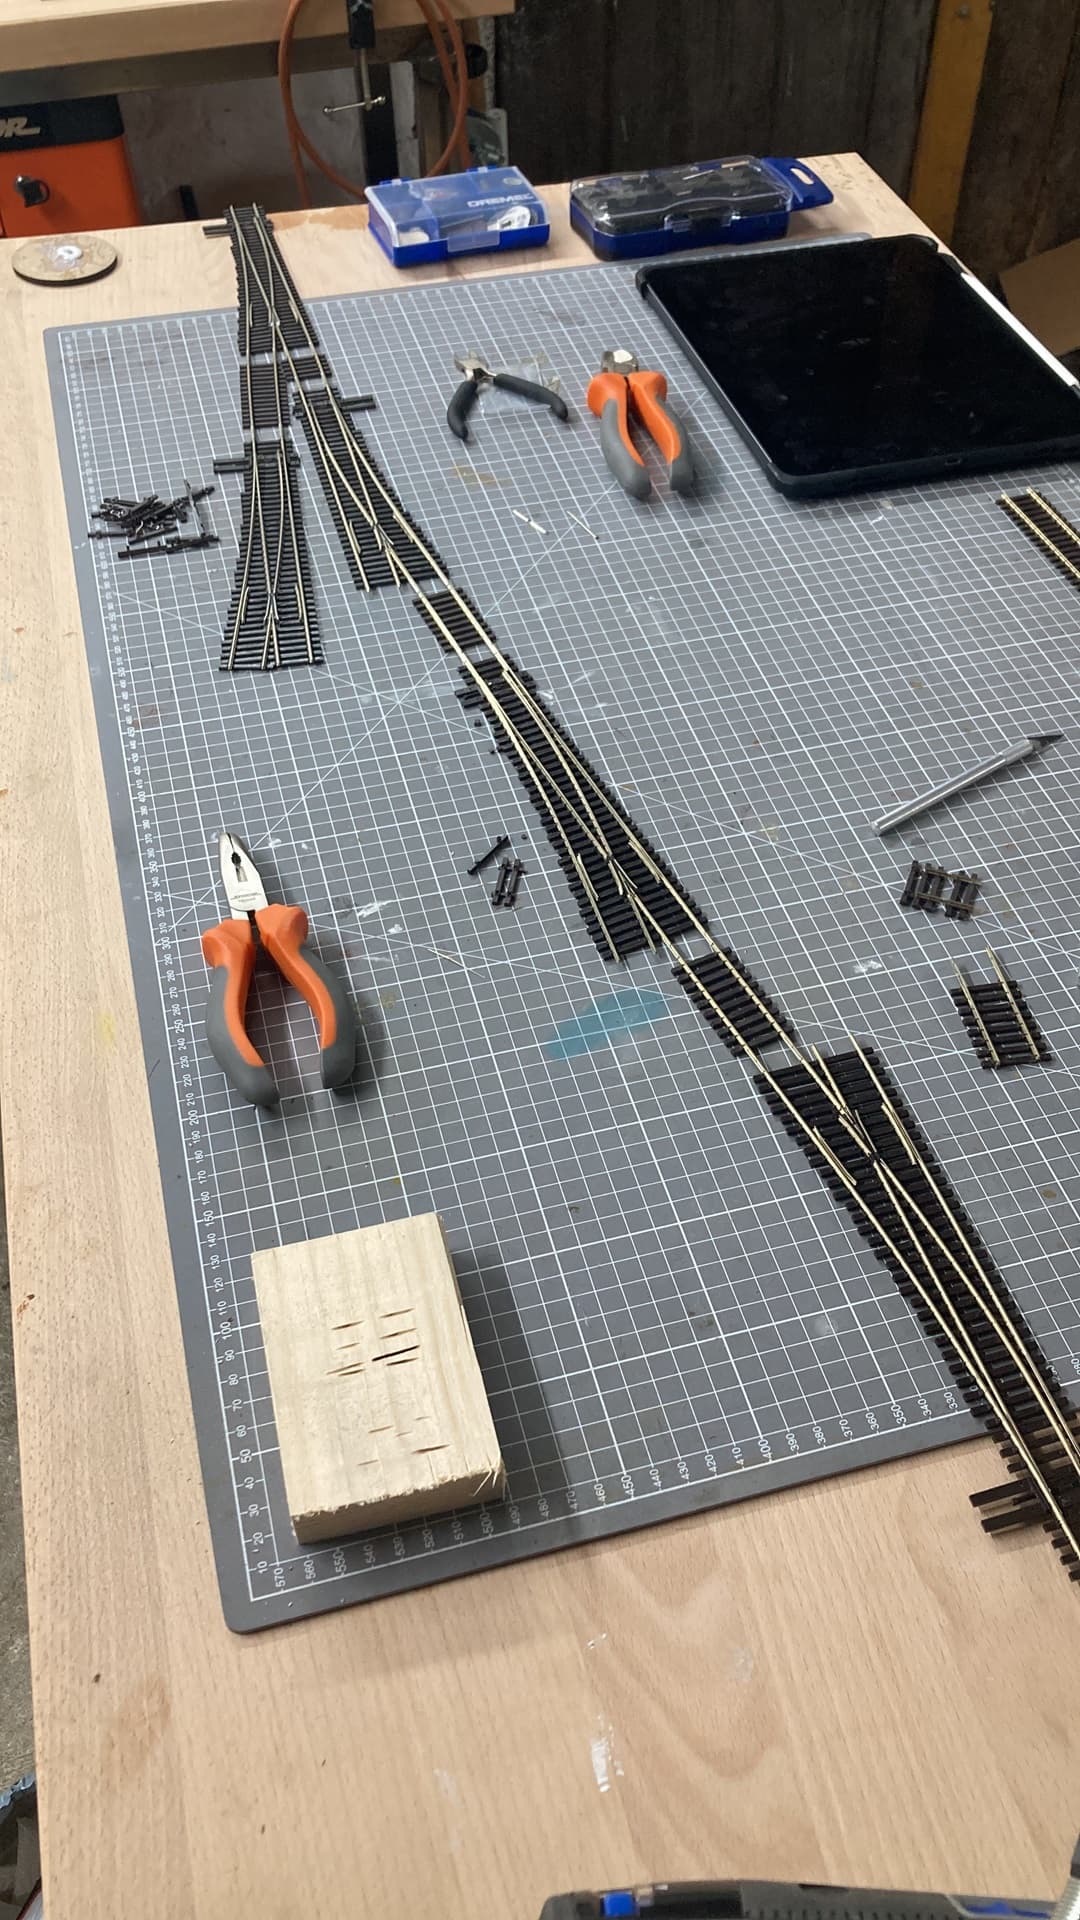
past weekend i had a little time to build on my layout. so i started to lay some track on section F.
the great thing about a cleaned workbench? You have space to work on ![]()
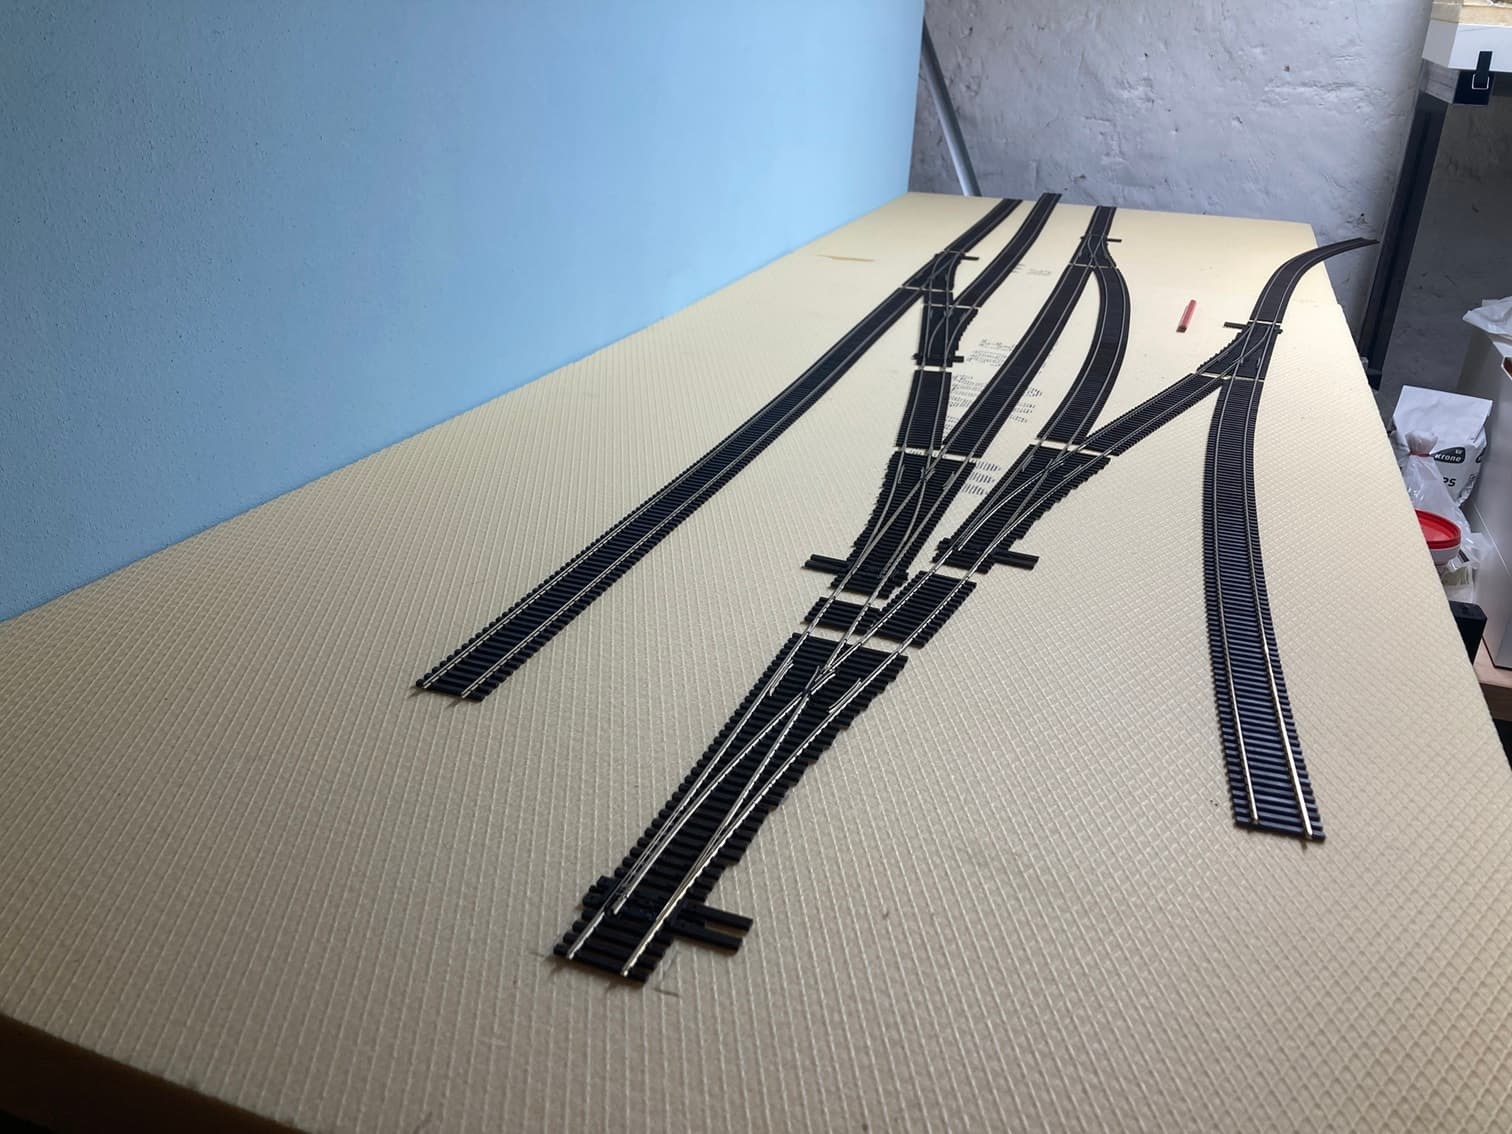
i dont have a trackplan, i just had a idea in mind, what i want on the “Module” and so i went from turnout to turnout till i had everything i need.
and this is how it will look in the end.
from left to right:
in my mind this already looks really nice and i have some plans for all the buildings and stuff. lets see how it will look in the end ![]()
cheers
Marco