My LHS has a cache of old Cary (pre-Bowser) metal shells and I’m thinking of buying a couple. Never dealt with these before, and I’m pretty new to painting. What does it take to airbrush one of these suckers in a post-Floquil world?
TIA
Aaron
My LHS has a cache of old Cary (pre-Bowser) metal shells and I’m thinking of buying a couple. Never dealt with these before, and I’m pretty new to painting. What does it take to airbrush one of these suckers in a post-Floquil world?
TIA
Aaron
I have a sack full of Cary E7s, As & Bs. When Floquil went away I went with True-Color Paint. I lightly primed them with Rustoleum Automotive Primer then shot them with my single action Harbor Freight airbrush. Everyone turned out very nice.
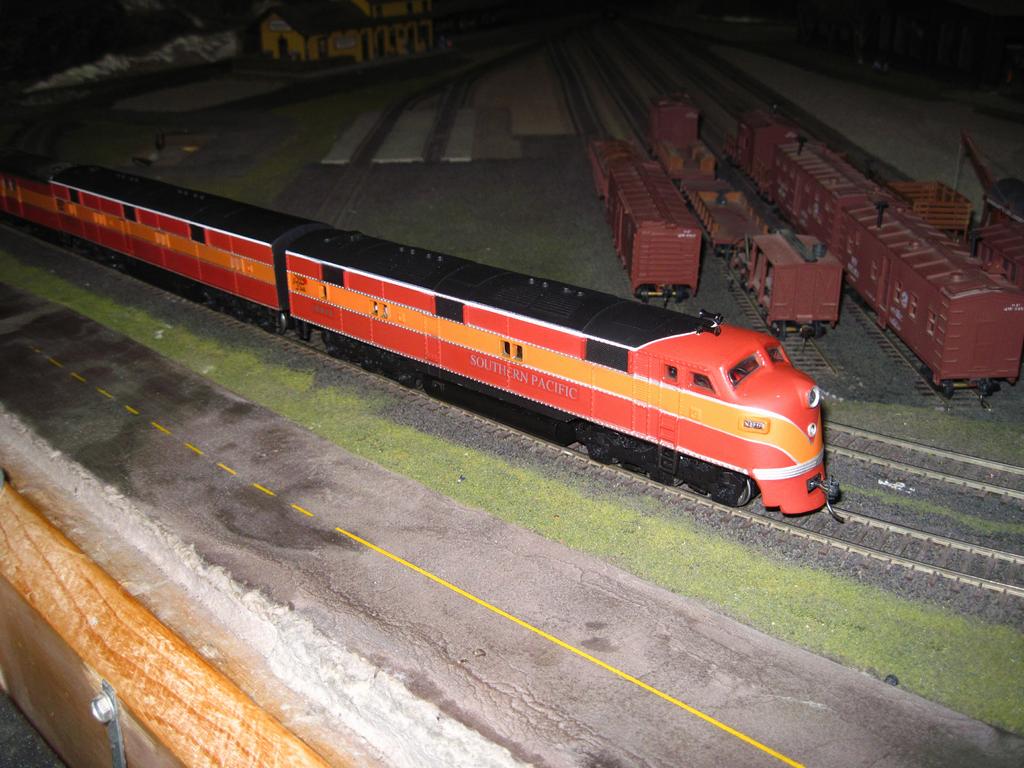
I have 4 sets of Cary E7 As & Bs painted and another set ready to paint.

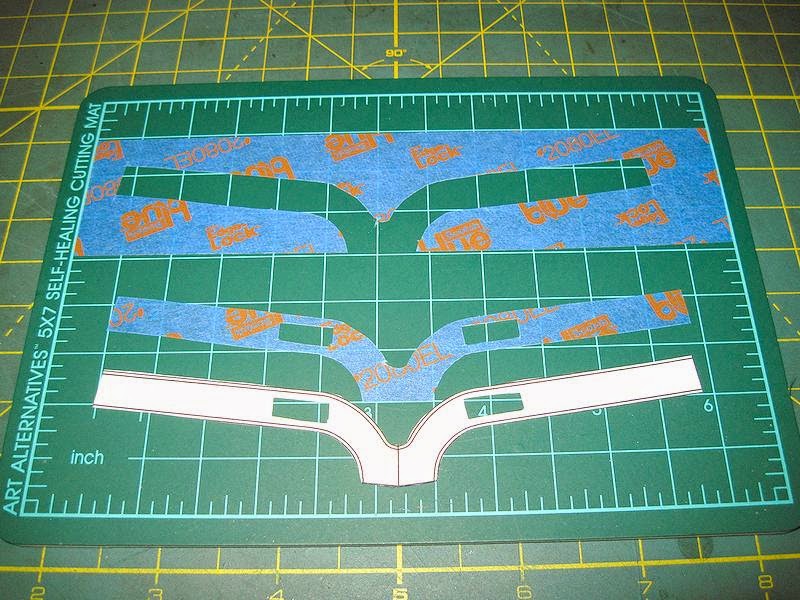
I made a drawing of the deep V and used it to cut out the masking tape to paint all of my Southern Pacific E7s. Worked out much better than using decals.
Mel

My Model Railroad
http://melvineperry.blogspot.com/
Bakersfield, California
I’m beginning to realize that aging is not for wimps.
Wow, those did come out nice! Thanks.
Those Cary bodies are on Athearn BB SD40-2 frames with Mabuchi FK280SA motors, they weigh almost 2 pounds and have 8oz drawbar each.
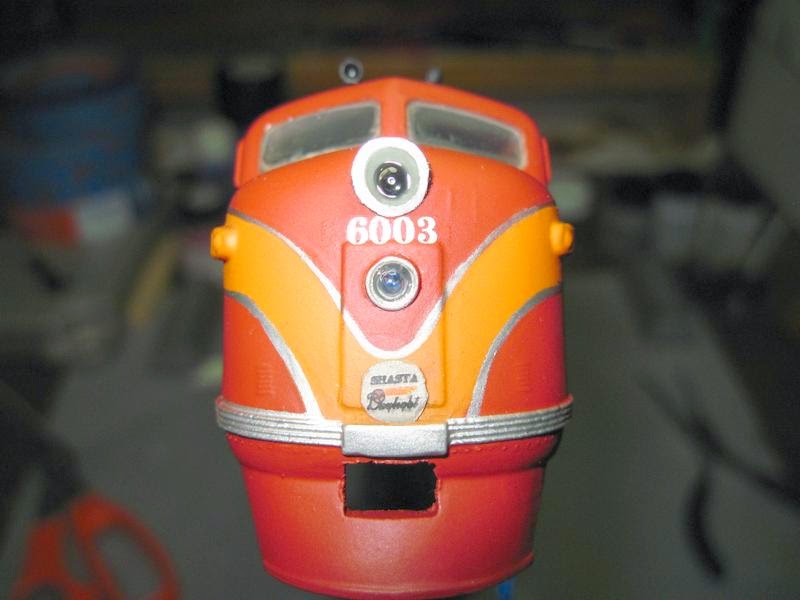
The Cary bodies don’t have the lower headlight, that’s a Mel mod.
Mel
My Model Railroad
http://melvineperry.blogspot.com/
Bakersfield, California
I’m beginning to realize that aging is not for wimps.
Good info, Mel. I have a Cary heavy mike, and was wondering how to go about painting. Thanks. Dan
One pair of my Cary/Athearn E7s are my go to engines for layout maintenance and get tossed around a lot and the paint is holding up very nice. They get handled a lot and after about five years they still look like they just came from the paint shop.
They are coupled together with a 3/16” x 1/16” brass drawbar so both locomotives have to be moved as one and handling a pair of 2 pound E7s isn’t always easy.
This is my 2 pound plus maintenance E7A sitting on my scale.
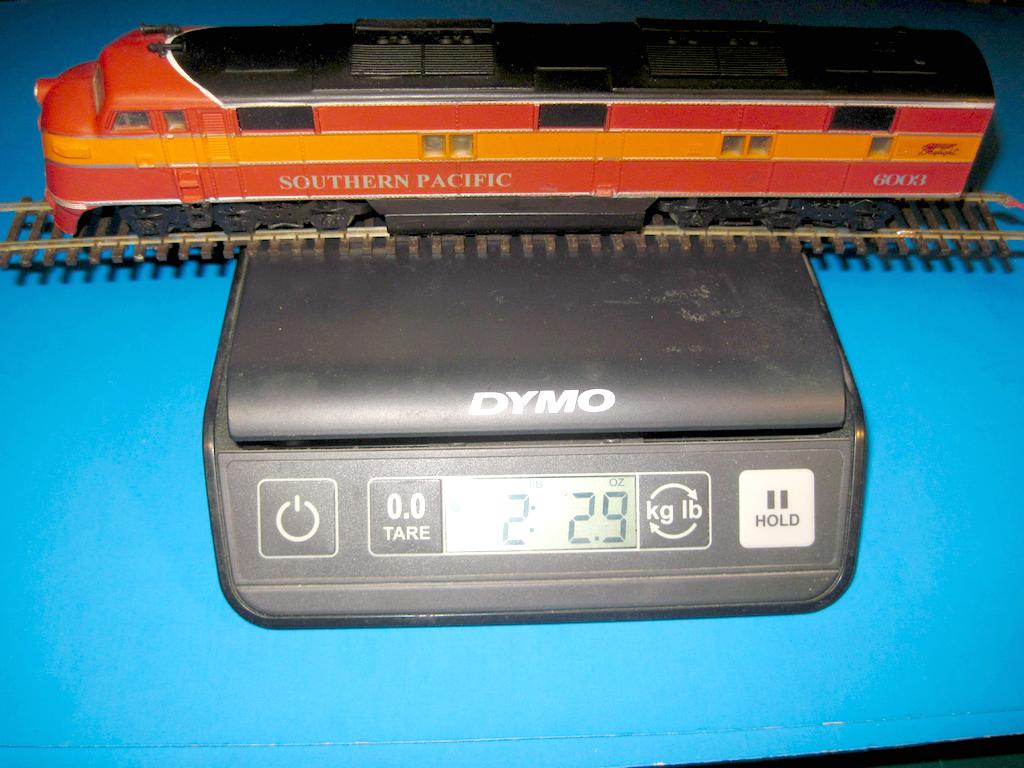
That paint has been on for about 3 years in that picture.
Mel
My Model Railroad
http://melvineperry.blogspot.com/
Bakersfield, California
I’m beginning to realize that aging is not for wimps.
I have one of those Cary steam boilers installed on a Mantua Decapod. If I had access to these boilers in a LHS, I would empty the shelves… They are hard to find these days. I like them because they remove that “standard” Mantua look, which is nice if you have a fleet of these.
Preparation is pretty much like any other metal engine: remove the boiler from the model, make sure the bare metal is clean from oils and residues, including skin oils. If your boiler already has a coat of paint from a previous owner, it’s probably better to remove it with something like Pinesol. Some folks use auto brake fluid… I prefer to remove old paints using a hobby sandblaster, using soda as a blaster medium.
Apply a good metal primer – auto primer works well. I haven’t tried it on that particular boiler, but I imagine you can bake the boiler in an oven for about 20 minutes (250 degrees) after applying the primer for a more durable finish. That’s what MDC recommended for its metal boilers… I’m not sure it’s necessary. I like using diluted shellac as a primer, but I think I’m more the exception than the rule. I brush paint a 50% solution on the boiler. I find that auto primer rubs off too easily.
After a few days (use the sniff test to ensure that it is entirely dry), apply a good quality model paint, solvent or acrylic based, taking care not to touch the unpainted boiler with your hands. Scalecoat, Vallejo, Modelflex, Protopaint… these are the usual characters recommended on this forum.
Simon
Surface prep is important. They need to be degreased with a solvent to deal with oil, grease, finger prints. Finish up with hot soapy water and a clean water rinse. Next pickle the surfaces. I use supermarket vinegar and soak for 20 minutes, half an hour, a little more, it is not critical. The acid etches the metal slightly giving it some tooth for the paint to grab onto. Good hot water rinse to get the acid off. Metal is smooth and slippery and paint has trouble sticking. The rattle can autoprimers have the best stick-to-metal chemistry known to man. They are sold to auto mechanics to paint somewhat greasy engine parts like ignition coils and various covers and other stuff. Stick to metal is highly valued. The two big names, Krylon and Rustoleum have competed themselves to a tie. They both work well. They work better than any of the primers sold by the model paint companies. They are sold in three colors, light gray, dark gray, and red. Use light gray under light colors like yellow, dark gray under dark colors like Pennsy DGLE, and red under red.
Jobs like this need to be sprayed, brush painting leaves brushmarks. You can do a pretty good job with rattle cans, but an air brush is better.
Thx all!
A friend and I were wondering about Rustoleum – if it’s okay to spray out of a can, or better to spray some of the paint out, thin it a bit and run it through the airbrush. Any opinions?
Aaron
Simon, my source was Arnie’s Trains in Westminster, California (I almost says CA… wrong abbreviation to use with a Canadian). They had at least one (maybe two) kits for Tyco steamers – might be the same as Mantua. I did not pay close attention to them as I wasn’t looking for steam. They had the diesel bodies for about $15 apiece, I think the steamer I saw was in the same ballpack. You might want to give them a call and see if they have what you need… don’t think they are running away. I know they do some mail order.
http://www.arniesmodeltrains.com/
You can ask for Kevin and tell him Aaron (Chris’ friend) from the Pasadena club sent you… but I doubt it’ll make a difference. ![]()
I will check that out, thanks!
I painted these 25 years ago and never finished detailing them. I used just your std automotive etching primer spray cans and airbrushed Floquil Warbonnet paints. I was pretty satisfied with the results for my first attempt painting metal shells.
edit:
Wouldn’t post picture I inserted.
Thank you everyone! I bought the Cary H-12-44 shell and appreciate all the instructions here – great guidance for when the time comes to (try to) paint it.