If you ever have plans to light a building, best to paint the inside flat black first. For buildings with a visible interior, use a primer, brown/red is good, but there are others. Then you can cover that with a lighter, more tyocial interior color than black.
After that, it depends on the kit. Paint hides a multitude of errors, so I tend to hold off until the basic structure is assembled. This usually leaves aside things like doors, windows, etc, which tend to be on seprarate sprues and can be painted a contrasting color as you like. Apply the basic color to the structure and paint the add-ons with one or more additional colors. Then finish assembly, EXCEPT for window “glass.” I weather things to my liking, if I’m in the mood, then shoot everything with Dullcote. Then I install the window glass last.
You might have to try different methods to find what works best for you. For me, on a plastic structure kit, I prefer to paint everything I can before assembly, including adding decals to the building walls. For a brick building, I prefer to paint both sides of a wall section with primer gray (usually Tamiya from a spray can). Then I use an art marker to color the individual bricks. The art marker has a fairly hard contact area, so it only paints the tops of the bricks, leaving the mortar part gray (or light tan, if you want to use that color instead of just leaving the primer gray). You can get art markers at an art supply store like Michael’s. Any dark red to brown color will work. You can always make a few bricks a different shade by coloring it individually with the sharp end of the art marker (most come with two points, one broad and one fine) or a colored pencil.
If you look at the building behind the BN boxcar, that’s a Walthers kit I used this method on. Notice I also left the trim the lighter color, like around the windows.
Like Mike, I prefer to paint the basic structure after it’s been assembled. This allows you to make alterations and touch-up areas where the parts don’t fit as well as they should - this is especially true of corners, particularly on structures representing masonry.
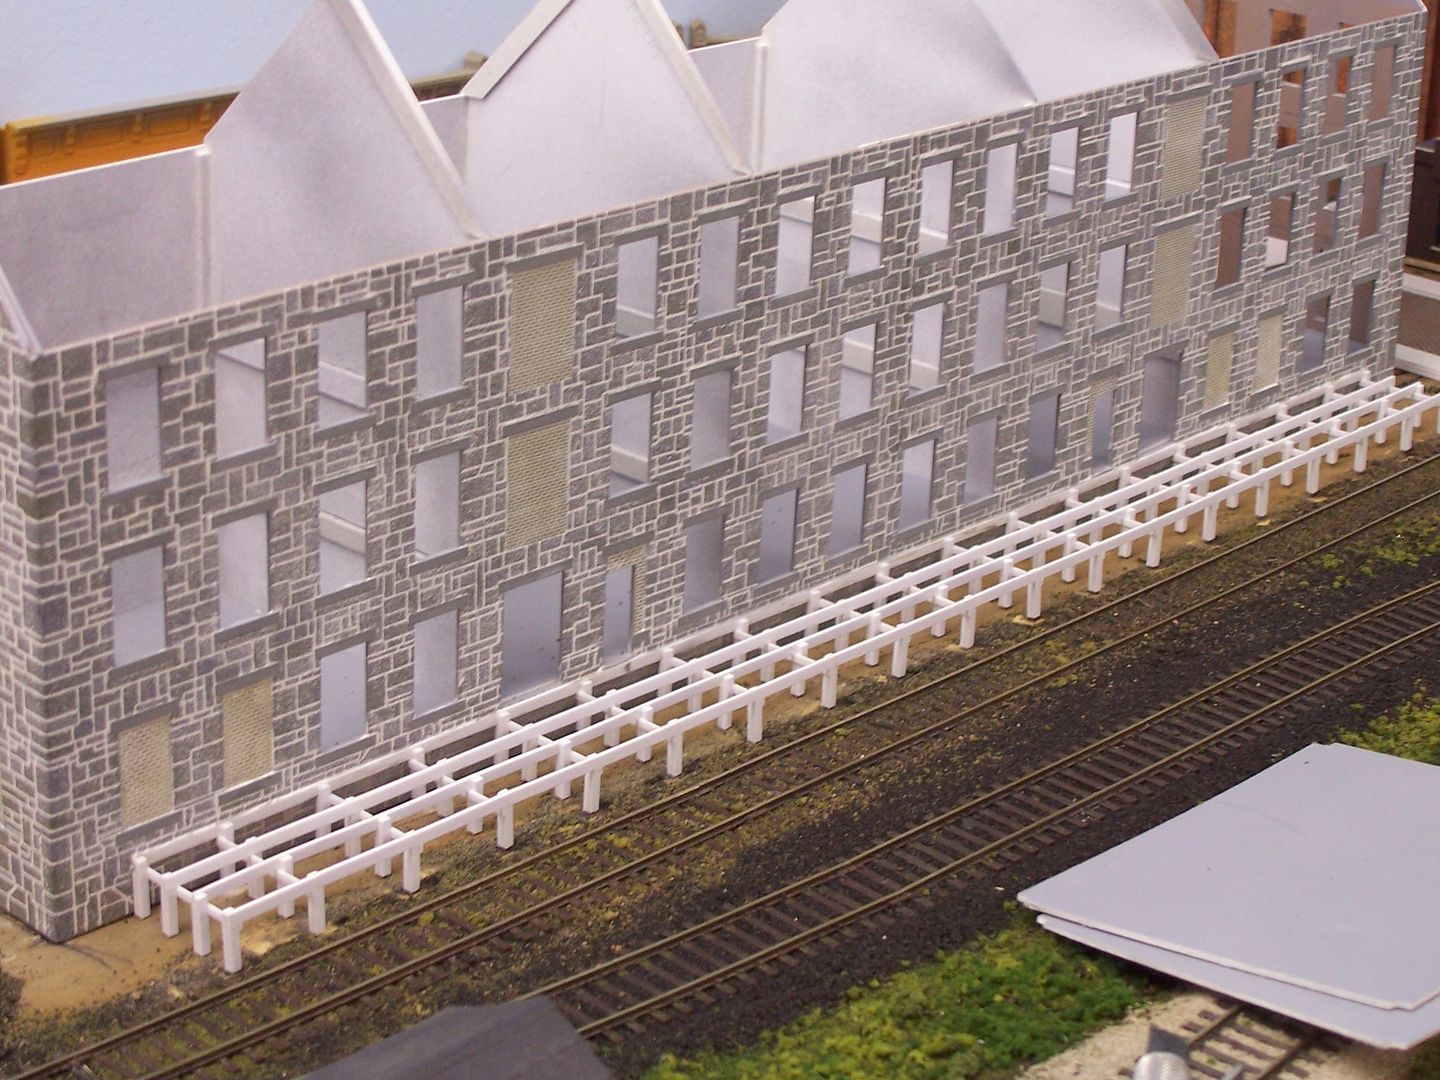
This simple IHC kit was built with both long walls facing the viewer:
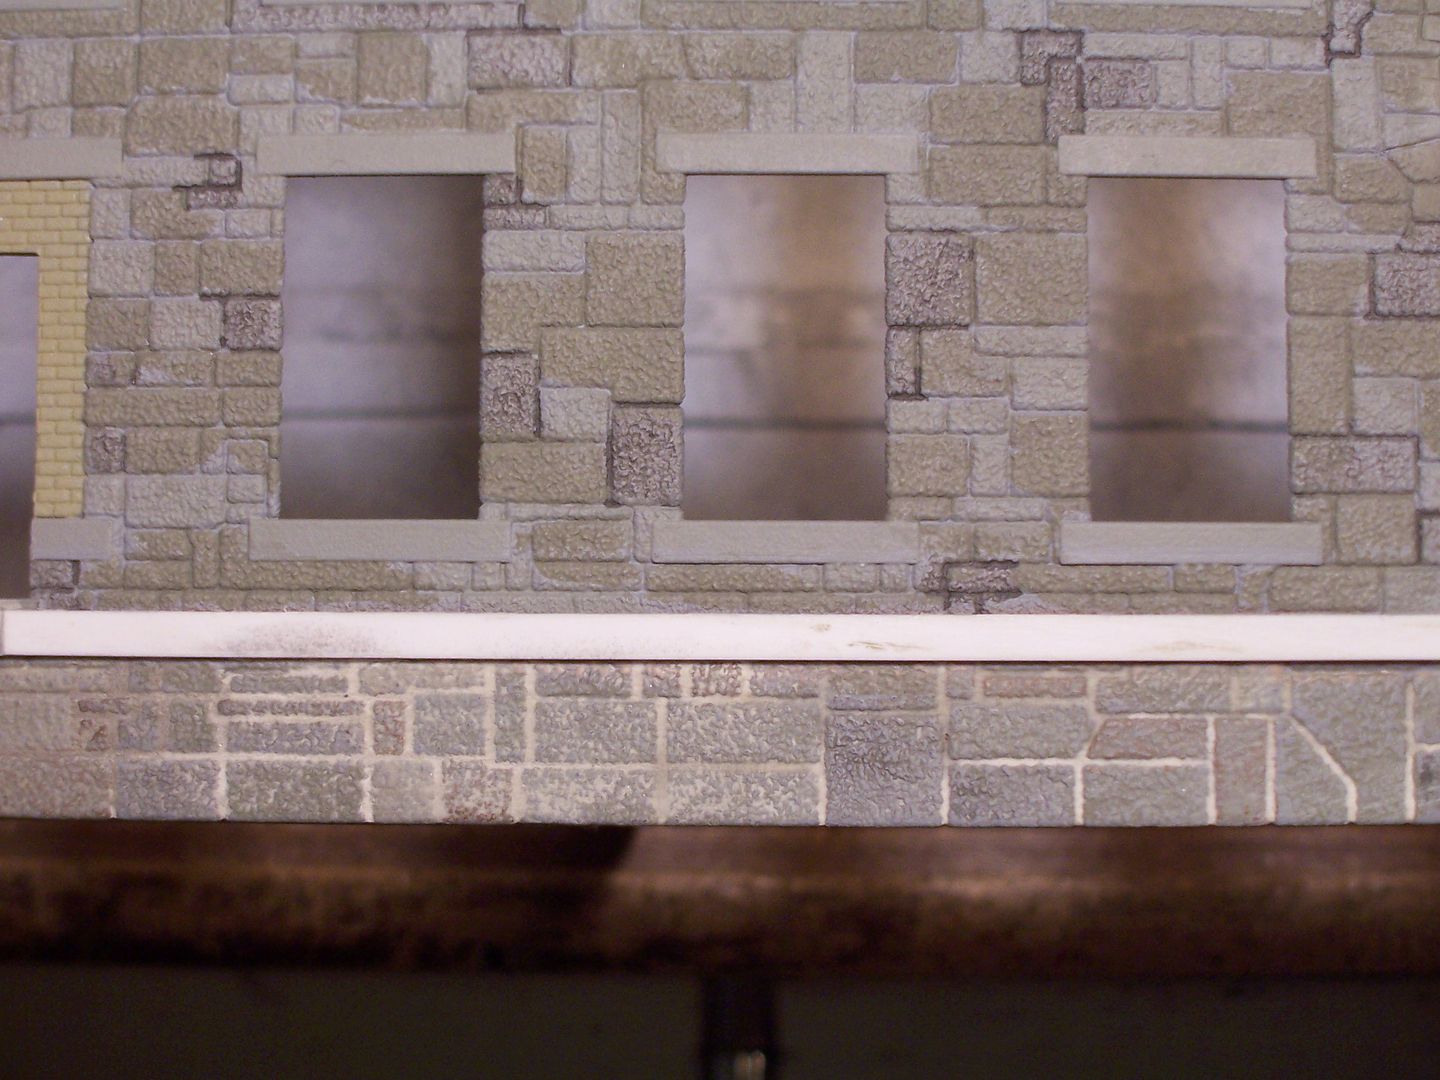
To maintain the proper window spacing, the mating ends needed to be shortened. I picked the most advantageous point on each piece, then, after cementing them together and reinforcing the rear surface of the joint with a sheet of .060" sheet styrene, I re-scribed the mortar lines using a #11 X-Acto blade and a dental scraper. The stones were then painted in various shades of stone-like colours, using a brush. Here’s a detail view showing the stonework.
As you can see, some of the thinned paint which I used ran into the mortar lines. The lower portion shows why that was not a concern, as I used a rag over my fingertip to apply pre-mixed drywall mud to represent mortar. This covers the stone completely, making the colour differences more subtle. Once the mud has dried (only a few minutes) I used a dry rag to wipe off the excess - best to do this outside, and shake out the rag often, preferably staying upwind of the shaking activity. [:P]
Here’s the building after the walls have been assembled, painted and had mortar added. The splice is approximately mid-way along the wall, and isn’t noticeable even close-up:
For detail parts, such as doors, windows, and trim, it’s often easiest to paint them while they’re still on the sprue. Lay out some masking
Like Mike, Stix, & Rich, I paint & weather all sides inside & out before assembly. I earned my MAM degree (Master of Applied Masking) early on, and it takes me a whole session to prep for detailing trim, lintels, sills, sashes, etc. I find it much easier to do that detail stuff when the wall is laying flat and I have a place to rest my elbow instead of trying to detail a “box” after assembly.