OK, I’m a novice here----but I am trying to “weather” the walls of a Walthers engine house and some of the modular structures that Walther makes. How do I make the mortar lines of the bricks stand out? The “other” magazine (MRC) had a recent article about kitbashing a Walther’s structure—where the author apparently painted the brick walls a mortar color, then “dry-brushed” reddish-brown color onto the wall to emphasize the bricks. Isn’t there a simpler method? Some sort of wash?
I’ve had pretty good luck adding a thin paint wash of light grey and then wiping the brick surfaces lightly to remove the grey from the areas that I want to be red or brown brick. I follow with a coat of Dullcote, then add any weathering in blacks and browns.
A method I’ve used for years, and I’d recommend for beginners, uses talcum powder and hair spray. After painting the wall sections your selected brick color and letting it dry thoroughly, hold the section flat and sprinkle the powder lightly on the surface. Lightly rub your finger over the surface to push the powder into the mortar lines and off the surface. When you’re satisfied with how it looks, hold the hairspray can about a foot away and aimed slightly upward (you want the spray to drop onto the surface, a direct spray will blow the powder off). The powder will “disappear” while the hairspray is wet, but will reappear as it dries. A small nail can be used to scratch it out of window openings, etc. For touchup, just repeat.
The reasons I recommend for beginners:
-
The materials can be picked up at your local Dollar Store. In fact, the cheap, sticky hairspray is what you want.
-
If you really mess up, the whole thing can be cleaned off by holding it under running water and scrubbing with an old tooth brush. After it dries, try again.
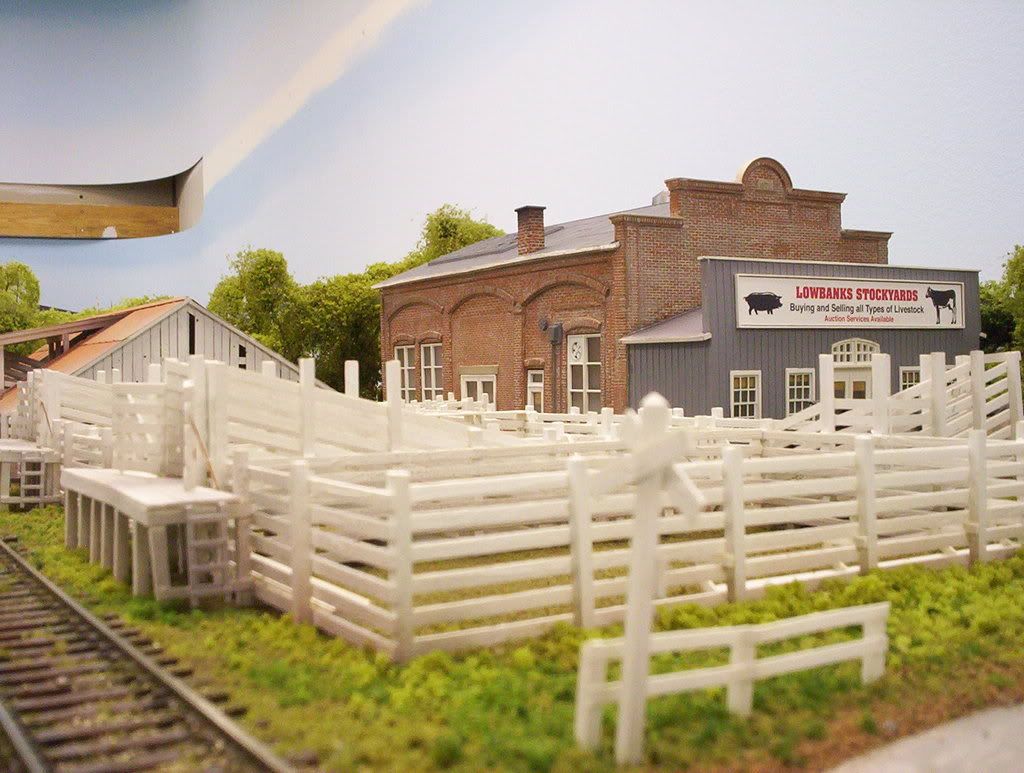
I’ve tried basically the same “powder” technique. The first attempt was with ordinary baking flour, using Testor’s Dul-Coat as the sealant. It works, but I found it hard to get uniform results. Now, I use Hydrocal casting plaster, the same stuff I use for rock molds and other castings. The activating agent for Hydrocal is simply water, applied using the same “rain down” technique. After it hardens, wipe off the excess with a lightly-moistened paper towel. The Hydrocal will dry brilliant white, which you can then tone down with a thin wash of India Ink in water. This building was mortared using the Hydrocal method:
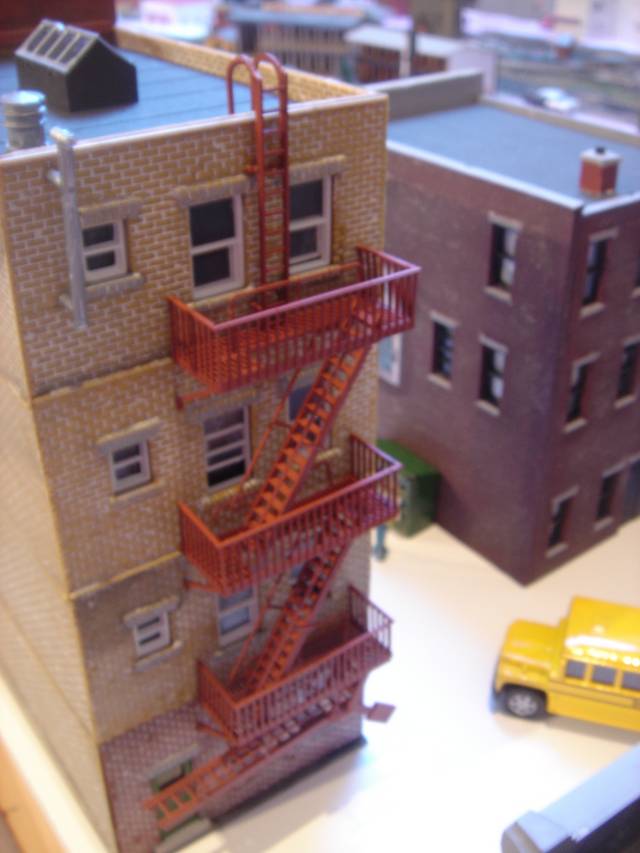
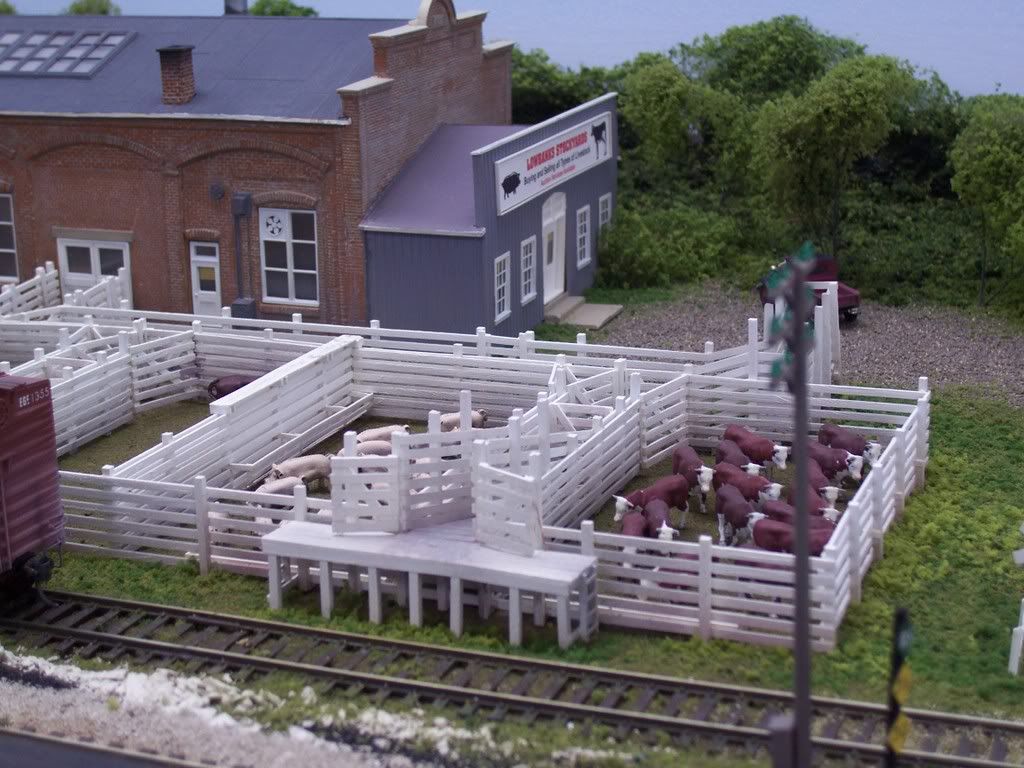
(click on the image for a larger view.) This particular building is from Model Power. The fire escapes are an add-on from Walthers. This structure is a more traditional brick color, with the same mortaring:
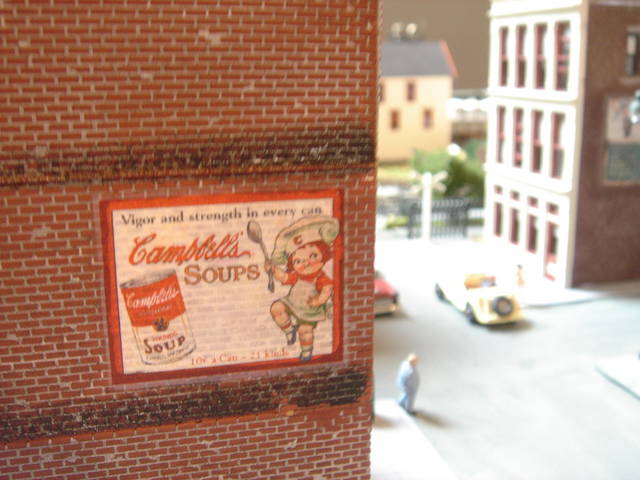
This one is another Model Power kit. The decal is home-made from a picture I downloaded from the web.
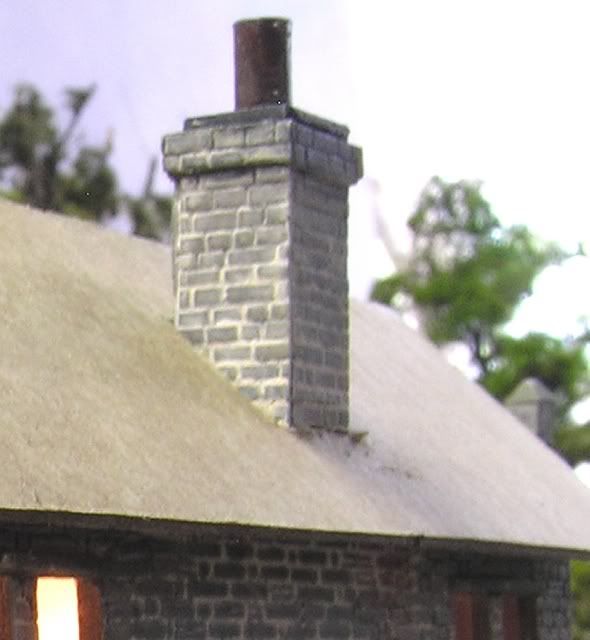
I used a method similar to that of Mister B., but used pre-mixed drywall “mud” instead of hydrocal. Simply apply it to the entire pre-painted building, after the walls have been assembled but before the windows have been installed - I used a rag over my fingertip. Just smear it on, taking care to get it into the areas around raised details, such as window sills. Because it’s only a thin application, it will dry very quickly. Then, use a clean rag to lightly wipe off the dried excess - this will leave an almost unnoticeable amount on the surface of the “bricks” too, toning down any starkness and adding a bit of “pre-weathering”. You can also colour the “mud” before application - I used some PollyScale paint for some buildings, although I think that acrylic artist’s colours, from a tube, might work even better. For the structure shown below, I sprayed the “brick” with Floquil Reefer Orange, then applied the “mortar”. That was followed by a wash of thinned PollyScale, and then some airbrushed Floquil, mostly near the foundation. (The orange bricks and white mortar (high lime content) are typical of the area which I’m modelling, although I was surprised at how effective the Reefer Orange turned out. Who’da thunk it? [swg])
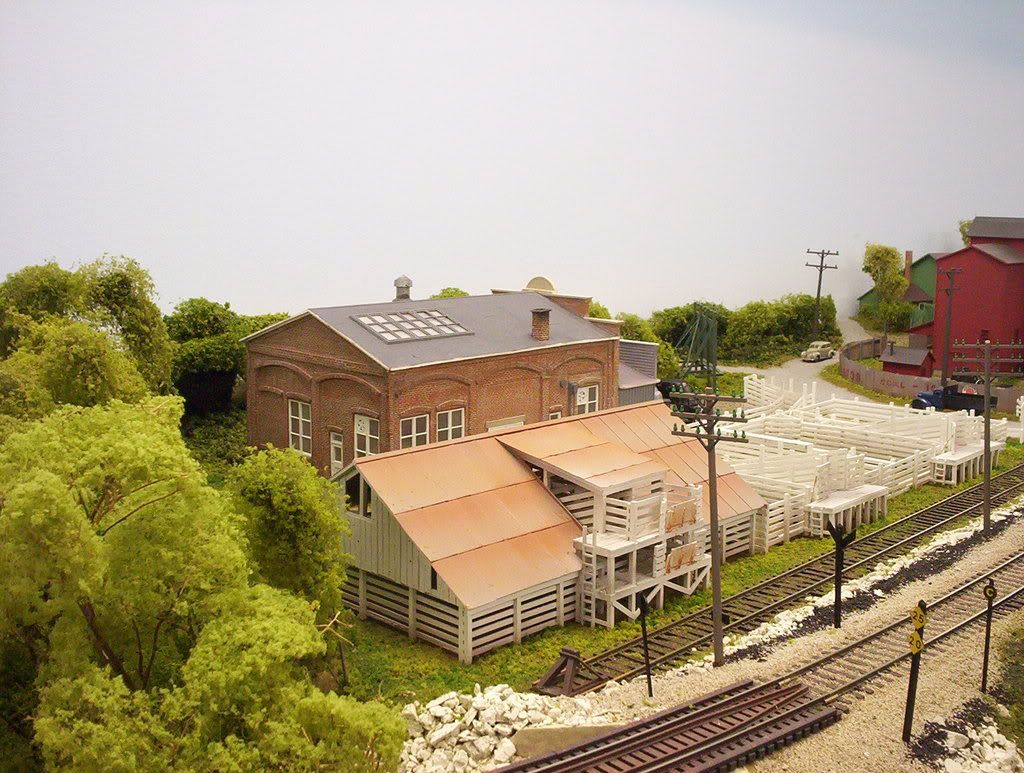
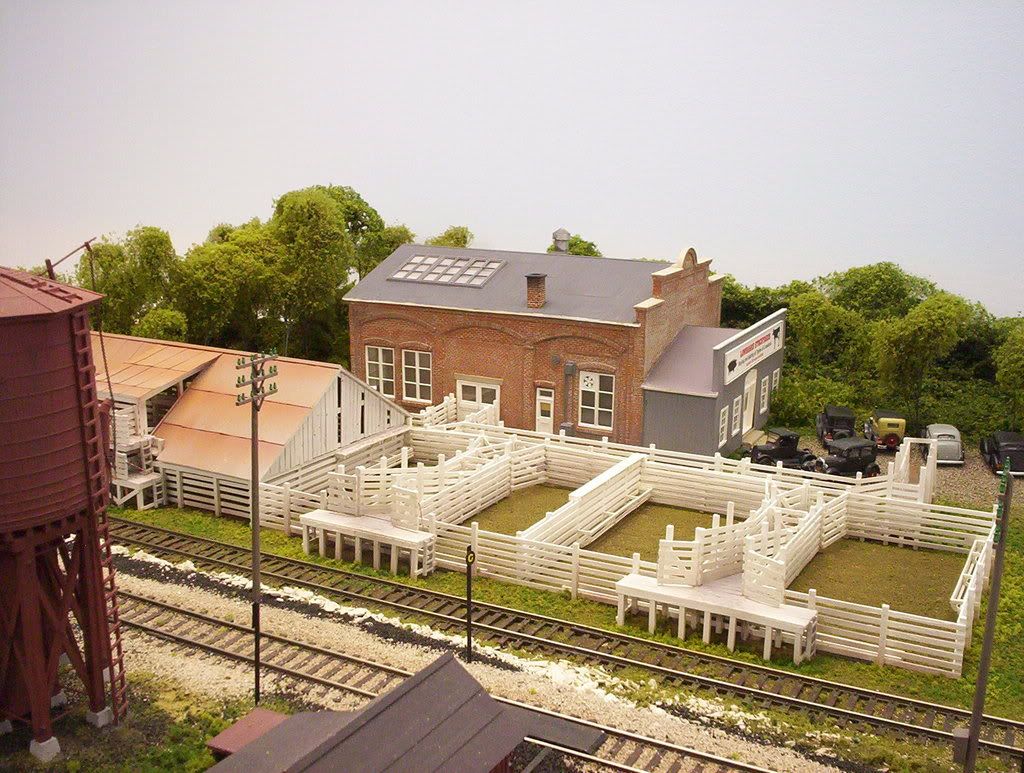
I also used the uncoloured mortar on this converted coal elevator - the “stone” foundation is from a Roundhouse 3-in-1 kit.
One that I’ve used numerous times is to spray the brick sections with a mortar color - I use Tamiya primer gray from a spray can, gives a nice even result. Then use a brick-colored art marker (brown or dark red) to color the bricks. If you don’t use too much pressure, you can color the raised bricks by running the marker gently along the face of the bricks, and leave the mortar areas gray. Then you can use a small brush to paint some individual bricks contrasting shades of brown or red. I read about that method in MR years ago.
One nice thing about that method is that by painting the model, you seal the walls in case you want to light the structure later, it won’t glow. If I think I’ll add an interior, I spray the inside of the walls primer gray too. It’s easy to add color with a brush later to the interior walls later, or just leaving it gray isn’t bad either. At least it contrasts with the red/brown brick exterior.
One that I haven’t tried, but looks interesting, was in RMC a while back. This guy had a model (I think he was reviewing a Walthers depot kit) with the brick walls molded in a good dark red brick color, so he sprayed the walls gray and sanded the face of the bricks, leaving the mortar areas painted gray. Looked very nice.
I have tried many, all of them give different but satisfactory results.
I have used a technique similar to Stix…painted the walls the mortar color (I used a spray can of an earth/tan) and colored the bricks with a tuscan color colored pencil from the art department. $2 pencil will probably do 75 or 100 structures. The color doesn’t look like it will wear or wipe off, but I secured it with a light dust of Dullcote.
On the otherhand, last night I just finished painting a brick store front building (DPM) with PollyS Tuscan Red from the airbrush, then I flowed Aged Concrete cut 90% with washer fluid. Light mortar lines, flowed like a river. Too heavy? Water it a little after it dries. Success again.
Rick
I’ve been using spackling compound. The soft/fluffy type. (Red Devil brand is one I use.)
I usually let it dry pretty thoroughly and then brush the residual amounts of with a dry tooth brush. My results are similar to Mr. Beasley’s and Dr. Waynes’.
I like the chalky residue that colors some of the bricks outside of the motar lines, much like the
dusty, slightly sloppy, look of older buildings. Looks very convincing. If you let it dry too long, however, you
have to scrub very hard or use a scotch brite pad. It’s easy to learn to work with though.
I’m constantly knocked out by the fantastic look of both of your layouts! I’ll have to try some of your methods and see if I like them better or at least to vary the look in my urban areas.
I like not having to use spray cans like hair spray, dull cote, etc. if I can help it. The spackling is very durable for handling and the very slight chalky “wash” doesn’t require the use of dull cote on the brick unless you
really want to use it.
If your new at this, the easiest to use is a paint wash.
Build the building but don’t add the windows, window frames, doors, or roof, just bare walls. Paint it the brick color of your choice (red fore-instance). Then mix a wash, 10 parts water to one part Polly’s or other water base paint (white or light gray for mortar) and add a bit of detergent (one drop for a small bottle). Mix or shake well of course. Next, lay the building on it’s side with one wall facing up and take a soft brush with the wash on it, and paint the wall. Only do one wall at a time. With the wall you are painting facing up, the paint will “lay” better in the brick and cover more evenly. Don’t let it build up in the corners too much, but use the corner of a paper towel to wick up the excess. Let dry, usually over night. Then do the other walls the same way. When done, if you think there is too much “mortar” on the surface of the bricks, you can use an eraser to remove some of it. Don’t try to get a consistant color as brick colors varied in the same wall. Then complete the building.
If you want to add some grime to the building, mix up a black wash and paint the entire completed building with it including the windows and doors. This time, paint it with the building standing as it would in place. Paint from top to bottom. That way the black wash will run down and be lighter at the top and heavier at the bottom. Let the wash puddle in the cracks and corners.
Once you are comfortable with this method, try another different method or two for mortar. By using different techniques, you get varying results. No two brick buildings are alike.
Thanks for your PM ksonkin. That was very nice of you. By the way, in case you haven’t read or been told
this, (I learned it after the fact), paint the insides of your building walls black before you paint the outsides so that light doesn’t show through the plastic walls. It’s NO fun doing this after the building is built!
I’m in a hurry heading off to a job, so it may have been mentioned, but chalks or pastel sticks are a good way to practice weathering/mortar to see how your skills are coming along. Easily washed off and dried for another try. If you like what you’ve done, a spray of dull cote will make it permanent.
I used pastels, as Capt Grimek mentioned

Sprayed mine with artists fixative that’s used on charcoal and pastels. Cover the glazing first.
Mike
Is the spackling compound a powder? How do you “fix it” to the plastic without the Dullcoat or other spray stuff? Sounds like an interesting technique.
Karl Sonkin
Another traditional technique – and again one that might use materials you already have on hand – is to swipe the painted brick with the white liquid shoe coloring that is intended for white “tennis shoes” – NOT white leather shoe polish. Having written that, maybe the day of the white “tennis shoe” is done and gone. They used to be very popular for both boys and girls, and back in the day you wanted them to look nice and white.
Dave Nelson
Generally painting the walls any color will work to seal in the plastic from “glowing”. I like to do interiors so never really went for black walls…plus I’ve rarely seen a plastic building that looked good unpainted. They usually have some “waving” in the plastic that detracts from the realism, so even if a brick walled building is molded in brick red, I’ll usually still spray it with primer gray and then color the bricks one way or another.
The spackling I use “Red Devil” brand, is very powder-ish/fluffy although it’s in a sort of paste form (small plastic tub). Sorry I don’t have a tub (about 14 oz.) in the house at the moment to give you the exact name. I think it’s quick drying. Anyway if you open the lid in the store and peek at it, you’ll know right away if it’s the powdery style as opposed to to the slick looking paste type.) Just remember to close that lid up tight for the next purchaser peeker!
It’s solid enough to spread into the brick mortar depressions with a finger or brush yet powdery enough to
flake off some as you do so. It’s also powdery enough to leave “cement dust” "coloring over some of the brick surface as in older buildings, if you want it. I let it dry to the touch and then brush off the remainder.
Don’t let it dry all the way though or you’ll have some more serious scrubbing to do. It’s very easy to experiment with. If you try using it, I’d recommend wiping some off: l. right away. 2. after 5 min. 3. progressively later. After an hour or so, it’s scale sized chisel work to get it off. (Not really, but it’s a bit of hard, hard scrubbing work.)
It doesn’t need any fixative such as dull cote if you don’t want to bother with it. It holds up very well to handling/fingers years later.
I’ve been working on an urban layout for the last year and, thus, have lots of brick buildings both DPM and Walthers. There are differences between them. The bricks on the DPM are larger and the mortar lines deeper. I’ve been using washes based on John Pryke’s suggestion in his book on urban railroads. The two biggest problems I’ve found are getting the lines two extreme and/or getting too much wash stuck on the bricks and leaving them too light. Yes, I know that can be wiped off, but that can take off the brick color too.
Here’s what I’m doing right now with a Walthers building. First I spray the wall brick color. In this case, Polly S Mineral Red. Next, I give it a coat of dullcote. Then, when I’m wiping off the wash, I’ll be up against the dullcote and not the paint. It’s very stark with just paint:
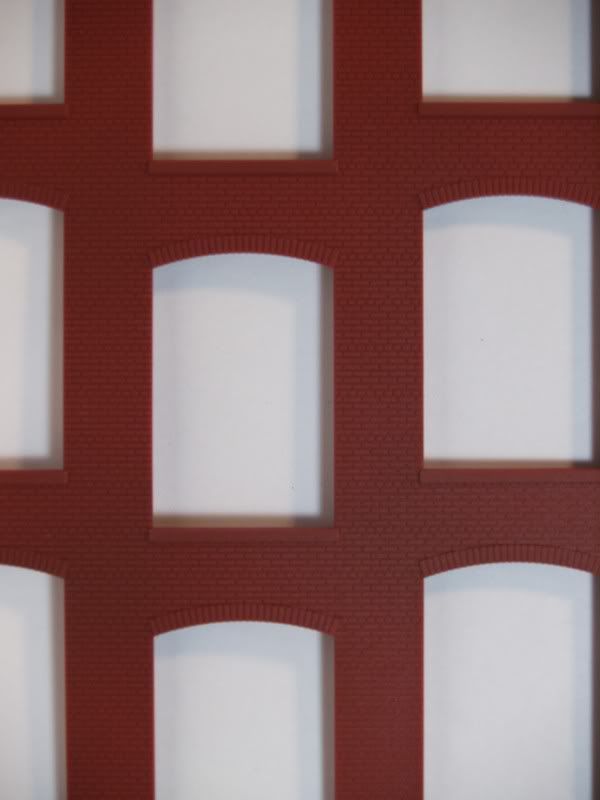
My wash has four parts. 1 part paint, 2 parts Liquitex Flow Aid, 3 parts 70% isopropyl alcohol, and 4 parts water. With the wall flat, I paint the wash on with a paint brush and then wipe it off with a soft rag with a little Windex on it.

The result is not bold and it softens the brick color pretty well.
Mark