I’ve order the Walthers “20th Century Limited” and have started to receive the cards. Getting the roofs off was a bit scary but now that that’s done I look inside and it all looks so monochrome. Anyonw have any ideas on how to pint the interiors? I wanted to do that before adding passengers, baggage and RR workers.
I have painted the interiors of my Walthers Superliners. The only advice I can tell you is to find color photos of interiors and match paint from there. It may be hard to do, but search Google. I am sure there is a NYC historical society or something like that to help you. Maybe someone on these forums may be able to help you out on the colors.
As for painting, you might want to paint the walls a light color, like white or light grey, to show the seats and other things more clearly. The tables in the diner, I would paint white to show table cloths. I know they haven’t released the diner yet.
When I did my Supers, I found photos on the web and Youtube. I know you are dealing with a train that has not been around since the sixties so Youtube is out of the question. Another thing, after you have painted the interiors, take a small jewelers file and gently rub the paint off where you want to add figures. The glue will adhere better where there is no paint.
Hope this helps. Good luck and please be sure to post pics of your progress.
Will
The link below might help. Some pages to go through but I think there are a few mentions of NYC passenger car interior colors in it.
I hope it helps [:D]
http://cs.trains.com/trccs/forums/p/18587/268112.aspx#268112
Remove the interiors from the cars when painting them. As others have mentioned use light colours. Light blue, green, tan, grey and so on. Use a small brush to paint the details in the interior a contrasting colour.
Adding passengers and repainting the interiors really ads to the look of a train. I did that to most all of teh passenger equipment I have.
Dome cars especially need passengers. The empty dome really stands out.
Back when Walthers came out with their Budd passenger cars, I got (for Christmas) and bought some to replace the Athearn cars I’d been running. When I went to paint the interiors, I removed the roof as you did. I realized it would be too easy to get paint on the windows with just the roof off. That’s when I unscrewed the floor to access the bottom tabs for the car sides, popping the sides off each car. #0 brushes and toothpicks came in quite handy for painting some of the hard to reach areas. It was a lot of work, but it was all worth it. Just need to add figures now when I get the money.


Kevin
Thanks so much. I thought that would be easy but… How do I take out the interior? Is it the screws in the bottom of the car?
No matter how this turns out I’m going to put the pictures on the web. Actually think this would make a great article for Model Railroader.
Anyway if you can help with how to get the interior out I’d appreciate it.
Kevin
Thanks so much for the tip and the pics - I hope I can do as good a job as you did. I wonder how many “extra” interiors I’ll go through before I get to your level.
Thanks again
Bob
I haven’t done any of the high priced, nor anything that was already assembled…But have bashed a number of the old MDC and Athearn car kits.
I painted (mostly earthy tones) the interiors with acrylic paints, added a few window shades and then some passengers.
Here is a pretty good example: An MDC Harriman style combine.
I still have dinners, coaches and tail cars, in the carshop that I now have painted, but they are awaiting “people” and assembly.
Unfortunately, interiors of the Walthers cars are essentially impossible to remove. I spent several evenings trying to find a way for removal. I fnally wrote Walthers and was informed they are not removable. Now, we all know that nothing is impossible but… . Rather than destroying a car while attempting the impossible I suggest a paint brush and a steady hand.
Good luck!
Ooppsss…
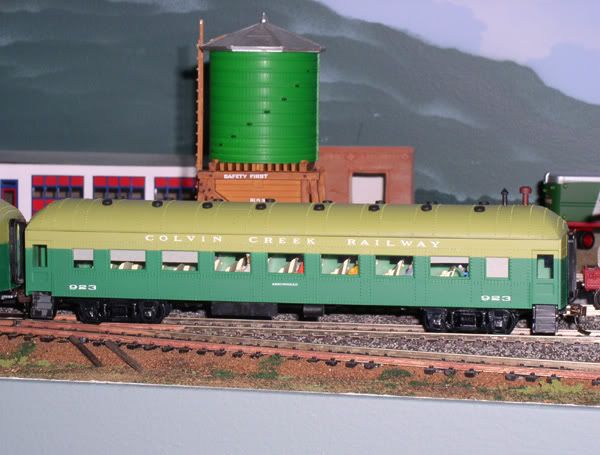
Sorry, wrong picture! That first one was just out of the paintshop.
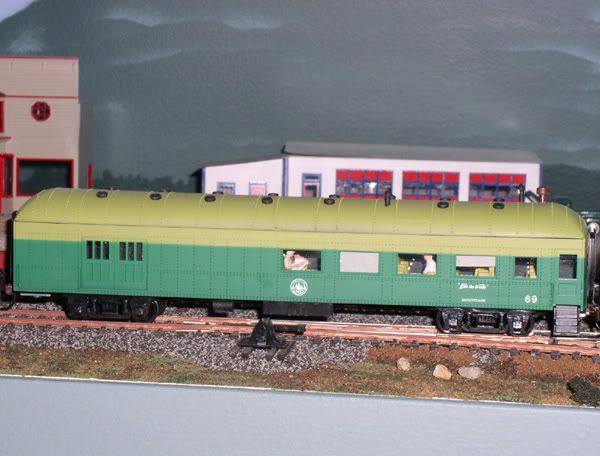
Here are two with passengers. Still not the best pictures, but I hope you get the jest of it all.
I would agree that it might be best to not try and remove the interiors to paint, something will probably break. That is the conclusion I came to on my Walthers heavyweights. Unless you plan to run the train with the roof off there are many places that you do not need to paint since they can not be seen from the car windows. A small paintbrush and steady hands will work.
I used the inexpensive acrylic paints ($1 a bottle) from the craft store. Since they will be inside you do not need to worry about them scrapping off.
Some details that you might want to consider are window shades (in random positions), antimascaras (I think that is spelled right [the white headrest covers]) and horizontal bars on the inside of the passageway windows. For the antimascaras I used white decals instead of trying to paint them.
Just take your time and make sure you have the right colors before you start anything. Also, paint light colors before dark, otherwise dark colors can bleed through the lighter paint. For example, on the headrests, I painted the seats white and then (once dried) painted the seat color, using a toothpick to paint around the edges of the headrests.
Kevin
The Walthers lightweight passenger car interiors DO come out. There are screws on the bottom down the center, and a couple drops of glue underneath. I removed the trucks and coupler assemblies and the other screws and slid out the bottoms. Then you can see the bottom of the interior, there are weights and contact shoes that all have to be put back exactly as they are if you want to light the car. A #11 Exacto blade under the body frame will “pop” the glue and the interior lifts out the top (don’t scratch the windows. I’ve only painted the interiors of cars that I bought undecorated so far, I usually paint them all 1 prototype seat color with white table tops as mentioned previously. The floors and some of the walls aren’t really visable unless you light the car.
This is a good topic of interest because there aren’t many color photos of interior except builders photos, and many owners progressively changed or covered the seats during the life of the cars. I’ve found that colored ads by the railroads from magazines are the best source. You can find them in Life, National Geographic, etc issues from the years you want to model, some Libraries or private collectors you may know, or already have them.
Actually, on mine, I used some Amtrak timetables and brochures fromt the 1980s to go by since it’s about the middle of the timeframe I model. The coloring may not be exact, but it looks much better than having the plain tan plastic showing throughout the car.
Kevin
I agree. My Walthers heavyweight interior was glued in solidly. The detail included the overhead storage bins so getteing a paintbrush to the seats would be difficult and possibly messy. I could not see any way of removing the interior parts without risk of damage. I got passengers in using twezers and slow setting adhesive so I could move them around until they were right.
Yes there is a New York Central Historical Society:
The recent book “Twentieth Century Limited” by Karl Zimmerman may be helpful, as I recall it has some color interior photos and design drawings of the Century.

Generally thru HO windows you’re not going to be able to see too much, so doing just say painting the seats the right color may give the impression the interior is much more detailed / correct than it really is. You could try painting the interior sides, when in doubt light gray-green was a very common color.
The white cloths on the headrests were called “Antimacassars”. Macassar was a men’s hair oil popular a century ago, which stained chairs and such when guy’s heads came in contact with them. [xx(] Anti-macassars were sort of like a cloth towel put over the headrest / top of the chair to soak up the oil. On a train they probably would be changed daily for clean ones.
I’m going to play the devil here a bit on this Friday afternoon when lots of folks might log on to the forums for the weekend. [}:)]
I am not sure about anything I am writing, and I certainly don’t want to give only faint praise to the great detailing I see in other’s work, since I am only beginning to get to this stage of the layout…
…but when I look at real world and passenger cars, or buildings for that matter, because of reflection, there is very little of the interior of any car that is illuminated enough to be visible…
certainly passengers sitting near windows, and seat backs near windows on a bright day etc.
but to be rather typical, if my HO train passes by me at a distance of 4 to 5 feet and I am looking down from a slightly elevated position, I am going to see rather little of the interior at all if it is going to resemble the real world.
Of course, all the great detailing will be useful with the cars illuminated to simulate night. But I don’t actually run my locos too much in the dim light.
But the reverse is a problem, because I think a fully detailed brightly painted interior would show up inappropriately on the layout under the full multi-directional lighting we may have in our layout rooms. It doesn’t look too real.
Now bash me!
You won’t hear me bashing you. We all have our own views as well as our own goals in regards to the details we put into our models. If we all liked the same thing, it would be a boring hobby and a boring world.
Kevin
One thing I have experienced with the Walthers interiors is that the manufacturer does not wash ANY of the mold release (silicone) and it repels any water based paints. You have to wash this off and it is tough to do. Alcohol and cotton swabs? If you don’t wash off the interior plastic the paint just beads up!
I have tried turning the car upside-down and spraying plastic-compatable contact cleaner to wash off the mold release with some success.
On coaches and parlor cars I’ve used card-stock masks to protect the windows and car sides then sprayed the seats and floor with red oxide primer which, to me, looks like a common Pullman upholstery color used then.
I would cut a narrow strip of colored paper and glued it down the center of the aisle to look like contrasting linoleum. I have an old roll of wood grain Dymo label tape. This peel-n-stick tape comes in handy for wood-grain paneling found in lounge cars and bulkhead walls.
ED
Adding a lighting kit will allow viewers to see inside the car in “daylight” conditions. Last summer at the Boothbay RR Village layout, I was running a passenger train during a display day. One car was lighted and the rest were not. The passengers in the lighted car were visible, and I was telling the visiting kids to look for the people in that car. So lighting does make a difference.
Have you tried one of those “orange peel” type cleaners? I have used Zep Citrus Cleaner & Degreaser that I found at Lowes or Home Depot, and it works as a resin prep on vehicle kits that I have done. One bottle will last many years unless you find non-railroad uses for it. It is similar to what Sylvan Scale recommends for paint preping their kits.