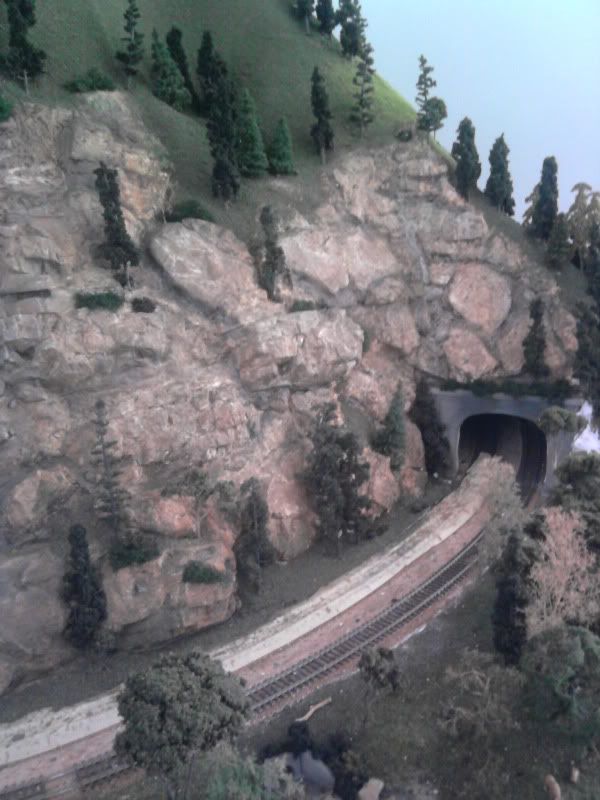
Does anyone have some good ideas on how to carve out nice looking mountains and rocks out of plaster. What other ideas that would be cost effective is there. I know that bush valley makes a real nice rubber rock but is very expensive. I want to learn how to make mountains look for example like the one at the top of the page. what tools are good for carving and at what point of the drying process is it best to carve into the plaster? I want to make a winding river scene with some nice looking cliffs. The location is rocky mountains western colorado around moffat sub. Any help would be great thanks. T
I like styrofoam. I get it from dump sites at construction sites for free. I stack it up and carve all my canyons and mountains. There are a lot of pics in my sig. Plaster can be carved with any sharp pointed instrament but masks a big mess. If you have not considered styrofoam, let me urge you to learn about how easy it is to make great rock formations without being an artist.
I am not yet a “Carver of Mountains”, so I am far from any expertise. I do remember a series of articles back in the 70’s about a huge floor to near ceiling mountain and canyon (Chalk River Canyon, I believe) where they did some fantastic carving with hydrocal, and dental picks. The big draw back to this was that when it was all said and done, they had added something like 400 lbs of plaster to about a 6 square foot area. The point of this is that If you use lots of plaster, make sure you have enough structure to support it. That is why my plans call for lots of styrofoam and just enough plaster to face the rocks.
Kevin
Quick and easy way is to take a 12" square of tin foil and crumple it from one side to the other on half inch pleats. Then turn it ninety degrees and do it in the other direction. Fill it with about an inch of plaster and gently press it in place. When it warm and partially hard pull off the foil. When you cast the next piece you can fix the joint area after ou pull off the foil with an Exacto knife. When it is dry use three different cans of spray paint to color it. One from the top. One from the right and one from the left.
I use crumpled newspaper covered with plaster cloth for terrain, and cast Hydro-Cal rocks, but I have seen some really nice cliff faces done by others with the aluminum foil mold system. It doesn’t have to be an inch thick, either. Just deep enough to cover all the crumpled foil.
I also carve my rocks and cliffs directly on styrofoam (pink or blue). No Plaster. Someone recently did a little how-to in another thread.
Actually, rubber molds are very cost effective if well used. I’ve casted over 40 rocks with just one mold and it is still in perfect condition. Scenery as the one seen above combines a lot of techniques including hydrocal rock castings, foam, natural rocks, etc… With three or four different molds you may model a huge scenery. Using the basic shapes, cutting them and rearanging them into different forms will give you lots of variety. This is the layout I’m building, you can see the castings before and after painting them. The ballast was taken away because it did’nt look good…
The whole mountain was made of plaster cloths over chicken wire mesh using a playwood structure.

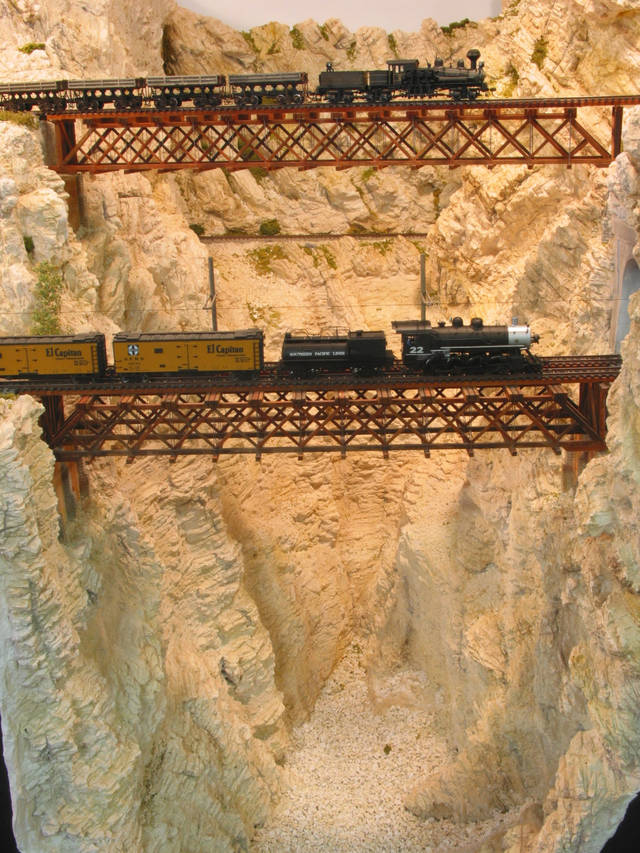
I hand carved rocks on my last layout - Four bags of hydrocal worth; The canyon took a couple of years to carve, working mostly in the winter.
Here is a view of what my canyon looked like**:**
Here are some lengthy directions on how I did it:
After all the track was tested and I built the bridges, the bridges were removed and I put in the screen. I used window screen and a hot glue gun to make the basic shapes of the canyon and the two mountains on either side. I decided that I wanted the canyon to be really deep so I made the mountains about 5.5 feet tall from the floor. The screen was glued to wood supports where necessary. It actually is quite stiff, so I didn’t need a huge amount of support.
I then applied the base coat of plaster. This is a very messy job. Use old clothes and old shoes and make sure you have a space that you can leave really messy for quite some time. Don’t put old plaster down the drain. Use paper towels to clean up wet stuff and let the plaster set on bowls etc and then crack it off to clean them. I used hydrocal plaster. It is a very hard plaster that is quite strong (when taking down the layout, I had trouble cutting it with a sawzall). I don’t recommend other kinds of plaster for this type of scenery because you need to wail on the whole thing when carving the rocks and most kinds of plaster can’t take the abuse. The base coat consisted of paper towels dipped in plaster.
I’ve used various methods to model mountains; cardboard webbing covered with plaster cloth, foam, etc. I found the easiest was the foam method. I carved the basic shape with foam, then covered it with a layer of plaster. I found that having a plaster base made it easier to attach rock molds. I use rubber molds. When the plaster has set to the point that it cracks when the mold is flexed, I slap it on the place where I want it. Once the plaster has completely set up, I peel the mold off.
For the pictures below, I started with a sheet of 1/8" piece of plywood, cut to fit the area where the mountain will be. I drilled and inserted wooden dowels (tapered on the top). I glued the bottom layer of foam to that. Once it set up, I stacked more foam, using strips, and gluing them so they overlapped on the back side. When completed, the underside of the mountain was hollow.

 As you can see, this section of mountain lifts off, allowing access to that part of the layout.
The best way I have found is to rough cut foam and use thin cast rocks, I did a 4’x4’ module with a deep canyon and I can still lift it with one hand.
Try piling up a bunch of foam packing peanuts, you can shape them in any form you like, and then cover them with plaster cloth. The way I do it is. (1) using rubber gloves I mix the peanuts in a large bowl with white glue, Then wait for the glue to get tacky. (2) Then form them to your liking on your layout, and let dry over night. (3) Cover with plaster cloth, add rock molds if you like, and paint and add ground foam. Try it I think you will the end results.
Sam
Thanks for your photos those mountains look awsome. What are some good color and techniques for painting the mountains the color you did and is it differnent for styrofoam than it is for plaster. i ended up using both techniques for this mountain that i made i my layout. Thanks again.
Hi,
I would recommend that you buy a book by Randy Meyer, Plastering Mountain
Scenes. One can purchase it at BHI PUBLICATIONS, PO BOX 247,
COTTLEVILLE, MO, 63338. or e-mail them at http://www.bhipubs.com. It
only cost $20.00. I bought his book at recent clinic that he gave.
Chris
http://i1135.photobucket.com/albums/m630/TerryPJ/quarry2.jpg?t=1298650403
I used foil molds for this quarry work in progress. I tend to use 6"x6" molds which I then break up and join with cellu-clay to get what I’m looking for.
Forgive me for double posting, but I want to try this photobucket IMG thing. I apologize in advance if I muck up the forums.
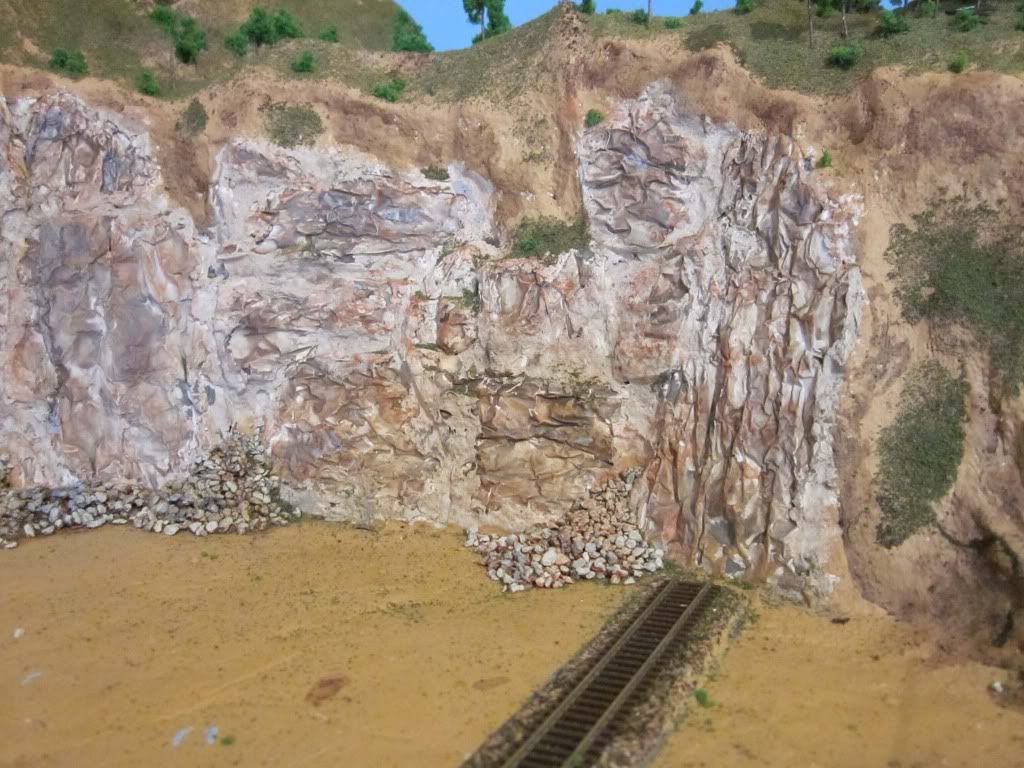
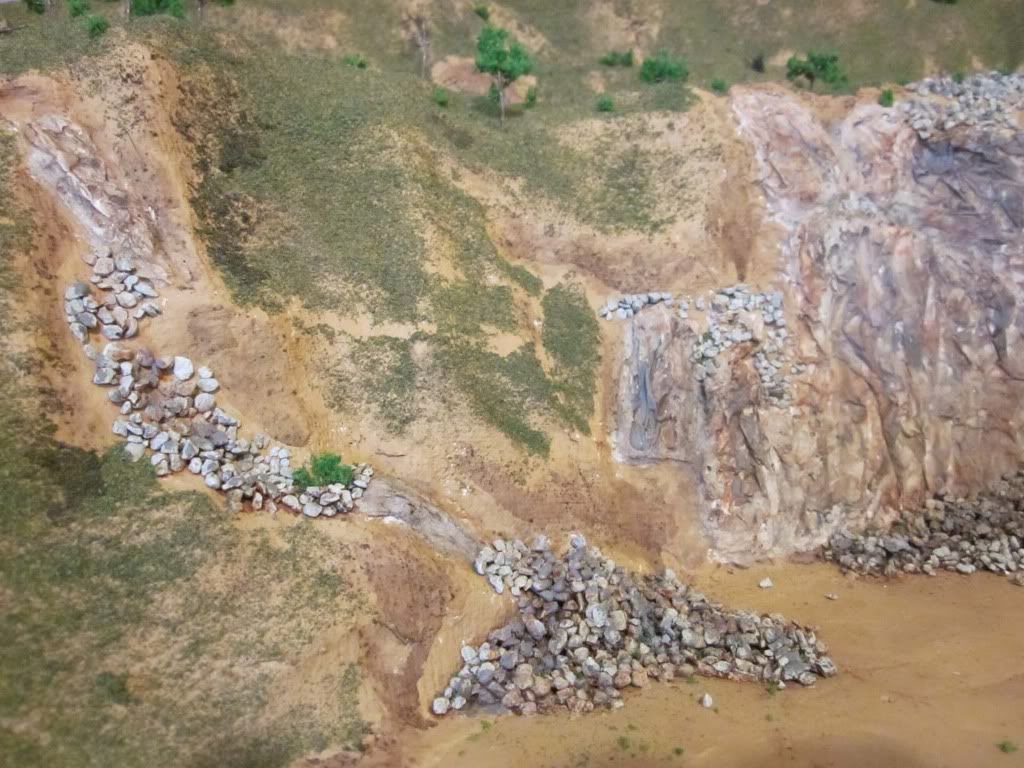
Anyway, these were made with foil castings as noted in my previous post - I hope I did this right.
It works!