Do they make premixed plaster that dries after you apply it? I have been trying to use plaster of Paris but it either dries too fast before i get it all on or its to runny. i cant get it the right mixer to last a small amount of time. And yes i have tried just mixing a little at a time .
I believe hardware stores / home improvement stores do sell pre-mixed plaster in plastic tubs. Not sure about sizes or how long the plaster stays soft after the tub is opened.
You can mix a little vinegar in when mixing the plaster. It will slow down the setting time for the plaster, but don’t add to much or it might weaken the plaster.
FWIW on my layout I’m using paper towels brushed front and back with straight white glue instead of plaster. Seems to work well and is much neater than plaster.
Sure, just go to your local big-box home improvement store and pick up a bucket of pre-mixed drywall/sheetrock mud. They should have a selection with different drying times, lighter weights, etc.
You can use sheet rock mud which comes in a one gallon or five gallon bucket and can be thinned with water. The downs side of it is that it is formulated to be applied in very thin layers and feathered out. It’s also designed to sand out very easily.
For our purposes it shrinks a LOT when we make up large rock out cropping and such and pulls into cracks during that shrinkage.
I think the only solution for what you describe is to make smaller batches and perhaps have a modeling friend assist you by making batches for you so you can keep going and out run the dry times.
Additional note… when making a second batch in a bowl… do not pour fresh dry plaster over the remnants of the previous batch. The partially kicked previous batch will accelerate the kick in the new batch. Use two flexible plastic bowls and let the one kick fully and then flex to flake it out. If you use a batch fully you can wash out the bowl and it does not need to be dry but it should have no previous plaster remaining.
if you run some down the drain… flush fully with water as it will try and settle in the P trap.
see ya
Bob
If you want a plaster that has a pre-set curing time, try Durabond patching plaster. It should be available in any home improvement store, and comes in a couple sizes of small boxes or in 33lb. bags. It’s also available in several different setting times, as indicated by the number following the name: Durabond 20 sets in about 20 minutes, while Durabond 60 does so in 60 minutes and Durabond 90 in, naturally, 90 minutes. You can mix it to almost any consistency and it will still set in the time indicated, and it can be applied in almost any thickness without cracking as it sets.
When it starts to set, it can be carved somewhat, but when fully hardened, is extremely hard.
When doing large expanses of scenery, I apply it over aluminum screen, then colour it, once hardened, with a wash of thinned latex house paint (half paint and half water).
You can cast it in simple moulds to create “concrete” bridge piers and abutments:
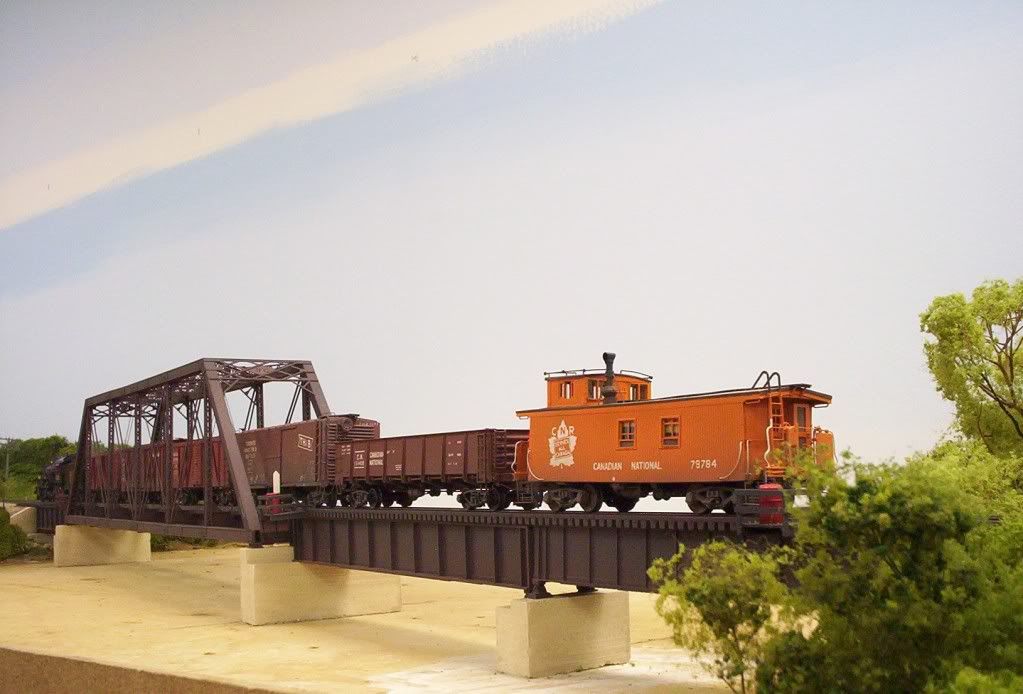
…and even use it to create the “water”:

I use only the 90 minute version, but whichever you chose, don’t mix more than you can use within the specified time, and don’t mix a new batch without first removing the remnants of a not-fully-set batch in your mixing container. This product contains a catalyst and it will affect the newly-mixed material.
Wayne
I THINK that there is no pre mixed plaster. Plaster cures. It gets hard regardless. When cured is is not water soluable. Thus, don’t get any in your drains. Premixed dry wall mud and other premixed compounds do not cure, they dry, thus can be kept in an air tight container. They do not cure and are disolved in water after they dry. Thus you can wash them off weeks after they are dry. You can also get some in the drain, it will also disolve out. I use plaster of paris for casting rock molds and draywall seam cement for everything else. When I mix it with saw dust, it does not crack as much. ’
I hope this helps sort through all the products on the shelves.
Cool thanks every one. i found that durabond 90at home depot. I’ll run there tomorrow and get some
What are you using this for? There are many types of gypsom products and they all have differing properties and uses for our needs. It is quite possible that you have a bad/ old batch of the Plaster of paris. It gererally has a decent amount of working time. Now Hydrocal is a different story. There are veneering plasters (Unical, Diamond etc) that have the greatest working time next to going w/ the softer Durabond.
For myself I have not had the success with drywall mud as with actual plaster. The mud does fair when used as a thin coat over foam terrain, before applying ground foam turf, but for me at least it doesn’t do well for carving or any time of detail work.
Well i went and got the durabond 90 and went to start working on the layout. and found that the last plaster cloth and plaster i layed on it wasn’t even dry. the whole section was mushy. .I dont know what to do. can some one please give me some advise on how to fix this mess. these pics will show what is happening.
This is when i first started.
.
After painting

Then i painted it gray but didnt like it

so i repainted it. Then i added plaster cloth and plaster of paris. then it whet really down hill then

Then i noticed it was still wet and mushy[:'(] so i ripped it out


Any help would be appreciated
I’m not sure why your original work didn’t dry, but since you’ve already removed it, simply re-do it with the Durabond.
My use of Durabond is almost always over window screen. While I prefer aluminum or steel, the fibreglass stuff will work if it’s well-supported - temporary wood profile boards or scrap lumber C-clamped to the benchwork will do, as will wadded-up newspaper. Staple the screen to the benchwork or side of the wooden sub-roadbed, mix the Durabond to a consistency you find easy to use, then apply it with a putty knife, scraper or drywall knife. It shouldn’t be so thinly-mixed that it drips through the mesh, but you should be able to easily force it in, to some degree: when hardened, it will keep the material in place even if it’s accidentally broken. To get rid of the tool marks caused by the application, use a cheap 2" brush, dipped regularly and liberally in water, to smooth the surface - this should be done as soon after application as possible, as it will have no effect once hardening begins. While Durabond is not as hard as Hydrocal or dental plaster, it is very much less brittle.
Wayne
High humidity, too much water (runny mix, and/ or a possible old/ bad batch of Durabond could cause this. How long did it sit when noticed it still wet? Durabond 90 will start to firm up in 15-25 minutes and dry in the 90 minute range. Of coarse over wetting to soak paper towels could have been the issue. Try using Hydrocal for soaking the shop towels (the cheaper/ coarser the better). or just use plaster cloth.
Durabond is better suited for the ground layer ( ground goop, you can add fillers like sawdust, perlite etc. This you spread over the thin/ weak base of plaster cloth. Add scenery details, use it to bond rock castings, tunnel portals and all sorts of fill-in spots of scenery contours. I actually perfer to use Unical w/ the fillers.
Unless I misunderstood, I think the problem is with the plaster which was previously-placed. I’ve never had a problem with Durabond due to age. (Well, maybe lifting the bags, but that’s on account of my age, not that of the Durabond.) [(-D]
Wayne
Gidday Wilson, Don’t know why you would have had problems with the plaster not drying. I’ve always used “plaster of paris” because I can control the thickness of the plaster I require for different applications. I’ve used “old” plaster that’s been sitting at the club, in an air tight container, and plaster that’s sat in its cardboard box that"s been stored in the bottom of the water hearer cupboard for ages. Where I go wrong is when I get carried away and mix too much.[banghead].
That said and done in reality all I’m offering to you is my sympathy, backward steps are down right annoying and frustrating, and while it’s of small comfort to you, I’m sure that most of us have had “those” moments at one time or other.
Grit your teeth, count to ten, and smile.
Cheers, the Bear.
It could be a bad batch of plaster of paris? The humidity was low. The very first layer was card board strips, wad up newspaper and plaster cloth. That hardened really good. the problem started when i tried to add the plaster of paris to smooth it out to form it better but it didnt work… This weekend im going to get some pink
Extruded Foam to use
Wilson,
I’m sorry you experienced this problem, as frustrating as it is you should be commended for tearing out a problem area and starting over. In the long run you will be much happier removing something that just didn’t look right to you.
I’ve used Plaster of Paris quite a bit and have never had your experience of it remaining mushy after 24 hours. It’s hard to imagine what happened as it sounds as if you prepared everything correctly. However, when using something called Sculptamold then I have had situations where it took a good 48 hours to get what one would call rock hard—even after 24 hours Sculptamold will have a somewhat mushy consistency.
Send us a photo of your completed work so we can see how it all turned out. Good Luck.
Wayne
I can recall once where the plaster didn’t set at all – remained mushy just as mentioned. In my case it was from trying to add a retarder to slow the setting. Must have worked really well. Perhaps something got mixed in by accident???
Started reconstruction. So far i found it easier to work with foam. But i will have to see. lol
I’m using 1/2 inch extrude foam
I’m Not sure if i should leave it even as in the first pic or edged like in the second pic? o plan on adding some plaster. But in thin coats lol
What do you all think? I would like to make it look rocky. Where i live there are shale hills
So what would be the best color?


If you plan on attaching rock casings make sure that you leave enough room. I would carve the rock into the foam maybe adding a few castings if you wish. Arthill and a few ithers here have done some fantastic work of foam carving. If they don’t jump in check out Arthill’s link in his signature.
Don’t worry about trying to maintain that “perfect” arc, look at a few “real” cuts along RR or highways to get a feel for the rock shapes and contours. It would be quite rare to see a convex curved cut nearly vertical 50-60 ft height. This of coarse would depend of the area you are modeling and the type of rock that was blasted or cut.
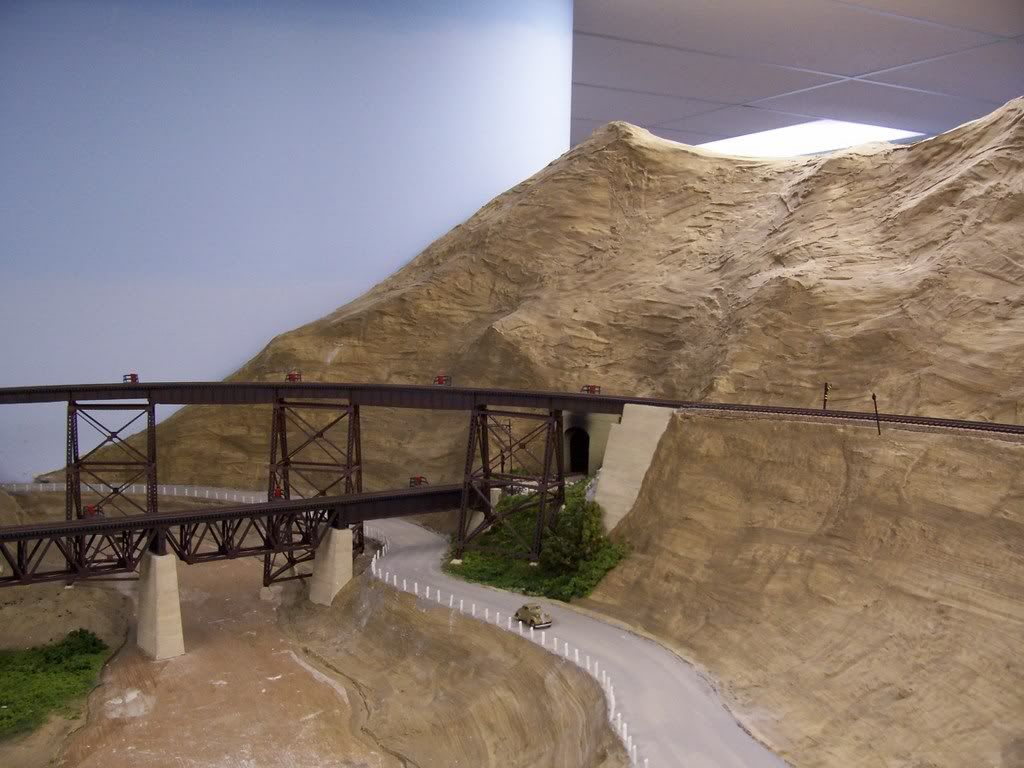
Here’s a curved cut on my layout, shown just after I applied color to the rockwork. I carve rocks into casting plaster, but you could use other kinds as well. Be sure to leave sufficient clearance for the thickness of plaster or whatever material you choose for modeling rocks.
Note how the walls of the cut angle away from the track and aren’t perfectly vertical. The actual slope will vary by prototype locale, so it’s best to consult photos of the are your’re modeling to get the look right.
I colored the rocks by starting with a wash of black acrylic craft paint, then added layers of various progressively lighter tan shades by dry-brushing, much like weathering a structure or freight car. Again, use photos and select a range of compatible shades of color to build up the color on your rocks.