Re-Paint an ho scale pre painted Rivarossi Passenger Car

I have a Rivarossi passenger car pre painted in Santa Fe Colour.

I would like to re paint it in New York Central Pullman Green.

I will be using Tamiya acrylic paint.

My question is do I,

A. Strip the car, prime it and paint it.

B. Prime over the existing colour, then paint it.

C Paint over the existing colour without priming first.

Any thoughts.

Thanks

Vincent.

Hi Vincent,

Respectfully, paint stripping your shell is the best route to take. Good news is that the older run Rivarossi, IHC, AHM, Con Cor, the early 2000’s production Walthers passenger cars (non-plated), and the new Walthers Main Line cars are EASY to paint strip. 91% ISO Alcohol, Super Clean, and ELO will work well.

(Note: 91% ISO Alcohol won’t paint strip Walthers Main Line cars. Super Clean will).

I normally use 91% alcohol but have been using Super Clean as I get a discount on it due to my job.

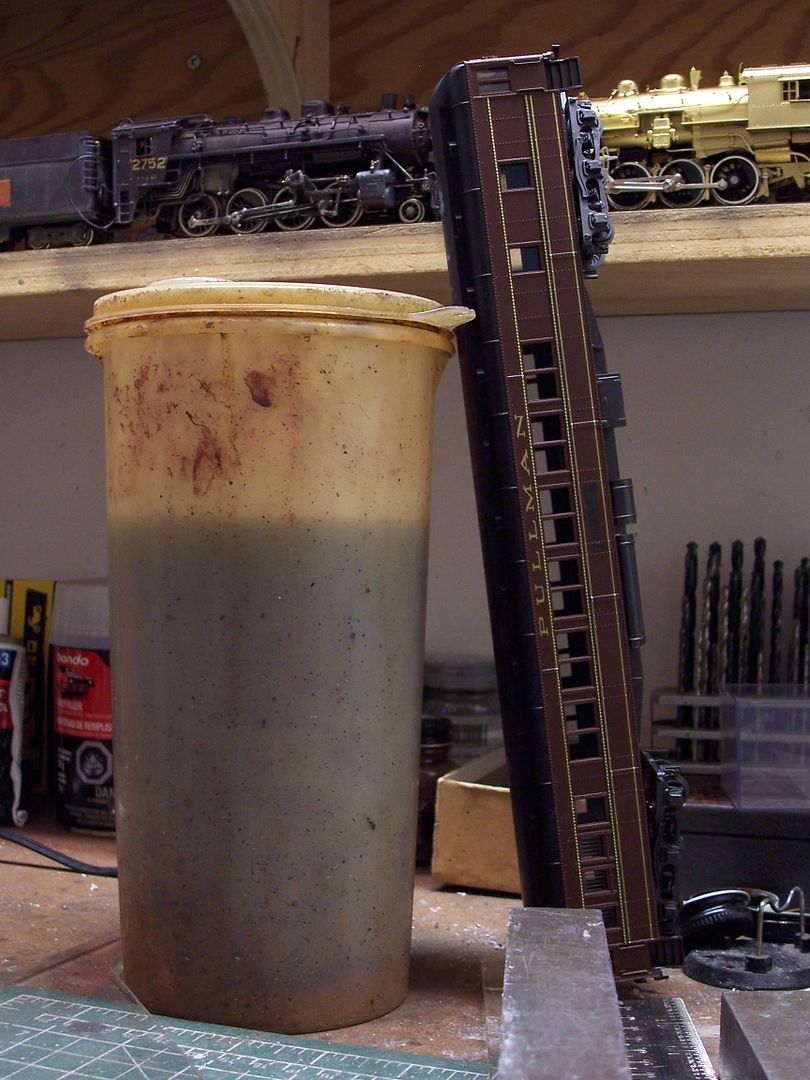
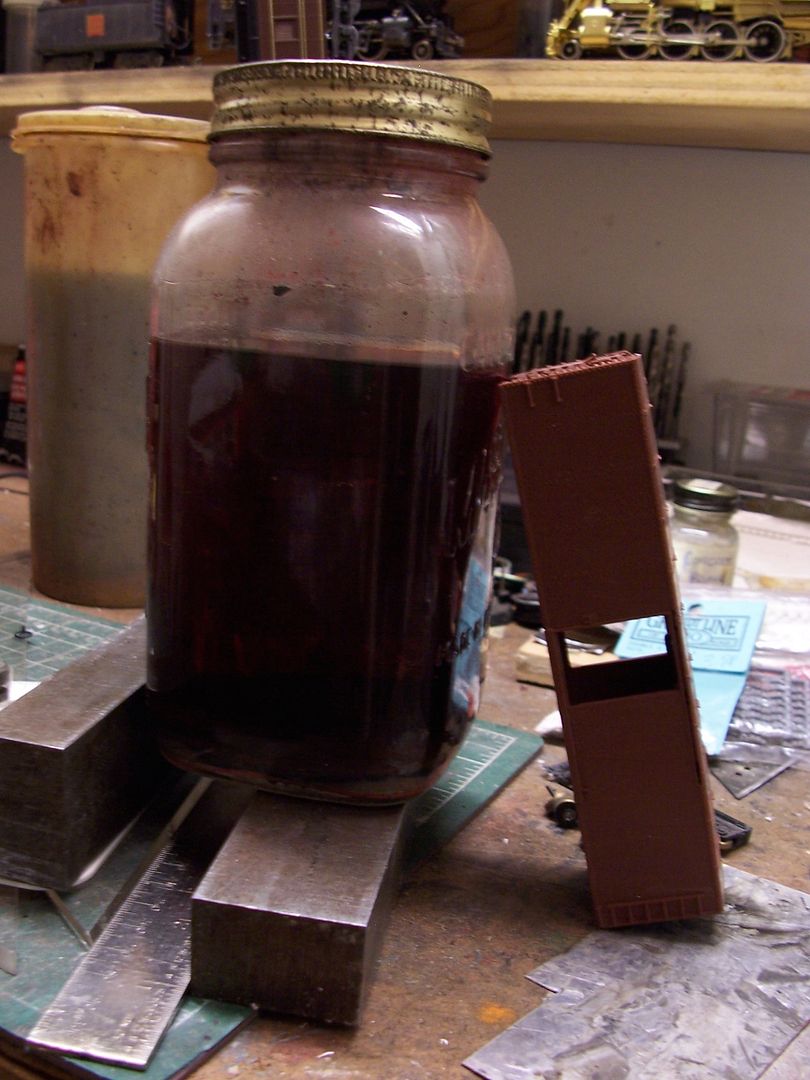
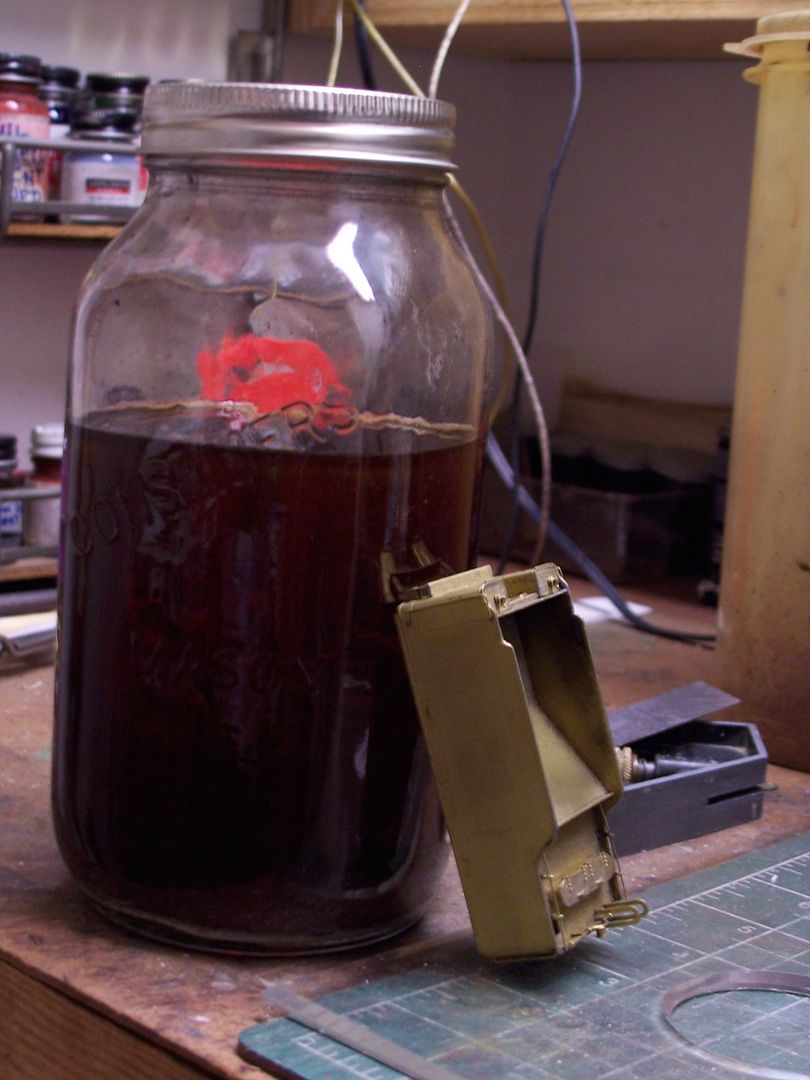
A. Fill a small tub with Super Clean, insert your shell upside down into the solution. (weigh it down). Allow it to soak overnight.

B. Next morning, scrub your shell, in the solution, with a medium bristle tooth brush. Paint should fall off easily. Keep toothpicks handy for those tiny stubborn flakes wedged in tight corners.

C Once finished, wash your shell in warm water and a non-moisturizing type of soap (Dawn or Ivory Liquid). Allow to dry.

D Wipe the shell with a lint free cotton cloth, lightly dampened with iso alcohol or Windex, and you are ready to paint.

D. If your stripped shell is medium gray, and there are no color blotches on the surface, you can skip the primer step and spray your color coat.

E. Friendly reminder regarding the color coat: Test spray your paint first for smoothness on a scrap sample. My early paint jobs were textured. I found that taking the extra 3 or 4 minutes to test my mixtures was worth it. I usually winded up thinning my Solvent and Acrylic paints an additional 10%.

NOTE: If YOU USE SUPERCLEAN…PLEASE WEAR GLOVES WHEN IMMERSING and WHEN SCRUBBING! I made the mistake of not wearing rubber gloves the first time I paint stripped a shell using Super Clean, and a few days later the skin on all my fingers was peeling off. Not painful, but noticeable.

Photos below are of a Walthers Main Line Shell and a Con Cor shell. I hope thi

Very Nicely detailed explanation AntonioFP45! Thanks for the pictures as well, I shall use your suggested method!

Were it mine, I’d strip the paint completely, then wash it using fairly warm water and dish detergent, rinse well, and let it air-dry.

I like grey primer under most colours or where a model has had extra detail parts added, which are not similar in colour to the main body shell.
Since I’ve almost run out of Floquil grey primer, I’ve found Alclad II lacquer-based Grey Primer & Microfiller to be a good substitute. It’s airbrush ready, and offers easy and uniform coverage.

For stripping the factory paint, I’ve used methyl hydrate, or EASY-LIFT-OFF from Polly S, if you can still find it. In some cases, 99% alcohol may work, too.
Another option which usually works well is Super Clean.

If you use methyl hydrate, wear nitrile gloves, as it’s otherwise readily absorbed through the skin.

For most paint stripping, I use this not-quite-tall-enough plastic container…

…although if you’re using methyl hydrate, it will evapourate quite easily if the container is not kept capped when not in use. A toothbrush or not-too-stiff fingernail brush may aid in the paint removal, too.

Super Clean can be used in plastic containers or in glass jars, like this, meant for canning (a different hobby of mine) and works well for plastic, like this freight car…

…likewise, a sealable glass container works well when using lacquer thinner, as for this brass tender, as the lacquer evapourates quite readily, too…

Any of these stripping solutions can be used multiple times.

Here’s

Hello Wayne,

Thanks for your input and detailed picture as well! I will most probably use 91% isopropyl alcohol to strip the paint.

Stripping paint is tricky. I tried a bunch of stuff on an ABS plastic Spectrum loco and tender before stumbling across Testor’s ELO. It’s basically just DOT 3 brake fluid diluted a bit with who knows what (I compared the MSDS sheets for ELO and brake fluid, same stuff basically).

Alcohols (isopropyl or methanol) won’t affect much modern “plastic” paint. Alcohol and toluene were used for lacquers and shellacs. Don’t use toluene, it dissolves plastics nicely. Styrene cement is basically a toluene solvent which “glues” styrene by dissolving the surfaces so you can weld them together with gentle pressure. Plastic “glues” aren’t, they are just solvents. Paint for plastic models is often more plastic than paint. Beware of crazy glue solvent ideas. Some paints just disappear with this stuff but so do some plastics.

Be aware that modern model making applies paint in a way that creates a silhouette effect of very slightly raised plastic, like embossing, even after the paint is gone. Quite annoying.

Be patient with ELO, you brush it on and wait 15-20 minutes then rub off the crinkled up paint and decals. Repeat for stubborn paint.

If you can see the silhouette remaining after removing the paint that will show under your new paint. Someone suggested very fine grade 3M plastic abrasive used for fine auto body repairs to gently scuff off the slightly raised residue.

This thread:

http://cs.trains.com/mrr/f/88/t/266062.aspx

PS Tamiya paint remover works well on Tamiya enamels but attacks ABS plastic. It is fine on styrene.

You’re most welcome! [:D] I’ve corrected the typos in my post. Good tips from Doc Wayne.

Looking forward to seeing your work. If you don’t mind, please post photos of your progress [:)]

What I’ve done is use Solvaset to remove the lettering - apply it to the lettering, then rub a pencil eraser over it. You normally need to add Solvaset a couple of times, but the lettering (which is pad-printed, not decals) will come off.

If you’re OK with the color of the car as is, you can spray it with gloss finish and decal it without repainting. I prefer to repaint it, so all my cars are the same exact shade of green, so I spray it inside and out with gray primer, put some soft paper towels inside the car, then spray the outside Tamiya Olive Drab. The paper towels, if put in carefully, act like a mask so the interior is a different color from the outside. Then spray with gloss finish and decal per usual.

The Rivarossi cars, at least back in AHM days, had some of the best and most “solid” lettering of any RTR cars at that time. If it was pad printed they used a better process than most did

The downside is that that means the lettering is perhaps not as easily rubbed off as, say, an Athearn or Roundhouse car. But I do agree that if you like the current Pullman Green color of the ATSF painted cars, then removing just the lettering and numbering and saving the original paint makes sense

Remember also (if we are thinking about the same cars) is that the clear plastic for the windows is integral with the separate roofs. I assume that means that if the roof is put in paint remover that the result is clear plastic? Never tried it myself.

Lastly, at least some of the Rivarossi standard passenger cars were actual Santa Fe prototypes, identifiable with the slightly inset lower sill all along the sides. IF you do intend to strip the paint and then repaint that might also be an opportunity to cement on a very thin strip of styrene in the inset sill to at least partly hide that tell tale “this is a Santa Fe car” look.

Dave Nelson

For what it’s worth:

I have some Rivarossi unpainted passenger cars. I attempted to add some striping using Vallejo paint brushed on. I wasn’t happy with the results so I undertook removal of the stripes. I repeatedly rubbed them with a cloth dipped in 70% isopropyl. After several applications, the paint began to soften. I was able to peel off the paint using a fingernail, the plastic toothpick from a Swiss Army Knife (not to damage the car plastic) and occasionally the tip of an X-Acto #11 in fine grooves. The car plastic looks like new. Would it have survived 91% isopropyl and/or removal gone faster? I don’t know-I don’t have any but am delighted with the results.

Dante

PS. Now I am going to try cutting fine stripes from colored tape unless someone has a better idea for applying stripes!

Dante

It should be, the undec ones I’ve gotten had the entire roof and window assembly clear plastic. However, since the decorated cars have the roof painted black already, I’d assume the OP would just leave them as they are - unless they’re painting them into a later streamliner paint scheme where the roof isn’t black.

p.s. I’m assuming the lettering is pad-printed, but I’m not positive. However it’s put on, main thing is it’s not a decal so can be completely removed with Solvaset or something similar with a rubber eraser and a little ‘elbow grease’.

For most fine striping, I use decals…

The fine lines between the colours were done with decals…

…and likewise for the stripe around the roadname on this one…

…while the roadname was done using individual letters from a Champ alphabet set.

…although sometimes I’ll airbrush the car with the striping colour, then mask it and apply the “base” colour…

…and used the same procedure for this Walthers tugboat, done for a friend…

For wide stripes, I prefer paint and masking…

Wayne

Wayne, you do great work!

Dante

I appreciate your kind words, Dante. Thank you.

Wayne