I have a tall warehouse kit (the Perkins Produce) with a basement freight door that will be open, and I’m thinking of putting a light in the building that will give some glow to the folks working in the freight door but also show in the widows of the upstairs rooms, although this latter is less important. I want it to be a very warm luminescence, not some blinding stalag searchlight. I don’t know anything about lighting, but I hear a lot about LEDs these days.
What would you recommend?
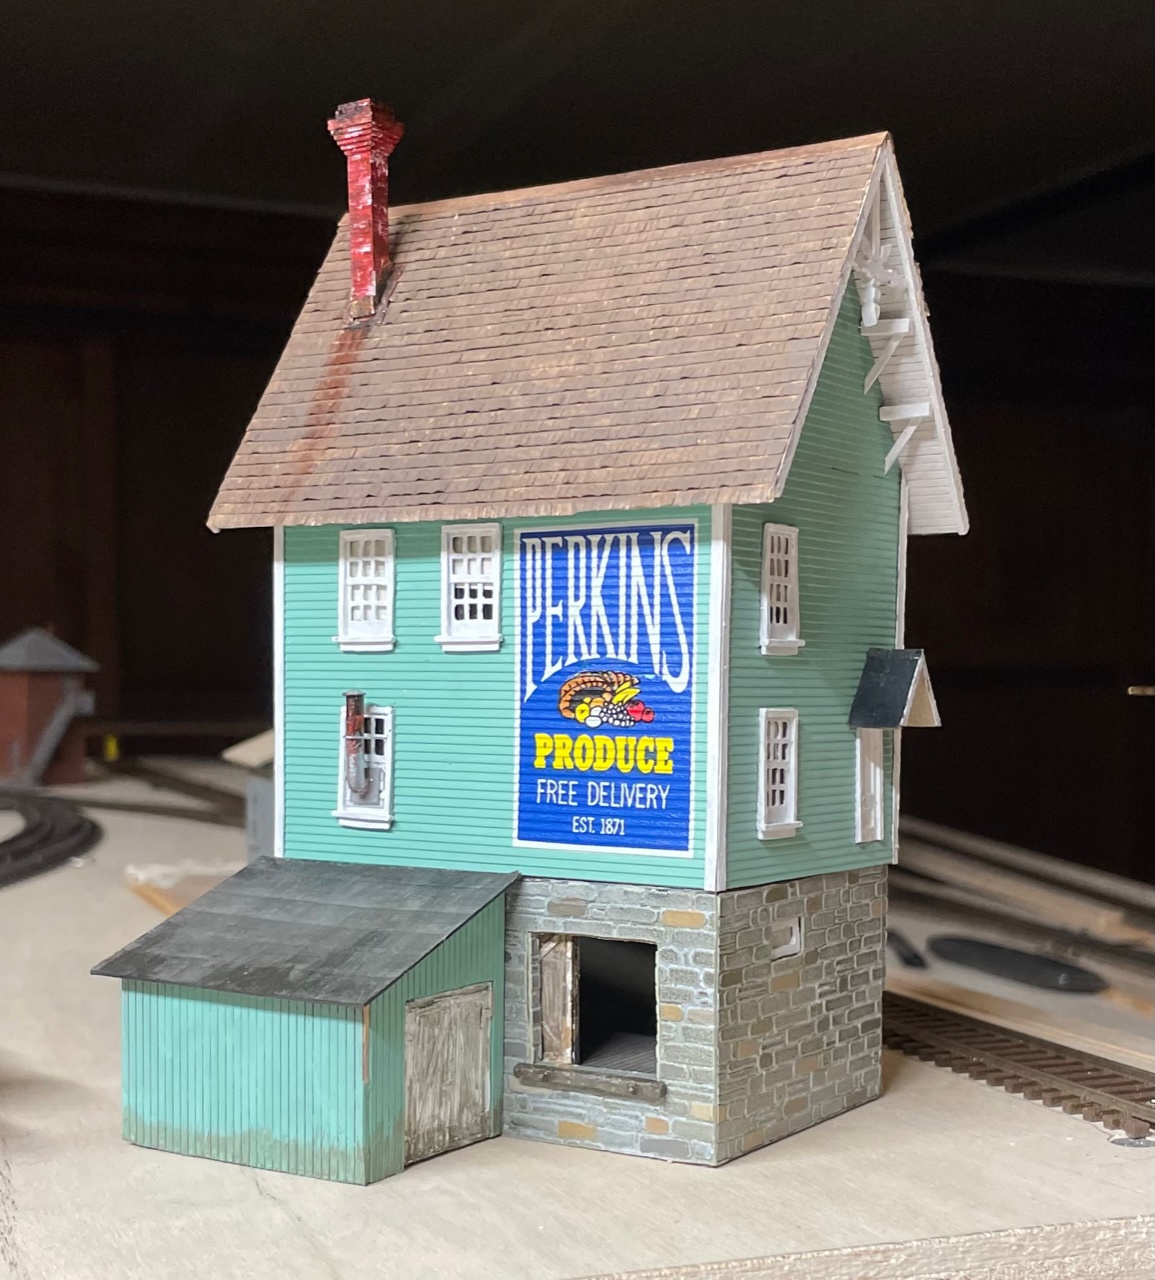
Here is the commercial photo of the built kit. The freight door in this one is closed but you can build it slid open, which I have done.
For interior lighting you can go with either warm-white LEDs or incandescents. Depending on the bulb voltage and how you power them, it may require you to also use resistors to achieve an even warmer glow. Will the light fixture itself be visible through the windows or door?
I used 1.7mm-12V Miniatronics incandescent bulbs to illuminate both the interior and exterior of my NYC freight house below back in 2006:
The bulbs are a bit oversized for the HO lampshades but I really like the visual appearance of the glass bulb itself. Their 1.2mm bulbs were better-sized but I wasn’t happy with how it cast the light. A number of them projected a crescent-shaped reflection onto the surface below.
Although the bulbs are rated at 12V, I hooked them up to the DC terminals of a spare MRC 1370 power pack and “dialed” them up to only 8-9V to give them the above appearance*. That gave them a nice warm glow, as well as extends the life of the bulb operating them at the lower voltage.
*[The photo makes the exterior lighting appear brighter than what it actually is in-person. The interior lighting is more representative of both.]
I do like LED lighting but my main experience with them is using them for headlight illumination. The small flat SMD (surface mount) LEDs are especially handy for lighting brass headlamps and give them a more prototypical beam than the bulb-type. The bulb-type I usually use when illuminating a headlamp through the clear plastic lens from inside the locomotive shell.
I do have some MTH passenger cars that use warm LED strips for interior lighting and they look fantastic. I’ve even toyed with the idea of using either a function-only decoder or a lighting module board to turn lights on & off independently inside a structure.
I have done a lot of lighting with LEDs and I think your warehouse is perfect for lighting effects. Here are my recommendations. Don’t be put off by their apparent complexity. If you can add one LED, then you can add several just as easily. Here are my recommendations:
First, make sure that the structure is sealed against light leakage. You don’t want glowing walls or light coming through the corner joints or out from under the foundation. The wood walls are much less prone to light leakage so you really only have to worry about the seams and the foundation. To block any light leakage, first make sure that the joint is completely covered with glue and then paint the joint black. You can put more appropriate interior colours over that. Light leakage at the foundation can be eliminated simply by putting a floor in the bottom of the structure;
You definitely want to use warm white LEDs. Something in the 3000 kelvin (colour range) is ideal. You can get them on eBay. There are a lot of choices. The cheapest LEDs are generally the 3mm size. I use the much smaller 0402 or 0603 with the wires already installed. This is just one example. These are in Canadian dollars:
I’m old school and I use and like small incandescent bulbs for interior lighting. I use 16 volt Miniatronics bulbs and I run them at 12 volts DC. The bulb manufacturer isn’t that important, just what my LHS had, and if you have AC power that works, too. I do like to keep the voltage lower than the bulb rating. It gives a warmer glow and results in longer bulb life.
The suggestion about sealing the corners and doing something to prevent the building from glowing is a good one. I usually download a wall texture, print it and glue the paper inside to prevent bleed through, and I always use balsa strips to reinforce corners, and that seals the corners well.
If the structure will be close to a wall, block off any window that will allow light on the wall. Seeing a window on what should be empty sky is disconcerting.
On larger buildings, I like to install floors and sometimes walls. Nothing fancy, just thin foam board cut to shape. Then I use a few bulbs scattered around so parts of the building are illuminated but other parts are dark. Yes, it takes me a month to do a 4-walls-and-a-roof kit, but the results make me and my little figures happy.
Thsi is the rear view of the DPM hotel, now sold by someoned else. I have put in floors and walls. Inside those windows, neatness isn’t terribly important because they mostly serve as light blocks. I’ve glued interior textures to the inside walls.
Thanks guys. Great ideas here, stuff I wouldn’t have thought of, and just what I wanted to know.
It’s taken me close to three months just to get this far, and I haven’t even started the loading dock on the uphill side yet. I’m asking this stuff now because I soon have to glue the building’s various components together and I wanted to make sure I left access for replacing bulbs, and dark skirting around where light might bleed through, etc. The Roof is glued to the wooden upper part, but the wooden part is just sitting on the stone foundation right now, and the shed is also not yet affixed.
The warehouse looks great! I love the weathering on the chimney and the rust on the roof.
You seem to have a pretty good grasp of how to install the lighting but I would point out the following:
If you use LEDs it is highly unlikely that you will ever have to replace them, especially if you use higher value resistors (5K ohms?) to reduce the current flow. LEDs have a life of at least 10,000 hrs and most will last up to 50,000 hrs. Just don’t forget the resistors or you will instantly have DEDs (Dark Emitting Diodes).
One other point. Lots of ‘warm white’ LEDs aren’t particularly warm in colour. You want something around 3000 kelvin, but if the LEDs are too ‘white’ then one or two coats of Tamiya Clear Yellow will give them a nice yellowish tone. That’s what I did with this lantern and this headlight. Both have 0402 prewired LEDs:
Several years ago, I went to one of the local big box hardware stores the day after Christmas. All of their remaining Christmas decorations were on clearance. I found lights strings of 100 warm white diffuse LED’s for a few bucks each. I bought several. Yes, I had to disassemble the strings of Christmas lights to get to the LED’s but it wasn’t all that much trouble. The cool part turned out to be the diffuse lighting feature. Each 3mm LED was molded with an inverted cone in the tip. Thus, the light reflects to the sides of the LED instead of being focused out the tip. This means this type of LED is perfect for lighting building interiors. I also discovered that, when looking directly at the tip of the lit LED, that the tip of the inverted cone creates a hot spot of light. This hot spot makes the tip of the diffuse light LED look exactly like a lit sealed beam headlight. Hey, would these work as diesel loco headlights? Heck yes! I have replaced all of the headlights in my blue box EMD F7 locos with these lights and they look great! I started by tearing out the original headlight mount and replacing it with a piece of .040" styrene super-glued to the inside of the frame (similar to the original metal mount). I then replaced the shell on the frame after removing the original headlight lenses. I then used a drill bit that just fit inside the diameter of the headlight openings and carefully drilled centerpoints in the new styrene mount. After removing the shell again, I finished drilling the LED locations in the styrene mount. I next fitted the LED’s in place and replaced the shell on the frame to check clearances and the accuracy of the LED placement behind the headlight openings. Once I was happy with the LED placement, I glued the LED’s to the styrene mount and painted the rear and sides of each LED with flat black paint. The final step was to use Testors Clear Parts Cement t
The Tamiya paint that Dave is referring to is their X-24 Clear Yellow. I like to thin mine 2:1 with Tamiya X-20A thinner. It takes more coats but allows you to acheive more subtle results between coats.
My preferred method for applying the clear yellow is dipping. If I need more control, I use microswabs. And I let each coat dry thoroughly before applying the next.
If you can’t find suitable Christmas light strings or don’t want to have to pull them apart, the diffused light LEDs (sometimes called ‘straw hat’ LEDs) are available in bulk from eBay for pretty good prices. Here is just one example:
Several of you have mentioned LEDs and resistors. This is the division point for me between what I can easily imagine doing and what seems arcane and difficult, but I think I want to go that way if the light is not too harsh.
Here’s where my journey has taken me so far: I found an inexpensive INCANDESCENT bulb at my LHS last week (he had “warm” LEDs but I wasn’t yet convinced), and stuck it in the building and wired it temporarily to an old Tyco power pack’s DC terminals. I turned out the lights in the garage. It looked great (although it showed light leaks around the windows and doors EVEN THOUGH I had insulated their insides with glue and then painted the glue black as instructed above – still trying to figure out how that light is getting through).
I understand if I use warm white LEDs with resistors, I may not ever have to replace them and I may be able to reduce their bright-whiteness (intensity? luminescence?). But I don’t know how to use resistors, where to place them, their care and feeding. They sound grouchy and hard to negotiate with. And I know nothing about ohms. The “warm white” LEDs I see online look awfully bright (which could be great in other applications – I actually bought a few to replace the headlights in some of my old YB Atlas locos).
I want to try the LEDs for this Perkins kit and other structures, but in this direction I can only perceive a wilderness without a pathway ahead.
In any case, thanks all for these great comments and suggestions.
Hooking up an LED and a resistor isn’t much different than installing an incandescent lightbulb but there are two things that you need to do with an LED vs a regular bulb. The first is to install a resistor in series between the LED and the power supply. One resistor per LED is the simplest place to start. It doesn’t matter which lead the resistor is connected to and the resistors are not polarity sensitive (LEDs are polarity sensitive). The second is to make sure that you have the polarity correct for the LED. If an LED won’t light, try reversing the wire connections to see if that works.
The LED/resistor calculation is very simple. In fact, I don’t do any math at all. I just guesstimate. Let’s assume that you are using a 12 volt DC power supply. Twelve volts is too much power for an LED without a resistor installed in series. The resistor restricts the amount of electricity that can get to the LED. A very common resistor value is 1000 ohms with the resistor rated at 1/4 watt minimum (you can use 1/8 watt resistors but they can get very hot). That generally makes the LED very bright which is how they are shown in the ads but not what you want in this case. The higher the resistor value, the less light the LED will give out. I have used resistors as high as 30,000 ohms to make the LEDs glow like a kerosene lamp or a very early lightbulb. I would suggest starting with something around 3000 ohms and working up from there.
Here are some warm white 0603 LEDs with one 30,000 resistor per LED installed in my McKeen Motor Car:
I have found that 1k (1,000) ohm resistors are a safe bet for most LED’s. As far as how to use the LED’s for strings of Christmas lights, the individual bulbs are actually seperate pieces that plug into sockets along the string of lights. Simply remove each bulb from its socket, pop the clear or colored plastic dome off the top of the socket, then straighten the wire leads of the LED so that it will slide right out of the socket base.
Ok Brent, I’m ready for some help. But not in my roundhouse, in the produce building I showed. These LEDs arrived yesterday, very much like Ed’s exterior lamps in the thread at the link you provided:
As you can see, resistors are included. I can imagine how all this fits together mechanically, the nuts and all, but what do I have to know about the resistors? Where to put them in the wiring? Can I hook them up to the old Tyco power pack, which I think is 12v? Also, how do I know if these resistors are sufficient? Mr. “wehonest” on eBay provided them (which I hadn’t even realized was part of the deal, so plus points for thoroughness there), but I don’t know how…er… resistant they are.
These are awfully tiny gauge wires, too, can I just crimp them in connectors or do you solder them and tape them? I’m completely new to working with resistors. So many questions.
Google We Honest, they have a “Product Instruction” page.
It appears these LEDs run on 3 volts (without resisters) or 9 volts with the resistors that were included. 1k would probably be right for 12 volts.
The instruction page doesn’t have instructions for how to physically connect everything but they appear to have a distribution board that would simplify eveything.