I need to make this on a tight budget (any ideas appreciated)
What Scale? In HO a passable redwood is 2 - 3 real feet and that is a a lot just in material. A good start for cheap would be Caspia style trees with a scribed bark. These would be time consuming to make in that scale but with practice would look good. Paul Scoles has a DVD out where he shows you how he makes Caspia trees. You can see some of his 3-4 feet tall redwoods here http://www.paulscoles.com/Photo_Album.php
Search this site for Caspia and you will get some good hits
ratled
Whatever you’re doing, just be happy you aren’t working in g-scale, where a redwood would be about sixteen feet tall. It could be done, you know. I ain’t trying it any time soon, but if did I would find a real tree with something resembling the same scale bark and do some serious coloring. Or I might try just the base of one, the one where a car can go through.
…and by the way…that layout work of Paul Scoles is just amazing, just doggone beautiful.
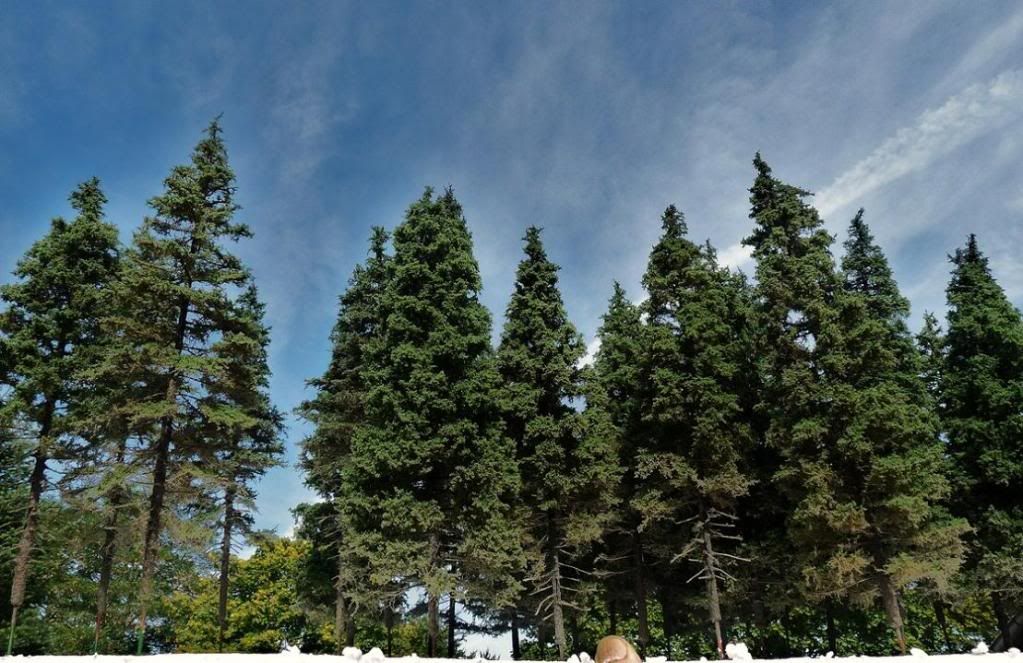
Is this for a project or a layout? Unless you are modeling some sort of logging layout for the redwoods, these particular trees are quite large and would look out of scale.
If it more for a diorama, these would be 24-30" tall in HO depending upon the Sequioa semperven (taller of the species- used more for redwood lumber) or the Giagantia ( the massive 16-20’ diameter trunk and what most consider the “Redwood” ie: (Redwood National Park)
To model it would be best to start w/ 3/4-1" dowels and taper the tops. The bases would need to be built up to a graeter diameter. this can be done by wrapping in cloth, paper etc. The branches don’t start until almost half way up the trunk and extend almost horizontally and gradually drop in size to the top. It is a good time of the year to use Balsom Fir clippings as they fan out in a flat manner similar to the redwood, Arborvite would also be a good choice due to the flat nature of the small end growth… You would need to work off pics. For branches, drill holes the apropriate size to accomadate “real” branch clippings. Some “real” branches should be dipped in glue and allowed to dry this helps keep some spring otherwise they will be very brittle. Theses can be sprayed w/ adhesive and ground foam sprinkled on. After building the tree, additional ground foam and chunk can be placed. Start w/ a dark conifer/ evergreen and add loighter green tones to the top of the branches. This will give a better illusion of depth and mimick over head sunlight.
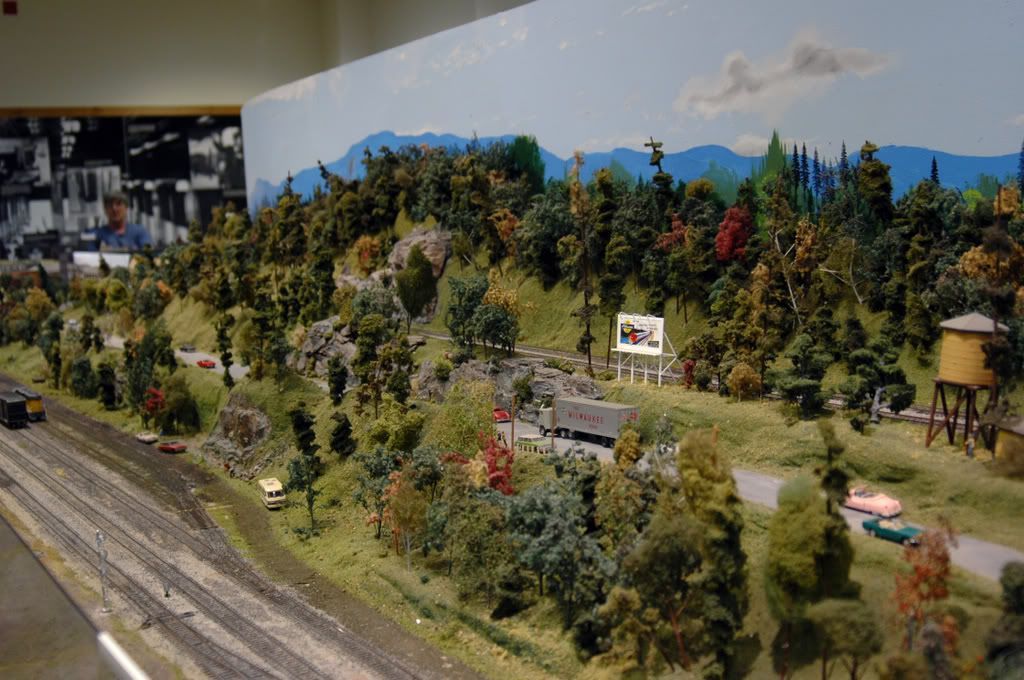
Some of the evergreens to the backdrop are scale 100ft, we did have some much taller, but didn’t fit the scene
You can get balsa in 3/4 x 3/4 x 3’ , enough for two nice size trees in HO and balsa is easy to carve. Then just use the furnace filter method of tree making.
May be something to consider:
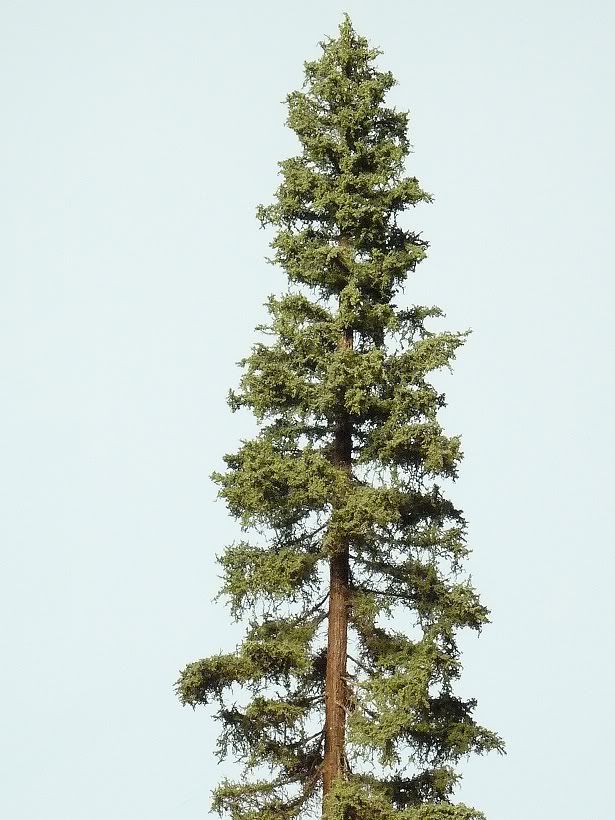
This kind tree(s)are cheap but “time consuming”:
It is not exactly a sequoia but with some
modifications" it can be transformed into a seqoia…
This tree is about one feet and 2 inches “small” so a young kind of tree
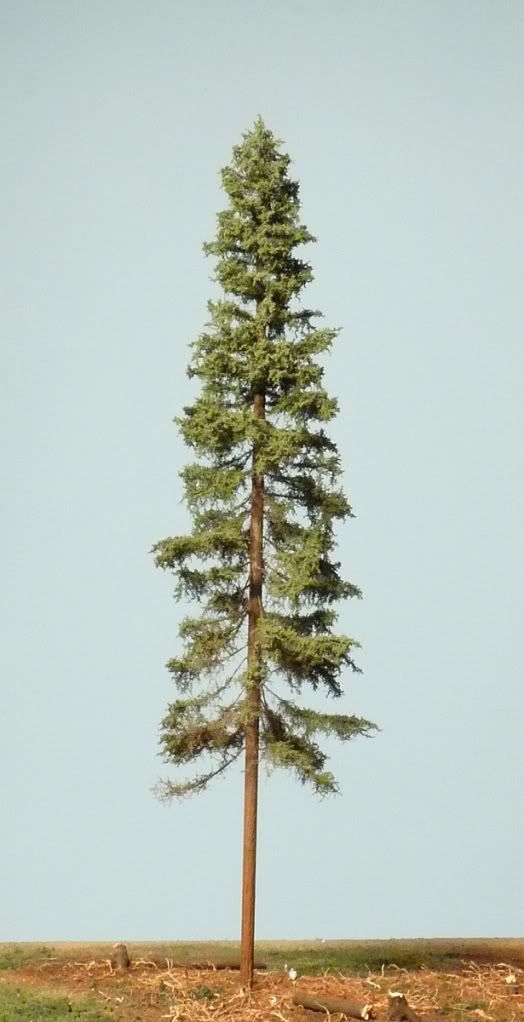
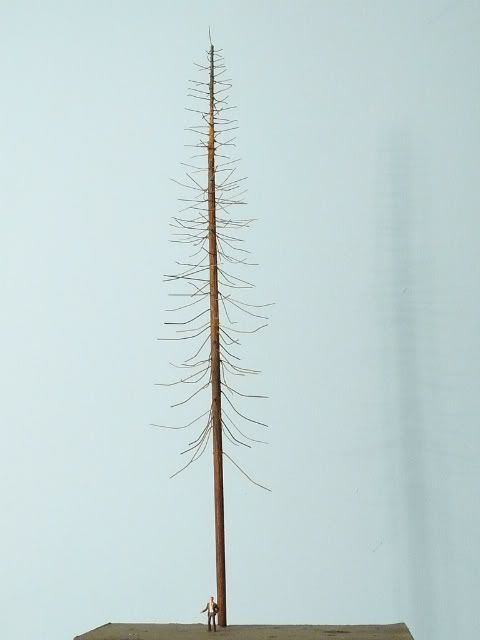
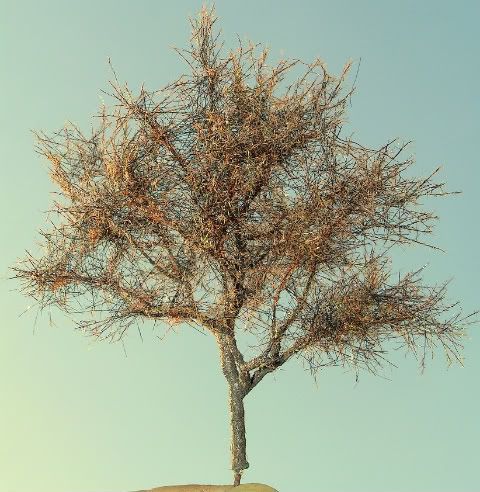
Here is the frame made of a dowel and shaped and colored.
DRilled some very tiny holes for the branches= floristic wires: 3-4 wires/hole.
Added the fibers and spraycolerd them in greybrown.
When dry added the grassfibers:
first some 6 mm ones and after that some 2 mm grassfibers .
last but not least: the fine ore coarse turf from Woodland.
The frame :
the frame + the fibers(- decotwister or “wooly”) btw: the fibers are glued with some sprayglue.
I cutted the "wrong placed " fibers with a sharp pair of scissors
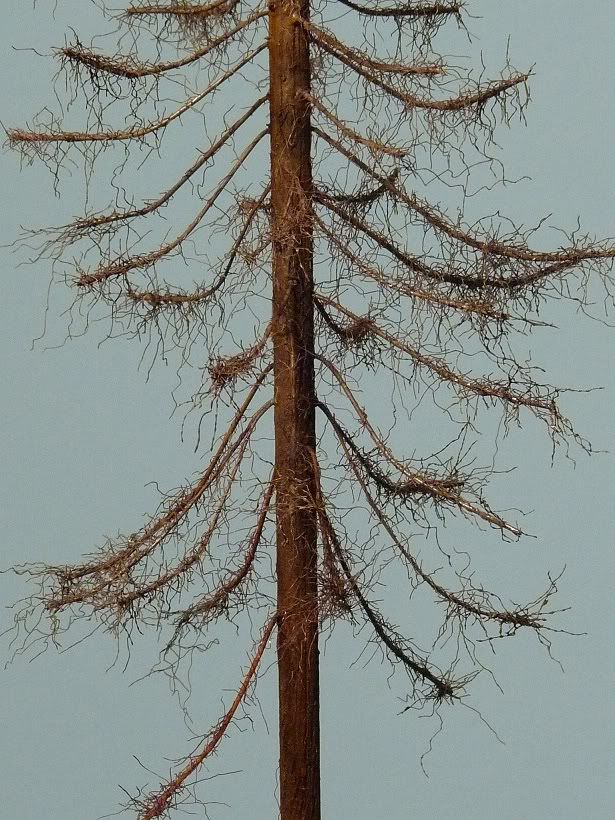
the frame with the - colored-decotwister/wooly fibers and the grassfibers:
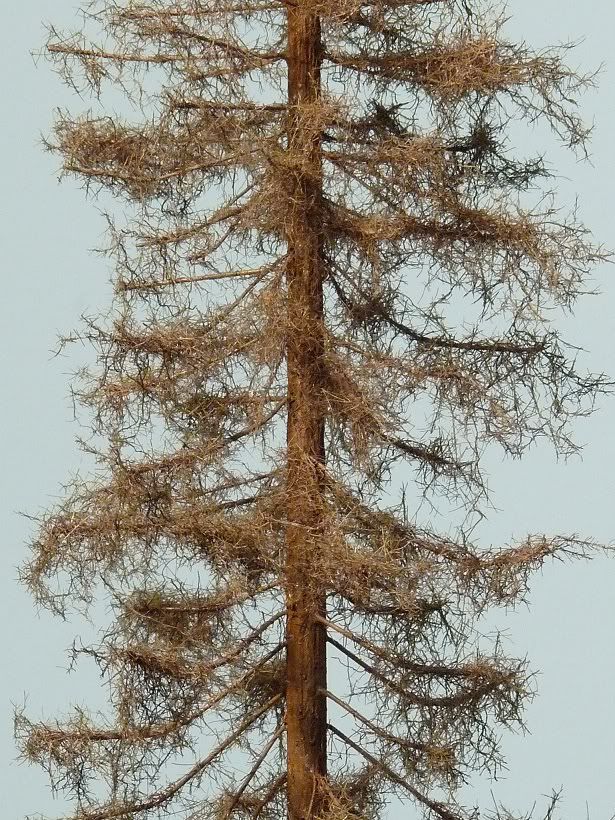
Detail of upper part of the tree:
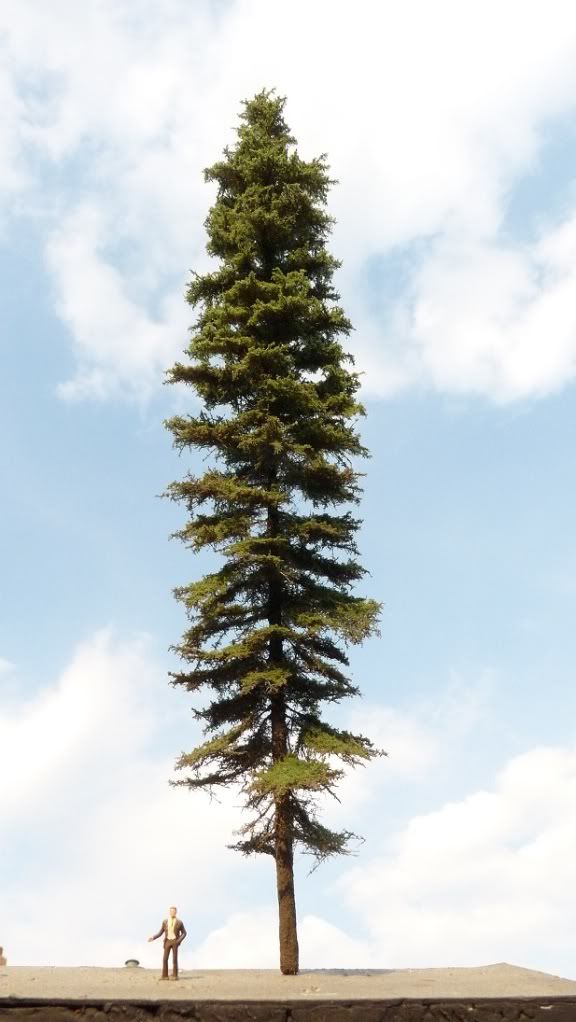
Here a smaller one( H0 scale) but made with the same technic/materials!

Jos
Those are some nice looking pines Jos. Might I ask what you used for the initial fibers. (The brown ones)
jos your Redwoods are looking amazing (as does all of your work). For those not familiar with amazing jos’s work he has this long and very informative how to thread (with pictures) here
http://www.railroad-line.com/discussion/topic.asp?TOPIC_ID=23011&whichpage=1
BTW The captain has to be one of the most photographed MR figures there is. thanks for sharing your work
ratled
Runnerguy347@:
Those are some nice looking pines Jos. Might I ask what you used for the initial fibers. (The brown ones)
Those brown fibers are artificial fibers used in the floristic industry( flowershop?)
Overhere they are called “decotwister”
May be in your country “Wooly”?? Just have a “look” on the internet( Google search)
Important is the length of the fibers you have to cut!!!
For example :
long ones- 1 inch max.- for decidious trees and shorter ones-1/2 - 1/4 inch for pine trees…
These fibers are the base of the foliage of the trees.
Grassfibers - 6 mm and 2 mm- complete the "small branches/twigs on wich the leaves will be added/glued.
Jos
Thanks @ratled!
Here are some pics of the tree unde construction:
As you can , hopefuly, see the “twisted”( kind of) decotwisterfibers and the added 6 and 2 mm grassfibers.
I already painted them in a grey/brown color with spraypaint/can
Same technic but other kind of pinetree…:
some young small sequoias:
Also big bushes/smalltrees can be made easily with these fibers:
Here without the leaves…only the long 6 mm grassfibers and the small 2 mm ones:
and because I am a N scalefan: 2 small BIG tropical kind of trees about max. 5 1/2 inches( pointing finger on the bottom left):

Jos