Here’s a quick and easy project using foam-core board and/or cardstock.
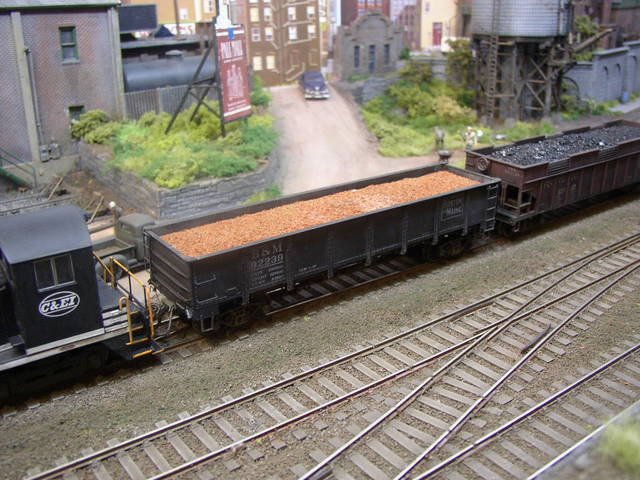
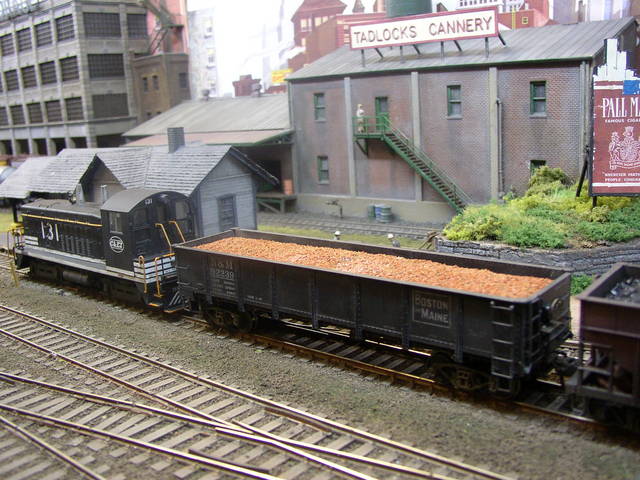
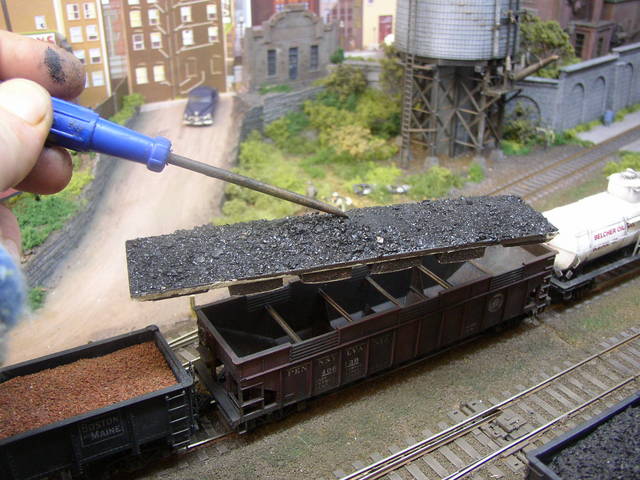
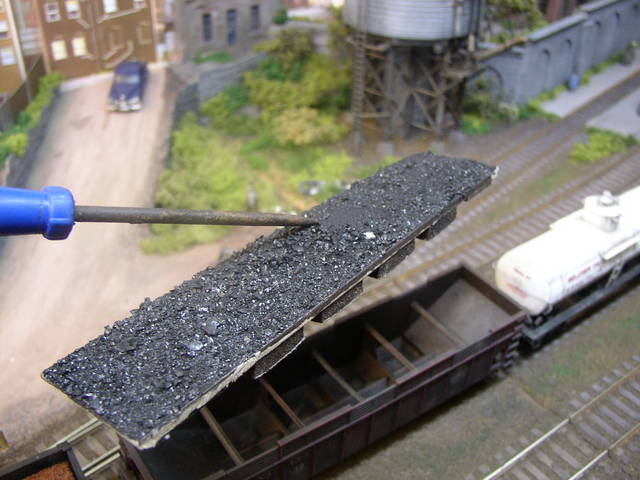
I made this ballast load for a Red Caboose gon in about 30 minutes.
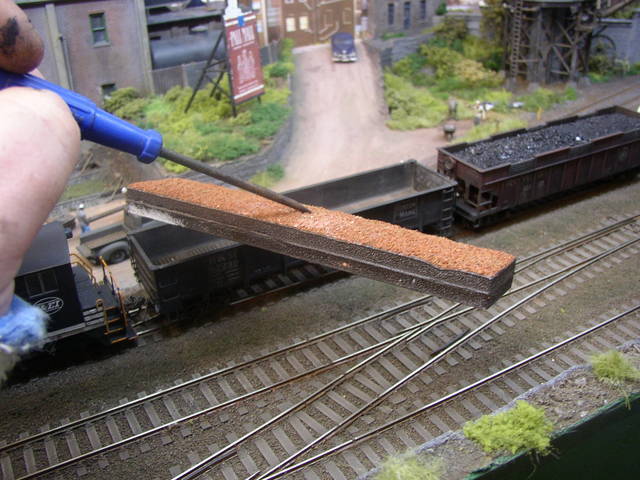
It is made from 2 pieces of foam-core board glued together, with modelling clay (Das) added for contour and topped with WS ballast glued on with carpenters glue.
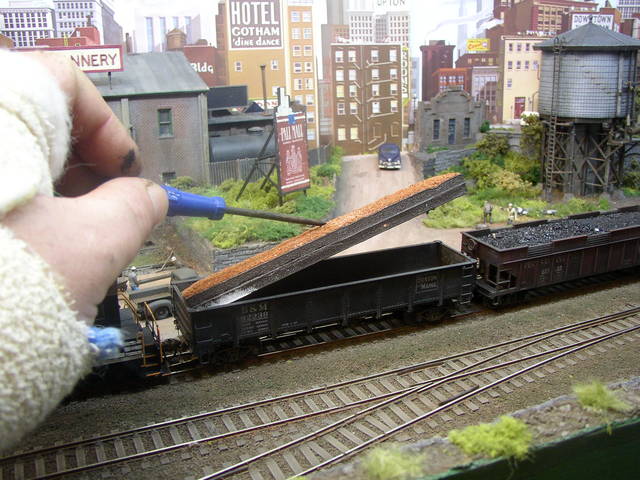
Before adding the ballast, I installed a small magnet to aid removal.
Because it’s light, it can be easily removed with a small screwdriver.
Good stuff, Jon! [:)][tup]. I’ve been kicking around the idea of doing this very thing myself but hadn’t thought it all the way through yet. Where did you end of purchasing the magnets from?
Jon, just a note of caution: A very knowledgeable MRRer told me recently that real coal and nickel-silver track do NOT mix. According to him, real coal contains an acid which will attack the nickel-silver coating of the track. Since your coal is fixed to the load, that may not end up being a problem for you.
Anyway, wanted to pass that bit of info along to you. Your loads look terrific!
All great ideas I was toying witht his idea myself after purchasing some Ore loads from a place in Menominee WI the name was something like Great Lakes (blank). He used foam from packages like DVD players the weird styrofoam not peanuts. And carved the shape out sprayed it that color and called it a day. Since then I have wanted to add gondola loads and hopper loads and now with this post you did sparked that want again. Great work and great idea with the magnet.
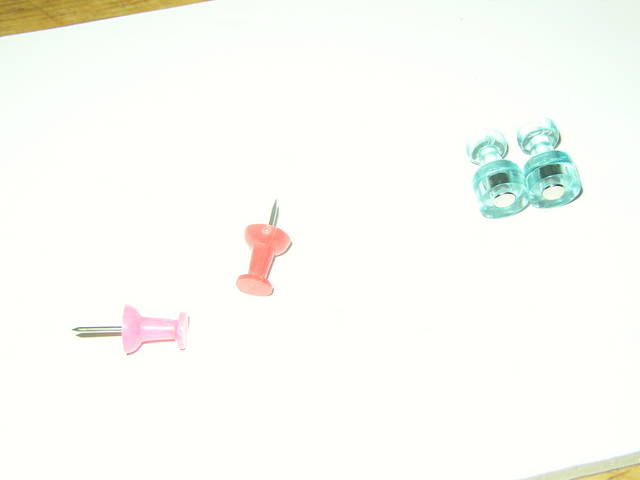
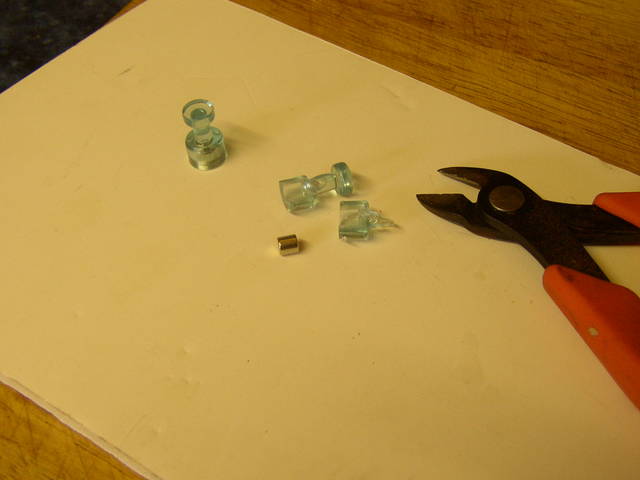
The magnets I use were salvaged from a packet of ‘push pins’, except with magnets instead of actual pins - for putting notes on metallic wallboards and fridges.
You can get them from any office supply store over here in the UK (Stationery Box), so I’m guessing it applies to the US too.
I’ll get you a couple of photos so you know what I mean.
I use flexible strip magnets that are used in window drapes for holding my lumber loads down on the flat car. The steel weight plate under the flat car floor works with the magnet.
I picked up a Magnet from Sears for fetching nuts and bolts out of engines and manifolds. It extends to about 18" and folds to about 6". I am going to route a cavity in some gator board and glue some steel to it. That should work for the hoppers amd gons.
IF and I said IF this railroad every runs at full capacity we should handle 125 to 150 hopper and gon loads per session (6 hours real time). That would require the full 10 man operating crew.
Thanks for the great ideas. Of course I will try all of them and see which one the operators like the best.
I love the idea. I only wish that my rolling stock would let me use it!
Problems:
Most of my open-top cars are steel! Accurate scale models made out of real, honest-to-Murgatroyd tinplate! Needless to say, if I used a magnetic load any attempt to remove it would get me load, car and all.
My prototype put reinforcing bars across the tops of hopper cars, which makes filling them with one-piece loads impractical.
Solutions:
Lifting pins, raised by magnet, used to pick up non-magnetic loads without disturbing the magnetically sensitive cars carrying them.
Loads out - empties in coal operation. The extended tipple is long enough to conceal the connection between the mine and staging.
Pool filter charcoal loaded at the mine (different track) and dumped while fiddling cars in staging.
Actually, I prefer to consider problems to be opportunities. Solutions always show up when needed.
Nice looking loads, Jon, and a neat way of removing them. I use removeable loads in my hoppers too, but these are loose loads, requiring dumping to create an empty. This material is locomotive traction grit (used in place of sand on the locos where I used to work), but I also use coke breeze, which is more greyish in colour. The loaded hopper in this photo weighs about 8 ounces.
Here are some other removeable loads. This oversize pole load was made from dowels, worked over with a razor saw and some coarse sandpaper. Everything is glued together, including the stakes and cable ties. The whole shebang just lifts out of the car.
These lumber loads, made from stripwood, are held in place by the stakes and simply lift off.
The machinery loads are made from extra side panels from a Walthers enclosed auto rack. The ones on the straight flatcar are held in place by the sidestakes, with the music wire bracing simply sitting in the appropriate stake pockets. On the depressed centre flatcar, the wooden (styrene) blocking is affixed to the car with double-sided carpet tape.
These parts for an overhead bridge crane, part of a five car consist, were scratchbuilt from sheet styrene and Evergreen structural shapes. The parts on the flatcars are held in place by the stakes, while the gondola loads rely on blocking on the carfloor. Each load and its stakes/blocking lifts off as a unit.
Thanks for the kind words, Jon. If there are more than two of those loads in a train, it tends to throw off locomotive tonnage ratings, as my layout has a lot of grades, with most of them on curves. I do run a tri-weekly coal train consisting of 12 loaded hoppers and an Athearn caboose. Motive power is a pair of modified Athearn Mikes. The train length was limited by passing siding length, so the locos were modified until they were able to pull the train. Other than minor grades, there’s a 2.5% laid out on an “S” curve, short enough between curves that both ends of the train can be in a curve at the same time. The other grade is also 2.5%, but with a short 2.8% about half-way through the first curve, which quickly shows if a train is underpowered. The grade is laid out over two horshoe curves and a wide-radius “S” bend, and is about 45’ long. There are some pictures of parts of the last grade in my thread about “Bridge piers and abutments”. I also have modified Bachmann Consolidations and remotored Athearn SW1200RS diesels: any two of these three loco types can move the train as required.
I like your paint schemes, Wayne, especially the green/cream diesel. Can’t say I’ve seen 2-tone numbers before - very unusual.
Getting a Bachmann consolidation on a whim prompted me to switch directions totally and model transition era. I like what you did with the tender extension
Here’s what I did with mine, one’s just a new tender, the other was a major kitbash
I also see that you changed the rubbish chimney on the mike - looks much better.
Thanks, Jon, the diesel paint scheme was based on that of the TH&B, substituting green for their maroon. The two-tone number was an attempt to make the locos look distinctive, and involved a lot of masking and spraying. The biggest change, visually, on the Consolidations was the tenders. I took 4’ out of the length of the cisterns and added the built-up clear-vision coal boards. Not so noticeable are all new lead-filled brass air tanks, and new piping, along with added weight in the boiler. With the Mikados, not too much new, cosmetically: A few appliances, bigger wind deflector on the cab roof, and, as you noted, a larger stack, made from brass tubing. The tenders were reworked with built-up coal boards and other details. The coal bunker, as with all of my steamers, was opened to allow for loose coal loads, and Bachmann trucks were fitted for improved electrical pickup. These locos also got lead-filled brass air tanks, and a major internal reworking to increase their pulling power.
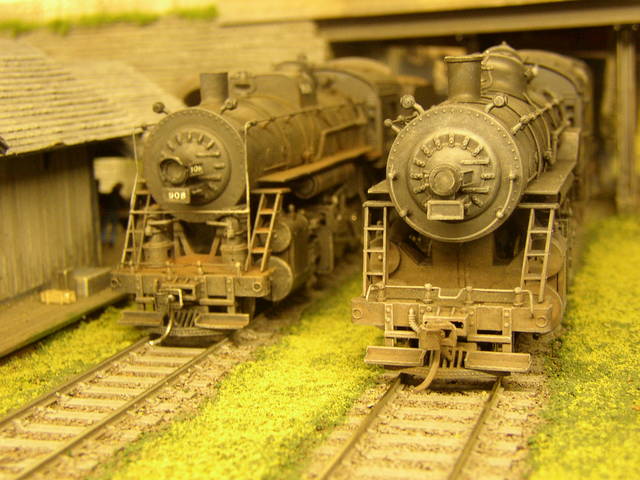
You’ve done a really nice job on the 908, not only on the sandbox, but also on the shortened tender. Speaking of tenders, that Vanderbilt one on the Erie loco really changes its appearance. Who’s the manufacturer? You’ve also got a very nicely sceniced layout there, and a great place to photograph trains. Can you show us some more, please?
Hi Chuck,
It sounds like you have an interesting prototype. Depending on the “look” you are trying to achieve based on it, is it possible to design a load that is suspended from the top of the hopper by the reinforcing bars? These could be plastic, attached to a post that goes down into the load. Then you just fish the whole thing out or drop it in to hang from the bars.
Of course, this would result in needing to modify what rolling stock you’ve probably already built, as well as putting up with the missing reinforcing bars when running empties. I’m sure the prototype left those installed on the return trip to the mines.
[:D]
Anyway, those were my thoughts. Hoppers are more difficult to design removable loads for than gons, as was mentioned, so I’ll be sticking to modelling the Rio Grande and it’s mostly GS hopper fleet in the 1950s and early 60s.
BTW, I am hoping to visit Japan, maybe in the next year or so. My GF went to Japanese high school, although her dad was in the US Navy, so she’s fluent. We’re starting to plan a trip that includes a lot of smaller lines. Is there anything left to see of your prototype?