What do you people use to fill the spaces between your rock molds, you know the space when two molds dont fit together, for example with the Woodland Scenics molds and how most won’t fit together. I’d like to know how you fill those gaps.
Lately I’ve been using Gypsolite to fill gaps. It’s thicker than Hydrocal, and holds its shape better. It’s a bit gritty, which makes for a nice surface texture but it may not match the texture of the Hydrocal. You can also use drywall compound or spackling.
I try to fit the pieces together as closely as I can, and then I shave off the edges until I get them pretty close, so the gaps aren’t as noticeable.
I used a product by Woodland Scenics, its called Foam Putty. It can be expensive if you are doing a large area. It remindes me of a very lightweight joint compound. It is easy to use in the gaps and holds the WS Rock stains well. It comes in a 16oz container and goes a long way. Just do a search on their website for it. I would suggest getting it from someone other than them, cheaper.
I use Scupta-mold in a fairly moist solution. Works great and allows you to create rock shapes if you choose to blend the rock spaces. Also lets you blend into the surrounding scenery. May need several coats of rock stain to match the plaster molded rocks, but a little practice takes care of that. Be sure to let the sculptamold dry first.
I also use scupltamold… yes, it takes paint a bit differently than plaster, BUT if you use a good black base (which “highlights” shadows anyways) before you start your rock washes, it does not matter. A little trick I use, is a piece of tin-foil pressed on top of the scultamold after 10-15 minutes of it being on the layout… gives nice cracks, crinkles, etc. over the defined shapes you have already molded it into and between the rocks; of note, wet the tinfoil with “wet-water” before you do this and it works better…
I usually apply the wet rock mold to the surface, so I carve and shape the plaster that extrudes out round the mold. That way it is all the same material so it takes the color in a similar manner.
The best! In some areas you can get an identical product called “structolyte”. Any builders’ supply house should have one or the other. It comes in 25 and 50 pound bags for a good price and makes nice “dirt” and rolling hills over foam too. It has a longer open time than plaster and is easy to sculpt with a putty knife. You can also dye the mix water if you prefer. The one downside I have found is that when using large amounts, it gives off a slight odor for a day or two as it drys.
In Dave Frary’s How-To vedio from Micro-Mark #82868 he uses gypsolyte (virtually the same stuff as structolyte, different manufacturer) and shows how to blend it to your molds. Mine is the old VHS, but I doubt the contents has changed much with it now on DVD.
I hope to be trying it soon, layout is approaching that stage.
When I mix up my Gypsolite, I squirt in some “Burnt Umber” cheap acrylic paint. I use a dark color because a little goes a long way, and it actually comes out a light tan, very dirt-like. I can actually leave it like that, and it will resemble an arid dirt area, or I can re-paint later. I like this a lot better than uncolored Gypsolite, because I can carve it without leaving a white gouge, and if I miss a spot with the paint, well, it just looks like dirt.
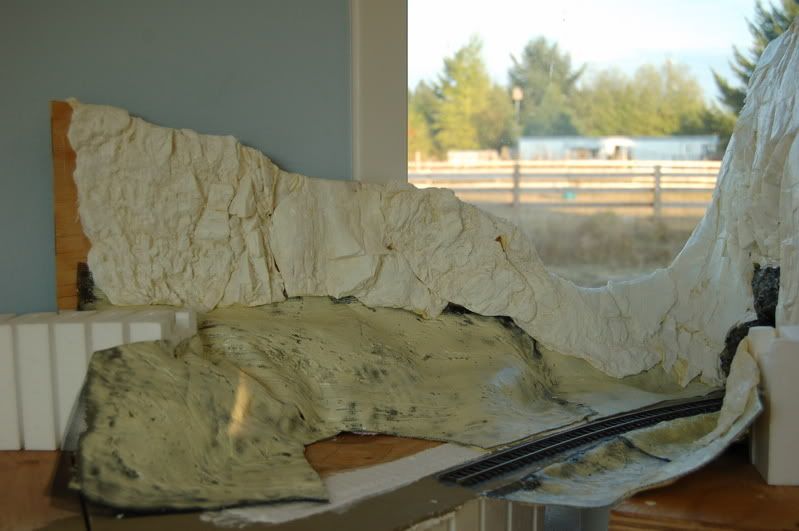
When doing rock faces, if I have a large gap on top I’ll first “bridge” over it with plaster cloth. (I like the cheaper stuff from Michael’s better than the WS brand.) Then I can either just paint that, or put on a bit of Gypsolite.
I have recently started using drywall compound and loving it because it takes a while to set when thick, unlike plaster. This has given me time to mold and shape it etc.
I use to use just plaster. Put on the plaster and then slap on the rock and later mold the plaster that stuck out. Either that or using a spatula I would fill in the spaces with plaster.
I much prefer casting rocks with Sculptamold rather than any type of plaster. It looks very good.
I then install the rock by placing a thick bed of Sculptamold, then carefully press the molded rock into place. The Sculptamold will ooze out and fill the cracks, joints and voids. It can then be sculpted to match the rock.
Easy to work with and clean up. Doesn’t set up fast so you have time to work it as needed.
I will usually do the same, especially on larger, irregular shaped areas of a hillside or cut. Before placing the mold blindly, I know the texture and strata orientation.
As for the gaps between molds, I save all the broken/ damaged castings and use a ceramic tile nipper to cut the pieces for the proper fit. A dab of Hydrocal placed on the castings will sometimes ooze out between. I leave this alone until almost set, then cut, carve and shape to match the surrounding rock. Some of the molds are purposely placed to have a continuous seam for fractures and/ or washouts that get sceniced with tallus and weeds/ small trees or bushes.
A good adhesive for setting dried plaster castings is ceramic tile adhesive. A small container is handy for use and I apply it w/ various spatulas made from paint stirers and cedar shingles. This adhesive is fantastic for foam to foam, foam to wood, plaster to foam or wood or plaster to plaster. Give it a try.
Martin, I switched to geodesic foam rocks from www.bragdonent.com. You apply them while they are still soft with hot glue. You just cut a piece of the foam rock and glue it in the space.
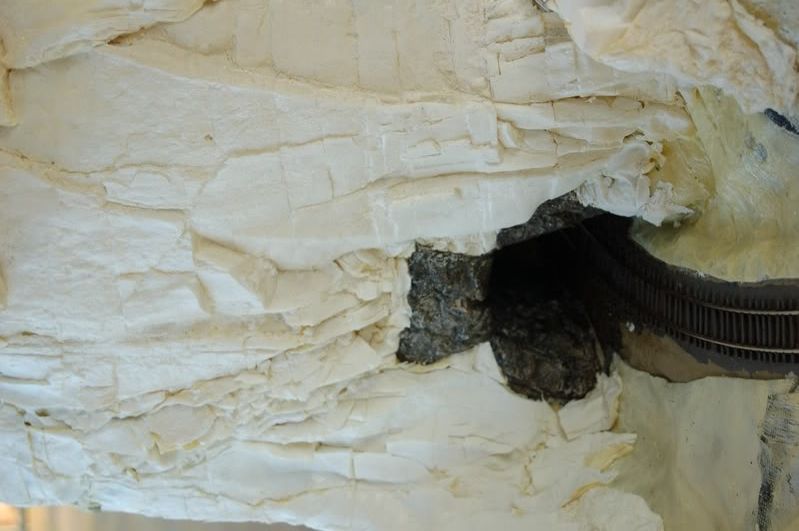
On this rock there are many small pieces joining the large sections.
On this section, you can see the seams in the rock, but after it is painted and weathered, it will look like a natural rock.
You can use a hairdryer to soften and mold the pieces that you use as filler.