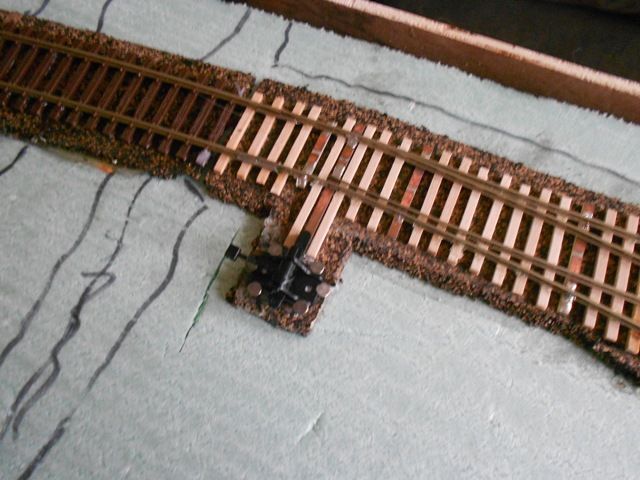
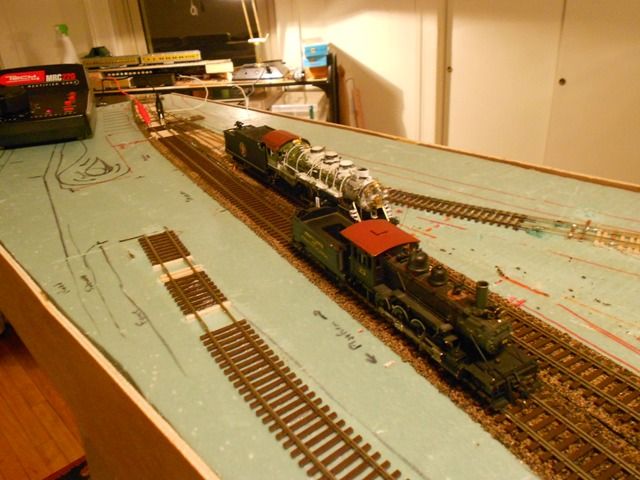
Slow, but steady progress this month-- and a number of different projects active now. I’ve been replacing ties and put CI throws on all but two turnouts:
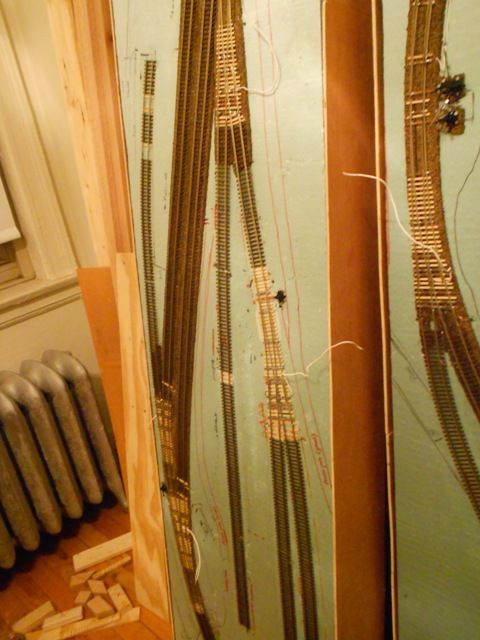
After consulting the track plan for Monte Vista again, I also changed the track a bit in the station/freighthouse area-- decided to remove a turnout and spur to space things out a bit more. I haven’t decided on final placement for the siding sticking out in the middle (a bit disorienting-- my layout sections are stacked up against the wall right now):
Although I’ve finished wiring all four sections, I am thinking about nixing the control panel, running just two bus wires and having switches set in the fascia to control sidings and the runaround. I have a number of switches ready, but haven’t decided if I want to go through the headache of rewiring, though it would be cleaner than what I’ve got, and more flexible if I wanted to add or remove a section later.
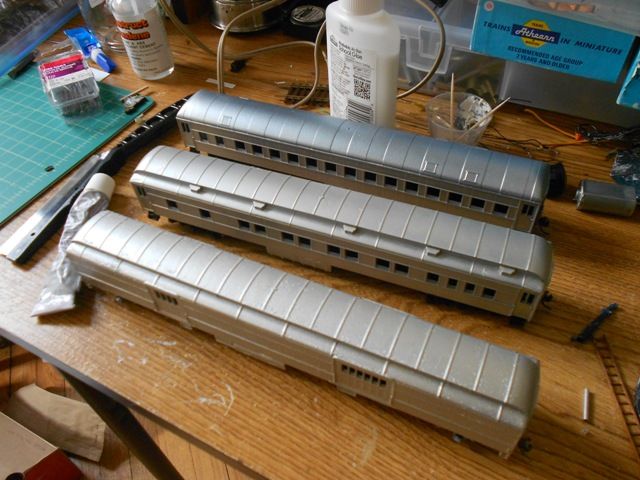
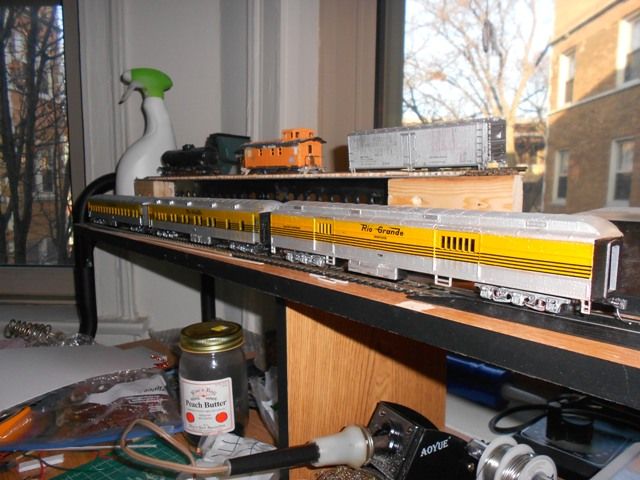
I also got some more airbrushing practice in earlier this month, priming and putting a coat of silver on a trio of Athearn 72’ passenger cars on their way to DRGW livery:
If you’ve followed the WPF threads I’ve also been making headway on my P-44. A bunch of detail parts arrived by mail this week, so I’ve been busy detailing all over the place:
Looking at what I own in terms of rolling stock, I’m starting to think about a different set of industries for this layout-- which is not so hard to do, considering I don’t have any structures yet. The depot will stay, as will the potato storehouse, but I’m thinking of replacing the scrap yard with a grain elevator since it’s a more interesting visual structure. This would allow me to modify a number of boxcars I already own to use as grain cars. The Colorado Seed Co. in Monte Vista might be a good candidate for this-- there’s an excellent picture here:
I’m still thinking about the freighthouse area-- one spur is gone and I’m seriously considering removing another. Maybe the freighthouse can go along the passing siding, which would make it more central, and then some other industry-- like a liquid fertilizer tank-- could go where the freighthouse is currently located.
The Colorado Seed Company looks like an interesting structure, but I wonder if it’s a bit too modern for your intended 1948-1955 time period. I’m not sure about that, but I’ll bet somebody on the forum can explain. During those years, I think most grain was shipped in boxcars, rather than covered hoppers. Of course, no law says you can’t be flexible in your choices and do things as you wish. It’s your railroad.
Tom, I agree that as it stands the building looks too modern, but I think grain was being shipped out of the area in the 1950s-- there are photos of grain warehouses from that period, similar-looking to the potato storehouses. I do plan to use boxcars to ship grain, should’ve made that clearer. I’ve been looking around to see if a grain elevator existed in the area in the 1950s and what it might look like, but haven’t found anything yet.
If you can’t find photos & data on a real prototype structure from your area, you can always build one (scratch, kit, crosskit, etc.) that appeals to you. As we established recently in another thread, that’s a surefire way to make the genuine data materialize. You’ll find the data about a week after you complete the imagineered project.[banghead]
I’ve seen your progress on the loco, but until you changed the headline, I missed seeing this thread. Thought I’d offer a link that you might find useful to Roland Levin’s website on modeling the Rio Grande in the SLV: http://hem.bredband.net/drgw/
Roland is a list acquaintance who hangs out on the Rio Grande Yahoo list, where you can also find others with an interest in the area.
Thanks for linking-- I’ve explored Roland’s site before and harvested lots of details. The ‘Grande Gold’ newsletters are chock-full of info from railfanning the area, including track plans, industry locations, and lots of pictures-- though it’s all several decades after the era I’m modeling, it’s still a treasure trove. Hadn’t seen the Rio Grande Yahoo list, though-- maybe I’ll join it.
Although not officially covered in the list synopsis, there’s been lots of discussions over the years about the various lines, past and present, in the SLV. There may be dedicated SLV lists out there, I just don’t know about them.
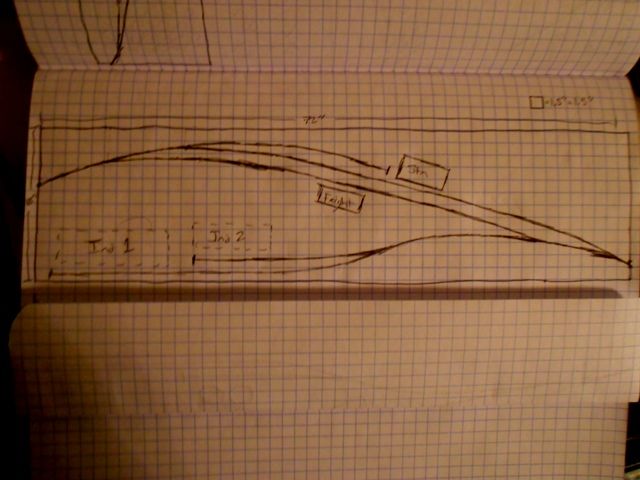
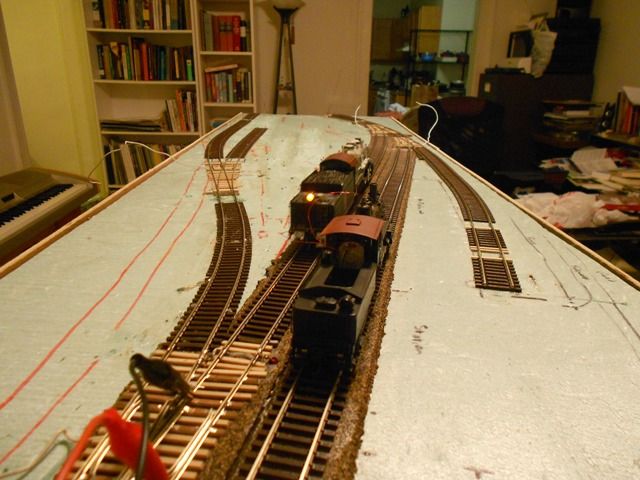
I’ve been thinking about function for the tracks on the busiest section this week. I’m finding two issues:first, the middle spur eats up way too much space, leaving no room for buildings between the outer spur and the main. Second, the two-pronged outer spur is 4 car lengths on each end, but there’s not even enough room for an aisle-side industry there, and the freighthouse doesn’t need two tracks to itself-- it’s not big enough to justify loading two boxcars, let alone two rows of boxcars…
Monte Vista has a long spur that moves away from the main line, with little tendrils branching off of it to serve a few industries. If I remove the middle spur and shorten the inside track for the remaining spur, I can approximate that (truncated, of course) and serve two industries instead of one. The freighthouse would then be placed on the passing siding. I think this is more in keeping with the ‘feel’ of the town and its layout. Here’s a quick and dirty sketch:
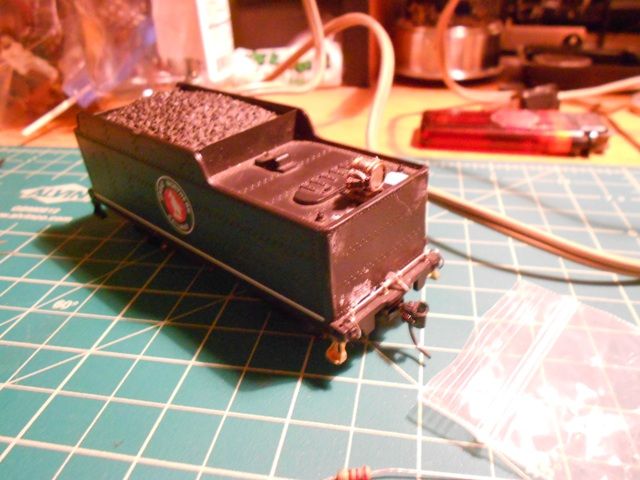
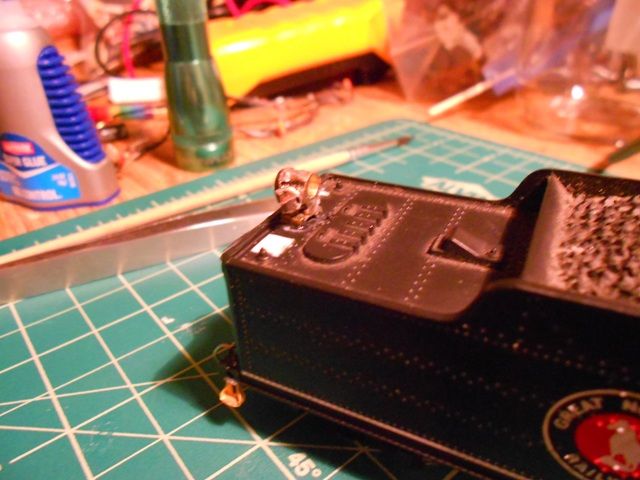
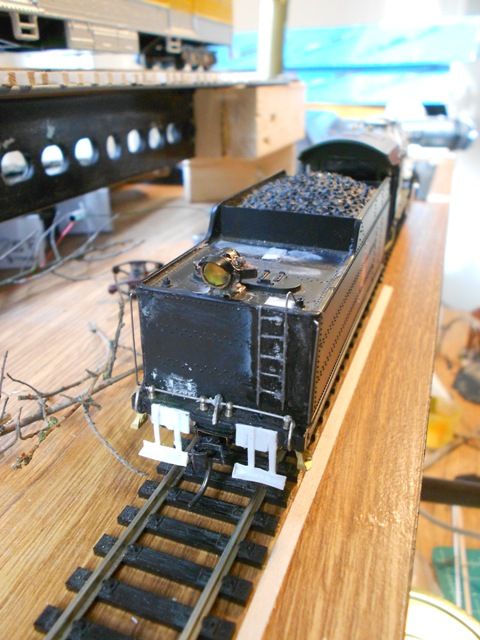
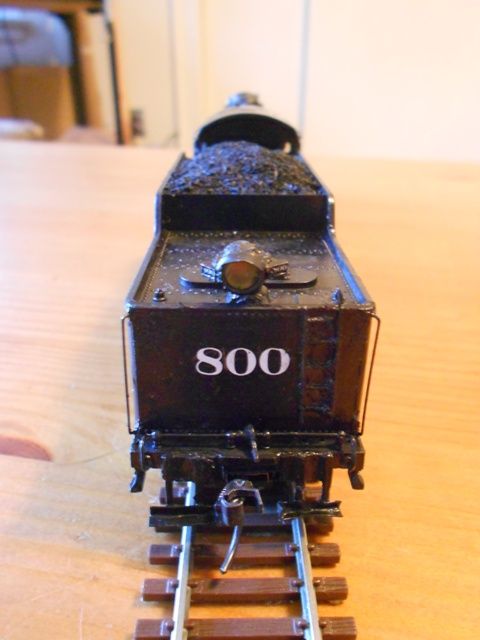
More P-44 work this week. I started with some detailing for the tender, removing the stock taillight and chiseling off the molded-on handrails, steps, and marker lights on the back. I put in a couple of DRGW tender steps and a spare brass headlight, drilling it out to receive a 3mm LED.
I only have cool white LEDs, but I do have bright orange and yellow transparent airbrush paints that aren’t being used for anything else, so I’ve spent some time experimenting with them to get the right color for the light.
I ended up using more orange for the light itself and also painting the inside of the lens with the bright yellow. For now I’m satisfied with the end result.
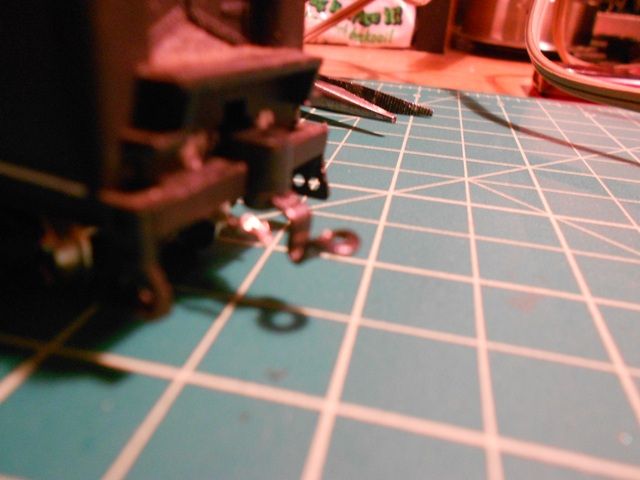
I also shortened the link on the tender front so that it sits closer to the engine by making a U-bend in it. The loco probably won’t go around an 18" radius curve anymore, but that’s not a problem for me.
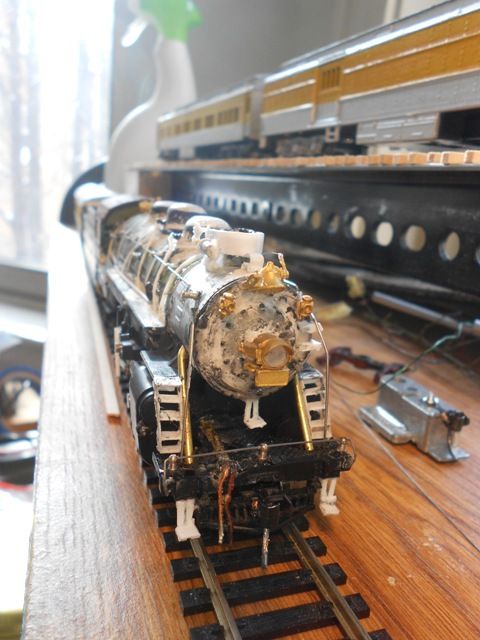
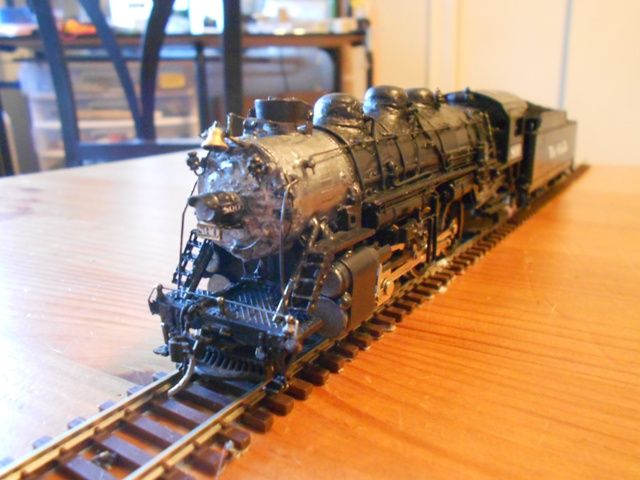
Elsewhere, I worked on all the handrails and piping for the loco. Yesterday, the long #26 Kadee for the pilot came in the mail, so I’ve been working on detailing the front end and almost everything is in place now. More to come soon.
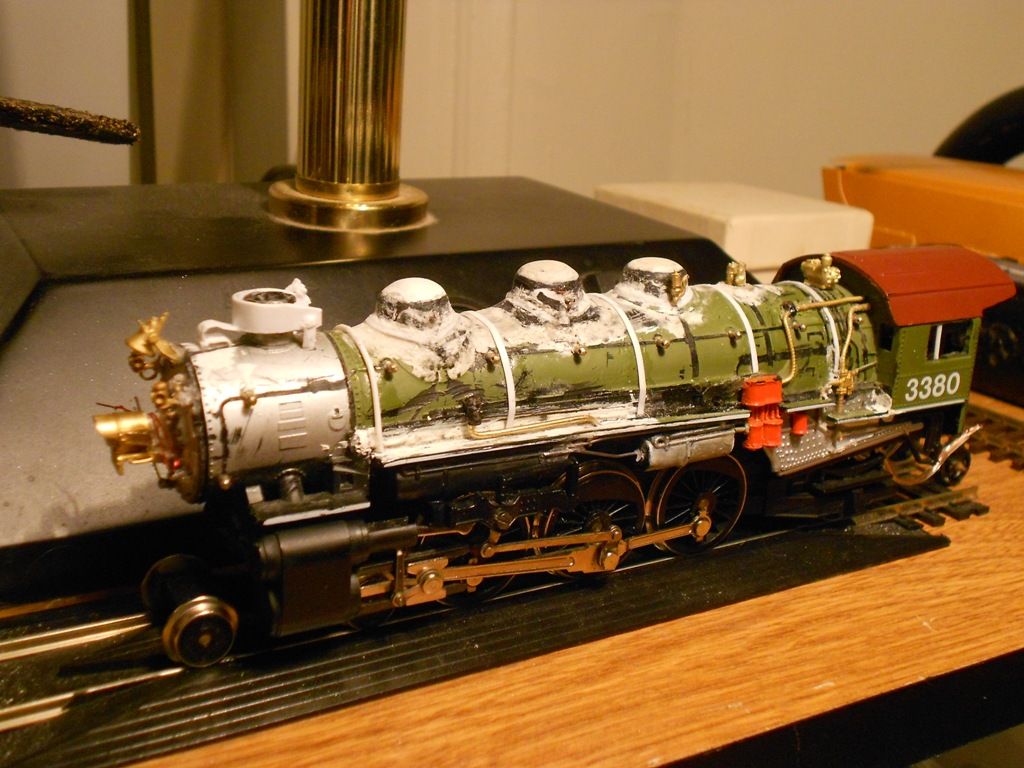
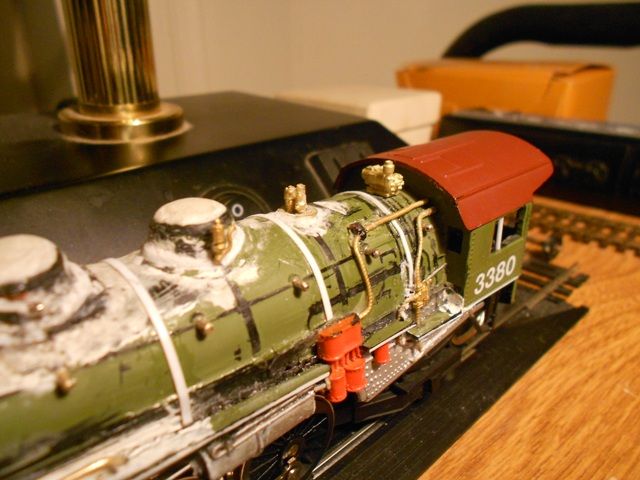
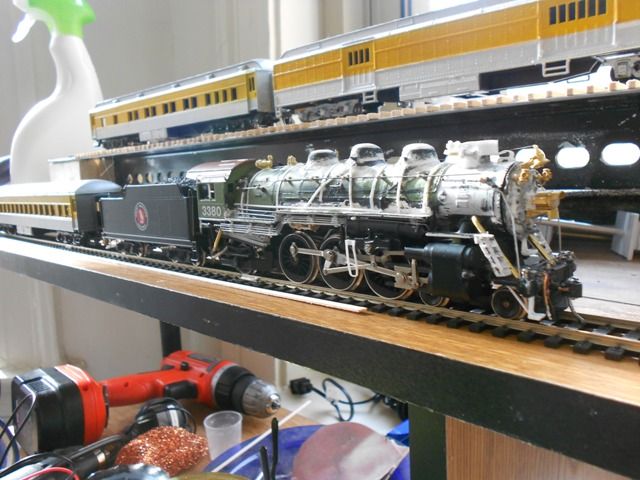
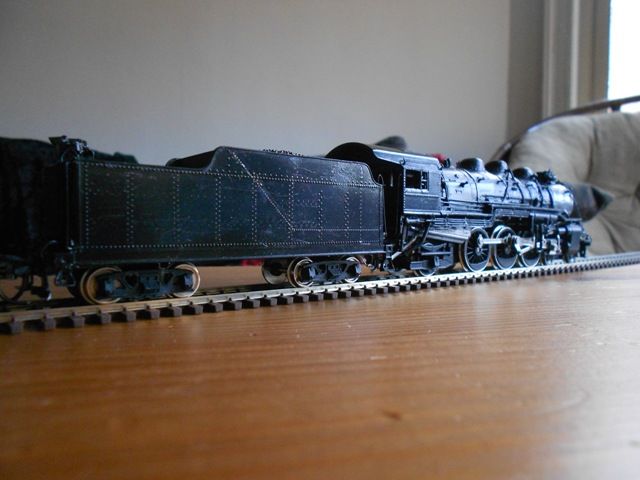
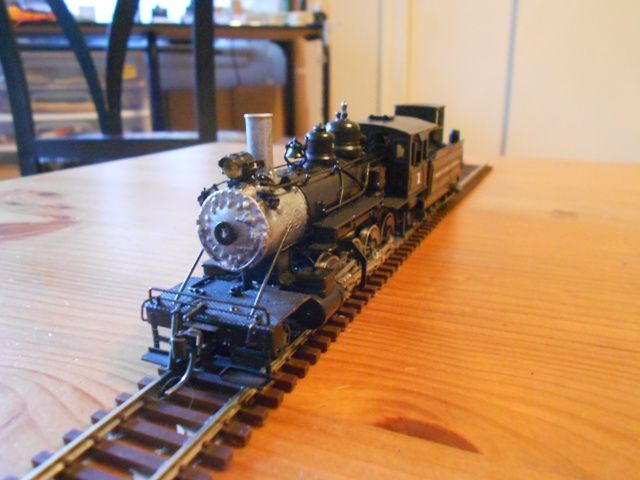
Nearly ready for paint. The headlight still hasn’t been hooked up, and I need to fix some of the strange rivet patterns on the tender before painting. After I snapped this last photo I also replaced the step beneath the smokebox because it didn’t look right.
In the background you can see my Athearn passenger cars, which received a yellow layer by airbrush this week.
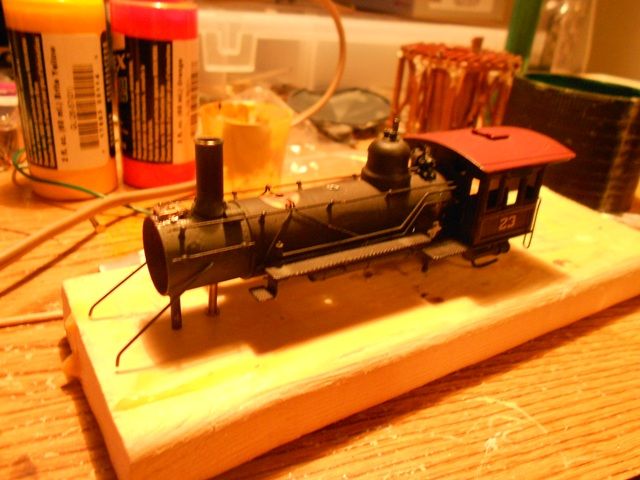
While the P-44 awaits rivets and paint I thought I’d return to my Consolidation this weekend.
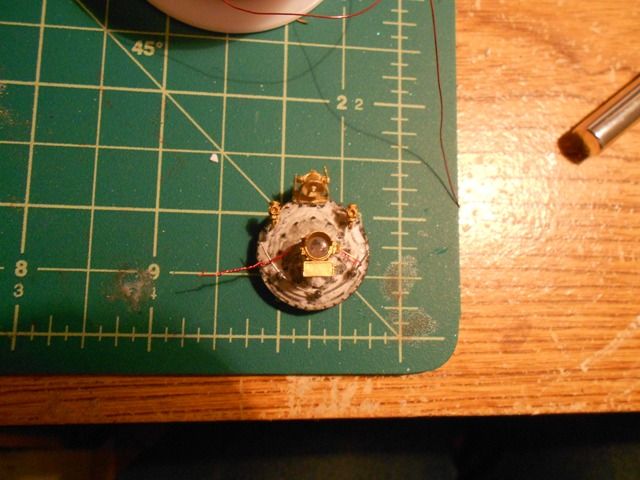
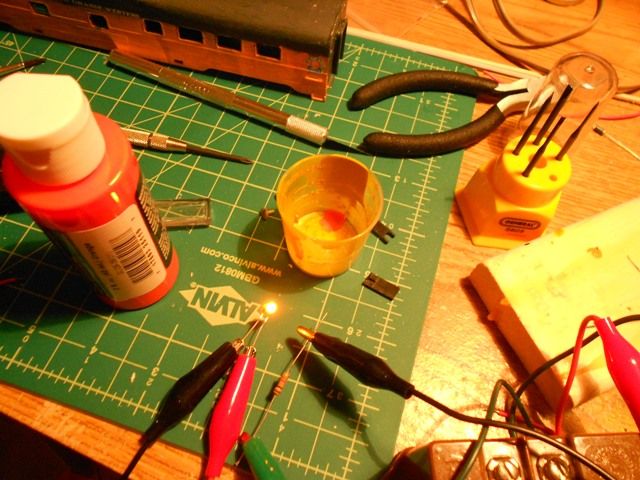
I started removing details off the body to move them around. I swapped the single-cylinder pump for a double, swapped the positions of the bell and sand dome, and moved the side tanks forward. I also installed a new headlight, though I haven’t wired it up yet-- I’m thinking I may run its leads (30 AWG magnet wire) down the body alongside the piping, because there’s precious little room anyplace inside the body except for some corners of the cab.
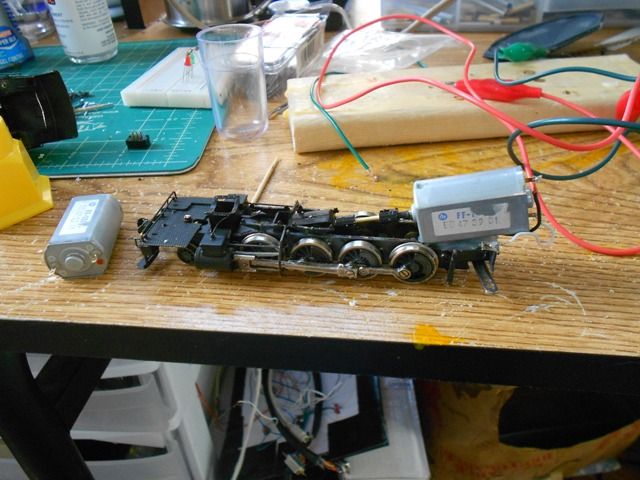
Additionally, I was curious about the loco’s extreme sensitivity to voltage last time I ran it, so I dug up the motor datasheet… turns out the operating range is 1-3V. D’oh! So I re-remotored it with another Mabuchi, a 130-SH which has better torque, lower rpm and a 12V operating range:
Then I did some bench testing for both steamers. Low voltage startup has DRAMATICALLY improved on the Consolidation-- and with tender pickup on the P-44, both engines really crawl now.
Sometime soon I’ll open them up on some lengths of flex and try to get a sense of min/max operating speeds.
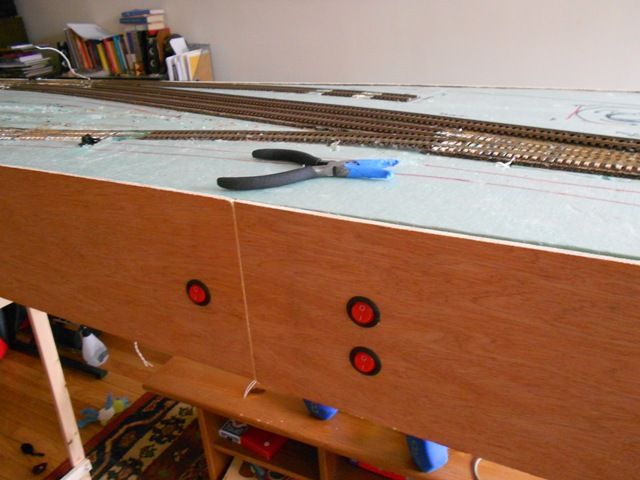
In other news, as the track plan has been modified I nixed the control panel entirely and have been rewiring the layout with rockers in the fascia to control sidings:
I think it’s a much more elegant solution than the panel! Far fewer wires across sections as wel
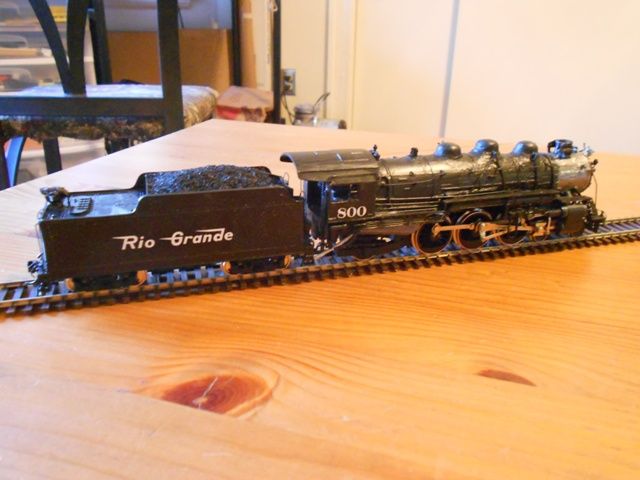
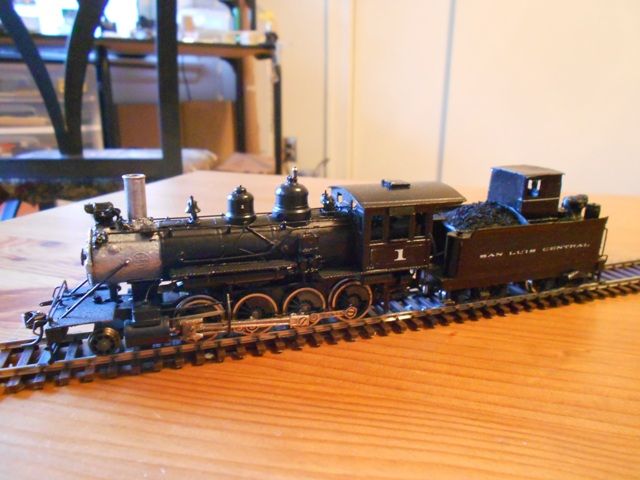
Both locomotives are now painted and decaled. The P-44 awaits some weathering and the Consolidation still needs a couple of details (spark arrestor, cab curtains, and some minor pilot and rear details) but aside from these and some trim painting, the two are essentially complete.
For the P-44, DRGW #800, my Archer rivet decal strips arrived last week and I finally chiseled off the ugly stock horizontal lines on the tender, replacing with the right pattern. I then brushed a thin primer coat over the existing decals and anyplace where there wasn’t already paint, and hit both loco and tender with the airbrush.
I used a glossy black for tender and cab, and mixed a slightly grimier, lighter shade for the loco body. It’s a double-edged sword, in that the lighter color brings out the detailing in relief, but it also shows that the boiler body isn’t as smooth as it could be-- you can see the scars from all the dome surgery. Oh well; perhaps when I weather it, that will alleviate the issue a bit. I used all acrylics except for the smokebox, where I used a metallic silver enamel and then went over it with a bit of powdered graphite, burnishing it in with a brush.
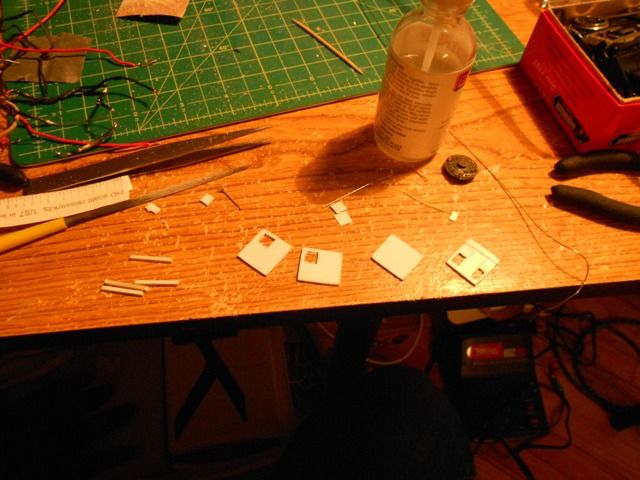
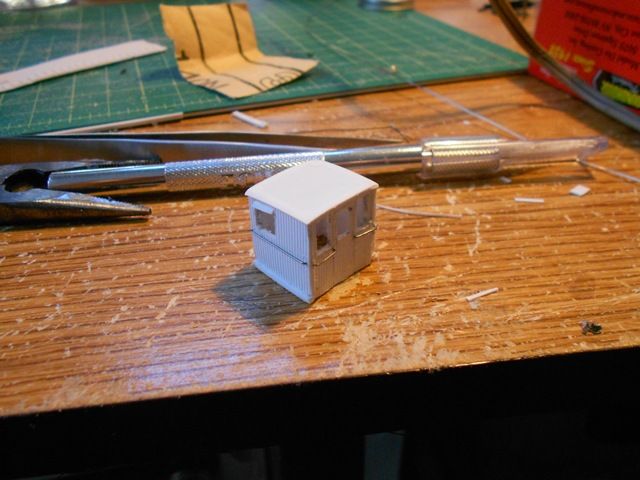
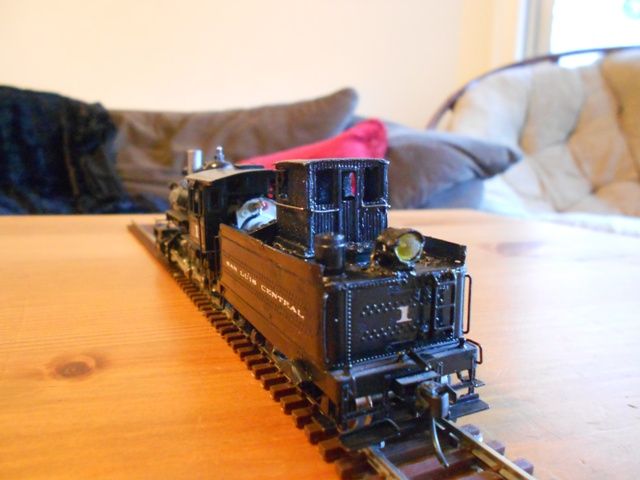
For SLC #1, some modifications had to be made to the tender. First I scratchbuilt the doghouse, eyeballing it based on my photos of the prototype.
I played around a lot with placement, moving the back end of the coal bunker forward and backward until I got the proportions I wanted. I painted the two locos together in one session, using the same glossy black and silver enamel/graphite mixes for this one. SLC’s crew took pride in caring for and cleaning their only steam engine, so I’m not really planning to weather it much.
Also, as with the 70-tonner #71, I couldn’t find exactly the right font, so I went with something a bit similar-- SP Extended Roman. The doghouse is only temporarily affixed with some dots of white glue, since I’m waiting to place glass in its windows before permanently attaching it.
I’m loving it. [tup][Y] Those locos look great, certainly close enough to build a layout around. It’s a good lesson for those who say because something isn’t made RTR, it’s standing in the way of their dreams.
You gentlemen are too kind. Mike, that’s quickly becoming my MO. Really, what drives me to try to use up what I have stems from being economical, but also from wanting to preserve some part of what I had when I was little, trying to re-purpose what still works well and turn it into something new-- and if that requires taking pieces from three locomotives to make a really good one that works well, so be it. That’s the reason behind finding new shells for my pair of diesel frames over in the other forum instead of buying new locos outright, or for all the work behind the 4-6-2 instead of hunting down the Samhongsa import. I’m thinking about finding donors to construct a C-41, which was to my knowledge never imported, although Tom has given me a lot of great info for kitbashing a C-48 from fairly easy-to-find brass.
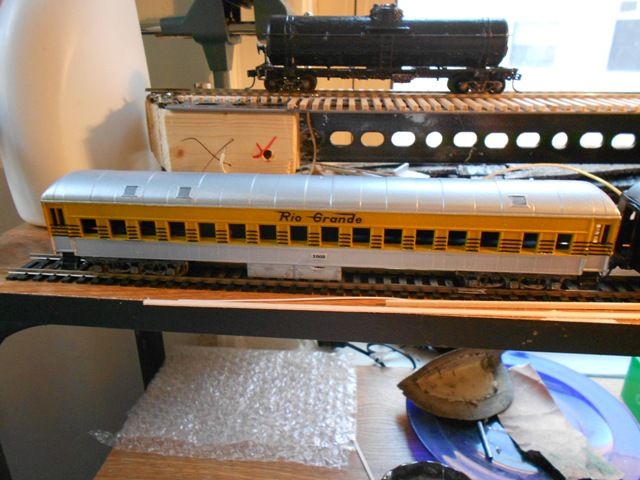
I switched gears for the week, from locos to passenger cars. Lots and lots of decal work with cutting up those stripes:
I have some American Ltd diaphragms to add to these, plus handrail work, but in general I don’t feel inclined to be quite so fastidious on rolling stock as I was with the engines, so I may leave it at that.
I’ve used some of the American Limited diaphragms before. They’re a piece of cake. The tricky part is getting the distance between cars set right for them to work best. This kind of depends on your layout, so if you don’t have a good test bed to run them on, might be best to hold off until you do.
Wish they, or anyone, would make a narrowgauge diaphragm. All the standard gauge ones I’ve looked at are just too physically big to work, so probably will roll my own eventually.