Scratch building a MILW terminal caboose

Thanks for the info Harrison, I did look at the article from the June, 2010 MRR.

I didn’t have any old cabooses that I thought would work, or I would have done the same.

The steps on the prototype I’m following are 31" wide, and any old caboose I had, they are 24" wide, so I cut them apart, and used the sides as a guide. It was a lot of putzin’ around. One of the areas that I could have done a better job!.

Mike.

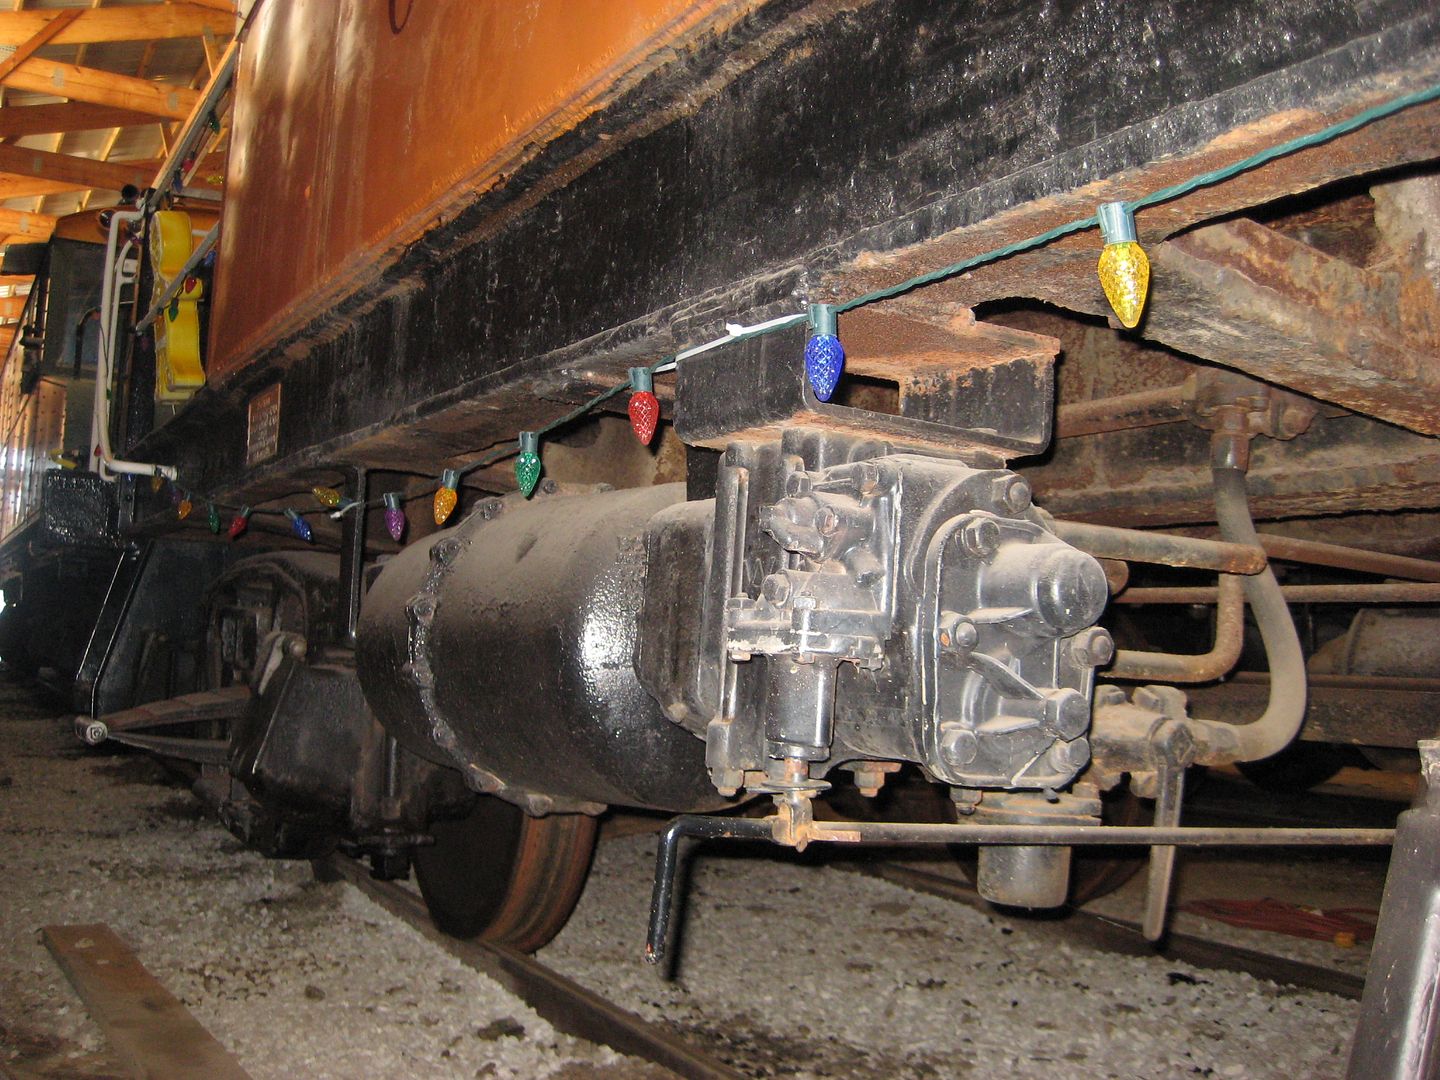
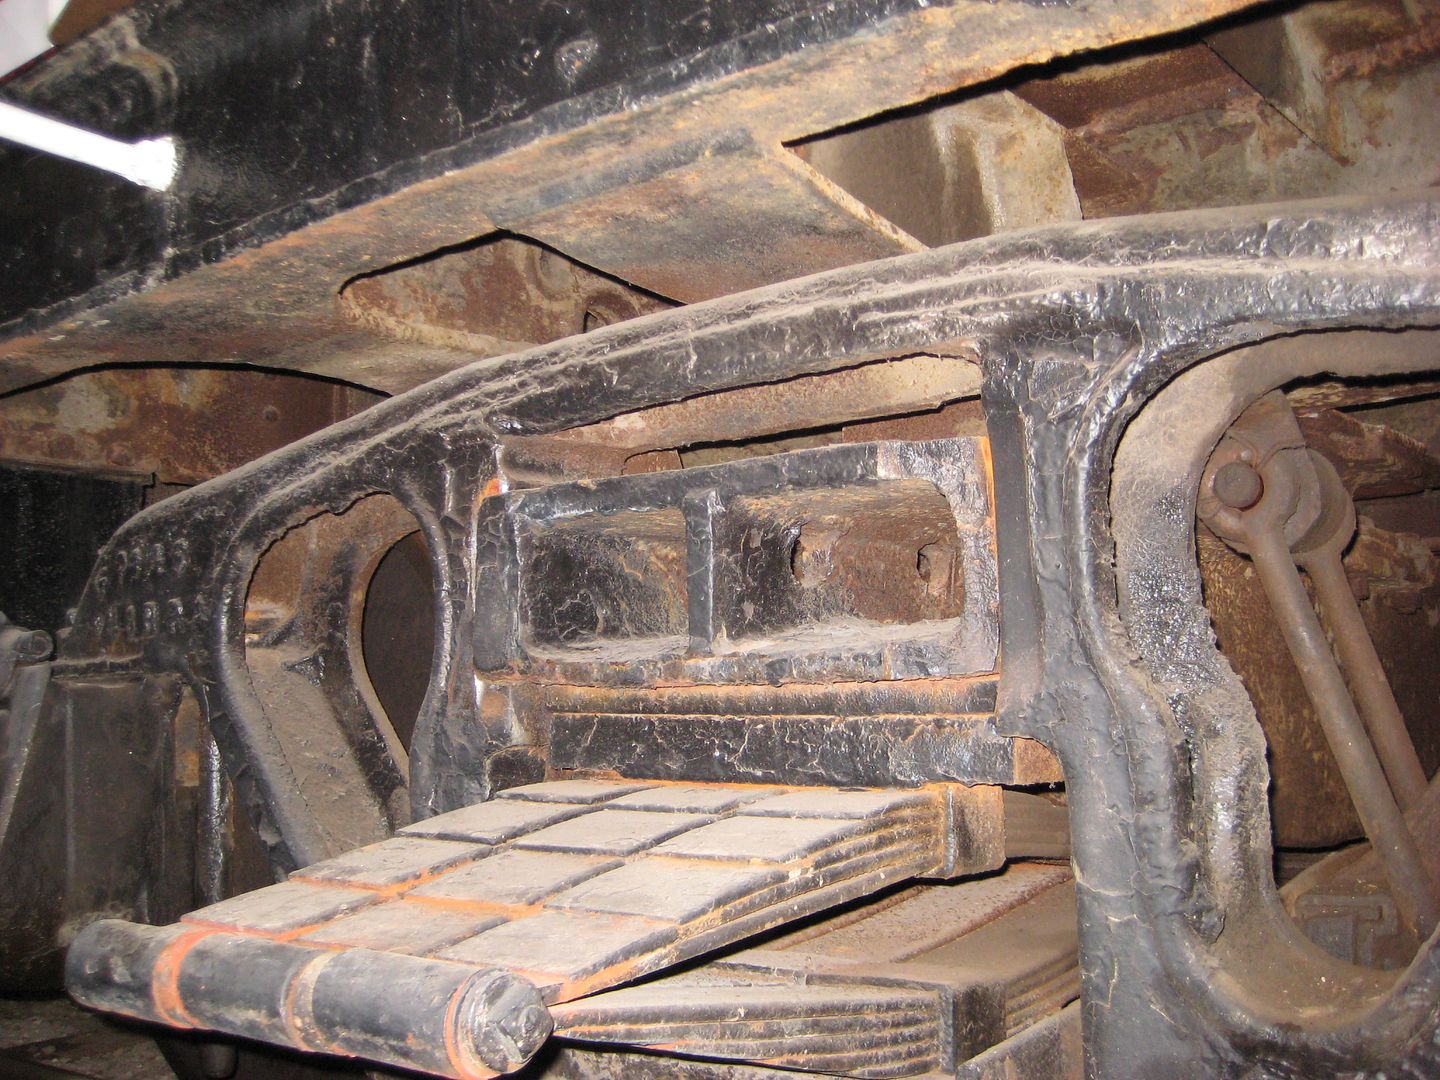
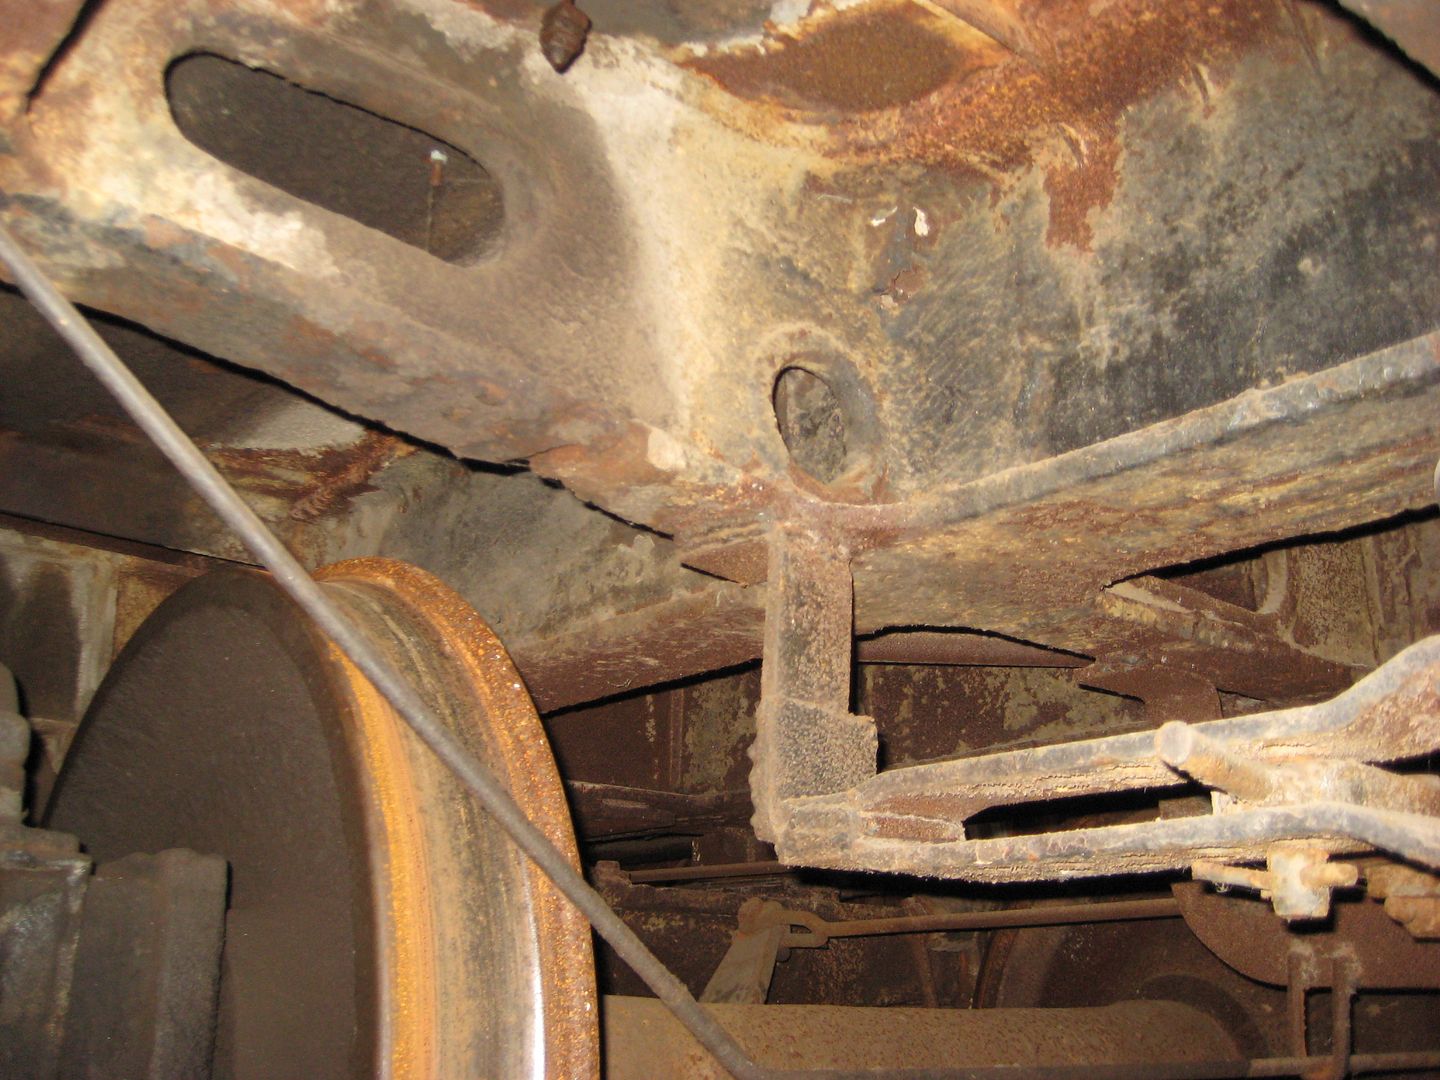
I built a somewhat simplified version of what I seen, while crawling under the car, trying to get pictures.

Scroll back to the top, and the picture I posted of the frame I built, sitting on the trucks.

Also scroll up to the picture I posted of the bolster / truck connection. There are two “main beams” running the length of the car, on each side of the bolster, and an outside beam/sill on each side. There were lots of cross members, the same size as the beams, along with some other steel I didn’t include, which kind of looked like a depressed area, covered with sheet steel.

It was all very heavy duty, as you would expect a coal tender to be.

I built mine from styrene strips I cut, and for extra weight, I added the plates, hidden by the cab, as I’m not going to detail the interior.

Here’s a couple more pictures showing the frame. Look above the trucks, and brake cyclinder, and you’ll get an idea of the crossmembers.

Mike.

Oh Mike! I like the Christmas lights!! Are you going to add those?!?[swg][(-D][(-D][:o)]

Dave

Oh yea! they used to get that out, decorate it, light it up, and use when Santa comes to town. Santa and crew ride the train from about 1 mile out of town, into the ETERR’s station, Then Santa, Mrs Clause, and the helpers ride a horse drawn sleigh (when there’s snow, or a horse drawn carriage) to the town square. It’s a big deal here in town when Santa shows up. [(-D] It’s a sea of kids and parents that night, in down town East Troy.

BUT, I don’t think they’ve used it the last couple of years. [:^)] I think they used a flat car, all decorated up.

Naa, I’ll skip the lights. It’s going back to work on my railroad.

Mike.

No, he worked for them back in the '50s, about the third job he had after he mustered out of the USAF after serving a 4-year hitch during the Korean War. The MILW was a going concern in those days, with 4-unit F-M C-Liners hauling 100 car freights up out of the Menomenee River Valley, often with an EMD SW1200 giving a boost. When we first visited, in 1953-54, there were still rows of wood cabooses, some hump-backed, a couple swaybacked, parked down near the yard office below the old Mitchell Park Conservatory, which was too dilapidated for visitors then. Heady stuff for a 14-year-old!

Deano

A macro shot can be a great tool, whilst kit bashing or scratch building, as in this case, though the results can either deflate the ego, or signal it’s time to visit the optometrist.[sigh] [(-D][(-D]
Cheers, the Bear.[:)]

According to the roster in the steel caboose book, Milwaukee cabooses went through several renumberings. 01738 was the original 1956 number of “your” caboose, part of a series of 10. Later it was 03 and then 990003. I wonder if it was perhaps leased to the Des Moines Union Ry while under its original number, and the Milwaukee assigned new numbers to it even though they did not have possession of it to repaint/renumber (in other words it was an “accounting/bookkeeping” number should it ever be returned, which of course it never was).

The excellent color scale drawing in the steel caboose book is of 01738 using that number. The drawing says it is of the caboose as it looked circa 1965.

All the Milwaukee Rd Historical Society books are highly recommended but their three part caboose series (wood; steel; rib sided) is particularly good.

By the way the book mentions that a total of 46 terminal cabooses were built using tender frames, but not all the same tenders but rather from different series of steam engines. Most but not all used the original tender trucks (and thus some had 33" wheels, some 36" wheels). The book says that oddly enough the original tender builder’s plate remained on the frame. It also mentions that the cabooses were virtually indestrutable yet cost the Milwaukee just $6500 to $6700 each. Originally the Milwaukee converted just one tender as a test. Then came a series of ten such cabooses-from-tenders.

Then came the series of ten “your” caboose is from, and the tenders were from the big L-3 Mikados - those tenders carried 10,000 gallons of water and 16 tons of coal so these were heavier cabooses

Thanks for the info Dave. I might just look around for that book. The last time I visited the MILW historical society, it wasn’t availiable.

I don’t know if I’ll ever build another one,probably not, but it’s great information. I’ll do some “poking around”

Mike.

I did some carefull filing on the angle irons I used for the roof walk supports, and managed to “thin” them down a bit, and do some trial fitting of the roof walk grating.

Looks a little better, I probably should have started over, but I’m going to leave these as is.

I continued on with adding more details to the cab. The fuel fill pipe, for the small tank located in that corner of the cab for the oil stove, the drip edge flashing above the doors and windows, the angle irons for the side hand rails, the ladders on each end, the marker lights on each corner of the cab, and fitting the Plano “apex” style roof walk.

That fill pipe might look big, well on the prototype, it is big, as they used the same nozzle to fill these tanks as they use to fill diesels.

I also added a fuel gauge.

Time for some sanding and getting ready for a coat of paint.

More to come.

Mike.

Hi Mike,

Have you thought about adding lighting? I have a cheap and easy constant lighting circuit (thanks to Mark R.) which would do a great job of lighting up the marker lights and maybe an interior light too.

You can use a 25 volt capacitor if you are not comfortable running a 5 volt cap on 14 volts, but this circuit has never blown the capacitor.

The reed switch is optional, and latching reed switches can be hard to find, but any micro switch hidden under the shell would work.

Dave

Dave, I thought about it, but I’m not going to light anything. The cab interior won’t be detailed, as it has a stack of weights inside.

For those tiny markers on the cab, I’m going to drill them out just a little, paint the inside red, and fill the hole with canapy glue. That will give a decent looking “fake” light, with a lens.

I also don’t run anything at night. Nothing is lit up on my lay out except the locomotive head lights, although I do have red lights on the end of a passenger train I run, along with the EOT flashers (Ring Eng.) I have on freight cars.

Mike.

Dave, (Nelson) did you add some to your earlier post that I missed? There seems to be a lot more info than what I remember after reading your post the first time. [*-)]

Anyway, thanks! It’s great info!

OK, that would explain the “dropped” area, under the caboose, and all of the extra steel!

That’s what the hand wheel look likes, so I was able to order some Equipco hand wheels from Kadee.

Yea, well, [:^)], I don’t think they turned out TOO bad, The only soldering so far, are the two sided hand rails on each end of the running boards, as they have 3 legs, so the 3rd (middle one) was soldered. First time I tried the paste, that Frank uses. I’ll let the macro lens and you guys be the judge [swg]. WARNING, I don’t have the skills that Frank (Zstripe) has at this, just for a heads up. [(-D]

I’m using Plano apex style grating.

Ah come’on! [(-D] Just kidding [(-D]

Thanks again Dave! Excellent stuff!

I’m about ready to paint the cab, and finish detailing, so the cab itself, is totally complete, then I can get to work on all of the other hand rails that are part of the chassis/frame/base.

More to come!

Mike

The scratch build is looking great so far Mike.

I don’t feel it’s appropriate to say to another guy… Hey! Nice Caboose… So I won’t[(-D]

Keep up the good work[Y]

TF

Back with more, one thing about a rainy WI. spring, it extends my “model railroad season”.

Cab is painted with Floquil MILW. orange. I had to thin a lot, and I gave the cab 3 light coats.

Photobucket is down to a slow crawl today, this post is going to take a while! [:|]

Next I painted the roof, and started to work out the hand rails on the chassis.

"I know what your thinkin’ " [:-,] The roof looks strange, like it doesn’t overhang the sides, or even go to the sides?

ALL of the prototype photos I’ve found, that the way the roofs are on these cars. The drawing/floor plan I posted early shows how the wall sections were made in panels, steel plate, inside and out, with 3.5 “Z” shaped steel studs.

The roofs must have been made in the same fashion, at least, that’s the way it appears. My prototype has the same roof, with that 3" edge showing all the way around.

Next I installed the running boards.

Then I did the hand rails for the running boards.

Next I filed and sanded my solder joints, and put on the first coat of white paint, added the stove vent and the toilet vent, and glazing in the windows, which pretty much completes the cab, for now.
Wow, that’s really starting to look good! That MILW color is really good, adds a whole new level of realism to the caboose. I really can’t wait to see it finished!

Thanks SP.

Should have more progress to show tomorrow.

Mike.

Looking good Mike. She’s really starting to take shape[Y]

TF

Very nice!

Thanks TF and Chuck! Been working on it today. Working on the railings, I’ll have more to show tomorrow.

Mike.

I’m getting to the end of this project. This is my first actual scratch build of a rail car, not counting the things I used to do to old Tyco and Life Like cars back in the 80’s and 90’s to turn them into something I might have seen on a train. Lots of hacking. [(-D]

Buildings, no problem, many of the buildings on my lay out are scratch / kit bashed. I didn’t have to pay strict attention to dimensions, just make it fit the space I had, and make it believable.

This little caboose! a whole different story. I have dimensions I have to follow, from a drawing, from the engineering office of the MILW. [:O]

Anyway, continuing on, the inside railings have been painted, and I have started the outside railings, and brake wheel stand.

I couldn’t find a stand that looked like my prototype, so I made my own.

My first attempt and the end frames didn’t look right. [%-)]

So ripped it all off and tried again, and again, and I finally settled with this. Not quite as “chunky”.

I then added the coupler cut levers on both ends.

I gave them all a coat of paint, and then realized I forgot some air piping and a valve.

Now I have the missing air piping in place, and ready for paint.

Everything in place, and painted.