Recently, I dismantled BVLC engine #7 to clean the wheels and perform some other maintenance. While doing this, the frame of the locomotive itself broke, in a spot where I had repaired it previously. Given that my repairs didn’t seem to be holding up, I decided to retire #7.
However, this left a gap in my roster. So, I decided to fill it. I had a Roundhouse HO scale 2-8-0 from when I was considering a HO scale layout, and I decided to use the same techniques I’d used to build the original #7 to convert this 2-8-0 into the new #7. This is how I did it.
This particular post covers part 1, the basic locomotive body and boiler.
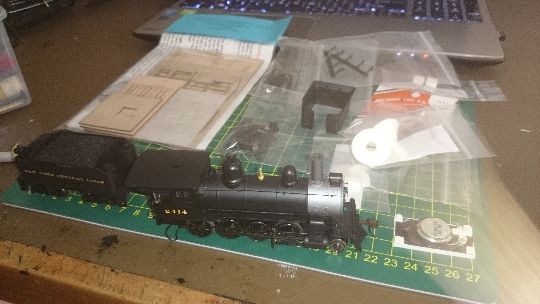
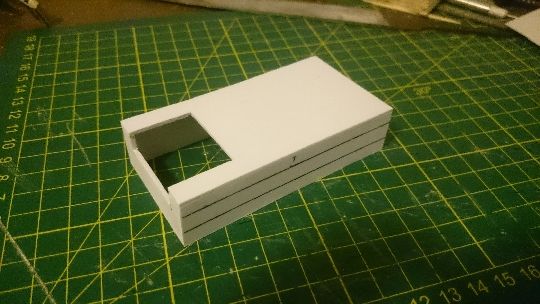
Here’s what I started with. Various detail parts, a laser-cut kit for a replacement cab for the Bachmann On30 Climax, the original fuel bunker shell from the Bachmann Heisler, and the Roundhouse 2-8-0. The roundhouse model is an ideal basis for this sort of project, as the boiler and most of the body are a single piece, cast from metal without an independent weight. My plan is to build the On30 body around the original boiler & body, but to do that, I first had to do some deconstruction.
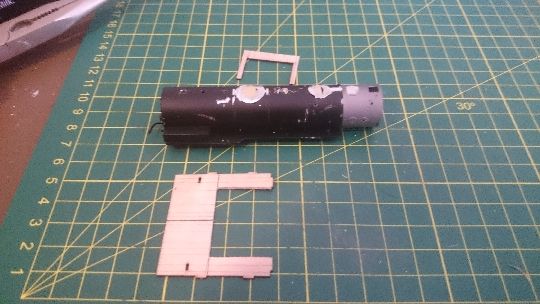
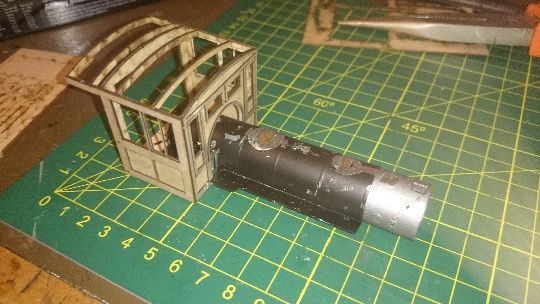
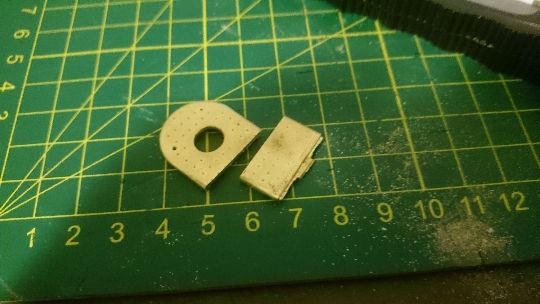
Here we have the boiler with the domes and smokestacks cut off. The wooden bits are the floor of the cab kit. Cast onto the cab end of the boiler are two rectangular ledges, which were used to hold the original cab in place. I planned to use them the same way, and so cut the cab floor to fit around them. The front of the cab would hold it in place.
Once I assembled the cab, I used a piece of sandpa
While I am no longer into On30 and I’m not a steam fan anyway I do enjoy these “How I did it threads” So I will be looking forward to more progress reports.
Yum, that was a great one, tbdanny. Very satisfying to read and watch. I like the way you think through the subassemblies, but even better how you’ve illustrated that classic technique here.
I’ve been able to make some progress on the new BVLC #7.
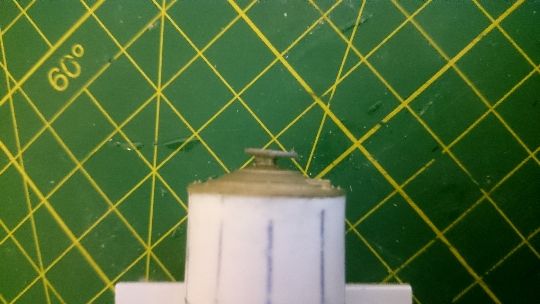
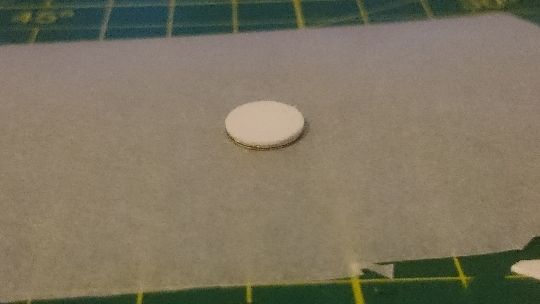
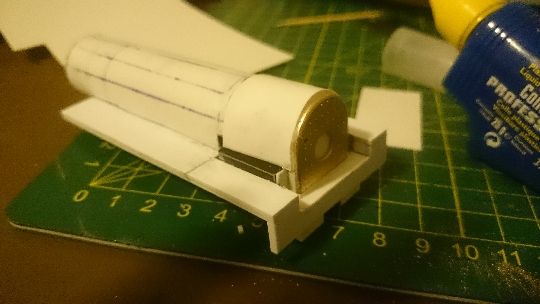
The first thing I did was fix up a mistake I’d made on the original boiler. As can be seen from the above photo, the number plate on the front of the smokebox was at an angle, and was also off-centre. This was made from a nail for which I had drilled a hole through the smokebox front. I cut this off with a razor saw and filed it flat.
I then created a new numberboard, by gluing two washers together, gluing those onto a sheet of 0.5mm styrene, and cutting around that. When that was done, I glued it to the front of the smokebox.
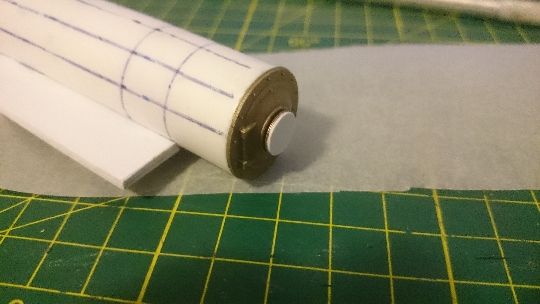
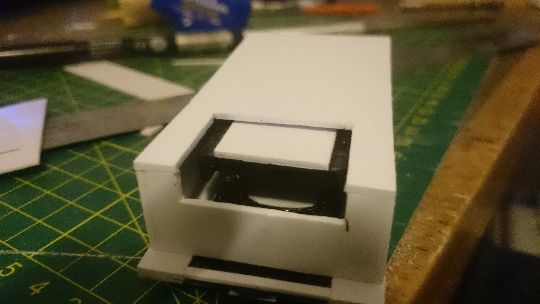
With this done, I turned my attention to the cab interior detailing. Fortunately, the package containing the boiler backhead casting arrived during the week. The day after my last post, in fact.
I had to trim the casting to fit the cab, as it was a little too tall. I used some of the cast-on rivets to line up the razor saw, and that produced a clean, straight cut.
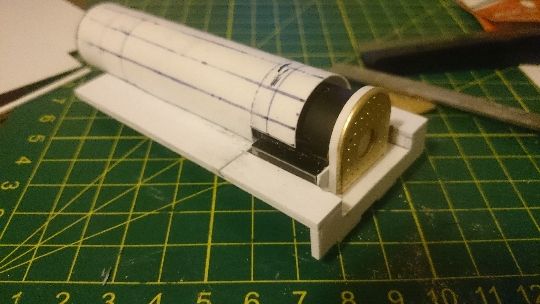
My next step was to glue a length of 2mm x 0.5mm styrene strip around the outside of the casting, then mount it in the cab. This brought the outside diameter of the backhead up to that of the boiler.
I’ve been able to continue construction on the tender for my new BVLC #7.
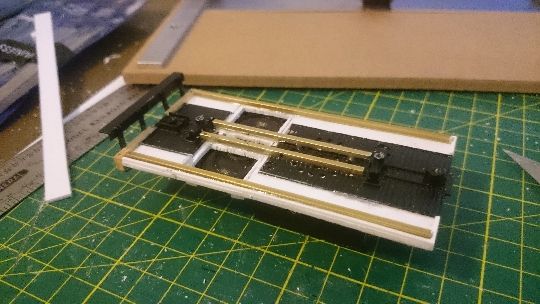
After putting together the chassis as per part 2, I realised that the two brass bars I’d put across the middle of the chassis weren’t enough to make it stable. So, once I’d put the edging around the outside of the chassis, I added two brass bars along the edge.
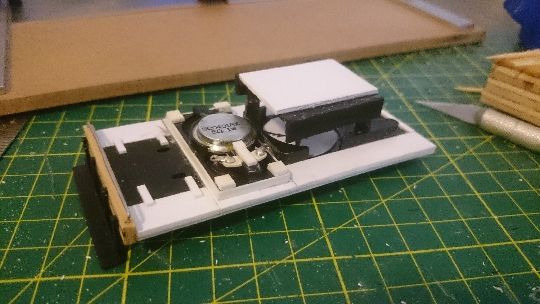
With that done, I took the original tender shell which I’d prepared earlier, and glued a section of 1.5mm on top to act as an anchor for the tender shell. Once the glue had set, I screwed the original shell in place using the original mounting posts and screws.
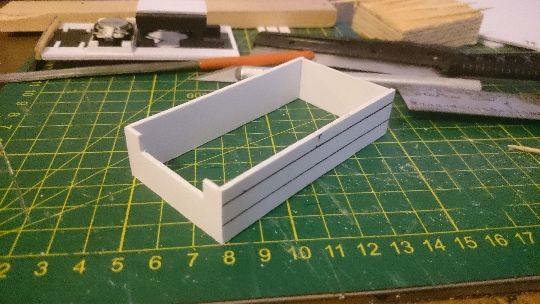
With the chassis done, I turned my attention to the tender shell. I made it out of 1.5mm styrene, cut to size on my NWSL duplicutter. Before cutting them to length, I marked lines along the sides and rear at 1 and 2 scale feet up from the base to help align the rivet decals when the time came. I used a right-angle clamp to glue the four sides together.
I then cut a section of 1.5mm styrene to be the tender top, with a cutout at the front for the front of the fuel bunker. After gluing this to the top of the body, I used a file to tidy up the edges.