Ok, I’ll start by saying this is only my 2nd attempt at prototypical weathering. No excuses [:)]
The starting model was a Walthers $8.75 50’ BN Waffle Box car. I’m going to list the weathering items I used and how I did it, and the steps involved in this process. The most important thing to remember is that ANYONE can do this. This isn’t rocket science. There is only one step involved that requires some artistic license, but again, given time anyone can do it.
I did this in 2 days, only because I had to wait for the boxcar to dry overnight. Ok here we go…
Use a REAL photo of the item you wish to weather and study it. That way you can’t overdo the weathering.
Fade the Boxcar. I used 60% water to 40% Pollyscale white paint. Using an airbrush spray “lightly” using multiple sweeps. DONT OVERDO IT. LESS IS MORE!
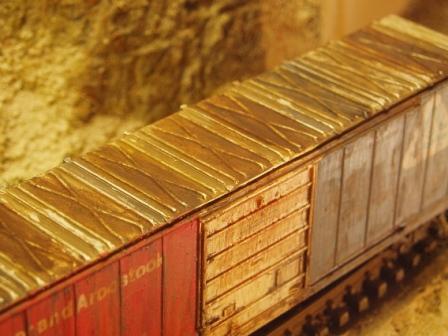
Weather the roof, inside wheel sets and a few rust spots present on the boxcar itself. I used “Sophisticated Finishes” purchased at Michaels craft store. Its a two part process. Spread a thin even coat of “iron metallic surfacer” on the parts, let dry overnight then apply the “Rust antiquing solution” next over the iron metallic surface. Let dry overnight. You can apply more than one coat for a lighter rust effect. Your choice.
Dull down the shine of the boxcar using a brush and a 10% solution of “India Ink” and alcohol. You may apply several coats to get the effect you want.
Add other darker rust spots to the boxcar using “winsor & newton” “Designers Gouache” Burnt Sienna. Its an Oil paint you apply with a small brush to make the rust spots. Immediately after applying the gouache sprinkle some “A.I.M.” rust/brown chalk on the oil paint and blow remaining chalk off.
Ok, here’s where the artistic license comes in. Using your plethora of A.I.M. chalk or Bragdon powders, weather the boxcar LIGHTLY to look like the photo. I used blacks…browns…rust both light and dark…mixed several piles together to achi
That boxcar looks really good. I haven’t tried my hand at weathering yet, I’ve been a little scared to try it in case I mess it up. I’m thinking about buying some cheapy old plastic cars from ebay to practice on.
It’s looks fine to me. The stuff you use by Sophisticated Finishes is great stuff to get real rust. The only thing I would add is graffitti. But that’s my preferance.
What PSI did you use on the white paint? I’ve always wanted to fade my cars, never tried it because I didn’t have an airbrush.
It’s an excellent model, faded more than the prototype, and some rust aptches that aren’t on the prototype, but hey, it looks great and if you tried to do it EXACTLY like the prototype, never would get it done.
Looks good so far, but unfinished to me. I think it would benefit from a dark wash, to simulate the dark brown gunk collecting around the waffles and other places. I would add a couple of oil paints and a can of mineral spirits to your weathering tools. Mix up a thin wash and apply with a soft brush with the car laying flat.
I would start with burnt umber and raw umber. Any brand should work, but I would avoid the cheaper brands. I use Grumbaucher. I prefer mineral spirits to turpentine/turpenoid. It seems “cleaner”, turpentine smells, is a little gummy and can dry with a sheen to it. You can get a small can at the arts and crafts store or a larger can for much cheaper at Walmart or the hardware store.
Seriousely, it looks good. Not quite as dark a rust or as grimey as the original. Maybe some better lighting and a few more shots from different angles would help. Hard to see the same effect in indoor light as in sunshine.
Driline, sure looks good to me, nice job! I think the only thing I would’ve done differently, is I would’ve scabbed-in some styrene on the sidesills to get it closer to the prototype. That’s just my preference…your’s may vary.[swg]
Thanks for the “how I did it.” THAT’S what I always thought these forums were supposed to be about, a resource for tips, tricks, and inspiration.
Driline thats a good weathering job especially the roof.
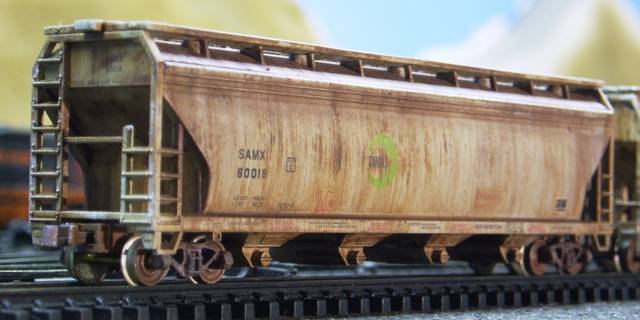
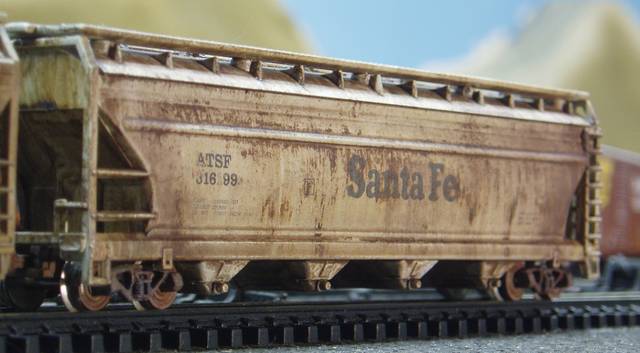
I have been experimenting with similar techniques. These cars were done with artists oils. 6 colors in all. Adding some chalk in a dark rust mix created some texture then when all the oils were dry I added a layer of chalks to tie it all together. I used black for a few deap rusty run spots and a makeup sponge with white to hilight trucks and edges. By the way trucks and couplers were done with acrylics and Mig pigments.
As you can see I gat carried away on at least one of the above cars.
Now if I could only add attachments I would show you the roof on the boxcar.
A sincere thank you for this “primer”. You have given me the confidence to try a weathering job. Your effort is very good. I also do not plan to use grafitti.
These are top professionals when it comes to weathering. There cars are absolutely unbelieveable and fetch top $$$. With the same amount of practice your cars will look just as good. How did you apply your Sophisticated Finishes?
Driline- Thank you! You are starting what I’d hope would happen.Only your second attempt? That gives me hope. At the risk of sounding like I’m trying to be an expert, and I’m not, maybe a bit more rust and mainly grunge at the seam at the base of the sides and sorta carry onto the the side frame to get it dirtier than the rest of the car? Especially under and around the door area.
Thanks for the “instructions”. This could turn out to be a fantastic thread.
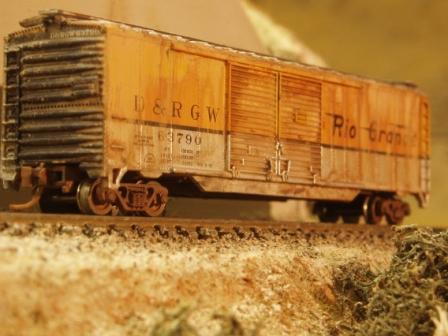
spidge- My favorite is the first photo of the hoppers. As you pointed out others appear to have a heavy hand. Not near as heavy as mine though. I would be happy if I was at the point you are. Very happy. The roof looks real good and so does the Sante Fe box as well as the D & RGW. Now that one looks like it’s been rode hard and put away dry out west.
Great work, hard to tell from real stuff, I wonder how the guys feel with their 500 cars that are bright and shiny (fresh off the lot) feel when they see photos such as these? do they actually go into shock, as you may note I’m from the “If it ain’t weathered, it ain’t finished” school. Nice work, guys.
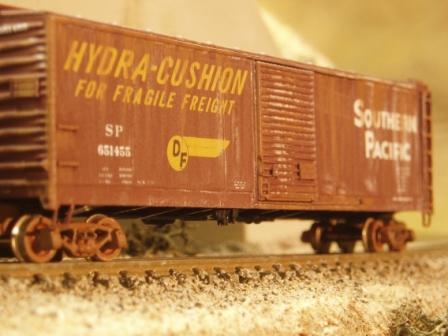
I guess I will jump in. Hopefully it won’t get locked. Just a couple of old shots!! “Ann Arbor car was shot inside. Seems like it wanted to rain that day”.
**John…**Just practice and lots of patience. Some thin brushes, powders, oils, and some dullcote. I start with a fade of “testors white” air brush. Let that dry for a day. Then I take some powders and go along the ribs of the boxcars (hoppers are done different). Dullcote. Let that dry, and then add some rust pits, streaks, etc. Dullcote. Let that dry. Then I do the underneath. I just do a dusty/grime look. With a mix of powders. Dullcote, and let that dry. I always do the roof last. I sometimes use the real rusting agent, but most of the time its a rust color wash.