Hi, I need to custom paint some shells solid black (NS) and I don’t want to buy an airbrush for this unless I have to. Scalecoat makes spray cans of all their colors, and I was wondering what kind of quality finish I can expect to get with that over an airbrush. Anybody tried this? Any ideas? Thanks again.
Spray canswork great for flat paint, (sometimes I just don’t want to break out the airbrush for a quik touchup on a boxcar but I would not recomend that for an engine.
BTW, I am totally new to custom painting. I have done a lot of detailing work, but never custom paint. What, if any, clear coat should I use after I get the black sprayed on. Dull coat? What do I need to have on in order for the decals to stick properly? Again, I’m new to this so anything you can tell me helps.
I’ve made a couple of horrible, time consuming efforts with an air brush. Ever since then I’ve used model quality spray paint. It’s quick and easy with little clean up. The only drawback is that you must give many small coats and allow time to dry between each one. Here are some of my results:

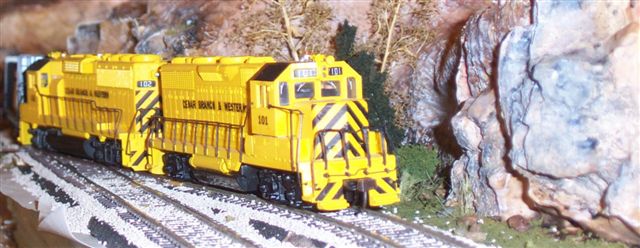

Anything black and yellow was with a can!
You need a glossy, smooth clear coat for decals to adhere properly. Something like Testors GlossCote should do it.
After you apply the decals and let it dry, that’s when you seal everything up with a Dullcote.
You can get acceptable results using spray cans… But if you want to do weathering, it’s much easier to do with an airbrush.
Hope this helps.
Thanks for the help so far. So should I glosscote the whole model before decaling or just the area that the decals are being applied to?
I cover the whole shell with the gloss cote… Just for the sake of an even thickness coat everywhere.
You can try just glosscoting one area on a junk shell or a piece of scrap styrene and see how that turns out… If it works, go for it.
Good luck!
I use a method called “Dry bombing” with a spray can. What it is, I would pass the spray over the model quickly starting before I get there and stopping AFTER I pass to the other side.’
The paint should be almost dry upon contact with the surface and several passes later the model is covered without the dreaded runs, beads or blobs (Or drips… those are the worst)
Then they get a Glosscote after drying a few days. That would make them ready for decal work. (Usually I would wait until fine painting, assembly and weathering are completed)
Decals go on using best practices and the whole thing gets a coat of dullcote to kill the shine.
I find that a airbrush will enable me to do weathering as the spray cans are way too “Heavy” on the models.
Also I like to accumulate several models or peices of a like color so I can hit several all at once using just one can of paint.
Hope this helps.
Try two coats of Testors Flat Black and then one coat of Gloss Black. The flat covers a LOT better with a thinner coat. You can then decal right over the gloss paint. Last step, over the decals is Dullcote, UNLESS you want it to look just shopped, in which case you could Glosscote it. Testors is fine as long as they have your color, their pigment is every bit as fine as Scalecote, and they own Flowquil I believe.
If the shells are already black plastic you may be able to get by with just one light coat of gloss black.
I have done a couple of steam engines, one brass, a few years back, with spray paint, and the paint results were excellent, but I got an airbrush because I think black that is not quite pure black, more like real real dark gray, shows details a lot better. You might get an inexpensive airbrush and try it with some cans of propellant if you might ever want to paint some more you could look at a compressor then. Or, take care of it, and you can probably sell it when you are done for almost what you paid for it.
Good luck.
If Scalecoat paint in the spray cans is the same as their regular paint, it should dry with a nice glossy finish that is ready for decals. I’d try the spray can on something else first, to get the knack. No need to spoil your engine! Maybe an old boxcar, a child’s toy, etc.
One step I’ve noticed missing from all of the above posts is: decalset. I use it to get my decals to settle in and around those little cracks and crannies. THEN I shoot the Dull-cote.
I deliberately left out the decalset because we are deep enough into the layers of painting, did not want to confuse the person.
Yes, I think Testors and Floquil are owned by Rustoleum but gotta go into my notes.
http://http://www.railpictures.net/viewphoto.php?id=161425
So if I were wanting the fresh paint job look like this Dash 9 has (in the link above) would I want to glosscote after decals or dullcote?
I have done custm painting for my Freelanced MRR’s with an Airbrush and Spray cans…
- I dont use the custom RR colors cause well I can find equal colors at Walmart for well less. I found a yellow that matches Santa Fe’s, a Nice flat black for the frame and walkways,( I dont like grey that much) Pretty much I use Spray cans for quick colring usually flat cause it dries quicker, if I cant find the right color in flat I use gloss and hope it dries.
I also use the Airbrush to custom apint colors I dont want to by in spray cans. I have a well stocked Santa Fe Blue in jars so I use that in my Badger.
My latest Project Dash 8’s have been painted with both the yellow is spray can the Blue is airbrushed. I have not weathered any of my freight cars or Locomotives I lack the talent but I do goot on buildings. I say if you can find every color you use can be found in spray formula use it you get just as good models using them as airbrush.
As for Clear coats and dullcoats
I use a normal clear coat for the siney coat then I use a dullcoat thats made for spraying onto thoise little warhammer figures.
During all the spraying remember to make light passes and not to cover the whole train at once. As stated earlier start spraying before the model then stop about an inch after it. The finished product will look great.
I’m Milwhiawatha and I approve this message.
One problem with black paint (gloss or flat) is that it is too black, i.e. the details tend to blend together and not show up. This is particularly the case if you plan on taking pictures of the model. One of the advantages of an air brush is that you can mix colors. Adding 5% white to engine black gives an almost black, very dark gray, but the details will show.
If you are thinking of doing a lot of spray painting, you should look into an air brush. I had similar reservations about the cost and complexity before I bought my compressor and air brush. The results were so much better than spray cans - a much finer spray pattern, the ability to use mix paint colors, and control paint flow. Try weathering with a spray can, it’s almost impossible. I have been using an air brush for about 20 years, and have not regretted the purchase. I still use spray cans for some projects like brick buildings, and flat black on the inside surfaces of buildings.
One note on clear coats. Testors Gloss Cote is OK, but many other clear coats will attack and craze clear plastics, so do not use them if you have installed glazing on your windows. If you are not sure, test the spray on a scrap piece of clear plastic first.
Testors and Floquil are owned by RPM International. They also own Rustoleum and a lot of other brands. http://www.rpmintl.com/default.asp
All the above Info is great with one exception. When Ever I use a spray can let it sit in a sink of very warm water! This allows the paint to thin and the propelent in the can to expand. I find you get a better coverage with the thiner paint as well as a little more control with warm paint, rather then room tempature ( Keep in mind that even if the room temp is 75 deg the paint is usually 5-10 degrees cooler). Also I prefer to use an airbrush because you can control the consistancy of the paint. as well as the air flow ( with compressor and regulator) I have been painting for the last 12 years ( I am 24) and have been airbrushing for 6 of the 12 years. I do a lot of car model painting as well as starships, and do 1:1 body work for a hobby. If you have any questions I will try to help the best I can.
Curt
I have quite a bit of experience painting things, as I combine model railroading (which is little painting, more running) with building model cars, ships and aircraft (which is almost all painting). For the type of work you do on a locomotive, I am VERY partial to using an airbrush, but this is largely do to experience. I find I can personally lay a more consistant and smoother coat with an airbrush and can do very find detail work that is quite useful for weathering. I can also adjust the thickness of the coat to get a dusting effect to replicate kicked up dirt and such.
Spray cans are great for high gloss finishes (laquer and spray can seem to be a great combo) or if you don’t have a lot of experience with an airbrush. They are very consistant and easier to reproduce than airbrushing if you are not used to playing with thinner ratios and air pressures. The comment made about warming the can is absolutely spot on. Warming the can both raises the temperature and causes the paint to be atomized into smaller particles. The end result is a thinner and smoother coat of paint that is less likely to run (drips from too much paint).
Since you are new to this, let me share some of my experience for custom painting. Take with it what you will, as this works for me, but may not work for others. First off, I am not a big fan of completely stripping models. If the model was decorated, I will use a weak thinner (turpenoid or such) to take off the decalled/raised lettering, but usually find that the factory paint shows no raised lines. There are a number of debates on priming, but I recommend it. This has less to do with adhession and more to do with even coloring. I model CNW which uses a lot of yellow and having an even basecoat is important. I would still recommend a light gray primer for you to visualize surface defects before proceding. If you weren’t using black, I would also recommend following this with a w
I have a Thayer&Chandler airbrush with separate air and fluid controls; after one time trying one of the others that control both with a single button, I would never consider anything but my trusty T&C.
I’ve used an airbrush, but I still use cans too. I like the Tamiya ones, they seem to really create an even smooth finish. The two that come up the most are gray primer, and black - the roofs of my passenger cars and passenger diesels are black, I find their black works very well. I’ve used other colors on buildings and freight cars, their Inca Red is pretty close to caboose red.