Another vote here for plaster-over-screen. I use aluminum screen and Durabond-90 patching plaster. The Durabond can be mixed to almost any consistency you wish, and will set-up in about 90 minutes. There are also other setting times available. It’s available, I think, in 2lb. and 5lb. boxes, or in 33lb. bags, which are the most economical. It can be applied as thin as drywall mud or 1" or 2" thick and won’t crack. I apply mine with a wide scraper or drywall knife, then, before it begins to set, smooth it somewhat using a 2" brush dipped in water. It can be carved somewhat for a short time after setting but once cured, it is extremely hard and strong. To colour it where I use it as a general landform, I stain it with thinned latex house paint - it soaks in somewhat, but is also a lot easier to apply than the same paint right out of the can - I mix it no thicker than 50% paint, and often as little as 30%.
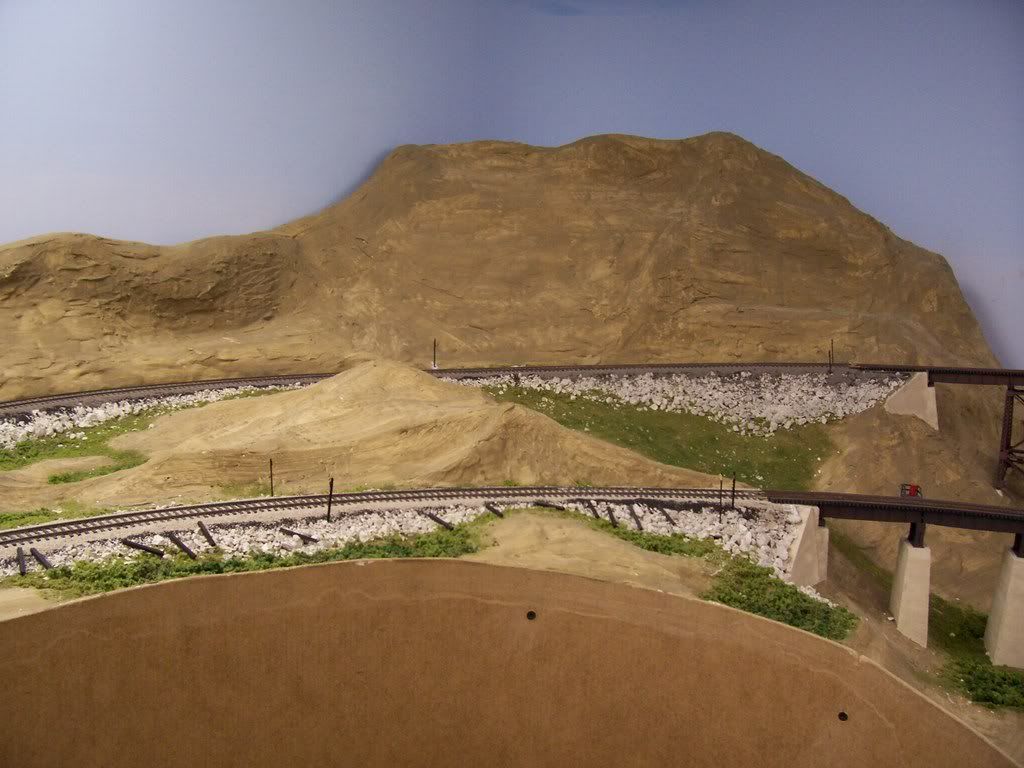
Here’s an area which has been coloured, with only a little ground cover applied near the tracks, mainly to make use of excess glue run-off from the ballasting process.
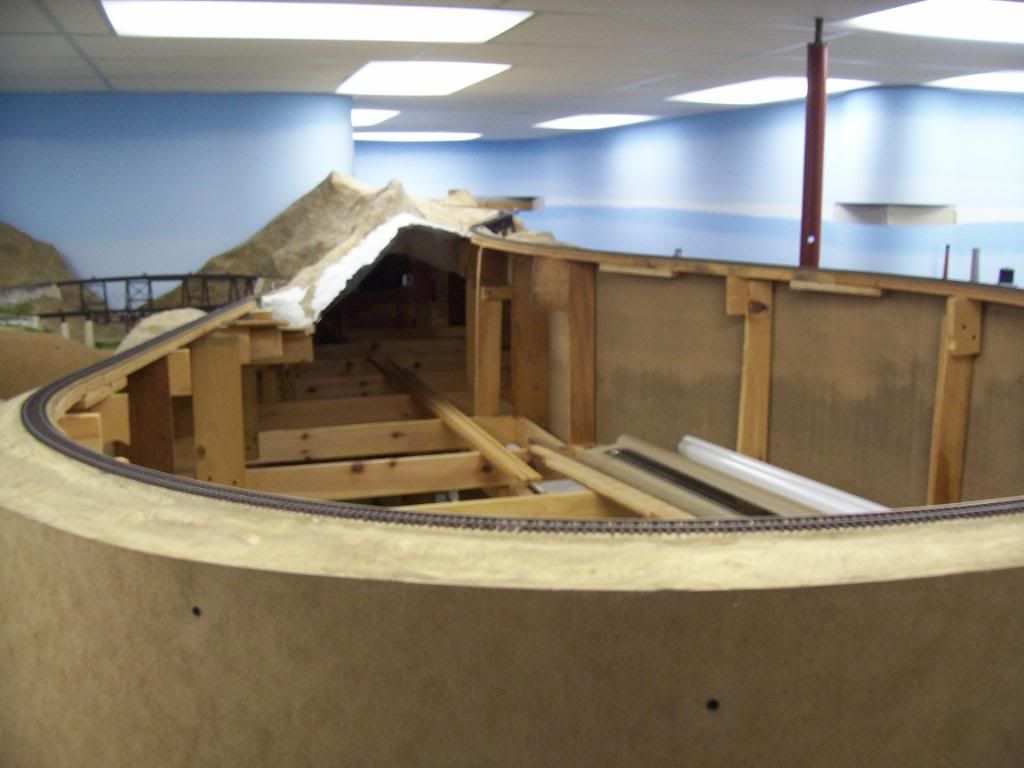
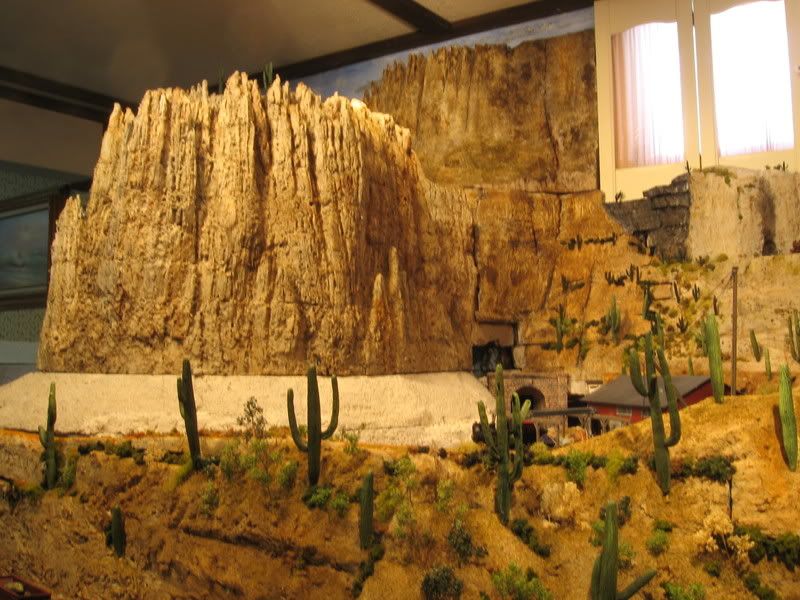
This view shows a cross section where landforms haven’t yet been completed. The thin cross section is strong enough to allow me to steady myself on it when changing light bulbs overhead, although it certainly wouldn’t support my full weight.
Here’s an area which has been ballasted and had ground cover applied. Trees are “planted” by drilling holes, then applying a dollop of white glue to the bottom of the tree before sticking it into the hole.
About the grocery bags: crumpling newspaper pages and then stuffing them between the screen and something else is a lot harder when they are done that way individually and loose. The bags contain the newspaper, add provide more outward resistance by confining the pages, and the bags are more easily controlled and wedged into place between others already placed.
The vermiculite goop is textured, but it can be made smooth with either sanding, wet brushing, or just tamping as soon as it is placed. If you pour concrete and let it sit for a minute it looks firm and appears to be setting…which it is. But if you take a stick and gently tap it in one spot three or four times, barely dimpling the surface, you will soon see that it is very much a slurry still.
Which takes me back to the stuffed plastic grocery bags. They add the resistance behind this somewhat heavy wet slurry so that you can do some shaping and blending, and they’ll support the initial coarse result until it really does cure over the next 12 -18 hours, depending on humidity. I control that humidity so that it dries in 12 hours by using a dehumidifier close by and keeping windows and doors closed in the space for maximum efficiency. I tend to let things dry, such as wet ballast and ground goop applications, over night while I rest.
One advantage of a plaster-based slurry is that, with the space and weight saving vermiculite filler, it is easily drilled for poles and armatures, as I mentioned previously. Thinner shells need more care for such ‘planting’ and anchoring. I have found that extruded foam doesn’t like repeated insertions and removals of utility poles which I had to do due to cost and wanting to have realistic scenes for photography.
The vermiculite can be obtained at garden sections/centers or on-line. For my last layout, I ordered a 50 liter bag of the stuff from a garden center for about $40. Now she says her supplier can’t get it.&
The plastic bags keep the newspaper dry. Wet paper collapses, and the paper wicks the water out of the plaster cloth. In the bags it will stay up where you put it and it is even easier to control with much less tape.
Plaster cloth will stay where you put it and with the bags you can smooth it out without collapsing the newspaper. The bags don’t bother it a bit.
I’ve used balled up newspaper with plaster cloth, plaster cloth over foam, and finish it off with dry wall joint compound as the final layer. If the joint compound cracks, it is not much of a big deal to touch it up.
The bane of my existence is HGTV. My life and house is in the constant change of remodel! I have laid so much marble in the past year I am turning to stone. Also outside projects involving lots of cement. The pic’s below show a non flammable section of the layout that goes across the fireplace. It is made up of various colours of tile grout, layers of tile thin set, real cement toppings and a few other things. Every time I had something left over in the bucket from a project, I took it to the train room and slopped it on.
I am not recommending these products, but am showing you can use just about anything to get the job done. It still needs painting to match the adjoining foam solid granite, but the two should be indistinguishable when done.
I use caulk to seal up the joints of the layers. I only use paint and ground foam to cover the foam. This first picture is my first attempt at using foam. Is it perfect? No, but it was better than anything I did before…
This next picture is the same area “after”. No plaster cloth, using an earth color paint (brown or tan), paint the foam in small sections and before it dries, apply fine ground foam, the wet paint will help bond the material. You can go back and apply more ground foam to your liking. After the area is covered, I use diluted white glue to finish off the bond.
This next picture is the second mountain I did. Still not perfect, but getting better at shaping, carving and covering with ground foam.
Is it as good as doctorwayne and others? Heck No! I’ll probably die before I can match&nbs
If you apply enough force to any plaster-type product, it’s going to crack. I use Sculptamold over solid surfaces, like extruded foam board, or to make terrain features where there is already a layer of plaster. It does dry hard (although you can sand it), and I imagine that you would not get such good results laying it directly over a flexible support like cardboard mesh or screen forms (that’s why most people use plaster cloth to cover these). I did, however, once make a wolves den by putting a half-inch layer of Sculptamold over a piece of newspaper supported by a cardboard frame. When it dried, I was able to pull out the cardboard, leaving a cave about 12" by 8". It’s been 5 years, and it’s still intact.
I have never had a problem with Sculptamold cracking except where something has hit the layout (my son once dropped a hammer on it, and a couple of pieces did chip off, but I simply glued them back on).
The Nutmeg Brown is a great earth tone for this part of the country where soils are often reddish. It may not be right for the area you’re modelling. You can use paint chips and get cheap interior latex, or you can see if they have any pre-mixed batches
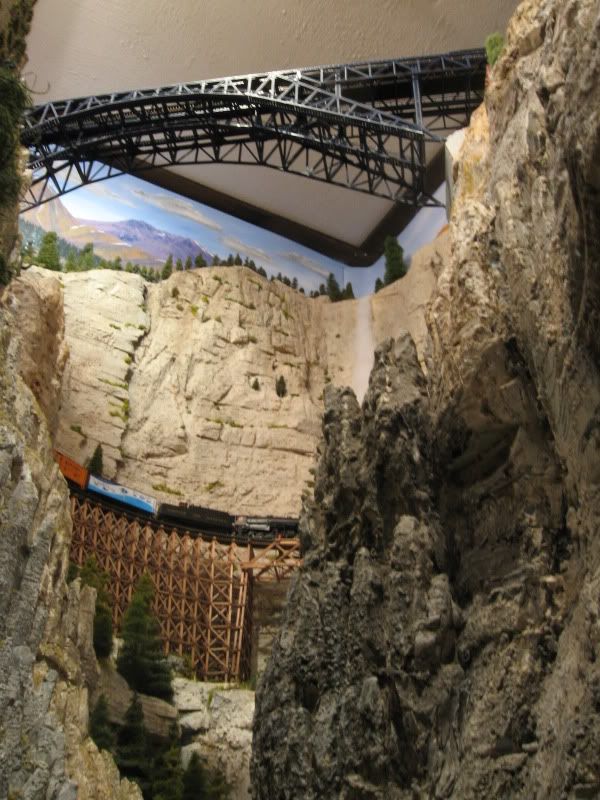
My love of carved foam is in the ability to do wild and large cliffs and rock formations. For a low hill, plaster cloth and a few rock castings are cool, but for a floor to ceiling canyon with hoodoos and falls and Yellowstone canyon type scenery, foam is the only way I know. Its what you want, I guess. I am still amazed that so few try to remember John Allen and his sense of height.
The brown paint is from Walmart, their absolute cheapest flat interior latex. I asked for a dirt colour, and got that “look” [:-^] along with a colour chart. It’s often difficult to get a sense of the true colour in the store, but since my layout is also under fluorescent lights, I chose something they called “Thatched Cottage”. This was a few years ago, and also in Canada (I don’t know if it would be the same paint supplier or the same colour names in the U.S.)
The paint is a “deep base” and the sticker with the paint info on it has some numbers, plus the tint formulae. It reads:
10YY 17/140 THATCHED COTTAGE
67380 WALMART
BLK 2 P 16 YOX 3 P 2
OXR 0 P 44 WHT 0P 4
As for the Durabond, the screen is only used where there’s no plywood top on the layout, as the framework is open grid. Durabond sticks to wood, cork, drywall, or itself - just about any porous surface. I spray such surfaces with “wet” water first, letting it soak-in for a few minutes before applying the Durabond. This helps to prevent the water from being drawn out of the just-mixed Durabond.
In the area shown below, the subroadbed is 3/4" plywood, with cork under all track. When I decided to build the station shown here, I simply mixed some Durabond and dumped it into the low areas between the tracks and around the cork, building it up level with the top surface of the cork. When I get around to finishing some backdrop work in this area, I’ll ballast the track, which will also fix the structures in place.
When the Durabond begins to set, you can’t slow it from doing so. If you mix it in a soft plastic container, such as a dishpan or litterbox, you can flex the container to remove the hardened Durabond.
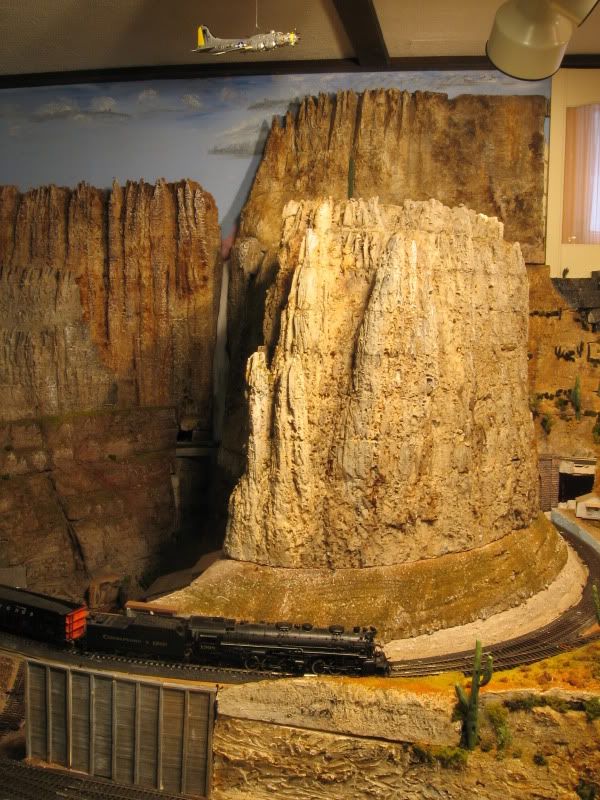
I do hoodoos ala Bryce and Yellowstone. I also did a version of the Superstitions. This is where the foam is best in my view. If you havn’t seen my pics, here are a couple. The rest are availble in my sig. I am into vertical scenes and this is how I learned to do it.
When I started my layout I got a lot of inspiration from Art Hill. The only difference is my foam is the solid granite of the Canadian Rockies. I am also building a canyon to the floor that will be crossed by an (hopefully) impressive bridge.
I really like foam the best for rugged craggy rock. That being said I have used other methods on this same layout and will use any and all means to accomplish the look I want. Even the Rockies have rolling hill bits in them, and that’s where the goo soaked towels over cardboard weave or screen come in.
One thing I do differently now is instead of making rock faces in molds and sticking them on, I cut a thin piece of foam with a bread knife and stick that on with a little caulk. I dare anyone to tell the difference between the goo cast rock and the foam slice once both are in place and painted. I must admit using the foam for random rock faces is not that rewarding as it is all done in a couple of minutes.
Here is a pic of stacked foam. I used Dap on my finger to hide the cracks and other imperfections. I then read “how to paint the Canadian Rockies” on the internet and this is what I got on my first try.
DOCTORWAYNE - Thanks so much for all of your help. I really appreciate the time you’ve taken to explain things and in such detail.
I found Durabond-90 today. Hope there’s not more than one out there. The one I found is a US Gypsum product and had the Sheetrock brand name on it. I found a 25-lb bag, no tubs.
I have a fair amount of flat homasote to cover, so it’s good to know that you just apply a layer directly to the homasote (or plywood) without needing screen wire.