I have a bunch of code 83 M.E. flextrack - weathered.
Recently I read somewhere in these forums a discussion of how to straighten this track before laying it. It is not at all straight when purchased. The discussion said something about pushing the track section up against a board - I’ve tried that but without any luck. I’ve looked as best I can on here with the ‘search community’ tool, but cannot find any such discussion.
Can anyone tell me where I might have seen this? It’s also not in any of the stacks of (paper) magazines I have around here. Thanks -
grip it sideways between the heel of your palm and the tips of your fingers. give it a rap on a flat surface so the ends of the ties smack down smartly and evenly. good luck.
I’m doing the same straightening with ME code 70. I am using a heavey 36" x 2" strip of straight steel and laying the 36" length of flex track up against it. Once its straight, I have been using a pin vise drill and going though the railroad ties and “T” pinning the track in place. The pin penetrates the tie and goes down into the foam board. I follow the same procedure when I glue it into place. I am not that particular when it comes to getting the track straight since I am modeling a prototypical rail spur and it is far from being straight.
Let me second the vote for the Ribbonrail track gauges – lengths of aluminum strip that fit between the rails, and then you “run” them back and forth to force the flex track to the tangent. However I use the 24" long straight gauge. Just forcing it down between the rails gives you a good start at truly straightening the piece.
Thanks for the tips. Not sure about ‘smacking it down’, but I may try that. I have a bunch of the curved Ribbon Rail tools, but no straight ones. Going to order one or two of those.
If you have a work bench with a nice flat top lay the track on edge with one edge of the ties on the bench top and firmly push down on it with the heal of you had or you could even use a flat piece of wood. I will second the fact that most “real” track is not dead straight a little wiggle here and there looks more real at least to me it does.
A few quick comments from some one who has a couple of hundred feet of ME on his layout:
Weathered track is harder to bend and straighten than un-weathered…Code 70 is easier to work than 83.
Take care with the track in the bundle and there is less straightening to do later.
3…When lining the ties on a hard surface, you need to be careful because the ties are held on by tiny spikes and it is very easy to pop the rails off of the ties by rough handling. They don’t go back on… at ME prices, that is a costly mistake. Edit: Hitting the track on a hard surface works…(see below)
I haven’t been able to find the Ribbon rail 24" gauge. I was told is is discontinued. Let me know if anyone locates any.
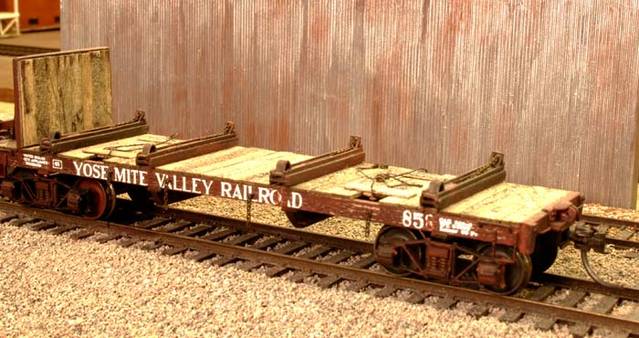
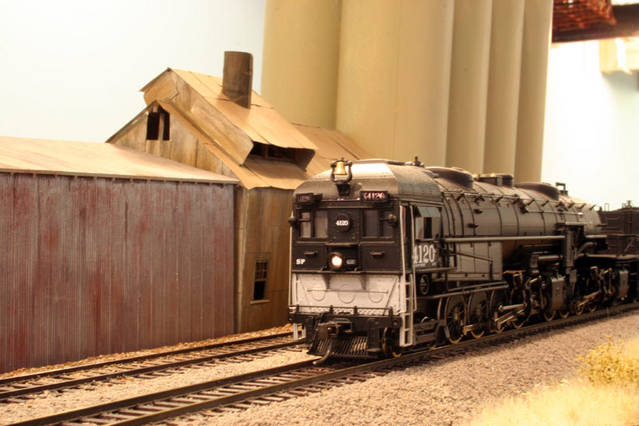
This track looks great and (IMHO) is well worth the cost and effort if you value the realistic look…Here are a couple of examples:
Also from someone who has many hundred feet of weathered ME track under his belt, the whack on a hard surface is not a joke at all. It is the best method I have use so far. It takes a split second and produce surprising results. A try will convince you.
I honestly thought the previous poster was kidding…I went out and tried it and you are right, it is not a joke. It works very well. I am convinced and stand corrected. I would definitely use this method for track that is being installed.
I am still looking for the 24" straight ribbon rail guage to straighten track that has been laid (spiked) but not ballasted. It has moved over the years of leaning on it etc…
i guess some of you guys thought i was kidding about whacking flex-track on it’s edge to straighten it. a hobby shop owner showed me that trick with a length of atlas fibre tie track about 50 years ago. it was frumpled up and he just smacked it edgeways on the glass counter top to straighten it. some things don’t change, they just get forgotten. in truth, i never though about how flimsy the spike heads on some plastic ties might be so a careful approach may be in order.
Actually it was/is pretty sturdy stuff, the old Atlas fibre tie “flex” (ha!) track – but the staples that held the brass rail in place could get loose and the track lose its accurate gauge, assuming it ever had it. I don’t use the stuff on my layout but I did use up my remaining pieces when I was trying out some track laying and ballasting techniques using adhesive caulk. The end result looked so good I then regretted not using real track on my real layout! [B)]
Some of us remember when Atlas offered the flex tie strip and you’d lay your own track but on the strip not on wood ties. Somewhere I still have a roll of the stuff … Oh and they offered s track gauge made of the same black fibre. I have several of those somewhere. Very strong stuff so long as you didn’t get it wet.
I have seen those rolls but never the track gages. In fact I have seen a lot of early stuff at swap meets and as you say the standards were not always right on. I installed an early NS three-way turnout by Shinohara and after it was installed noticed that even though it was code 70 and all my equipment is compliant that I had to trim all the spike heads down or get that bumpity bump.
They way I have done it, is to hold the track in two hands and to bring it down fast as evenly as you can so all the edges of the ties hit the table-top more or less at the same time and at the same level. Any tie(s) deviating in level from the norm get pushed up, or tend to come down to meet the table. It is not unlike getting a loose deck of cards to even out by hitting it hard on a flat surface. In theory I suppose more than once piece of track at a time can be done this way.
Perhaps other folks have techniques of their own that differ?