I have several sets of different size terminal blocks, some 4-screw double row, some 8-screw double row, and some 10-screw double row.
I bought them years ago with the intent of using them to organize my wiring but I never did. I was thinking of listing them on eBay, but there are literally thousands of them out there.
Does anybody use them? is there a better term for them than terminal blocks?
I use them all the time. If they are the kind that links top to bottom I will use those to travel from one area to another. I wll also wind a copper wire around half of the strip dividing it into two sides and then attach a black AC to one end and a Red AC to the other end. I then can hook up all my building lights in that area. Use them.
Terminal blocks, terminal strips, barrier strips…I’m sure there are more terms to identify them.
I have used many of them on my layout, most of which are the so-called European style, where you insert the wire tip in an opening, then tighten a set sdcrew to grip the wire. They are no better or worse than the type with the screws around which you wrap the wire end or use a crimp on terminal. I just fine the Euro style easier to use.
It’s a good bet many others use them, too. Yours may sell on ebay but if it were me I would probably give them away to a local club or a fellow modeler. Individually they aren’t worth very much.
I used them at first, but found they tended to slow wiring down for me. I still use them in certain special situations. For the most part, I use the very common, very cheap wire nut. By using a system of color-coded wires and set routines of how things are wired, it’s superfast to use and is easy to troubleshoot and modify. It can look a little rat-nesty in tight spots, but it’s an organized mess, not an indicipheral one.
Absolutely. Crimp on terminals and terminal strips with either jumpers or I make my own with a wire and crimp on terminals about an inch long. Solder if you want to but why not use them. They are a heck of a lot better then those suitcase connectors.
Yes, I brought out all my DCC connections to terminal blocks - #12 wire does not solder to the PM42 edge connector, nor does it fit in the terminals on the booster.
I used them between my NCE and the 3 subdistrict boards, in my control panel between the Tortoise power supply and each DPDT, and near each Tortoise (which made connections easy under the table, with pre-wired turnout frogs, etc). I used typical dual barrier strips and added the jumpers as needed to make one side a common as needed. At the Tortoises I used 5x2 strips, two for the motor power and three for the track power & frog. I wish I had used 8x2 strips at the mainline Tortoises as I plan to add position indicators at the mainline turnouts (in addition to the control panel LEDs). I got my goodies at All Electronics.
Terminal blocks and crimp connectors are the ONLY way I ever wire a layout. Using them makes changes in track plan, additions to trackwork, addition of signals and lights, etc. so much easier than having to cut and splice wiring.
I purchase terminal strips, terminal jumpers, and crimp connecots in bulk from All Electronics. You can get 100 crimp terminals from All for the price of 10 at a local supplier.
Well, those panels look prety good, but they cost money. Crimp connectors cost money. Twisting a screw driver bothers my claws. NOPE those things are not for me!
No way I can afford that stuff! Solder is easier…
Nails are cheaper than barrier strips and crimp conectors. No way I could afford any of those.
If they’re two connectors wide, they are terminal strips.
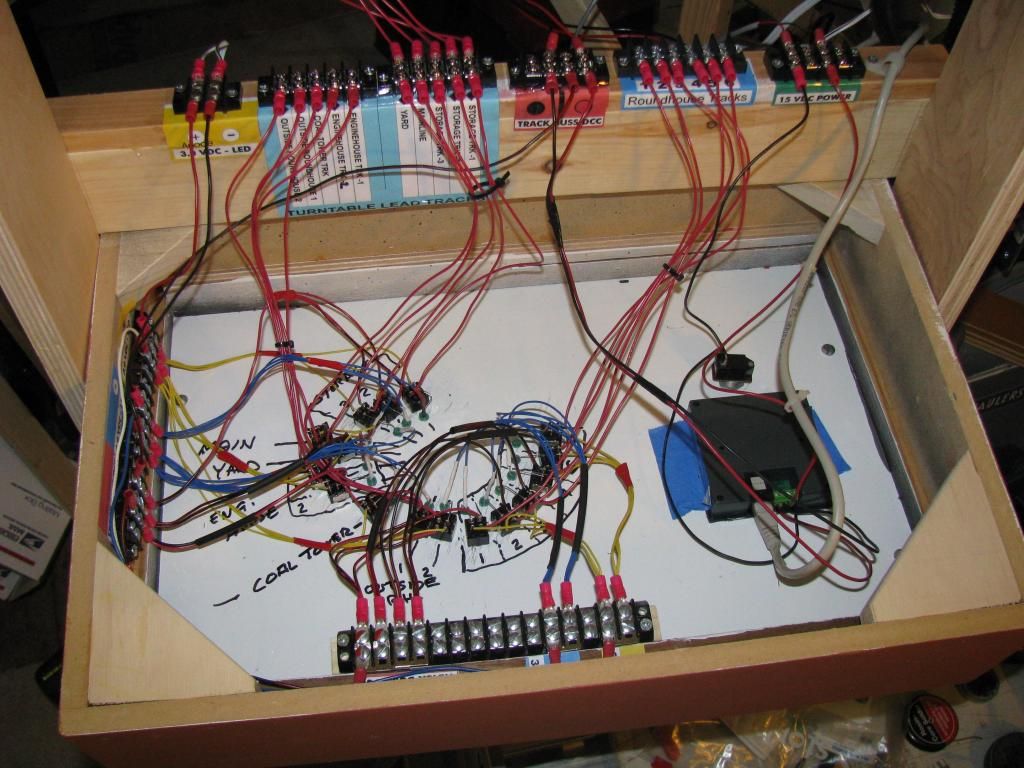
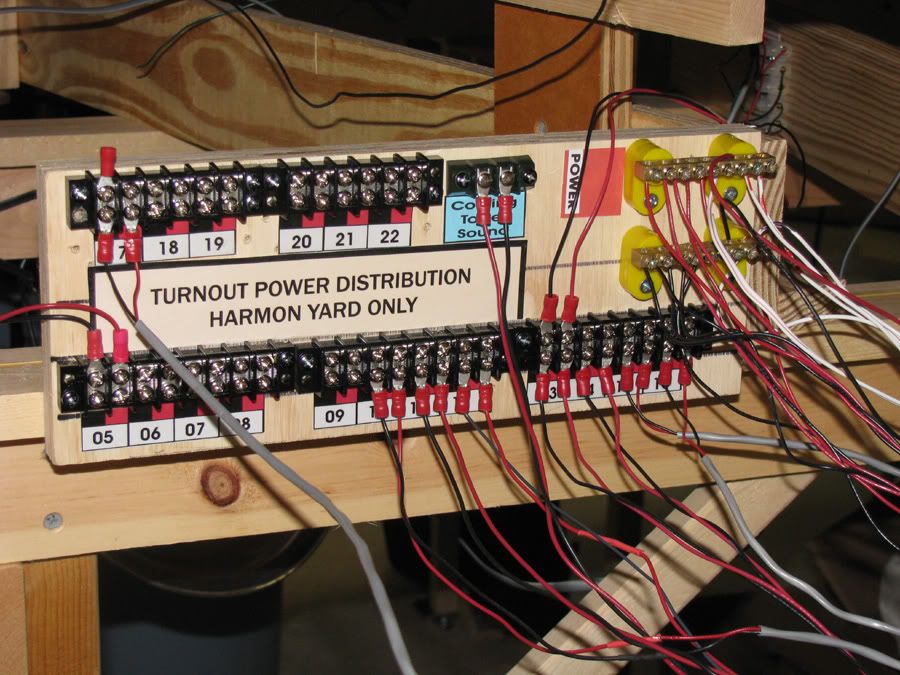
I use homemade terminal strips and terminal blocks for ALL of my wiring, with every terminal labeled and every wire identified in the schematic documentation. The terminal blocks (four or more stud terminals wide) are custom-designed for the specific location and requirements - up to 90 terminals on one block at the interface between the layout and a control panel.
Construction is simple. Just drill a pattern of holes to clear #6 or #8 machine screws in a suitable substrate (I have used wood and Masonite, but prefer thick plastic) - longitudinally on 0.5 inch centers, transversely alternating 1.5 inches and 0.75 inch centers. The longitudinal holes are offset 0.25 inches from one column to the next. Screws are installed (2 washers and one nut, please) so the free end forms a stud on the working side. Wires are routed down the 0.75 inch alleys between studs, secured by a washer and nut. Several wires on the same stud get washers between them, but only one nut. The wider space is reserved for identification labels. I use an alphanumeric shorthand code. Other systems might require more than 1.5 inches between rows of studs.
Someone mentioned not wanting to be slowed down by using terminal strips or blocks. I don’t mind doing the job slowly if I only have to do it once.
Chuck (Modeling Central Japan in September, 1964 - with electricals as bulletproof as I can make them)
I prefer the ‘European’ style too…they work just as well, but I like not having to wrap wire around screws; just strip it, stick it in and tighten it down.
Some kind of terminal strip, barrier strip or similar thing is necessary at the ends of modules for Free Mo or other modular groups; might want to find a local modular group and try to sell them there.
Since the screws are exposed, it’s easy to use a multimeter to check voltage, etc without stripping or removing wire nuts. They are reusable; I have some from probably 20 years ago that still work fine.
In my model railroading experience I have made literally thousands of electrical connections in the process of building several large layouts. Life is short, wiring takes time and must be done accurately regardless of method.
I prefer to avoid terminal strips in most instances as they are an extra step. I use point to point wiring from the load on the layout directly to panel switches as much as possible.
I do use terminal strips in buss situations and usually the solder lug type for quick connection. As for revisions and trouble shooting, the time I have spent on these items is far less than the time it would have taken to install lots of terminal strips.
Your mileage may vary,
Guy
That’s exactly the same reasons I went with wirenuts for most of my connections. Chuck worries about my only needing to do something once, but I’ve had virtually zero problems. And the amount of time saved is astounding. Do-overs? Nah.
The wirenuts make it very easy to modify wiring, too. In fact, it took me just half an hour this morning to rewire 5 of my staging yard tracks from power routing to full time power., including cutting the gaps. Half of that was sizing things up and getting tools and materials. No way you could get all the screws loose from the wiring blocks in that amount of time, I suspect.