There are other similar chucks out there and you may possibly come up with a workable combination. It sure would be nice to get the cordless driver with the proper 2° 49’ 24.7" taper that the chuck could simply press onto the shaft without the adapter.
If you have a decent small lathe you could probably come up with an adapter. This one has a .125" bore you could probably open up to 6mm?
Thanks for letting me know about the PM. Normally I get a message stating such, but I guess the forum shelf-eleves are up to something.
I did take a look at the link. I’m going to have to spend some time seeing if I can figure out if there was any consensus opinion as to what worked best. It seemed like a big part of the discussion was why there were variations of the same item. Ended up totally confused…
Same here. No more email notifications that a PM has arrived.
The motorized pin vice discussion is spread over several issues. Three methods were evaluated and the conclusion was method 1, which is close to what I show with the General Tools driver, seemed to work the best.
I like the chuck that MicroMark offers. I might dip into some of my kid’s inheritance and shell out $30 for one.
Yeah, I think that the PM notification has pretty-well died.
I got a small 4-jaw chuck from MicroMark that snaps right into my cordless DeWalt impact driver. It accepts drill bits from #80 to #58-or-so.
To use it, I open the centre drawer in my work desk, and rest my hand and the driver in it, then use my free hand to feed the work-piece to the bit. The variable speed offers control good enough for drilling plastics, but I usually use it for drilling metal.
Ed got me inspired by showing his powered micro drill so I went looking for one for myself. As he mentioned, matching a chuck to a cordless driver seems to be a bit of a challenge, so I have ordered one of these. It is 12 volts so I’m hoping that I can use a train set power supply to control the speed:
I will test it as soon as I get it and if it doesn’t work as hoped I will return it.
Ed makes a good point about it being a direct drive. If I lower the speed enough to make it useable as a powered pin vice, it may not have enough torque to do anything.
I bought it through Amazon so, as I said, I can return it. They even pay the return shipping in most cases.
Dave
Edit:
I decided to cancel the order based on the fact that there was no reduction gearing.
Thanks to everyone for this very informative thread! Since this is all new to me, I have a few basic questions.
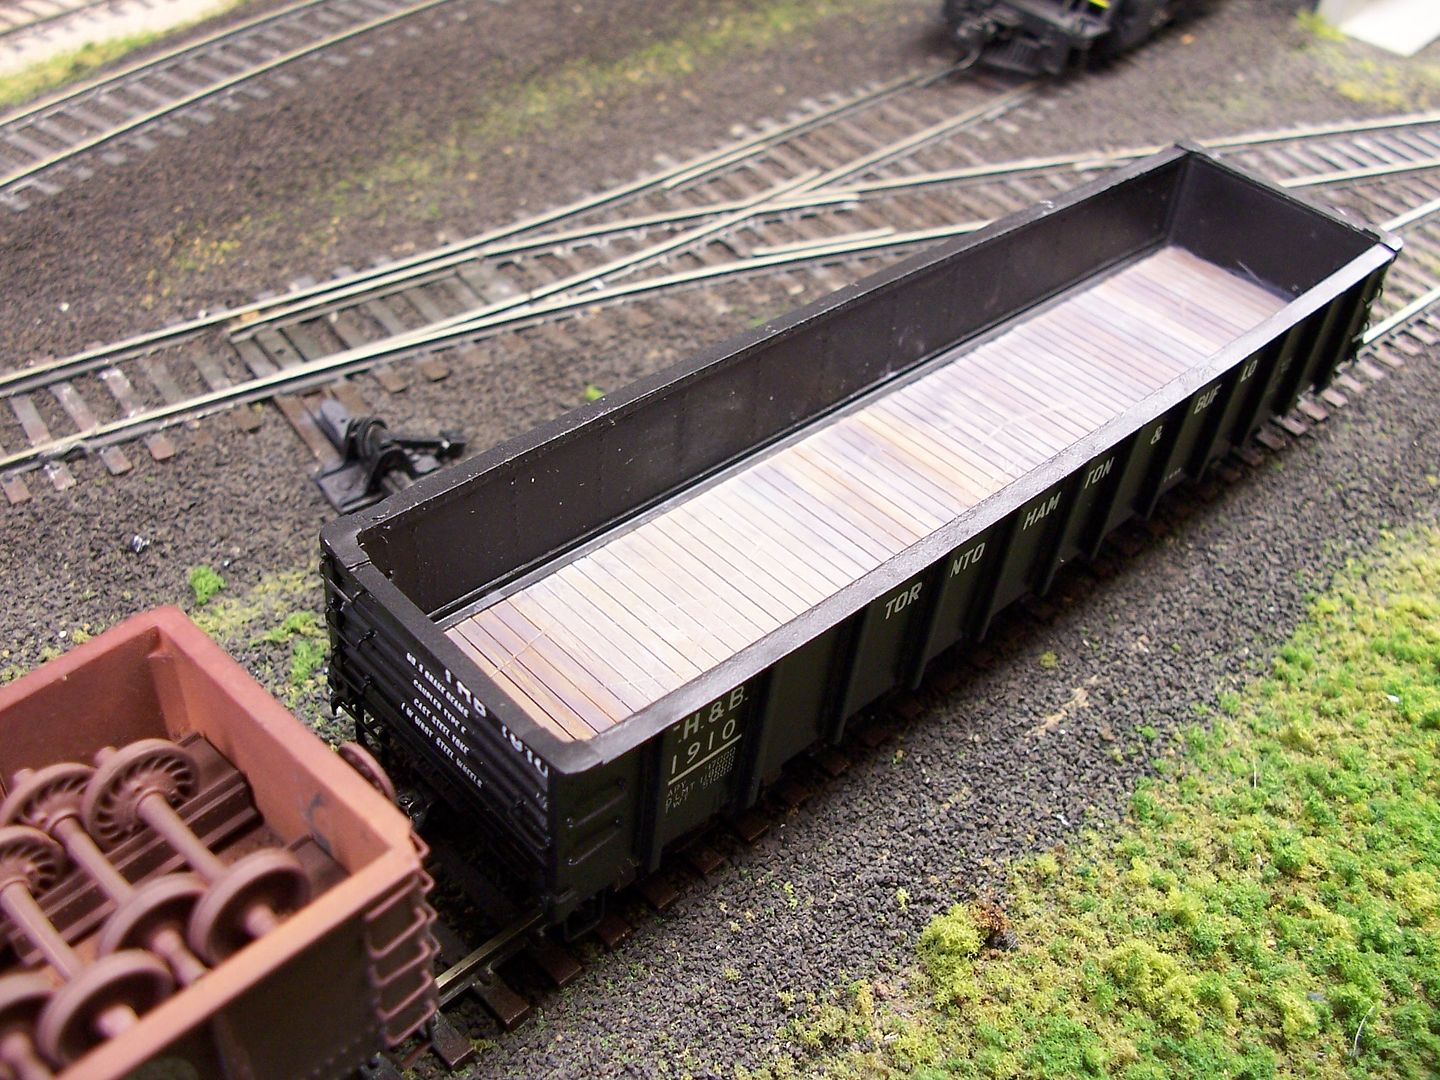
If the holes are drilled all the way through the car body, do the ends of the grab rails protrude beyond the inside wall or are the rails just the right length so they can be mounted flush with the inside wall?
In either case, how do you deal with the holes or protrusions that can be seen on the inside of a gondola?
Some of the rails are bent down 90 degrees. Do you make those bends before inserting the grab rails or after they have been installed?
Yes, the holes go through the car body, what I do is after the holes are drilled, and the grab irons are in the holes, I use a piece of styrene, usually .04 thickness, to set the depth of the grabs, than bend the back side over against the car body, and glue, with CA from the back.
You can get straight or the drop type (the ones you refer to as "bent down 90 degrees).
On a gondola, since you can clearly see the inside surface, I use the CA to glue the grabs in place, and then trim off the ends that stick inside the car, and maybe cover with a paint match to the gondola, if they show at all.
Hopefully Dr. Wayne will see this, and amaze you with some of his grab iron work.
A lot of resin car kits have the holes for the grabs irons lined up nearly even with the inside thckness of the car end. When this is drilled, the drill will either grab awkwardly into the end casting and snap, or it well bend into the void and snap. The way these kits are made it is not possible to cast a lip onto the inside of the car end to prevent this. Drilling corner grabs in the roof can have the same result.
.
Just plain recklessness… I have so darned many drill bits that I know I will not run out, so I do a lot of stunts that I know will probably break the bit, but it does not matter, I have plenty. When I start to run low I will become more careful. Right now there are no consequences for carelessness.
.
My right arm has nerve damage, and sometimes I shake or tremor, and there goes another #78 drill bit into the trash.
On closed cars - boxcars, reefers, passenger cars, etc., the wire protrudes into the carbody. I put a styrene spacer strip, .030" or .040" thick, between the outer sides of the car and the grabirons - use a piece narrower than the grabirons’ width, because if the spacer is touching the wire where it protrudes into the car, the ca may wick-out along the wire, cementing the spacer to the car’s side.
With the spacer in place, I put a finger of my free hand on the grabirons, pushing them tight against the spacer, then, using an old #11 blade in my X-Acto, bend-over the portion of the grabirons which protrude into the car. With the grabirons still held tight to the spacer, I apply ca to the bent-over wire inside the car.
The procedure is the same for open cars, such as gondolas and hoppers, but once the ca has hardened, the knife blade can be used to re-straighten the bent-over portion of wire, then re-bent and straightened a couple of times until the excess wire fatigues and breaks off.
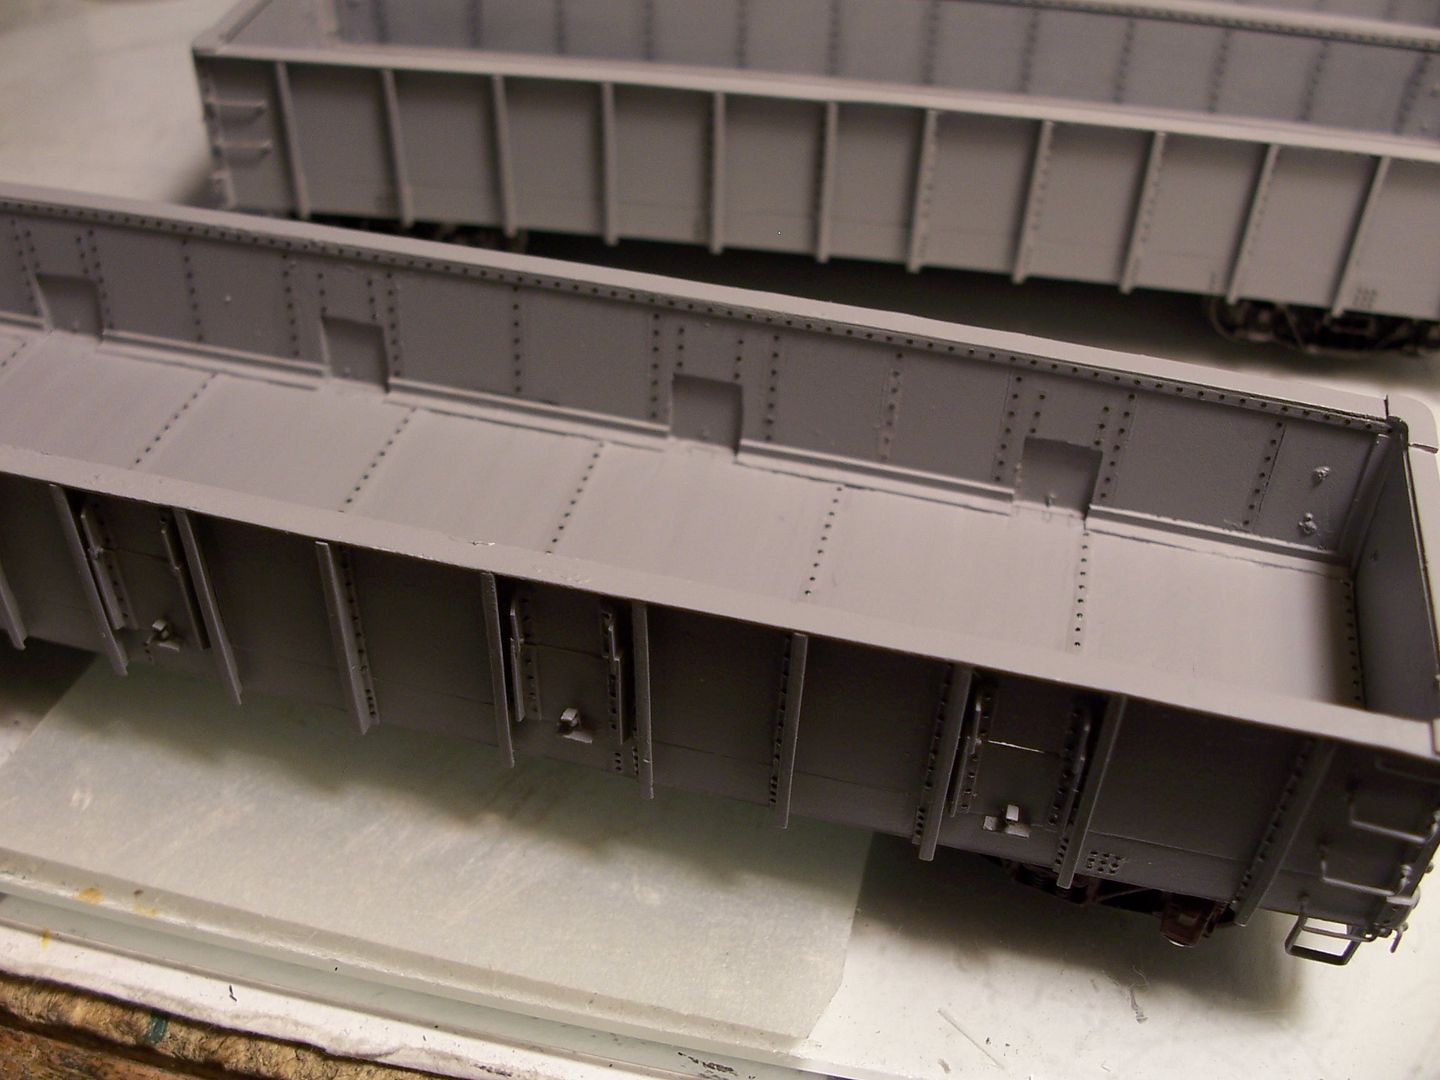
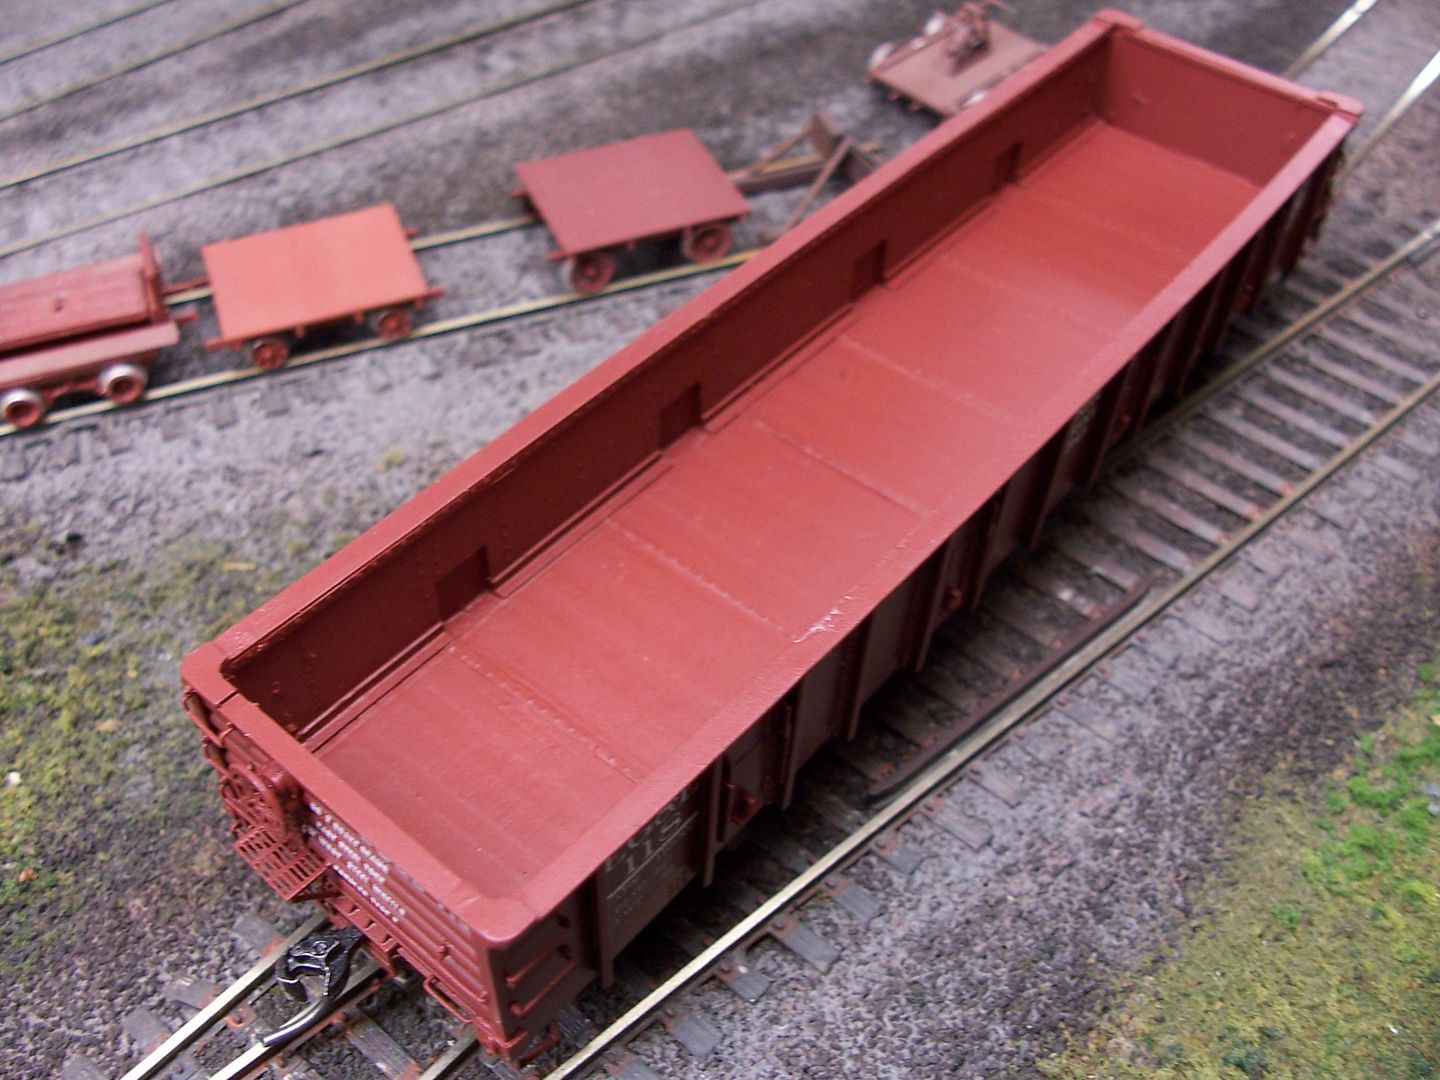
Here are a couple of scratchbuilt gondolas built on Tichy flatcars…
[quote user=“CapnCrunch”]
In either case, how do you deal with the holes or protrusions that can
Many thanks to Doctor Wayne and Mike for the thorough explanations. Doctor Wayne, the detailing on your models is remarkable…the cars are truly works-of-art.