I’m trying to build the water column, kit #8006 and I have some questions that I hope someone can answer. There are six pieces of wire shown in the instructions. Are the 3 shorter pieces simply the leftovers from cutting the long ones to length? Or is there a specific length (which isn’t mentioned in the woefully inadequate instructions). The instructions say to bend the valve lever. Bend plastic. Right. I tried. The valve lever broke in two places. Those of you who successfully bent the lever - how did you do it? And to what angle? Again, not mentioned in the instructions. The two pieces of wire which attach to the T handle of the valve lever, I guess you use an instant glue for that, right? Thanks in advance for any help you can offer. Jeff
The valve handle is bent at the yoke. In the instructions upper left corner shows where to bend and the angle. The arrows show where the bend should be. I held the two legs of the yoke with a smooth jaw pliers at the bend and carefully pushed on the part where the two legs of the yoke meet to the angle shown on the instructions. It takes several tries a little at a time. All the wires will need trimming. Drill the holes with the #80 drill. The T handle wires I bent a short 90 degree about 1/8 inch long and glued with a thick ACC by Zap in the hole and the T then trimmed them after the glue dried. So far I have 4 built with another 4 to go.
Pete
Thanks “jcopilot” for the thread… since I just purchased this kit at my hobby shop last Saturday. Pete has given us answers to help us both!
Have fun modeling, Hal
I forgot to add one thing. Sorry.
Make sure you trim the post if you use the extension. Another thing is test its fit. The hole may need reaming or the post needs sanding.
Sorry.
Pete
What are your opinions as to kit 8006, water columns? Are they of good quality, good to work with, have a solid railroad appearance? I am looking into getting no less than four for my layout.
Thanks!!
Dan
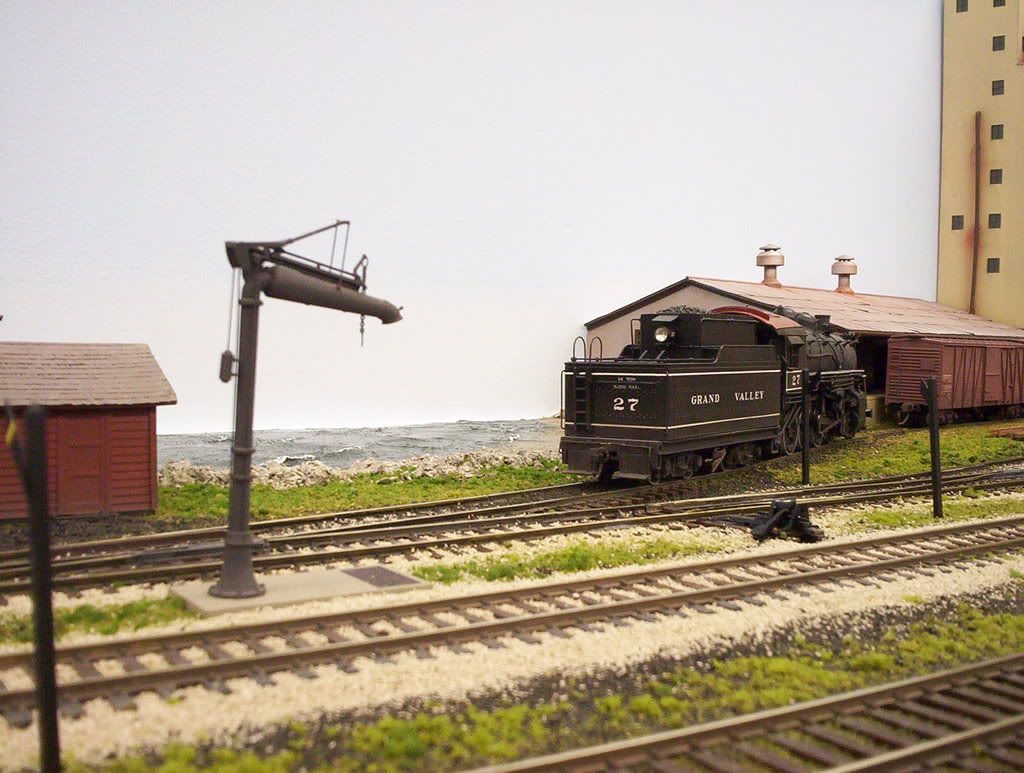
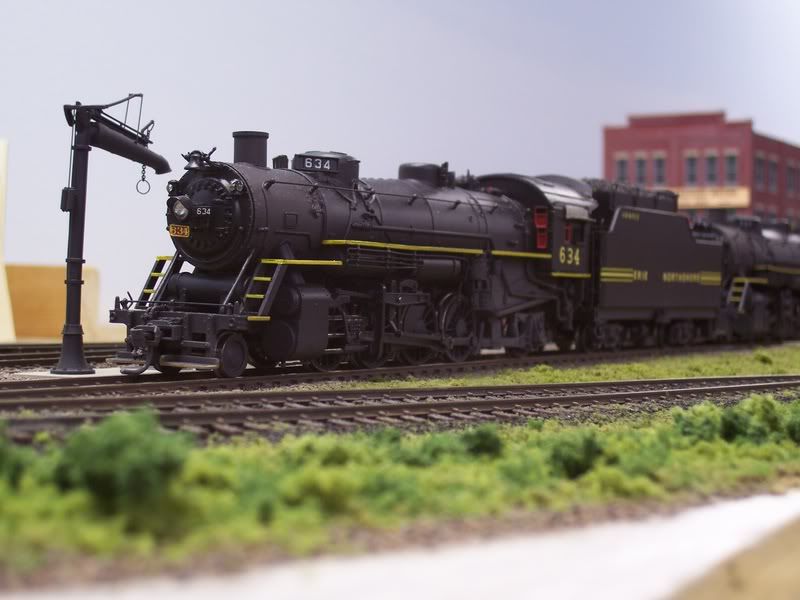
Great detail and I have seen many photos of the real things in action. They certainly have rail road looks.
Pete
Dan, The kit has some really fine detail and looks great, but I found the instructions lacking. Go here for some more help: http://www.theproto87chronicles.com/water_column/water_column.html Be careful when bending the valve lever, I broke two trying and Tichy graciously sent me some more - free! But I haven’t tried bending them yet. Here are some more helpful hints from someone else: 1 Paint the parts first and assemble the main column parts first. If you are using the extension for larger tenders than a little trimming and filing of the post is needed. Make sure the flat part of the flanges line up and set aside. 2 assemble the base and drain grate. The grate may need some trimming to fit good. 3 Glue the column to the base. 4 Bend the yoke at the point it shows in the diagram and glue it on. 5 drill the holes for the wire up rites and other wire parts that go along side the column. Carefully glue the wires on with ACC and let dry. Trim the extra length off after the glue dries. I glued a piece of chain from the column base to the side of the spout for looks. 6 weather with some paints or what have you and place it on the layout. Sorry if this reply seems all crammed together. For some reason, it looks good on my Mac, but when I submit it, all of the formating goes away. Jeff
Yup, they look pretty good and they’re easy to build, too:
It’s also not too difficult to make a parts-built one. I used Grandt Line spouts, along with various bits of styrene sheet, tubing and strip, along with some wire and, for the base of the column itself, part of the tip of a Bic pen. [swg] Here’s one of them, pictured beside the Tichy version, at left:
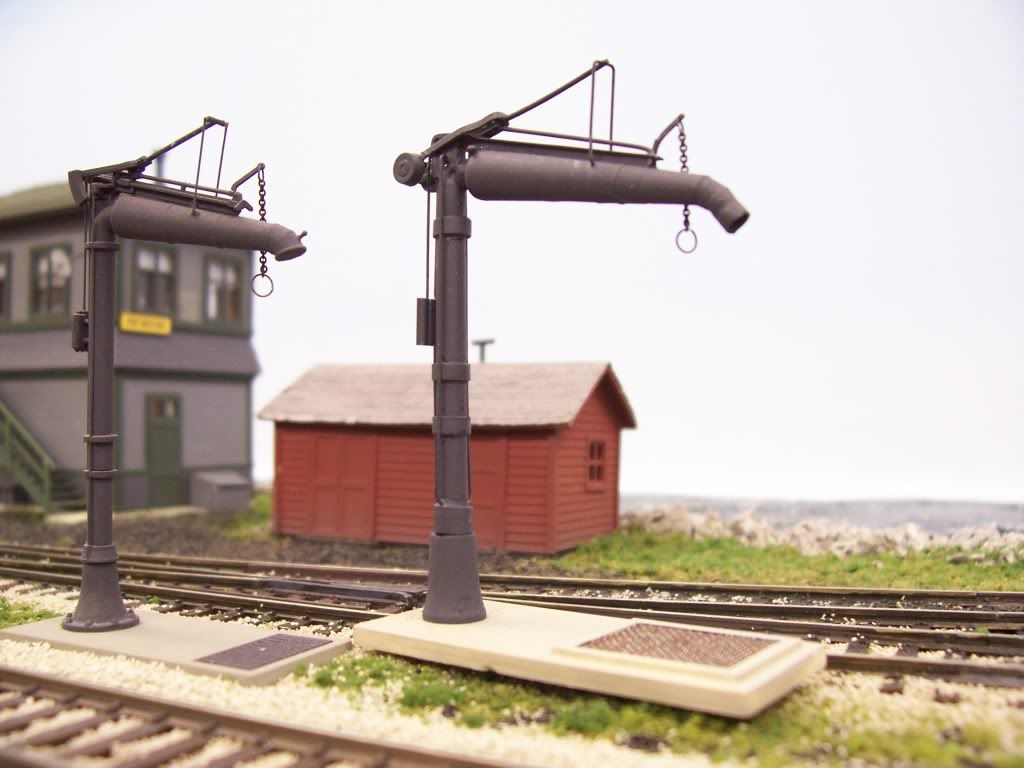
The longer spout allowed me to put two of them, one at each end, between a curving double-track mainline, whereas I would have required four of the Tichy ones to service both ends of the same tracks. Since they’re both background models, I didn’t worry too much about including the finer details.
Wayne
Thanks guys, appreciate the advice, opinions and photo’s(they do look good)…great help to me!!!
Dan
Thanks so much for posting these photos, and the tips too-all helpful for my first try with this kit. (and first time in a LONG while making a model kit) Will build more.
These tips have been very helpful. Thanks!!