I finished the Mainline on my layout just before Christmas so my grand kids could see some trains run. At that point everything was working fine.
A few days later one of my loco’s began derailing at the same point each time it traversed the trackage. I looked closer and noticed the track had lifted / separated from the laytex caulk that I used to glue it down.
To correct the problem I had to loosen the track another few inches to get the curve to line up and then drilled small holes in the outer edges of the ties then tacked it down with track nails. Once done the loco ran through without derailing.
A few days later I was running a couple of locos trying to set up the speed steps so I can MU them. I noticed them both wiggling on a straight section. After checking it out I found a section about 12" long where the track had warped and like before had become unglued. I did the same thing to remedy the problem.
Before long I noticed several places on the layout (12) where the track has warped. One section is on a lower level where the track goes under the upper level and I can’t get to the track to correct it.
The layout is in my basement that is finished. It is climate controlled also. The biggest change is that we are currently going through a very cold spell and it is dry. So I guess the layout is contracting.
The sub roadbed is 1/2" plywood with cork glued to it and the track glued to the cork.
Most of the track is soldered together, espically on the curves. That is where most of the warping has happened.
I read several posts about warping and how to keep it from happening. Gapping the track was one. Soldering and gluing it down was another. Soldering and gluing doesn’t work!
Alot of guys glue track and have had good results. I have always spiked/nailed flex track and never had problems. I can’t see ever gluing track because I don’t see any benefits.
Soldering the ends of rails together usually creates more of an issue because there is no gap. I have never soldered rails together.
Are you giving the wood enough time to acclimate itself to your basement’s environment? If you bring in a sheet of plywood from your cold, wet garage and immediately start laying track on it, the wood will undergo alot of change based on the humidity and temperature differences. Because of the size of my layout I usually had completed benchwork 6 months or more before starting to lay track. 6 months is probably way more than necessary but you get the point.
This has been discussed here many times over. The problem is not the track, it’s the wood under the track expanding or contracting with changes in humidity and temperature. The only cure is to seal the wood by painting on both sides or leave expansion/contraction joints in your trackwork
You cannot solder every joint. Some must be left for expansion.I never solder any joints, I put drops to a buss wire from every piece of track. Dont rely on the rail joiners to conduct current. Works for me.
The plywood has been in place since November 2007. I started laying track in February 2008. I just finished the mainlines around Thanksgiving. So I thought any drying out would have taken place and the wood would not change.
This is my first serious layout. It is 16’ x 14’ with a 7’ staging area branching off the 16’ section. So it’s a fairly large (for me) layout. After nearly 2 years in the same climate I didn’t expect the roadbed to change so much.
This is a lesson learned. On my next layout I will be leaving gaps between the tracks. I may use foam so nails will not be an option.
In the four years I have been reading on this forum, it has been said many, many times…solder the rails along curves to get a consistent curve. No one mentioned that soldering on the curves would prevent lifting due to inappropriate adhesion or fixing. They are two different issues.
Soldering sections of flex while they are aligned and tangent on a bench , and then bending them in place on the layout to form the curve needed is a way to ensure that you don’t get flexing joiners along the curve, particularly tighter curves. Flex track doesn’t bend near its ends on a curve, but it will bend better if the joiner is strengthened with solder. I have always seen it stated by those describing this process that where possible, especially on either end of soldered track, leave free-sliding joiners to allow expansion of the track system due to the layout frame shifting, settling, and changing dimensions due to humidity and temperature fluctuations.
Tracks lifting or snaking here and there is due to the compression of them as the benchwork below them shrinks due to a combination of temperature reduction and a reduction in humidity, with the latter accounting for something upwards of 80% of the changes, and thus the symptoms. I wonder if there is a substantial different in either material or application that would account for the lifting, because I have no nails in my tracks and I have no lifting. I use caulk exclusively.
If I couldn’t get it to stay put, I would drive some nails or small screws against the foot of each rail, and then use a cut-off disk to relieve pressure midway along the lifted arc. First, though, I would try two or three small spikes shoved into the outter tab on the ties.
My benchwork has been up for 3 years and I still have wood expansion/contraction problems. The odd thing is in the cool, dry winter I usually have problems with gaps opening up in the rails. Hot, humid summers cause it to buckle and lift.[%-)]
Using foam over the bench work should help with your problem. the foam does not expand and contract like wood. It’s inexpensive and easy to work with. I used standard 2 inch pink builders foam
Take the advice from a modular rail road builder. Modules go threw the roughest treatment. Temperature, humidity, and handling. We still need reliable track to put on a show. I have built 7 HO scale modules.
Bench work of 1x5 pine painted both sides and ends, Cork roadbed glued with white glue only on top of 2 inch foam. Track glued with white glue and ballasted with white glue. Solder only curves and leave the straights to expand and contract.
After five years only problem was bent rail from damage moving. The last show was during a snow storm when the modules were in the back of the truck for 2 days and moved into a heated dry building. The next day it was 8 degrees and then back into my house at 68 degrees. Still no warping or other problems.
I have a garage layout in California which is subject to a lot of temperature changes over the year, from cold, wet winters to hot, dry summers. My first garage layout was laid on plywood and believe me, it was a nightmare with the track from season to season. When I built my present layout, I escewed the plywood completely and built it on 2" extruded foam with wood bracing. In the seven years I’ve had it in operation, I’ve had little if any track expansion and contraction problems. I agree with a lot of the other posters, it’s not necessarily the track itself that is causing the problem, but the wood underneath expanding and contracting during seasonal changes.
This may sound funny, but as a professional musician, I know that wood remains ALIVE. Frankly, ask any string player or pianist–wood remains very sensitive to climate changes. That’s why string players and pianists make sure that their instruments are humidified to adjust to the changes. It’s also why model railroads should be kept at as even a temperature as possible. And if you find that you cant’–well, go for the Corning extruded foam, at least IMO.
My layout is located in a basement with good HVAC. I yellow glue cork roadbed to bare plywood and glue Atlas Code 83 flex track to the cork with latex calk. I solder two 3’ sections of flex track together with a feeder wire at the soldered joint. The unsoldered joint is connected to the next six foot section by rail joiner only. I have good electrical and DCC signal and no problems with track alignment.
Before using the latex calk I nailed the track to the cork and had constant problems with tack alignment.
Sure it does but you can’t solder all the track together and not leave some gaps for expansion/contraction. All my track, including the turnouts, is soldered. Now are you saying that I should be having no end of track problems? Well I probably would IF I hadn’t provided gaps about every 6 feet. If you want to say something doesn’t work, especially something that many have used with great success, do it right then if it doesn’t work you have a case. As it is from the way you describe your problem you put the track together tightly, soldered all the joints, neglected to provide gaps and then wonder why you have problems.
Jeffrey is right. It’s not either/or but rather both. Soldered joints and gaps. The method of attchment is not really relevant, glue, caulk or nails, the problem can still present itself. If there’s a lot of movement then you’ll need more gaps, less movement, fewer gaps. Ballasting the track also helps lock things in place.
What worked for me: I glued and soldered all my track and then came back and cut gaps with my Dremel every 10 to 15 feet at a convient straight section. To keep keep good electrical continuity, I solder “U” shape wire jumpers across the gap (on the far side of the rail so it can’t be seen). Once the track is painted, they virtually dissapear. I also ballast the track as soon as possible to lock everything down. Should a new kink appear, I just repeat the above and a few did the first year or two, they were minor and easily fixed, but nothing in the past 10 years.
How do you gap your rail. Do you solder it first then glue it down then cut gaps in it? How wide are your gaps and do you leave more or less depending on the season?
My concern was if I left a 1/16" gap it would grow to over 1/8" and possibly create a derailing problem. On the other hand I thought that as long as it was solidly secured to the roadbed I wouldn’t have any warping problems.
I have left gaps in the yard area and have not had any issues there.
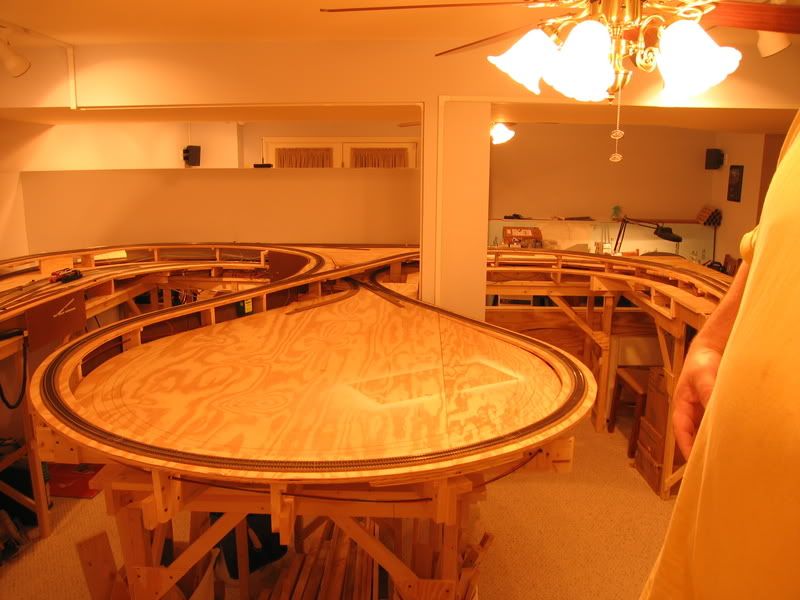
The main problem areas are on turns. I have one turn that is a 30" radius and runs possibly 300 degrees then loops over itself, see picture below. On this turn I did solder all the track because I wanted the joints to maintain their correct spacing. On that section it warped in two places.
I solder all the track first then go back and cut the gaps. My gaps are cut in both rails and are 1/32". On curves I cut them straight across then put a piece of an old credit card in the gap so it can’t grab wheel flanges. Try to avoid cutting gaps on curves if you can. It’s better to have and unsoldered join held by rail joiners on the curve. If you’re using flex track you’ll have to spike the rail just before and after the location of the gaps on the curves if there’s no joiner there to hold them.
EVERYTHING expands and contracts - diiferent things, under different conditions. SOUNDS LIKE more’carefull track laying is in order…
Metal (rail) expands with heat and running. (Biz card Gaps every 3’-6’ should correct). Soldering of joints should not be necessary when Bus.& Feeder wires are used.
Wood & paper based material expands with moisture (humidity).PLASTIC doesn’t.CORK shrinks.with age. Nailing or gluinng track in place BOTH work, if done properly. MY first layout used Atlas nails.
IF ATLAS code 83 isn’t working for you try PECO code 100 .(stronger).
I want to go back about 40 years. I built my first real layout as an adult using 1/2’’ homasote glued to plywood, with track fastened to the homasote using track nails, even then I had left gaps for expansion, nothing soldered. In a damp, very damp basement flooded on occasion in the spring, open hole sump pump with water in it year round 6’ away from my layout. Never had a problem like ya’ll are telling with expansion. I am speaking truth here, ha, mostly brass track on top of it!
I built my new layout 3 years ago. I used 1x4 pine frame, plywood cookie cutter, homasote roadbed, track nails hold the track down, but I did solder the joints this time, only because I liked the idea on the curves and in the tunnels and mountains. I also left gaps as has always been suggested for expansion. I do have mostly NS track, but I won’t go into that. My layout is now in a store front, ground level with the room temperature of 60 and humidity of 72% right now. I heat it and never moved the thermostat all winter. It gets to 90+ degrees and 90%+ humidity in the summer, and I’ve never had a problem in these 3 years. The plywood isn’t painted neither is the homasote. I live in the mountains of West Virginia. I didn’t use foam in place of plywood because of my experience with foam products around moisture that I’ve had in my lifetime. Years ago, 25-30, I purchased a sailboat that was foam covered with I think ABS vinyl, expensive boat, for my children. It developed a leak due to a seam coming apart, the foam got saturated with water and added 80 lbs to the boat. Also we had a dock about 25 yards from shore that foam was used for buoyancy. The big blocks with the deck of wood on top, it too, the foam saturated with water and was very heavy when we pulled it in for the winter. I only use foam for the mountains and scenic area’s. I just don’t trust foam and thinking moisture from humidity would accumulate, I won’t take that cha