Yes, as it was originally wired for use with one decoder in the locomotive; the 4 x 2 male & female mini-connectors on each car end providing the electrical path to illuminate the interior lighting off all cars and the taillights in the observation car.
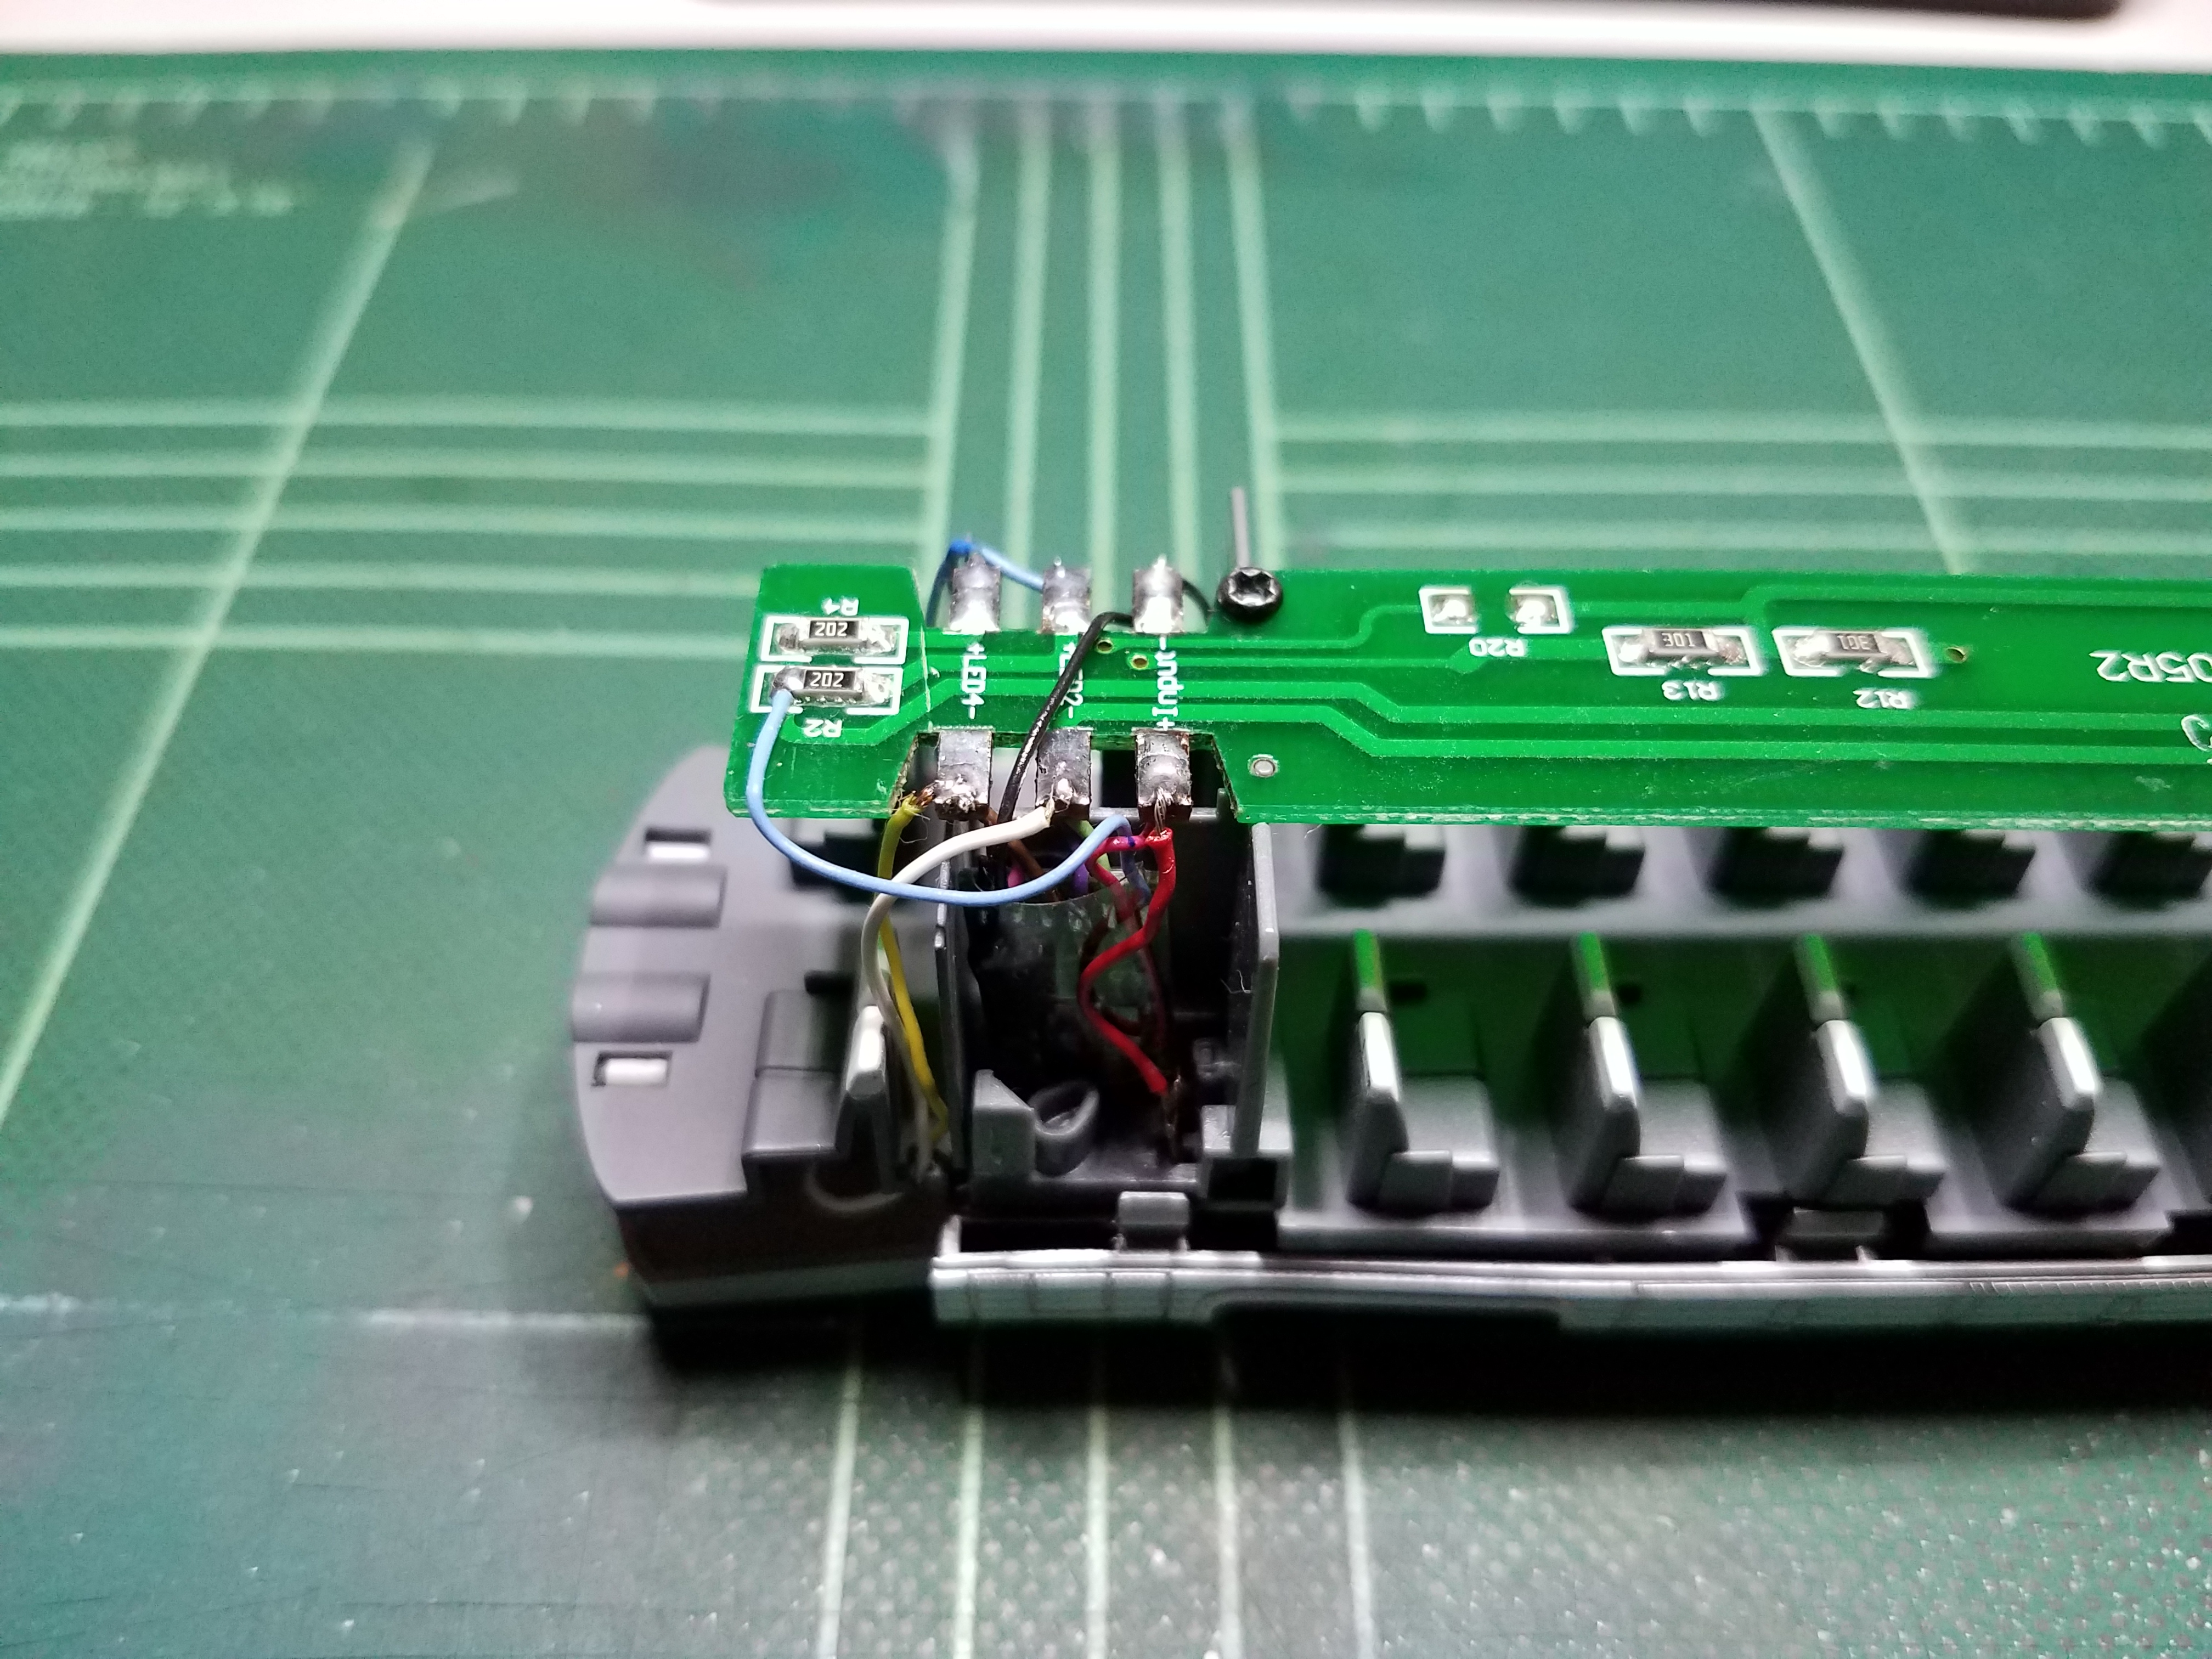
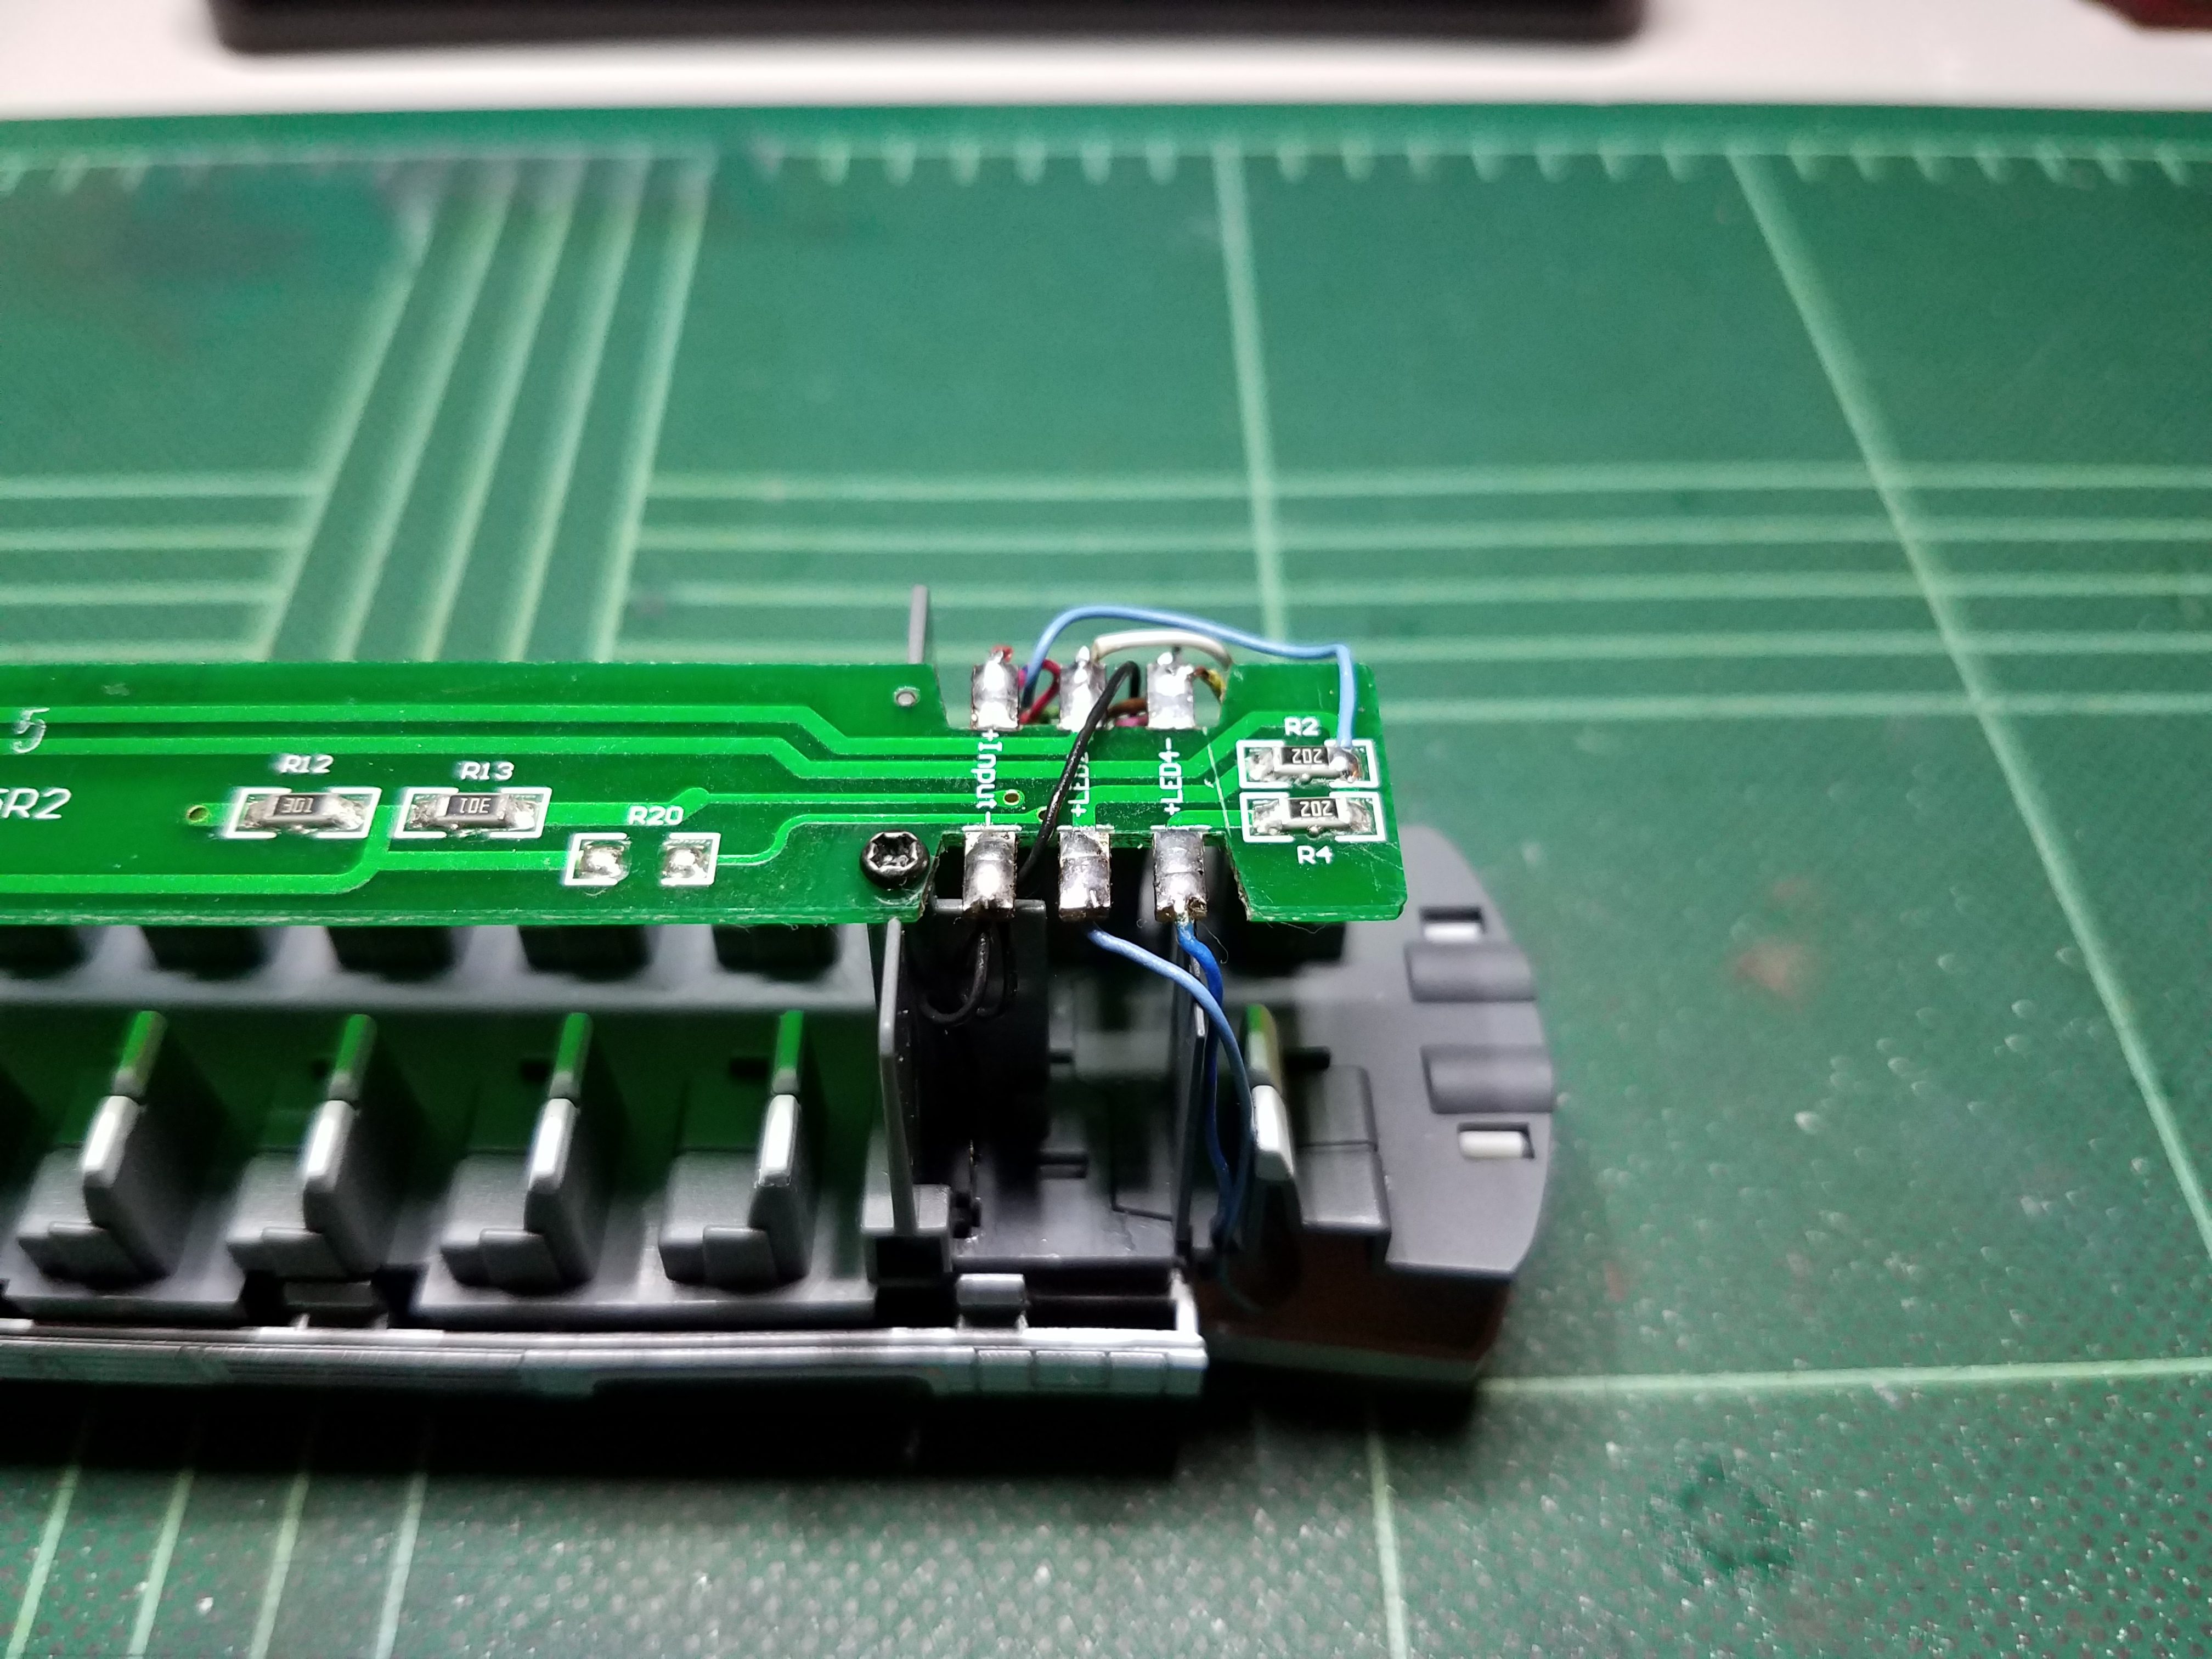
When I added the FL4 decoder, I unsoldered the F0F & F0R wires and common(+) wire from the left side of the circuit board in the lounge car. By doing so the F0F, F0R, and both common(+) pads for the LEDs on the opposite end of the board (nearest the tailllghts) are completely isolated from the Loksound Select up in the locomotive. The only decoder controlling the taillights is the FL4.
I like the idea of cutting the traces on either side of the 2K SMD resistors, Randy, then using those to wire the common(+) to both F0F & F0R LEDs. Should I ever want to return the observation car to single-decoder operation and lighting, that’s easy to skywire.
[quote]
SHould be easy enough to test the old FL4 to see if the function is blown, connect it to a test track and reset it so all f
It changed with turning the second function oon and off? Yeah, that sounds like it failed on. Turning on the second function gave it a fully working connection to ground and it would get brighter. Makes sense to me. Like I said, easy enough to test once you get a working decoder in the car. I’ll say you’ll see a constant voltage on the blown function, but slightly less than what you get for a working function when turned on.
Thanks, Randy. This has been a good learning experience in troubleshooting & problem-solving and I appreciate all your comments and insight with this issue. I’ll keep you posted…
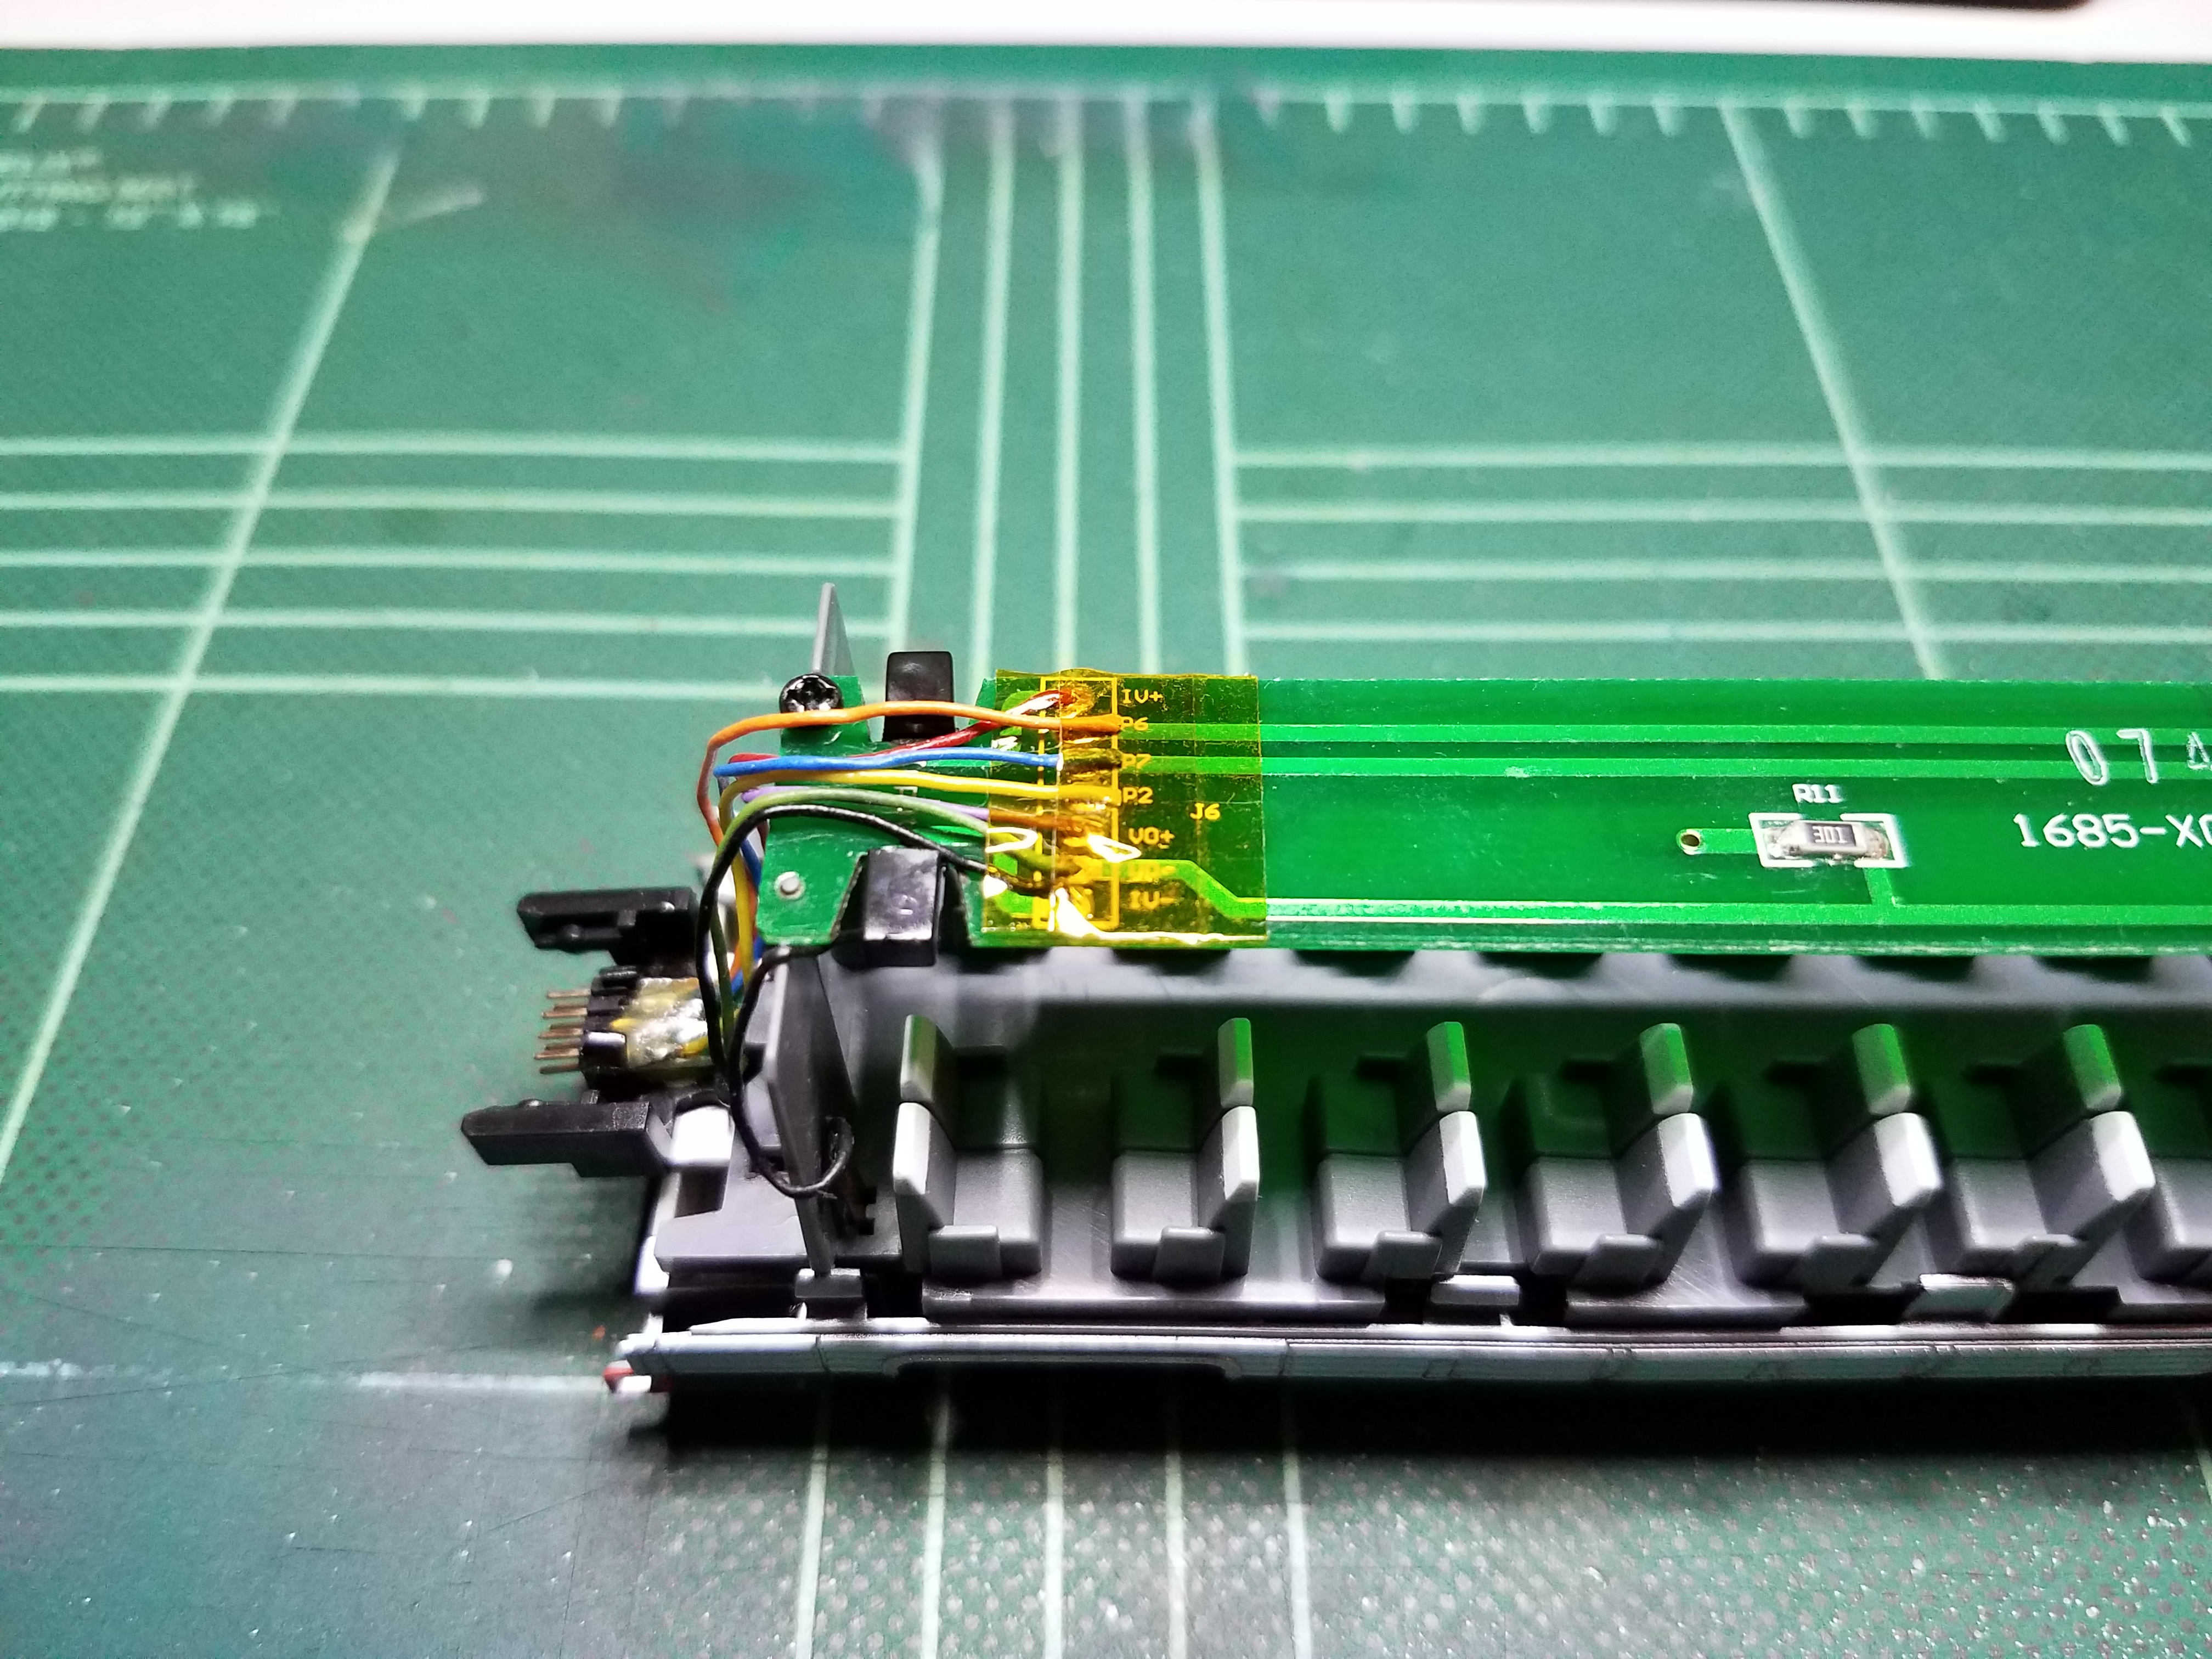
The replacement TCS FL4 decoder arrived yesterday and I temporarily soldered it to the appropriate tabs on the lightboard of the observation car. With the lightboard common wire now isolated from the common leading to the Loksound Select up in the locomotive, both rear taillight LEDs lit up as originally configured on the FL4. I copied the “programmed” roster file from Decoder Pro and the gyralight and constant worked just like they were supposed to.
I unsoldered the FL4 then measured, fitted, trimmed, and soldered it back onto the lightboard again. Here’s a few photos of the finished install. The side alcove at the rear of the observation car fits the FL4 decoder with a little room to spare:
In the bottom photo I insulated the unsoldered wires (F0F, F0R, and common) between two pieces of Kapton tape to keep them in place. I’ll post a video of the finished lighting when I have a chance.
Here’s the promised video. Sorry it’s a bit on the dark side. I lowered the lighting of the room so that the various lighting effects wouldn’t get washed out: (To enlarge, click “YouTube” at bottom of screen)
The gyralight values used for the decoders are as such in Decoder Pro:
Loksound Select (F0F) - Function Settings > General Physical Output Settings > Rate for Blinking Effects: 23
This gives the effect of a flash rate of slightly over 1 sec. (1.11 sec. or 54 per min. - to be exact) This matches several videos of gyralight flash rates found on YouTube.
Thanks, Ed! Yea, backing those up would be a good thing and I’ll do that when I get back home this evening.
FYI: To create separate files for each decoder, I gave each roster entry the identical DCC address but a slightly different ID - e.g. NYC 1001F & NYC 1001R. When I wanted to program the headlights for the locomotive, I opened up NYC 1001F for the Loksound Select. When I wanted to program the rear taillights for the observation car, I opened up NYC 1001R. While I couldn’t program them together on the same programming track, I could program them separately then place both on the programming track to test the lighting effects, as you see in the video clip above.
It’s been a fun project and a head-scratcher at times. The challenge was isolating ALL the crucial connections (i.e. F0F, F0R, and common) between the Loksound Select in the locomotive and the TCS FL4 in the observation car. The only thing left I may do is add more resistance to the F0R taillight to tone it down some.
Using light weight bus bodies for railroad cars was probably the worst part of the whole thing. That funky loocking locomotive was pretty futuristic, but didn’t lend itself to adjusting the size of the train based on demand (the talgo style coupling of the cars didn;t, either - same thing that doomed the early diesel passenger trains like M-10000 and the Flying Yankee.
More than anything, it was a design that put style over substance. Sure it looked neat, but it rode roughly and wasn’t flexible enough. Somewhat underpowered, as well.
Your list of reasons for the failure of the Aerotrain, Randy, are identical to the ones that I’ve read by others. Another reason alluded to by your “flexiability” comment was the inconvenience of turning the train around for a return trip because the cars could not be easily uncoupled from the locomotive, or from one another. The "reversing process " had to be accomplished using either a balloon track…or a long wye.